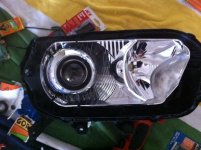
Hid's or Projector Headlights

Took a couple pics on the way home from work last night of the step that I was talking about.

You can see the step as the light in my lane is alot farther down the road and the cutoffs on the trees and telephone pole.These are S2K projectors with Philips 85122 D2S bulbs and 35w digital ballast. The 85122's come as 4300k but color shift to 5000k after approx 100 hrs and what were stock on my M3 ,as you can see slight bluish in them with a prism effect in the middle. Plenty of light with 35w ballast,no need for 50w, and never got flashed once.

Picture023-5.jpg~original


At approx. 25ft on a brick wall. Hard to find a completely dark wall in the burbs as even this spot had street light reflection.......
you can see ,sitting from the drivers seat that the pass side projector could have been rotated a degree or 2 CCW.


Picture025-4.jpg~original
 
Projector retro-fit all the way!

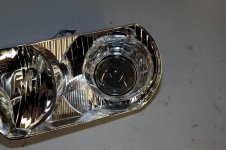
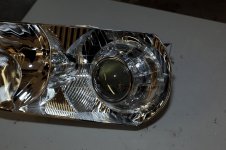
Here is what LightWerkz is currently working on for me (they just sent me some pics a moment ago):

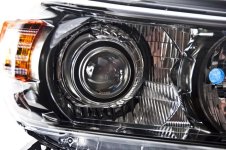
OEM headlight housings with LS460 projectors:
 

Attachments

  • Retrofit 1.jpg
    Retrofit 1.jpg
    137.9 KB · Views: 1,554
  • Retrofit 2.jpg
    Retrofit 2.jpg
    136.8 KB · Views: 1,723
Projector retro-fit all the way!

Here is what LightWerkz is currently working on for me (they just sent me some pics a moment ago):

OEM headlight housings with LS460 projectors:
Those do look dead sexy with those factory Lexus shrouds!:reddance:

Did you go with the Bi-Xenon or the regular LS460's?
What bulbs and ballast did you go with?
 
Those do look dead sexy with those factory Lexus shrouds!:reddance:

Did you go with the Bi-Xenon or the regular LS460's?
What bulbs and ballast did you go with?
Thanks! I went with the regular low-beam LS460s over the bi-xenons for two reasons:

1. Size was initially a concern and going with the bi-xenons would've created a need for additional space to fit the solenoid.
2. The additional output of the high-beam from a bi-xenon assembly is negligible at best considering our 4Runner headlight assemblies have separate high-beam bulbs already. The bi-xenons are really only useful and worth it if there's no separate high-beam bulb to begin with.

As far as bulbs and ballasts, I went with the Osram Xenarc bulbs and Morimoto 35w ballasts. I originally considered going with either the Denso or Matsusihta ballasts; however, after speaking with TRS, we both agreed going with the Morimotos (for longer warranty, weather sealing properties, etc.) was a better choice.
 
My HID kit showed up this afternoon and everything looks pretty good. Now to set aside a weekend and assemble.
 
You will post some output pics, yes?

Of course. I shall post pics as soon as I get them installed (I won't receive them for at least another week and then I'll have to wait for a free weekend, so hopefully it's not too long).

By the way, LS460 projectors here in the USDM are only low-beams. The JDM version is the bi-xenon.
 
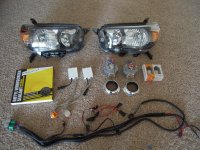
Received my TRS Retrofit kit last night. I went with the Iris shrouds and 55w ballasts/bulbs at 5000K. Had this set-up in the past and was completely satisfied. Below are some pics of the kit received and examples from Lightwerkz site of the Iris shrouds mounted. Very clean looking.

Was quoted $755 from Lightwerkz for installation. I've done a HID retrofit in the past on a much more difficult headlamp. They were pop-up headlights on a TransAm. Space was a huge factor and most of the job included fabricating plates to be able to mount the projector.

The 4Runner 'looks' to be much easier. I'm going to go ahead and do this myself. Figure I will use 4-corner bolts/washers with slightly elongated drilled holes to allow for rotation/alignment, then JB weld them and the projector in place.

Going to try and get the stock headlamps off the truck today; mount them to a table, clamp 'em down, power 'em up and mark out the stock alignment. Then do the same when I get the new projectors mounted to dial them in. Then its plug and play with the rest of the installation.

Ideally finish this this weekend....buuuut its 70 degrees on the Gulf today..... May have to take advantage of the perfect weather!
 

Attachments

  • DSCN1581.jpg
    DSCN1581.jpg
    141.5 KB · Views: 2,483
  • DSCN1583.jpg
    DSCN1583.jpg
    125.1 KB · Views: 2,017
  • Iris shrouds 2.jpg
    Iris shrouds 2.jpg
    80.8 KB · Views: 2,556
Dispense - did you take your OEM lights off, or are those after market pictured? I'm looking forward to how you do this, since you've done it before. Please keep us updated with tips etc. I just got my kit today and I can't wait to get these installed.
 
They are OEM headlamps, I bought them online from an OEM Toyota parts store.

I have them mounted and just waiting for the JB Weld to cure, should have them on the truck this weekend. Could of had it done yesterday but wanted to take my time and have a weekend with them to abuse a bit; and be sure I had time to troubleshoot if needed.

Overall a pretty easy job, just time consuming. Hardest part is aligning them in the headlamp. I bolted the headlamps and projectors to the truck, used a 12v power source and lit them up. Used zip-ties through the projector and holes drilled in the headlamp bowl to do the initial anchor and provide some support. Adjusted them as needed and "spot" welded them with JBWeld. Took them off the truck and finished the job.

Just to be sure to light up the projectors/bulbs and check the light output and cut-offs prior to getting started. I have one that has the FX-R 2.0 (ours are 3.0) bowed cutoffs from improperly aligned front and back projector halves. I didn't even bother to check prior, assumed it had been fixed since the big fiasco over the summer with the 2.0s..

Not as impressed with the FX-R light output and beam pattern as compared to my previous TSX retrofit. Maybe that will change once I get a better power source and the proper wiring hooked up.

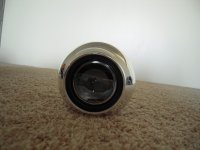
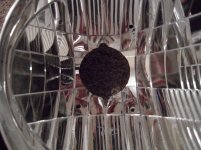
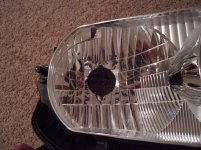
Couple pics of the headlamp reflector modified. I decided to mount from the front to give me the most clearance behind the headlamp assembly. I have plenty of room back there now, as much as stock.
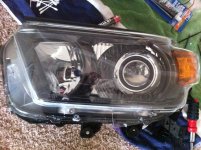
Next pics are of the headlamp covers lying on top for a rough idea of completed appearance; and with the headlamp cover off.
 

Attachments

  • DSCN1585.jpg
    DSCN1585.jpg
    131.8 KB · Views: 1,802
  • DSCN1586.jpg
    DSCN1586.jpg
    138.3 KB · Views: 1,795
  • IMG_1494.jpg
    IMG_1494.jpg
    138.7 KB · Views: 1,829
  • IMG_1500.jpg
    IMG_1500.jpg
    134.8 KB · Views: 2,825
They were kind of a preliminary cut, maybe 2.5" or so.

I went on to enlarge them a tad more to add more contact surface with the projector. No more then .5cm I suppose.
 
they look good man, nice job. I just got my kit yesterday and I have a question. How did you attach the shroud to the projector? Are you supposed to glue it on or something?
 
So while test fitting my shroud to my projector yesterday, I was having a hard time getting the projector to fit snug in there (Gatling Gun to FXR). Called TRS this morning, and as it turns out, this shroud DOES NOT fit. this was news to them and me. just a warning to any potential buyers.

here is someone's pic from TW

IMG_4718.jpg~original
 
Last edited:
I'm actually changing out the shrouds for a different look - I'm going to exchange for the E55's and see how that works out.
 

Members online

Forum statistics

Threads
278,307
Messages
3,554,054
Members
248,016
Latest member
Advally Service

Trending content

Back
Top