Krayziekid
New member
MAJOR IMPORTANT UPDATE 8/14/15 - It is extremely important that everyone who does this mod reads this. I suggest you read the guide and then come back here and read this important update.
So the original way I wired it was the only way I really saw how to wire it, and that is still (in my mind) the correct way to wire it. Unfortunately, the DRL flasher is only meant to handle 4 bulbs total (2 front, 2 back), @ 27 Watts each. This means that using the stock 03 DRLs, with the newly added 06 DRLs (assuming you use a standard bulb) is WAYYYYYYY over the Watt allowance. This causes the DRLs to turn off about every 3-4 minutes, cause the flasher unit will automatically cut power to prevent overheating and overvolting.
This means that if you do this mod, it is almost a requirement to use LED bulbs, as most of them have lower wattage than standard bulbs.
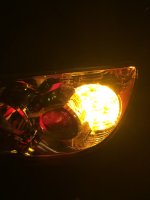
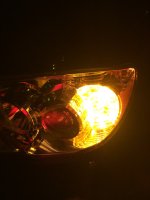
As most of you know, most LED bulbs will hyperflash if you just put them in without a resistor. That is what happens in my standard 03 DRLs/Turn signal when I just put the bulbs in. They seemed to not overload the DRL flasher, which is what was expected, but I do not want hyperflash. So my next thought was, what happens when the 03s are filled with LEDs and the new 06s are filled with a standard 11W bulb. Well, I put them in, and ran them for at least 15 minutes, but I think closer to 20. They did not go out AND they did not hyperflash. This means that the current draw is likely the problem,. Unfortunately I am extremely busy over the next week, so I won't be able to test my next theory, but I am pretty sure that having two LEDs per side (4 LEDs in the front total) will work. They should draw enough current together to not hyperflash since they are wired together, but it should be below the wattage allowance in the flasher.
I know [MENTION=50591]gaterose[/MENTION] was having a problem similar to this, but there was never really a clear answer to this. He seemed to accidentally solve it by replacing all of them with LEDs. I think this should work, but I just want everyone to know that this is JUST A THEORY. It seems like it will work, but until I can get everything I need to test it and confirm, I will leave that warning. Hope this helps everyone.
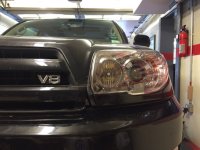
Hey everyone. So I just did the 03->06 Headlight swap on my 2003 Limited 4Runner. I couldn’t find a ton of fantastic guides or literature specifically on this, so I figured I would post a guide with my experience and what I did. I hope this helps someone in the future if they ever want to do this or if they are having issues with their installation.
Also, keep in mind I am a hardcore newbie at automotive stuff, showing how easy this really is. My install my not have been perfect in the eyes of some people, but it works for me
Here is a sample video of how the lights work: https://vid.me/hajw
So here goes. Here is what you are going to need:
-06 Headlight Housings (I bought mine from RockAuto)
-06 Headlight Trim Pieces (Also bought from RockAuto. Go to 2006 4Runners and look under the “Body” tab)
-DRL/Parking Light Wiring Harness (Part #81125-35440) Amazon
-9006 to H11 Adapter (I bought a pair off eBay) eBay
-Wire Cutters
-Soldering Iron
-Heatshrink
-Electrical Tape
-Scissors
-Extra Wire (Probably 16-18 Gauge. Stock Wiring is very thin)
-10mm Socket/Wrench
-Flathead Screwdriver
-Needlenose pliers
-Razor Blade
-Appropriate Bulbs (Should be 9005, H11, 1156, 194A if you want to fill all four slots)
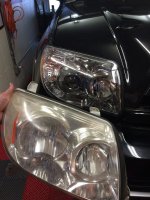
So that should be everything you need to get you started. Now we can get on with the install! So if you have an older 4runner, your headlights might start to look yellowish or fogged. If so, then do this upgrade because it looks awesome!
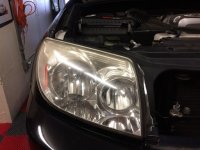
1. Open your hood
2. Remove the splash guard at the front of the hood. It is held on by a number of plastic retaining clips. I can almost guarantee that a number of these will break. I highly recommend replacing them with something sturdier. I found that ¼” nylon push rivets from Home Depot worked very well and fit the hole perfectly. You can also find very similar retaining clips at AutoZone.
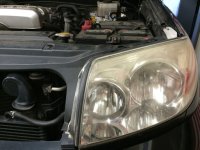
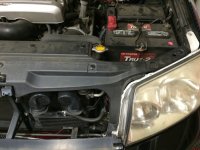
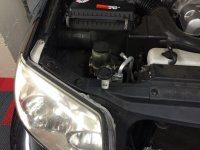
3. Now pull the splash guard and place it off to the side.
4. Next, you will see the headlight bolts. There are four in total. Two are at the top, one is on the side near the hood latch, and one is under in the front bumper in a very hard to reach place. If you have bigger tires and have trimmed your wheel well lining, then it is very easy to see and reach. If not, you may have to Houdini your way to finding it and unbolting it. I would say it is easiest to go in from the bottom.
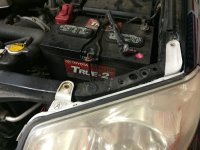
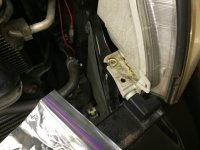
5. Once you have the 4 bolts undone, the headlight housing should be free BUT DO NOT MOVE IT YET. There is a trim piece attached to the headlight. There is a bolt on one side of the trim piece, and a clip/tab on the other. You must REUSE this tab in the new trim piece if you want it to be flush and fit perfectly. It is very easy to snap a tab.
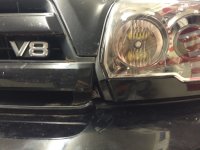
6. In order to make this easier, I suggest you lift up the front bumper guard thingy. In order to do this, take your flat head screwdriver and look behind this piece. There are some small rectangle openings that your screwdriver can fit in. Push your screwdriver in while lightly pulling up, and you should hear a pop and feel it move a bit. We are NOT removing this piece, only pulling it up slightly. It can take some abuse, but do not use too much force.
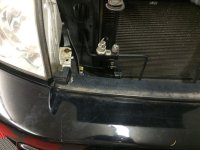
7. Next up, pull the housing out, making sure to disconnect all the bulbs/sockets. It will take some jimmy-ing, so be patient and do not force anything. It will eventually come out. Before you do anything else, there are two things that have to happen or you may forget and kick yourself. First, take the tab out of the current trim piece and put it in the new trim piece. Second, you should see a little yellow (color may vary) rivet holder thingy where the trim piece is bolted to the housing. Under the bolt, and use your needlenose pliers to take that piece out of the old headlights and put it in the new one. Now you can move on and won’t have to redo a bunch of shit like me
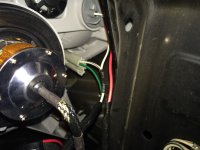
8. With the headlight out, you should be staring at some wires you just pulled out. IMPORTANT NOTE: The way I did my install may be different from the way you want to do yours. I have DRLs in my 2003. In the 2006s, they moved the DRL up to the headlights. I decided to wire it in a way so that I have DRLs in the stock 2003 bumper, and the new 2006 headlights. They also BOTH double as turn signals. Not a huge deal but I want everyone to be fully aware that this is how I did it and this is how the rest of the guide will be presented.
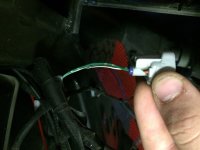
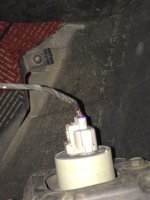
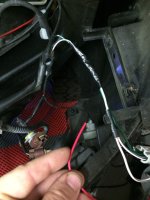
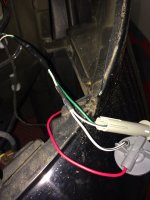
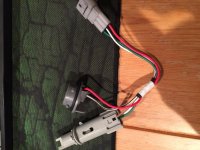
9. This is the wiring harness from above. This has the socket for the turn signal/DRL (1156A) and the parking light (194A). Undo the tape in the middle. Both of these lights share a ground, but the green wire is power for the parking light, and the red wire is power for the DRL/Turn signal. We will wire them the same way.
So the original way I wired it was the only way I really saw how to wire it, and that is still (in my mind) the correct way to wire it. Unfortunately, the DRL flasher is only meant to handle 4 bulbs total (2 front, 2 back), @ 27 Watts each. This means that using the stock 03 DRLs, with the newly added 06 DRLs (assuming you use a standard bulb) is WAYYYYYYY over the Watt allowance. This causes the DRLs to turn off about every 3-4 minutes, cause the flasher unit will automatically cut power to prevent overheating and overvolting.
This means that if you do this mod, it is almost a requirement to use LED bulbs, as most of them have lower wattage than standard bulbs.
As most of you know, most LED bulbs will hyperflash if you just put them in without a resistor. That is what happens in my standard 03 DRLs/Turn signal when I just put the bulbs in. They seemed to not overload the DRL flasher, which is what was expected, but I do not want hyperflash. So my next thought was, what happens when the 03s are filled with LEDs and the new 06s are filled with a standard 11W bulb. Well, I put them in, and ran them for at least 15 minutes, but I think closer to 20. They did not go out AND they did not hyperflash. This means that the current draw is likely the problem,. Unfortunately I am extremely busy over the next week, so I won't be able to test my next theory, but I am pretty sure that having two LEDs per side (4 LEDs in the front total) will work. They should draw enough current together to not hyperflash since they are wired together, but it should be below the wattage allowance in the flasher.
I know [MENTION=50591]gaterose[/MENTION] was having a problem similar to this, but there was never really a clear answer to this. He seemed to accidentally solve it by replacing all of them with LEDs. I think this should work, but I just want everyone to know that this is JUST A THEORY. It seems like it will work, but until I can get everything I need to test it and confirm, I will leave that warning. Hope this helps everyone.
Hey everyone. So I just did the 03->06 Headlight swap on my 2003 Limited 4Runner. I couldn’t find a ton of fantastic guides or literature specifically on this, so I figured I would post a guide with my experience and what I did. I hope this helps someone in the future if they ever want to do this or if they are having issues with their installation.
Also, keep in mind I am a hardcore newbie at automotive stuff, showing how easy this really is. My install my not have been perfect in the eyes of some people, but it works for me
Here is a sample video of how the lights work: https://vid.me/hajw
So here goes. Here is what you are going to need:
-06 Headlight Housings (I bought mine from RockAuto)
-06 Headlight Trim Pieces (Also bought from RockAuto. Go to 2006 4Runners and look under the “Body” tab)
-DRL/Parking Light Wiring Harness (Part #81125-35440) Amazon
-9006 to H11 Adapter (I bought a pair off eBay) eBay
-Wire Cutters
-Soldering Iron
-Heatshrink
-Electrical Tape
-Scissors
-Extra Wire (Probably 16-18 Gauge. Stock Wiring is very thin)
-10mm Socket/Wrench
-Flathead Screwdriver
-Needlenose pliers
-Razor Blade
-Appropriate Bulbs (Should be 9005, H11, 1156, 194A if you want to fill all four slots)
So that should be everything you need to get you started. Now we can get on with the install! So if you have an older 4runner, your headlights might start to look yellowish or fogged. If so, then do this upgrade because it looks awesome!
1. Open your hood
2. Remove the splash guard at the front of the hood. It is held on by a number of plastic retaining clips. I can almost guarantee that a number of these will break. I highly recommend replacing them with something sturdier. I found that ¼” nylon push rivets from Home Depot worked very well and fit the hole perfectly. You can also find very similar retaining clips at AutoZone.
3. Now pull the splash guard and place it off to the side.
4. Next, you will see the headlight bolts. There are four in total. Two are at the top, one is on the side near the hood latch, and one is under in the front bumper in a very hard to reach place. If you have bigger tires and have trimmed your wheel well lining, then it is very easy to see and reach. If not, you may have to Houdini your way to finding it and unbolting it. I would say it is easiest to go in from the bottom.
5. Once you have the 4 bolts undone, the headlight housing should be free BUT DO NOT MOVE IT YET. There is a trim piece attached to the headlight. There is a bolt on one side of the trim piece, and a clip/tab on the other. You must REUSE this tab in the new trim piece if you want it to be flush and fit perfectly. It is very easy to snap a tab.
6. In order to make this easier, I suggest you lift up the front bumper guard thingy. In order to do this, take your flat head screwdriver and look behind this piece. There are some small rectangle openings that your screwdriver can fit in. Push your screwdriver in while lightly pulling up, and you should hear a pop and feel it move a bit. We are NOT removing this piece, only pulling it up slightly. It can take some abuse, but do not use too much force.
7. Next up, pull the housing out, making sure to disconnect all the bulbs/sockets. It will take some jimmy-ing, so be patient and do not force anything. It will eventually come out. Before you do anything else, there are two things that have to happen or you may forget and kick yourself. First, take the tab out of the current trim piece and put it in the new trim piece. Second, you should see a little yellow (color may vary) rivet holder thingy where the trim piece is bolted to the housing. Under the bolt, and use your needlenose pliers to take that piece out of the old headlights and put it in the new one. Now you can move on and won’t have to redo a bunch of shit like me
8. With the headlight out, you should be staring at some wires you just pulled out. IMPORTANT NOTE: The way I did my install may be different from the way you want to do yours. I have DRLs in my 2003. In the 2006s, they moved the DRL up to the headlights. I decided to wire it in a way so that I have DRLs in the stock 2003 bumper, and the new 2006 headlights. They also BOTH double as turn signals. Not a huge deal but I want everyone to be fully aware that this is how I did it and this is how the rest of the guide will be presented.
9. This is the wiring harness from above. This has the socket for the turn signal/DRL (1156A) and the parking light (194A). Undo the tape in the middle. Both of these lights share a ground, but the green wire is power for the parking light, and the red wire is power for the DRL/Turn signal. We will wire them the same way.
Attachments








Last edited: