How to install new CV Axles

I thought I was prepared until...

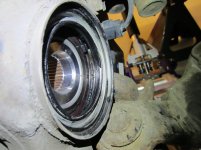
...I saw this. It's the steering knuckle oil seal. Part of it went with the CV axle when I pulled it out.
 

Attachments

  • Bad Knuckle Seal.jpg
    Bad Knuckle Seal.jpg
    129 KB · Views: 4,039
I know this is an older thread but wanted to say it worked perfectly. I did have a slide hammer but it did not work for squat. Spent 15 min dicking with that and decided to go big hammer and pry bar. It popped out in no time. Total working time was about 2 hours. If you're thinking about doing it yourself I would say save the money on a mechanic instal and highly recommend this method.
 
I did the passenger side a few days ago...took about 20 minutes. I didn't mess with the seal, or the draining/refilling of the diff. I only lost a couple drops of fluid...is this normal?
 
Drat! Both my inner boots are leaking. Are you guys using OEM parts or aftermarket parts? I generally use OEM Toyota parts but if the aftermarket boot or clamp is a better design, I'll go with that.
 
...I saw this. It's the steering knuckle oil seal. Part of it went with the CV axle when I pulled it out.

Mine were in exactly same shape as yours. I replaced both knuckle seals with new ones. They expensive at $40 each from the dealer but I figured what the hell I don't like to do things twice.
 
Toyota uses top grade cardone rebuilds so I would say cardone would be good. Napa also uses cardone rebuilds but it's a coin flip on which grade you may get I got one top grade and one that was a low grade which didn't even have all the abs rings or whatever they are and included no hardware while the other did. I took it back and got another top grade from Toyota. Here's a pic to see the difference. Both came from the same napa at the same time and are the same part #
Top grade
atenuqes.jpg

Low grade
aja3esa3.jpg
 
time to do mine as well....

CHanged my oil and rotated tire today. WHile measuring my brake pads for thickness I noticed grease splattered all around the drivers side lower A-arm. Found the inner boot torn off just behind the outboard band. Crap. I didn't want to have to do this. At least not right now...grrrr

So here are the questions I have for all who have done this. Do I understand correctly that on the knuckle-side, All I have to remove are the 2 bolts beneath the lower ball joint? Seems easy enough. (BTW, I've changed my wheel bearings so I've been in there before)

Right now I'm looking at the axles on the Parts Geek site. Thinking I'd go with the Cardones with the heavy duty boots.
08 2008 Toyota 4Runner Axle Assembly - Driveshaft & Axle - A1 Cardone, EMPI, First Equipment Quality, USA Industries, Front, Front Left, Front Right - PartsGeek
[MENTION=93692]Cygan1008[/MENTION] - WHat did Toyota charge for the top quality axles?

I'll try to add some pics whenever I can get to this. I might try to get my Bilsteins on at the same time since I'll have the wheels off but I still have to get the front shocks assembled.... I guess I can put that off a bit longer. I sure wish I had a garage so I didn't have to lug all the tools across the yard from the shed, what a PITA....

 
Yes the two lower ball joint bolts. This is very do-able by anyone with average intelligence and a good selection of tools. Of you've done wheel bearings you've got this. Save the old cv axle and re-boot it.
 
CHanged my oil and rotated tire today. WHile measuring my brake pads for thickness I noticed grease splattered all around the drivers side lower A-arm. Found the inner boot torn off just behind the outboard band. Crap. I didn't want to have to do this. At least not right now...grrrr


So here are the questions I have for all who have done this. Do I understand correctly that on the knuckle-side, All I have to remove are the 2 bolts beneath the lower ball joint? Seems easy enough. (BTW, I've changed my wheel bearings so I've been in there before)


Right now I'm looking at the axles on the Parts Geek site. Thinking I'd go with the Cardones with the heavy duty boots.

08 2008 Toyota 4Runner Axle Assembly - Driveshaft & Axle - A1 Cardone, EMPI, First Equipment Quality, USA Industries, Front, Front Left, Front Right - PartsGeek


[MENTION=93692]Cygan1008[/MENTION] - WHat did Toyota charge for the top quality axles?


I'll try to add some pics whenever I can get to this. I might try to get my Bilsteins on at the same time since I'll have the wheels off but I still have to get the front shocks assembled.... I guess I can put that off a bit longer. I sure wish I had a garage so I didn't have to lug all the tools across the yard from the shed, what a PITA....


Toyota wanted $115 and some change + tax and a $50 core but I walked out paying $95 + tax and $50 for the core which was later returned and refunded.
 
seal ID question, etc.

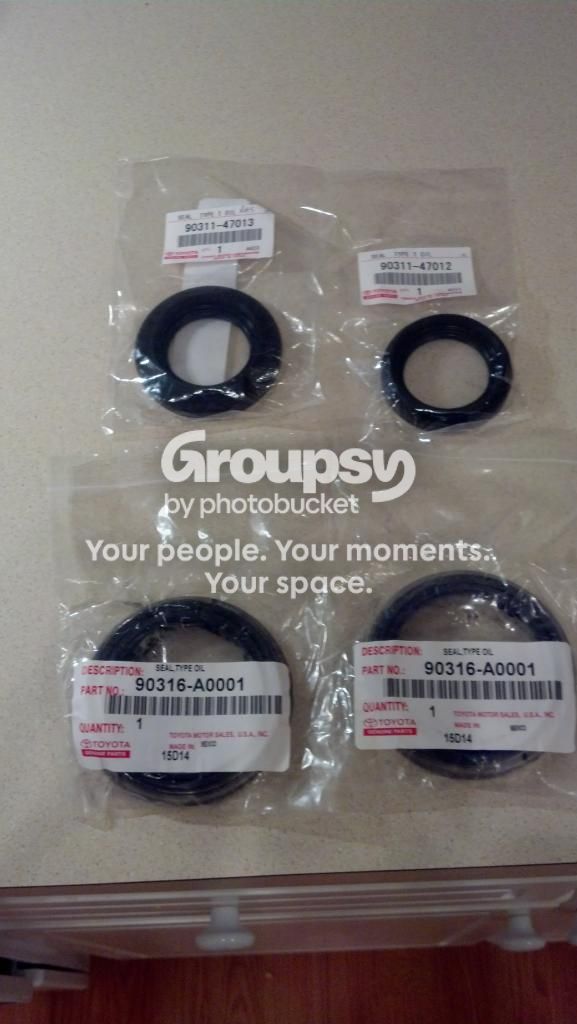
Here are the seal I got. Any of them look amiss to those who've done this job? I believe I found the correct part numbers.

In the pic top are the axle seals and bottom are the "knuckle seals."

axleseals_zpsfb42a6c3.jpg~original


Anybody know if there is a significance to the pink/red dot on the inner dust cover?

cvaxle_zpse992e5b4.jpg
[/URL]~original[/IMG]


I went with OEM re-manufactured. Has a 1 year unlimited warranty and if I need to use that I can just take it to my dealer, rather than deal with online parts houses. I wound up paying ~$98 per axle including the core charge discount. I was giver the "online" price. I didn't even ask for it. I found out when I went to pick up, I asked about a "best price" before I paid. Figured I'd just replace both since they both have the same mileage and the good one might be ready to tear. I might just keep my old ones as spares (and re-boot the torn one). Don't know yet...

As for anyone who wants to know where to order OEM parts. If you haven't already, you might want to check and see if your local dealer sells parts online. I found an old thread listing Village Toyota and Dallas Toyota. I decided to check and Fred Anderson in Raleigh also sells online and has comparable prices ( I thought ). Anyone in this area, who doesn't already know, might consider that.

Also:
Did I understand correctly that to get the axle seal to seat correctly I can slip them onto the inner shaft and then install into the diff, allowing the inner housing to set the seal at the correct depth/position? I read there is a tendency to install the seal too far into the diff.

~Bob
 
Last edited:
i dont know what seals the tops are for but the bottoms look like the oil seals for pass / drive front diff
but they should be diff part #'s for driver / pass as the pass seal is larger then the drivers side seal
i will check my part #'s later
 
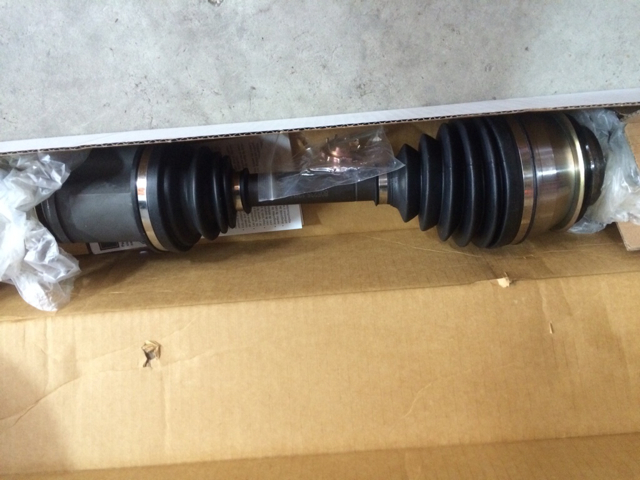
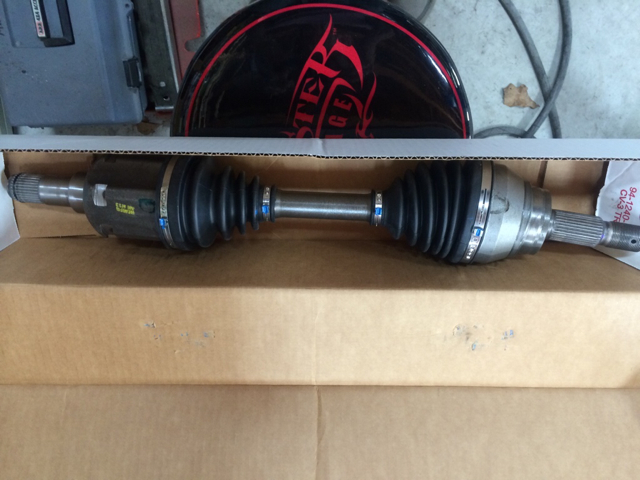
can someone post a pic of the seals on the axles before install??? and this is probably a dumb question but do these axles come pre-greased in the boots or is that something that has to be added....

Thanks, Mike...
 
can someone post a pic of the seals on the axles before install??? and this is probably a dumb question but do these axles come pre-greased in the boots or is that something that has to be added....


Thanks, Mike...


Check nj636 for seal pics and correct part #'s
He sells wheel bearings on here

And yes new cv's come with grease in them just pop them in and your ready to go
 
Whew... got one in (the broken one, drivers side). Had tons other stuff that I had to get to so I got a late start. It took me about 3-3.5 hours. Mine was slow to get out and slow to get in. I only had a demo bar, but I wound up getting it. The axle seal was a little bit of a pain. I should have waited and tried to find a PVC cap to use as a seal driver.

I only undid the 2 19mm bolts beneath the LBJ. FYI, the mention of just swinging the rotor out of the way (paraordnance), swing it forward. Mybe I'm dense but it took me a minute to realize how to move it. It worked, it just doesn't give you the most room to handle the axle.

I forgot how much I hate refilling gear oil.... Having to stop at one side caused me to waste some gear oil since I'll have to drain it again, but I can't let the wife be with the kids and no car while I'm on duty... Oh well.

Can someone look at this pic and let me know if it look seated in there alright? the gap at the differential is approx. 5.25mm. Visually it looks similar to my pass. side, which I haven't touched yet.

IMG_20140723_194439_147_zpskuu3q2ku.jpg
[/URL]~original[/IMG]

After a test drive through the neighborhood, no immediate leaks though I might have allowed the diff drain plug gasket to get a little smooshed. Will have to inspect later to see if any leaks.

I think my other one will go a little easier now that I've done one, but the pass. side axle seal seems to be the trouble one. I'll try paraordnance's idea of setting it on the axle and let the axle seat the seal. I ought to get a bigger pry bar I suppose.
 
Last edited:
Looks good from here

I use a hammer and long cold chisel
One or two hits and she pops right out

When u go to remove the original pass side seal
Look and take note of depth it is installed at
 
Yeah looks seated right to me. When I replaced my axle seal I pushed it in a bit then let the axle push it the rest of the way. I was worried about pushing it in too far, not even sure that's possible, but I have no leaks, so it must have worked.
 
Sweet. Thanks for taking a look.

@ Brutalguyracing: So, by a long cold chisel, how long is "long?"

I've got one that had the plastic handle/handguard, but I think it's too short. I totally forgot I had it until you mentioned the chisel. Matter of fact I'd have to go hunt for it to try and find it.
 
Sweet. Thanks for taking a look.


@ Brutalguyracing: So, by a long cold chisel, how long is "long?"


I've got one that had the plastic handle/handguard, but I think it's too short. I totally forgot I had it until you mentioned the chisel. Matter of fact I'd have to go hunt for it to try and find it.


The one i use is like 10" long
But even a large screwdriver will work
I put it on the ridge on the tulip and a few wacks and she pops right out
 

Members online

Forum statistics

Threads
278,316
Messages
3,554,113
Members
248,016
Latest member
Advally Service

Trending content

Back
Top