How to install new CV Axles

I just wrapped up installing the new CVJ axles and I wanted to update this thread with something interesting I found during the install. I didn't have a jig to set the new knuckle seals but while I was looking for something to use I noticed the grease cap that covers the axle nut is actually a PERFECT fit for the knuckle seals. It worked perfect for seating the new seals.

DAMN! If I had only checked that!! good catch.
 
I went with OEM re-manufactured. Has a 1 year unlimited warranty and if I need to use that I can just take it to my dealer, rather than deal with online parts houses. I wound up paying ~$98 per axle including the core charge discount. I was giver the "online" price. I

As for anyone who wants to know where to order OEM parts. If you haven't already, you might want to check and see if your local dealer sells parts online. I found an old thread listing Village Toyota and Dallas Toyota. I decided to check and Fred Anderson in Raleigh also sells online and has comparable prices ( I thought ). Anyone in this area, who doesn't already know, might consider that.

~Bob


Thanks for the idea of looking up local dealers for better pricing. The only item I couldnt get low enough was the freaking AXLE still want $200+.
 
I hope this,is,not a stupid question but are taco and 4runner axels the same? 1st gen tacos compared to 3rd gen 4runners....thanks guys
 
I need to do this soon but have some questions concerning the seals. I'd like to pre-order all the seals and parts prior to doing the job to minimize downtime.

I am a bit confused with which seals are required. I want to order all new seals and replace them while its apart. How many seals are required are there two seals between each axle and the differential or just one between each axle and the diff?

Are these the correct parts?

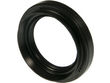
National Axle Shaft Seal - Front Left
national.gif
1231386.jpg
Part Number: 18875-07080123​
<form class="bb_fline" name="add_cart" method="post" action="http://www.partsgeek.com/cart/add/"></form>

Notes: Axle Shaft Seal -- Toyota; Independent front suspension; 8" R.G.

and

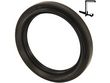
National Axle Shaft Seal - Front Right
national.gif
1314482.jpg
<form class="bb_fline" name="add_cart" method="post" action="http://www.partsgeek.com/cart/add/">
</form>

Part Number: 18875-07167762
Notes: Axle Shaft Seal -- Toyota; Independent front suspension; 8" R.G.


The outer seals are called oil seals or wheel seals? Seems to be a lot of different seals for this job...


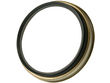
National Wheel Seal - Front
national.gif
1231334.jpg
<form class="bb_fline" name="add_cart" method="post" action="http://www.partsgeek.com/cart/add/">
</form>

Part Number: 18875-07061075
Notes: Wheel Seal
Position: Front
Condition: New


What are these?

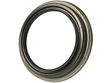
National Wheel Seal - Front Inner
national.gif
1231376.jpg


Part Number: 18875-07061131
Notes: Wheel Seal
Position: Front Inner
Condition: New


I was going to order the seals because I am not sure the axle will come with seals...

Thanks.
 
Here are the seal I got. Any of them look amiss to those who've done this job? I believe I found the correct part numbers.

In the pic top are the axle seals and bottom are the "knuckle seals."

axleseals_zpsfb42a6c3.jpg
[/URL]~original[/IMG]


Anybody know if there is a significance to the pink/red dot on the inner dust cover?

cvaxle_zpse992e5b4.jpg
[/URL]~original[/IMG]


I went with OEM re-manufactured. Has a 1 year unlimited warranty and if I need to use that I can just take it to my dealer, rather than deal with online parts houses. I wound up paying ~$98 per axle including the core charge discount. I was giver the "online" price. I didn't even ask for it. I found out when I went to pick up, I asked about a "best price" before I paid. Figured I'd just replace both since they both have the same mileage and the good one might be ready to tear. I might just keep my old ones as spares (and re-boot the torn one). Don't know yet...

As for anyone who wants to know where to order OEM parts. If you haven't already, you might want to check and see if your local dealer sells parts online. I found an old thread listing Village Toyota and Dallas Toyota. I decided to check and Fred Anderson in Raleigh also sells online and has comparable prices ( I thought ). Anyone in this area, who doesn't already know, might consider that.

Also:
Did I understand correctly that to get the axle seal to seat correctly I can slip them onto the inner shaft and then install into the diff, allowing the inner housing to set the seal at the correct depth/position? I read there is a tendency to install the seal too far into the diff.

~Bob


Bob,

Whats the difference between the axle seals and the "knuckle seals." Were they both on the inside of the axle between the CV axle and the differential?
 
Bob,

Whats the difference between the axle seals and the "knuckle seals." Were they both on the inside of the axle between the CV axle and the differential?

the axle seals create the seal around the CV axle shafts (inner) that plug into the left and right outputs of your front differential.

The "knuckle" seals are located between the steering knuckle and the outboard end of the CV axle, where the outer shaft goes through the steering knuckle. These seals have a stepped flange (your last picture, #18875-07061075, looks like the ones) that seats into the inside of the steering knuckle. I used a piece of 2x4 that I cut into a circle which fit on the inside (larger diameter) of the seal. The width of the wood gives you some space so when you drive (hammer) the seal in, you won't damage the part. I'll get a pic up in case I'm not making any sense...

Your 3rd picture (#18875-07061075, I think) looks like the seal that goes between you hub and wheel bearing.

Your first and second pics look like the axle seals, but the it's hard to tell for sure, although if they are listed as "front axle seals" then they are probably right. The passenger side has a wider flange that the drivers side, but in both cases a 2" PVC (or ABS) pipe end cap will fit over the actual seal surface and against the flange to drive it in. Pay attention to where your original seals are seated. You can drive the passenger side in too far and wind up with a leak. The flange is metal, but some seals have a rubber coating and some just the metal

Your axles should have dust shields on them. They don't appear to create any tight seals. I think they are just to keep large debris from getting into the seal unions and creating wear in the joints. In my picture of the axle, the piece with the pink dot is the inner dust shield.

Hope this helps
 
I hope this,is,not a stupid question but are taco and 4runner axels the same? 1st gen tacos compared to 3rd gen 4runners....thanks guys

As far as I know, the 4th gen 4Runner, 2nd gen Taco (05-present), and the FJ cruiser share the same front end for the most part. As seen in the suspension-related posts, the springs can be of different stiffness and slightly different sizes but I think there is wide interchangeability....
 
Can someone confirm. Is the 4th Gen front end the same as the 3rd Gen? Looking to do this on a buddies 4th and wondering if it is the same process I did on my 3rd. Thanks!
 
FWIW, I was only able to get it to go into the differential with the c clip opening facing down. Both sides were like that. This write up really helped though. Only concern I have now is that the drivers side went in the differential all the way but after the test drive it looks like it pulled itself out 1-2mm. In other words there is a small gap between the gold colored part at the end of the axle and the differential. No leaks though, at least not yet. Anyone else run into this?
 
Great Half axle write-up

This was an absolutely perfect write up for replacing my Half axle. I have a 2007 4 runner with 177 miles and one went and the other was going.

Few things I learned.

If you have a slid plate, take it off before you start. it will be easier to get to the axle.

Buy the seals. It is very difficult not to damage the seals and they are as old as the axles.

Be patient with the seals. It was the worst part of the job but I found using a long 3/8" socket extension helped to work them in. Make a note of where they are seated, you can go int too far and if you do you can damamge the seal.

Thanks again for a great write-up.


Here it goes. This is my first write up and unfortunately I don't have any pics and Don't want to do it again anytime soon. From me having to do it 5 times in the last 2 weeks I hope this will help those so you don't have my problems...

Tools
1 21mm socket
1 19mm socket
1 17mm socket
1 35mm socket
1 10mm hex head socket
BFH (big effing hammer)
Also a rubber mallet is a plus...or just hit the old axle with the big one as it's coming out anyways.
1 short prybar (12 inches)
1 long prybar (36 inches)
little screwdriver and little hammer to pop off the dust cover

Materials
1 new/remanned axle
1 cotter pin
1.5 quarts of gear lube 80/90 or 75/90


Removal

1. Jack up the truck, take off the tire.
2. Take off the two 19mm bolts under the bottom of the rotor that attach it to the control arm.
3. Take off the sway bar endlink from the knuckle 17mm nut.
4. Get a screw driver and pound it in to pop off the outside black dust cover. (be gentle and patient don't deform it just go slow and work your way around the cover.)
5. Take out the cotter pin that hold on the little thingy around the big hub nut.
6. Take a 35mm socket to the hub nut. (I used an air impact and it came right off....good luck with a big bar ;)
7. Take a rubber mallet and hit the center threads of the old axle to loosen it from the hub...make sure it starts moving a bit. A few good whacks should loosen it up.
8. Have a buddy swing out the rotor a bit while you push the threads through the hub (possibly some light taps with the hammer to get it through) Also, DON'T pry on the inside of the hub...could screw up some bearings.
9. Now you got the outside out...use a slide hammer (who has one of those?) Or a pry bar and a huge hammer...HUGE being the keyword. I used a 10 lb sledge. But just light swings on it. The weight is the key. You can't wind up anyways...just some light/medium taps with the huge hammer and it should start coming out. Keep the taps coming until you can wiggle it... (good to have a buddy on the other end supporting the axle some.)
10. Get a bucket, the gear oil will start dripping out (smells worse than death)

Install

1. lube up the new axle with grease. Make sure C-clip opening is facing up.
2. Set it in place and push it in as far as you can with your hands.
3. Get a really big pry bar (~36 inches) and thread it in there to get on the lip of the axle.
4. Use said HUGE hammer...and some gentle taps and it will go in.
5. Move the rotor out a bit and thread in the other end into the hub (easy)
6. Put the hub nut back on. along with the sway bar nut and the bottom control arm bolt and voila all done. and the tire...

BTW refill with oil using 10mm hex socket

The reason I did it 5 times is because my seals were leaking oil like crazy afterwards so after getting it all together I've had to redo each side seal (PITA).

The Side seals are Toyota part number
90311-47013 for the PASSENGER side
and I believe 90311-47012 for the DRIVER side...still waiting to get the right one. (WHY oh WHY are they different sizes???)

The 12 is smaller than the 13.

~10 bucks for the 47012 and 18 bucks for the 47013

I recommend replacing these seals too while you're at it so you don't have to do it again like me.

Just use your little pry bar and pry them out of the end (be mean to it). To install just set them in flush with the outside...and let the axle push it back in when you hammer it in. That way you don't have to deal with more leaking.


Notes: You don't need to take sensors or upper ball joint or hub or anything else out. This is literally 2 bolts and 2 nuts...that's it. Trust me i've done it like 5 times now and with air tools I can get it out and back in in about 45 minutes...Before I figured out the HUGE hammer with light/medium taps I spent an hour and a half trying to get the new axle in and out. but just go BIG on the hammer and light on the hits and you're golden.

I haven't seen any good CV axle right-ups on this forum seen a taco one and an FJ writeup but they took way more off than needed. Hope this helps everyone and if anyone is doing this and wants to add pics...much appreciated.

 
I conquered this task while simultaneously installing my DS lift the other wknd by following this video:


Problems I ran into/advice:

-I bought 2 brand new Max Drive Shafts from NAPA to do both sides. I installed the first one only to find that the thread on the hub end was goobered up/unable to start the nut (I even tried using a jeweler's file to straighten the threads) so I had to REMOVE the brand new CV and install the second brand new one instead which was meant for the other side. Since it's Max Drive/life time warranty'd, NAPA is replaced the shaft for free ( = why I bought these). Make sure to double check that everything looks good before the install. Compare the old shaft to new and check the splines, threads, boots, etc.

-In the process of removing the brand new CV (which was hella stuck in the diff & took me over an hour to pound out) I ripped up the diff seal and had to wait til next day for the part. Like someone mentioned earlier have this part ahead of time. It was <$10 and is a good thing to replace while you have it apart anyhow. I used a broom stick handle (that I cut using a miter saw to ensure 90* angle on it) to gently pound the perimeter of the seal into place. So far no leaks!

-I had a hell of a time getting the new CV to "click" into the diff housing even with proper C-clip orientation. Per an internet search (IH8Mud forums), I used the advise of carefully removing the c-clip from the shaft's diff end (with a small pick & flat head screw driver, careful not to scratch) and bend it in a vise so it hugged the undercut tighter/more outside clearance. Worked like a charm.

-When tightening the hub nut back down, it's easiest to have someone sit in the cab and put a foot on the brake to stop the wheel from spinning.

-Make sure you refill the front diff since you will lose gear oil, esp if you replace any diff seals. A cheap gear oil pump makes this a lot easier.

I am actually having a reputable shop do the other side since they quoted me only 1hr of labor and I'm due for inspection anyhow.
 
Last edited:
Hi, I have a GX470 and considered doing this job myself, still there is something I don't understand:

1) the C-clip and the opening, why does it matter which way it faces? Is there a catch inside the diff for the clip opening? The splines are straight. what is the purpose of the C-clip?

2) The seal install, someone mentioned getting it started then just install the axle and let it push the seal in, is this a fool proof method?

3) if I am really lazy can I just pull off the hub end and install 2 new boots like that?

4) does anyone have the timkin part number for the hub seal. Also I was told to regrease the wheel bearing while doing this job, is it THIS seal that is holding the grease in?

5) what kind of grease should I put on the spline interface?


Thanks and I am looking forward to learn from you all..
 
Hi, I have a GX470 and considered doing this job myself, still there is something I don't understand:

1) the C-clip and the opening, why does it matter which way it faces? Is there a catch inside the diff for the clip opening? The splines are straight. what is the purpose of the C-clip?

2) The seal install, someone mentioned getting it started then just install the axle and let it push the seal in, is this a fool proof method?

3) if I am really lazy can I just pull off the hub end and install 2 new boots like that?

4) does anyone have the timkin part number for the hub seal. Also I was told to regrease the wheel bearing while doing this job, is it THIS seal that is holding the grease in?

5) what kind of grease should I put on the spline interface?


Thanks and I am looking forward to learn from you all..

1. I'm not sure why the c-clip orientation matters, but it does. It goes in much easier when the opening is down. The purpose of the clip is to keep the CV shaft itself from backing out of the differential.

2. This isn't the right way, or really the easiest. First, buy OEM for the seal. Actually, buy two just in case the first one goes in wrong. I'm not always an advocate of OEM but the OEM seals go in much easier than aftermarket versions that I've used from Timkin or National and you really don't want to have to do the job over again next weekend because the seal leaks. I use a 2" PVC coupler and a Harbor Freight seal setting tool to tap it into place. If you put the seal in the freezer for an hour first and coat it slightly in differential fluid it will slide right in.

3. You won't be able to install both boots without completely removing the CV shaft. You won't have access to the inboard side.

4. I don't have the part number, but you don't need to regrease the bearing. It's a sealed unit. Regreasing it isn't required and isn't easy.

5. I don't use grease. Some kinds of grease can actually be bad for the rubber that the seal is made out of and cause it to wear prematurely. I coat the inside lip of the seal with differential fluid and coat the splines and inboard side of the CV shaft in differential oil as well. I'm sure that you can use grease, but it's not necessary and you have to remember that whatever you use to lube it up will end up floating around in your differential fluid afterwards.
 
Last edited:
Hi do you recommend doing the Toyota reboot kit, seems like most just putting in new axle, my car is only on road use, tear this one 130k miles, if I reboot it, how long would the CV joint last anyway?
 
If you didn't drive with a torn boot long enough to run the joints dry or get a bunch of debris in there then rebooting the shafts would likely be your best bet and should last you a very long time.
 
so.. the knuckle side seal.. Toyota label as "oil" seal but there is no oil in the knuckle is there..?? It's just to stop dirt, actually like water from getting in the hub and soaking the bearing right?

And did anyone need to remove the brake caliper? Not sure if the movement needed will stress the brake hoses?
 
CV Shaft Seal FAIL!

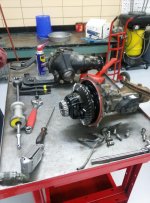
So, just the seal was leaking on the driver's side. But leaking a full quart of gear oil every 2 days. Knocked the outer CV Shaft from spindle and then tried to pull the inner knuckle from the transfer case. NOPE.
Big pry bar didn't work. Ended up using a hammer and large chisel to get the inner knuckle to finally pop out. As I'm about to pull the seal, I see HUGE metal pieces inside the differential. Needle bearing pieces to be exact.
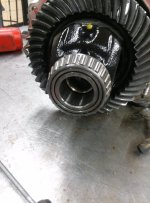
Not sure what happened over the course of those 254,000 miles, but it looked bad. I ended up having to tear down the diff, pull it apart and replace that needle bearing that the driver side (left) inner CV knuckle floats on.

Second picture you will see that I pulled the race out of the carrier, this is the scoring done to the outside of the carrier, but whew, no damage done to the inside.

Lets just hope when I drain the gear oil here in another 2000 miles, there won't be any metal shavings on the lower plug magnet.
 

Attachments

  • T4RDiff1.jpg
    T4RDiff1.jpg
    131.4 KB · Views: 2,324
  • T4RDiff2.jpg
    T4RDiff2.jpg
    130.7 KB · Views: 2,360
Last edited:

Members online

Forum statistics

Threads
278,316
Messages
3,554,113
Members
248,016
Latest member
Advally Service

Trending content

Back
Top