
HOWTO: Change lights of CC, shift light, and gauges

trd_style

New member
HOWTO: Change lights of CC, shift light, and gauges (LOTS OF PICTURES!)

Let me be the first to say that i am NOT responsible for any damage being done to your vehicle. Please take this write-up as an educational use and learn something from it. I'm not sure if this is the right section to post it but please redirect this thread to the appropriate section admin/mods. =)

That being said, i would like to say that, this took me more than an hour to do due to working at night + no one else to take the pictures so bare with me. =) If you have ANY question, ask me before performing this mod. Since this is a write-up, i decided to post pictures step-by-step since i'm a visual learned myself. Props to Bob (4runners.org) for the references pictures. Thanks!

Materials required:

Wrench
10mm socket
Flathead+Phillips screw driver
4 or more LEDs+resistors (up to you)
4 (2 packs of 2) wedge bulbs

Alot of time
Enough light

Lets begin..

Lets start by taking your battery off so it won't affect any of your gauges or climate control. And pull both your passenger seat and driver seat all the way back so you have enough room to work with.

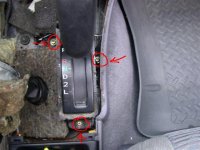
Unscrew 2 screws for your shift cover. The blue circles indicate the screws in the picture. Put the 2 screws in the small area where your e-brake is at.
DSCF0030.JPG


Now, use a flathead and pop the cover off. There are 2 clips on the bottom on the top piece so be careful not to break it. Here is a picture of those 2 clips.
DSCF0031.JPG


Unscrew 4 screws from the shift boot cover. Put those 4 screws in your door handle. So you would know which is which when you put them all back. Noticed those wires on the left side. Those are my LED neon light along with my radar wires. Very convenient place to hide your wires.
DSCF0032.JPG


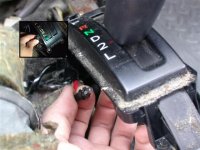
Reach under that cover piece and twist the light out. You will noticed there is a green condom over the bulb. For me, i just took the green condom put and didn't replace the bulb. Didn't felt like wasting any more money so i kept it clear bulb which will show up amber.
DSCF0033.JPG


Another picture from the side view.
DSCF0034.JPG


After that being done, reverse your way to put your screws back on, put your cover back on, 2 tabs on the bottom will hold it, and then screw the 2 screws to hold the cover on.
 
Last edited:
Register to hide this ad
change the climate control lights

Now to change the climate control lights.

Take off 4 of the tabs for the climate control. And try to take the A/C button out if you can. If you can't move on to the next step.
DSCF0035.JPG


Use a flathead and CAREFULLY pull the climate control cover out. There is 4 tabs on each side to hold it so be careful not to break it. This could also take the A/C button out. Here is a picture of how the cover piece along with the A/C button look like.
DSCF0036.JPG


Unscrew these 2 screws which is shown blue circles in the picture.
DSCF0037.JPG


Gently, pull from the bottom outwards. And this will pull out the whole center console out.
DSCF0038.JPG


There will be 3 wires connected to the console. The hazard light, defrost, and your clock. Unplug them and of course, when you plug it back in, you can't go wrong because each wire is different.
DSCF0039.JPG


Now! Here's the lighting part. The blue circles indicate how i power up my LEDs. I cut the wire and solder the LEDs to it. The red circle indicates the light of the cigerette adapter. I didn't change mine so i kept it green. But it's up to you to change it.
DSCF0040.JPG


Here is how to take out your climate control and also your stereo to hide the LED wire behind it. Unscrew the 4 screws from the stereo and put them in the area of your e-brake along with the 2 screws from the climate control.
DSCF0041.JPG


The blue circle indicates that there is 1 LED to power up the climate control light. I twist the original LED and replaced it with my LED. The second LED shown in the picture goes to the slider which it gives a cool effect to the slider of the climate control.
DSCF0042.JPG


Now to put back the console together. There are 6 tabs to hold it in place, so here is a picture of the 3 tabs on the LEFT side.
*Note* you can always hide your radar wire behind here if you don't want any wire to hang around in front your stereo and your vents.
DSCF0043.JPG


Again, reverse the process to put everything back together.
 
Last edited:
change gauge light

Unscrew these 4 bolts to take the cover out. It is 10mm socket so unscrew them and put those 4 bolts in your door handle. You will notice 2 metal wires, which is the gas door and to pop the hood. You could take it out for more space but i just moved it down. Didn't bother to take it out.
DSCF0044.JPG


Now to take out the ignition cover. It it basically 2 tabs so pull them out carefully.
DSCF0045.JPG


Here is a picture of the 2 tabs of the cover.
DSCF0046.JPG


Now to take the gauge cover out. Here it is the picture of the left bottom screw.
DSCF0047.JPG


The right bottom screw
DSCF0048.JPG


And now the 2 top screw of the cover. Put those 4 screws in the area of your e-brake. Now that the cover is out, depending on your car, you will get 2 other wires which is the dimmer and the alarm LED. Again, i moved it to the side and didn't bother to take it out.
DSCF0049.JPG


Now that the cover is off, here are the 4 screws to take your whole gauge off. After you taken it out, there will be 3 wires connected to the gauges. Press on the tabs to pull them out. Be as careful as you can be. Again, you can't go wrong when you plug them back because each plug is different.
DSCF0050.JPG
 
Last edited:
gauge continues..

The 3 blue circles indicate the light for the gauges. Depend on if you have stock gauges or aftermarket white face gauge, this will help your needles to be brighter. I took the bulb of the middle light out to wire LEDs to each gauge. You will see the process of the LEDs in the following steps.
DSCF0051.JPG


Here is a picture of the bulb. It has a green condom over it so i taken both the green condom and the bulb and replaced it with hyper white bulbs.
DSCF0052.JPG


Now to take your plastic covers out. CAREFULLY push down the tab and take off the clear plastic cover. There is 3 tabs on top and 4 on bottom. After that, CAREFULLY take out the bezel out.
DSCF0053.JPG


NOW! Here is my favorite part. Unscrew the first 4 screws on the left, which is the MPH gauge. CAREFULLY without touching the needle, take it out WITH CARE and hold it firmly so you won't drop it. The needle is very sensitive so try not to mess with the needle.
DSCF0054.JPG


I wired 1 LED to this small piece of the gauge. It will light up the gauge for your stock gauge but for mine, i have an aftermarket gauge, so it won't matter. The purpose of this LED is that the needle will light up brighter. I use scotch tape so the light of the LED could spread through the other gauges since it's clear plastic. When you are done, screw those 4 screws back on and continue the process to the RPM gauge.
DSCF0055.JPG


Now unscrew the 3 left screws to take out the RPM gauge. Do the same process as before with taping the LED to the gauge with scotch tape.
DSCF0054.JPG


Once again, reverse the process to put everything back together. Make sure everything is tighten and closed correctly so no air go get into the gauge. Which it could make your clear plastic gauge foggy.
 
Last edited:
final pictures!

And now for the finale. Here is the picture of the overall mods.

The amber light of the shift knob.
DSCF0056.jpg


The climate control light. I didn't bother to change the A/C button because it's only 1 LED without wires and plus, i couldn't wire up a resistor to it so no point.
DSCF0057.jpg


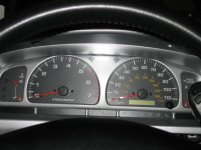
The complete gauge without the aftermarket gauge lit. You will notice how much the needles are brighter than before.
DSCF0058.jpg


The overall gauge with the aftermarket gauge lit. Can you say WOW? =)
DSCF0059.jpg
 
Last edited:
wow this is a really helpful post... im plannin on changing the lights on my runner... thanks for the tips... oh and btw... i have a '00 4runner and i notice you changed your ODO color to white... since the 99-02 have a differnt look to the ODO is it the same way change the light to that?
 
which areas are actually bulbs and which areas are actually LED's? i notice the shift knob and the gauges were bulbs.... is there anything behind the center console thats bulbs? and what about the circle light around the ignition? how do u change that?
 
skkiii_whhaattt said:
wow this is a really helpful post... im plannin on changing the lights on my runner... thanks for the tips... oh and btw... i have a '00 4runner and i notice you changed your ODO color to white... since the 99-02 have a differnt look to the ODO is it the same way change the light to that?

hmm, i am unsure what OBO means. could you explain to me and i'll answer it right away.
 
skkiii_whhaattt said:
which areas are actually bulbs and which areas are actually LED's? i notice the shift knob and the gauges were bulbs.... is there anything behind the center console thats bulbs? and what about the circle light around the ignition? how do u change that?

lets see. 1 bulb on shift knob. 1 LED on climate control. (you can also add 1 LED to the slider if you want it). 1 LED on the cigerette adapter. 3 bulb for the gauges. and that's about it i believe.

for the ignition. i'm not sure. i didn't bother changing it because it's not as bright as i thought it would be so i didn't change it.
 
ok so i noticed you put LED's on your gauges for the needles.... did you just add that just because? and if it has 3 bulbs... do those just lighten up everything on the gauges or what?
 
Last edited:
ok... hopefully this picture will show... but if you notice on the MPH gauge right below the needle thats the odometer...im guessing thats what its called... you can see between the 96-98 gauges theres a slight difference between the 99-02 gauges... the 96-98 has 2 areas where they show the mileage... one above and the other below the needle which is like a tickler style where as the 99-02 gauges upgraded it to only having one area to put the mileage odometer right below the needle and as you can see on the picture below its not the tickler style... its digitally electronic or whatever.. anyways the light on the odometer shows green just like everything else on the gauge... so if you changed your odometer/mileage light to white would it be different to change the lighting effect on the 99-02 since its digital rather than the tickler... hopefully you get what im saying
 

Attachments

  • 280393_17_full.jpg
    280393_17_full.jpg
    35.1 KB · Views: 4,541
Last edited:
skkiii_whhaattt said:
ok... hopefully this picture will show... but if you notice on the MPH gauge right below the needle thats the odometer...im guessing thats what its called... you can see between the 96-98 gauges theres a slight difference between the 99-02 gauges... the 96-98 has 2 areas where they show the mileage... one above and the other below the needle which is like a tickler style where as the 99-02 gauges upgraded it to only having one area to put the mileage odometer right below the needle and as you can see on the picture below its not the tickler style... its digitally electronic or whatever.. anyways the light on the odometer shows green just like everything else on the gauge... so if you changed your odometer/mileage light to white would it be different to change the lighting effect on the 99-02 since its digital rather than the tickler... hopefully you get what im saying

yes i understand. i didn't know what you mean by the OBO. your OBO is digital. so i'm not sure how you could change it. i don't think you can because it's not LED nor bulbs. the only way is use transparent clear vinyl over it to change the color. other than that, i don't think you can change it in any way. for mine, i only put one LED directly to the clear plastic piece which it will light up the gauge and also the needle. it might be bright enough to light up other gauges but not enough. but this LED is directly to one gauge. which is MPH then another LED to RPM. hope this helps.
 
skkiii_whhaattt said:
so if you used LED's on the gauges then what are the bulbs behind the gauges for?

originally, there are 3 BULBS for the gauges. but i took the middle BULB out and replace it with 2 LEDs. one on MPH one on RPM. the other 2 BULB are the fuel and temp gauge. which doesn't need to be alot of light as the MPH and RPM. of course you could put LED on each fuel and temp. gauge but it doesn't matter to me. the LED makes the gauges brighter for the MPH and RPM. hope you understand what i meant.
 
crap! i guess its different for yours and mine

with 4WD there are 3 screws here (not the issue, just for anyone with 4WD doing this):
 

Attachments

  • dscn2947 circled (small).jpg
    dscn2947 circled (small).jpg
    48.2 KB · Views: 5,689
Either its my year and newer or the fact that its 4WD but theres no condom/colored sleeve over the bulb and my bulb is a lot smaller:
 

Attachments

  • dscn2948 bulb (small).jpg
    dscn2948 bulb (small).jpg
    48.6 KB · Views: 2,258
trd_style said:
originally, there are 3 BULBS for the gauges. but i took the middle BULB out and replace it with 2 LEDs. one on MPH one on RPM. the other 2 BULB are the fuel and temp gauge. which doesn't need to be alot of light as the MPH and RPM. of course you could put LED on each fuel and temp. gauge but it doesn't matter to me. the LED makes the gauges brighter for the MPH and RPM. hope you understand what i meant.

so you just basically added the LED to make it brighter? is that it?
 
skkiii_whhaattt said:
so you just basically added the LED to make it brighter? is that it?

to make my needles brighter, yes. but you will noticed the difference when you have 2 hyper white bulb on each side and 2 LEDs on the gauges. i noticed it on my ODO meter. LED is more bluish white and the hyper white bulb is more white.
 
broncosi said:
Either its my year and newer or the fact that its 4WD but theres no condom/colored sleeve over the bulb and my bulb is a lot smaller:

you can wire an LED in replace of that LED. sorry about that. i didn't know different years of T4R would be different. good luck.
 

Members online

Forum statistics

Threads
278,317
Messages
3,554,127
Members
248,016
Latest member
Advally Service

Trending content

Back
Top