HULK Build Thread

ameining

New member
Time for a build thread

Name: The HULK
Owner: "ameining"
Location: COLORADO
Year: 2000
Make: Toyota
Model: 4Runner SR5 Sport

Engine: 3.4L V6
Trans: 5 SPD MANUAL
T-Case: Stock

Suspension Lift Kit
Front
-Toyota Progressive TRD Front Coils, both sides
-Bilstein 5100 Series Height Adjustable Nickel Plated Adjustable Heavy Duty Front Shocks
-Sonoran Steel 1" diff drop
Link to Lift Kit

Rear
-Toyota FJ Series Land Cruiser Coils - Replaced with OME 861's
-Bilstein 5100 Series Nickel Plated Shocks
-Sonoran Polyurethane Shock Bushings
-Sonoran Steel Fabrication L.L.C. Adjustable Trac/PanHard Bar
Link to Lift Kit


Meats
-Tires- (4) 285/75/16 Pro Comp X-Treme All Terrain New Tires
-Rims- 16x7 Stock 5-Star (Powder Coated 20% Gloss Satin) Wheels
-Spacers- All-Pro 1.5" aluminum hub-centric wheel spacers. Spacers

Armor
-Front winch bumper (Shrockworks) Front Bumper
-Rear 4WD bumper (CBI Offroad) Rear Bumper
-Rock Sliders (Shrockworks) Sliders
-Stock skid plate, modified for diff drop and Bed Lined

Performance
-K&N Cold Air Intake K&N CAI
-Flowmaster 40 w/2.5" f/cat back.
-Poly Steering Rack Bushings Bushing Kit
-Energy Suspension Rear Poly Bushings Rear Sway Kit

Electrical
-PIAA 510 Fog Lights PIAA's
-KC Daylighter 4WD lights, painted black KC's
-Full LED interior light upgrade LED's
-Sylvania HID headlights
-Green KC dash switch for 4WD lights
-Tacoma Black Whip antenna Tacoma Whip
-Uniden Pro520XL w/PA system and 4' Firefly antenna CB/PA System Antenna

Accessories
-Yakima Loadmaster and 2 bike racks on side Rack System
-Wet Okole Seat Covers with custom TRD emblem Wet Okole
-Uniden PRO 520XL CB/PA System, 4' Firestik Firefly antenna CB/PA System Antenna
-Custom Hulk Face and Fist 4WD shift knobs Hulk Knobs
-TRD main 5 speed shift knob TRD Knob
-1st Gen Rollbar installed Roll Bar
-Shrockworks, Simms, Burton, Specialized, and TRD stickers/emblems
-Blacked out grille Grille
-Blacked out emblems Emblems
-48" Hi-Lift Mounted Hi-Lift
-AVS In Channel Ventvisors AVS
-WeatherTech Digital Floor Liners Weathertech
-Secondary Oh S*** Handle on Driver's Side O-S*** Handle
-Mag Light and Fire Extinguisher Accessories Mounted

Photos are late, but when I bought the Hulk in 2008 w/72k off craigslist!!!

beforeanything1.jpg~original


Very clean interior, however that day I drove over 1,000 miles to get the beast and did not get any pictures of it : (

beforeanything2.jpg~original


Like most of us 4Runner guys, the first thing I did...even after that long drive (from Central California to San Francisco area for purchase, then to LA to get my Dad from airport...lastly back to Central California) I could not help but to pull off the running boards!!

beforeanything3.jpg~original


Much better already!

beforeanything4.jpg~original
 
Last edited:
Register to hide this ad
1st Modification

So with the limited funding, I was held to minor changes. I pulled the trigger on a new intake, after some research and the fact that it was immediately available I went with the K&N. Dyno charts showed about 9 hp increase, and the sound is pretty impressive.

A pre-photo of the equipment to be installed. Total cost for this kit was less than $250 from Autozone

KN1.jpg~original


All of the parts associated with the project. All in all, this is a very easy install and the removal of the very blocky and restrictive stock intake makes for extra room all over the place as well as increased performance.

KN2.jpg~original


Basic tools and about 25 minutes of wrench time, and voila the old intake was gone

KN3.jpg~original


To not bore with the details of this basic upgrade, I will skip the details. If anybody is looking to do the install I will mention that the instructions that come WITH the intake are sufficient for anybody to perform the install. Here it is installed, nice and clean!

KN4.jpg~original


And of course, manually throwing the throttle to hear the change!!

KN5.jpg~original
 
Last edited:
NeeeeXXXTTT

Well for a true timeline, I was out of money and being good to my credit card so here are a couple early mud and snow photos in Central CA.....I found a set of ski-rack attachments on craigslist for about $35, and since I snowboard so much I had to get them....I love craigslist!!

What some may notice is how I mounted the Burton sticker sideways, and I should be shot for that!!!


Nice snow photo, but the stupid sticker that was immediately changed after this trip!

wheeling4.jpg~original


Some beginning photos of an attempt at 'flex' with the stock setup!

wheeling2.jpg~original


wheeling1.jpg~original
 
Last edited:
Time for a Lift

I went with Sonoran Steel system 1.2. Ask for details or go to their website if you like: Sonoran Steel, Sonoran Steel Custom Metal Fabrication L.L.C. Custom Toyota Truck Parts. I did install on my own, and for the product their prices are GREAT

Started with the fronts. The instructions that come with the kit are phenomenal, so the install is not too much of a pain. The fronts involve removing the factory strut, and the hardest part is getting the larger one in. I used a pry bar to pull lower arm down so that the bolt could get through the lower eyelet.

Picture131.jpg~original


Little closer photo with factory suspension still in place

Picture132.jpg~original


Side by side comparison of front suspension. It appears as though newer ones are not that much taller, however they springs are stiffer and so the ride is higher

Picture136.jpg~original


And now one side of the front installed, looks much cleaner!

Picture139.jpg~original


With the 1" diff drop, the skid plate needed to be modified.

Picture142.jpg~original


A final photo of the skidplate modified, the pieces with welds in the center are what needed to be done. What was done on the LHS and was welded back on to the RHS was initially a mistake, however we took the opportunity to add some extra steel on for strength

Picture151.jpg~original


Now on to the rears. I did not take a huge amount of photos during the rear section. This install was not terribly difficult, it involves new shocks, springs and a pan-track bar that is adjustable.

Picture162.jpg~original


Hardest part is getting at the hardware for the shocks on the top, I had to use some extra socket extensions and about 3-4 beers worth of frustrating knuckle busters! Here is a good side by side of all the equipment in the rear, with the exception of the new pan/track bar.

Picture164.jpg~original


And of course a final shot, the kit arrived at 2100 hours, and so a lot of the work was done at night. The total install took around 8 hours, at a leisure pace with the help of a friend.

Picture166.jpg~original
 
Last edited:
Time for some new meats

I told myself I would wait for the cash to get the tires, but after being lifted...I would only wait about 12 hours before getting tires. I had done my research and was between a 255 and a 285 width...wanted more height but still went with the 285 width. Pro Comp X-Treme 285/75/16R. I shopped around, and did a price match with a CA tire dealer to get $178 a tire, which I thought was a good deal. Only went with (4) at the time, since I had no place to store a spare, that will have to come later.

Picture169.jpg~original


Picture173.jpg~original


These are directional tires, and so a true 'rotate' is not an option...

Just a note, the 285 width will rub on upper arm in the front with stock 5 Star rims. Which ultimately led me to getting wheel spacers that will be seen later. Here is a shot of how the tires currently do not stick out past the wheel wells

Picture170.jpg~original


Picture174.jpg~original
 
Last edited:
Some armor!

So my friend who welds had built the front bumper on his F250 truck, and was pretty much the sickest thing I had seen somebody do...and it got me thinking about it for the Hulk. He and I talked about designing and building (I design, and help slightly with the build) a bumper for my rig, but he was getting ready for a move to another state. So in my infinite online research I landed on the Shrockworks front bumper that is ready for a winch. Again, if you like or have questions please message me or go to their website: Bumpers, Rock Sliders, Rocker Protection, Skid Plates, ShrockWorks, They are very helpful and were a huge help for me doing the install by myself. I am new to working on vehicles, and even a middle school kid can follow his very thorough install directions.

Great packaging, the delivery is a bit long but I think after the wait I would say it was worth it. Also, the price is somwhat high, but the quality is there. Here is the package as delivered.

BumperTime1.jpg~original


The install requires that you grind off the excess on the outside of the frame rails, and if desired there is an additional support referred to as the 'end cap mod' which requires some additional welding. This is not totally necessary to get a good bumper that will be strong enough for recovery via a winch. I chose not to do the end cap mod. This is a photo of the minor grinding necessary, a 4.5" wheel grinder works great.

BumperTime2.jpg~original


Initially I just installed the frame rail brackets with no clamp, as shown here. This was not a good decision. Without a c-clamp to hold the bracket flush to the inside of the frame rail, the bumper brackets do NOT slide to the inside of the brackets. Lesson learned

BumperTime15.jpg~original


Here is a photo of the brackets with the appropriate c-clamps, this allows for the bumper to slide to the inside of the brackets...

BumperTime16.jpg~original


Now, I did this install by myself so I used two jack stands to assist in the weight (~110 lbs, and very awkward) while it was being positioned.

BumperTime19.jpg~original


Finally, there are two bolts per side that need to be aligned and tightened so that the bumper is fixed in place. These are each slotted so that alignment adjustment is possible. Mine does NOT fit totally level, despite my greatest efforts.

BumperTime21.jpg~original


Any questions or thoughts, please let me kniow!!
 
Last edited:
Final Bumper and 4WD Lights

My uncle learned that I was working on a 4Runner and wanted it 4WD ready, so for Christmas he gave me his old KC Daylighter 4WD lights. They are the Halogen bulb lights that are great for night wheeling, they pull a lot of energy but I still just run 1 battery. I directly wired them from a switch in the dash to the battery with an in line fuse to protect the lights (wiring not shown).

As part of the bumper installation, I put the lights in the slots the bumper came with

BumperTime23.jpg~original


Here is another shot of the lights. They are not the 'slim-light' profile but they do not protrude beyond the front of the bumper...and for a gift, I could not argue with the price!!

BumperTime24.jpg~original


And just a couple of shots during the day before I got the $15.99 KC protection cages for the front

BumperTime35.jpg~original


BumperTime37.jpg~original
 
Last edited:
More Protection

Same website and source as with the bumper, Shrockworks makes a great set of rock sliders. The install is painless, and the price is decent. For the material used the cost is high, but they fit snug to the vehicle and my buddy recently told me that the reason he likes my vehicle is that my 'running boards' fit so tightly to the vehicle!

As always the packaging is professional, and the powdercoating/craftsmanship is top notch.

RockProtection1.jpg~original


Ths install is relatively painless, just takes some drilling and then putting the parts in place. As per usual, I did this solo and so I put towels down in case I dropped them!

RockProtection2.jpg~original


The sliders do not weigh all that much, but they are long and narrow. To assist with the install, I used two jack stands to support the weight as seen here

RockProtection8.jpg~original


And a couple photos of them installed, sorry for the lighting. This project too me into the evening hours

RockProtection4.jpg~original


RockProtection5.jpg~original


RockProtection6.jpg~original


RockProtection7.jpg~original


RockProtection11.jpg~original
 
Last edited:
Rubbing on A Arms

As mentioned before there is rubbing with the 285 width tire. I installed 1.5" spacers, and yes I did utilize the help of a lovely blonde!!

I went with All Pro because their price was right and the color really means nothing to me. Yes the Spidertrax spacers are a nice blue color, but I honestly can't think of a place where you even see them...unless you pop a tire on a trail or something.

So, anyway my cute friend and I decided to get into this install. Very painless, just need a lugnut wrench. Here is my 'hired' help getting after it!

IMG_1607.jpg~original


What should be noted with wheel spacers is that they need to have new lugs attached otherwise there will not be enough thread engagement. This means that in order to get to the hub there is effectively now 12 lugnuts instead of 6.....Here are a couple photos of them installed. Sorry I do not have many photos, lets just say I was distracted

IMG_1613.jpg~original


IMG_1618.jpg~original


IMG_1615.jpg~original


Guess I better throw in a couple of the lovely blonde getting wrench crazy!!

IMG_1609.jpg~original


IMG_1611.jpg~original


I did not take before and after measurements of have perfect comparison photos. The difference is noticeable in appearance and gives it a more aggressive stance. HOWEVER it should be noted that the front now rubs on the outside when fully turned to one direction. I have since had to trim all possible parts and there is still rubbing...
 
Last edited:
Roof Rack System

I like to wheel, bike, snowboard and everything else. A roofrack seemed like the right thing to do. Went Yakima, since I had rigged up my last vehicle with a Yakima system.

What is needed:
1.) Yakima Control Towers that bolt directly to the factory tracks.
2.) Two 48" crossbars
3.) Optional SKS locking cores to secure your investment
4.) Any additional accessories you would like to have on top!!

***BE CAREFUL WHEN REMOVING THE FACTORY CROSSBARS, AS THE END CLIPS ARE VERY FRAGILE*** I had read this in a post but did not pay enough attention. After the removal, I thought to myself that the brittle nature and poor design of the end caps made it inevitable that they would be broken. However, the cost to replace all was around $46 after shipping at toyotapartscheap.com. : (


Here is the setup with just to loadwarrior. The part retails for $249 I believe, I found one on CL for $75. I was happy with the purchase.

TheRack3.jpg~original


So the next item was to add the Viper attachments. I had two of them already, so throwing them on was painless and obvious since I already had them!

There are two options for this setup:
1.) Mount the bike attachments to the Yakima crossbars (this is what I did)
2.) Mount the bike attachments to the Loadwarrior (same diameter crossbars). I chose NOT to do this because it would have made the bikes sit at least 6" higher on an already relatively tall vehicle. Not to mention even more of a PITA to get on and off unless you are 9' tall.

TheRack7.jpg~original


Bike on other side to make sure it all fit...

TheRack11.jpg~original


All looks good, right?? WELL of course, like everything with my projects there was something I overlooked. I tried throwing my MOUNTAIN bike up there and it was not happening. I do not have a good photo to show what the problem was (as I would have been balancing a 38 lb bike with a camera in the other hand!!). Basically the front fork on mtn bikes is a larger diameter. This is because it is a shock, and therefore when I tried to mount the bike on to the fork attachment it hit the side of the Loadwarrior. GRRRRRRRRR

So then I was back to the original debate of whether or not to put the attachment on top of the Loadwarrior??

Chose against that, I went to the store and bought a single round crossbar. It simply needed to be about ~3/4" longer on each side to accomodate the larger fork of the mtn bike. So I did just that (went with 1 1/4" on each side as a precaution).

TheRack18.jpg~original


And VOILA, mtn bike fits!!!!

TheRack19.jpg~original


Finally.......as mentioned above in my caution above I busted each of the endcaps when taking off the factory crossbars. Here is a photo of what I am referring to:

TheRack20.jpg~original


Here are the replacement parts, the only complaint I have is that because they are brand new they are not faded like the rest of the plastic up there. So they do kind of stick out. Lesson? Be careful when removing them!!

TheRack23.jpg~original


And finally, them installed:

TheRack22.jpg~original


TheRack24.jpg~original
 
Last edited:
It was like watching a catapiller come out of it cacoon into a buterfly.. hahaha.. Nice ride man.. Looks good.. nice transformation process also..
 
Shift Knobs

As you have likely picked up, I named my rig the Hulk. It was to replace an old truck we had on the farm growing up that was called the Hulk.

Well in my time of not havin the $$ I went online and found a custom shift knob builder in Wyoming (Kool Knobs). Bruce is his name, and he is very easy to work with. If I recall correct each knob was $30. So the entire project was less thatn $100 delivered to my door.

I purchased a 12" Hulk toy for kids at Target and shipped it to him. He removed the head and left fist and cast them in a clear epoxy. There is some bubbling on the head piece, but I think the effect is pretty neat. The original idea was to have the head as the main shifter, and the left fist on the 4WD (as in a hulk smash effort when 4WD is needed)! However, they are 2" diameter pieces and I found it to be somewhat uncomfortable when on the main shifter. I now just have one of the two knobs on the 4WD t case, just for appeal. Haha

Here are the two that he made for me sitting side by side

Knobs3.jpg~original


I toy between the hulk fist (as to mimic a HULK SMASH) when 4WD is needed:

Knobs7.jpg~original


And the raging angry Hulk face!

Knobs5.jpg~original
 
Last edited:
I like the head of the Hulk for the transfer case knob on the last picture, makes the tranny shifter and boots look like arms and gloves.

Hey lots of great additions, sweet looking IJM, too!
 
Love the color, the HULK name, beefy shoes and functional mods. Most of all the fact the you installed in all.......priceless brother ! Nice pictures and time line of your work. :trophy:

Whats impressive is how Shrockworks shipped your bumper, properly strapped and crated. That's a professional companies way of showing respect to their customers $1000 purchase. I've noticed that with CBI as well others do the same. Mine shipped with 1/3 of the bumper surface cover in a few paper thin foam pieces laid over the hoops only while the unsecured bumper rolled freely around in a cardboard box.

I guess that's what you get for $155.00. Thank goodness it made it undamaged, I was surprise to say the least and the freight driver thought it was a joke.
 
Last edited:
Prequel for the Next Phase

So this is just to prime the audience for what is next. I work on the rig for another week and a half, but upon arrival I will be doing a few things:
1.) Wet Okole seat covers have been delivered and are waiting for install.
- TRD offroad logo I got online, and all black with dark brown piping to match dash. $$$$ but when the whole ride is done it will look clean I hope
2.) Ordered a matching TRD emblem for the side of vehicle
3.) Uniden PRO520XL parts and firestick antenna are en route. If Driffter can make a mount, that will be installed on my 2 weeks off.
4.) LED interior kit is en route to the house, hopefully there when I get home for the full install.
5.) Researching powdercoating wheels and skid plate. I did research on this some time ago and was told it not possible, when I saw a rig on here that had it done I jumped on the idea again. Hopefully they will be blacked out on my days off
6.) Black out remaining emblems

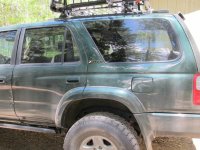
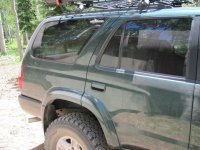
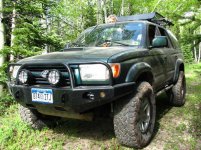
So I like this photo of the rig with two fly rods under the windshield wipers, enough to make it my signature too...haha. Others are to show the emblem on one side and the other side with Shrockworks sticker. Still undecided on keeping both of them or just the TRD emblem. Thoughts?

Stay tuned....
 

Attachments

  • emblem1.jpg
    emblem1.jpg
    95.5 KB · Views: 2,532
  • emblem2.jpg
    emblem2.jpg
    91.5 KB · Views: 2,534
  • signature.jpg
    signature.jpg
    112 KB · Views: 2,620

Members online

No members online now.

Forum statistics

Threads
278,306
Messages
3,554,045
Members
248,016
Latest member
Advally Service

Trending content

Back
Top