

Jeremy556
New member
At 70k miles, my Icons are past due for a rebuild. Instead of shipping them off and waiting a couple of weeks, I decided to DIY. I have rebuilt and revalved numerous bicycle and motorcycle shocks over the years, but this is my first automotive shock rebuild.
With all the weight I have added (600+ lbs over stock), the 12" 650 springs aren't really up to the task any more. They were set at a ton of preload, and would still blow through travel pretty easily on big bumps, off road, so I ordered 14" 700 lb springs from Icon.
I figured with the front end apart, I would replace my Total Chaos uniballs and bushings. After inspecting them, they are actually fine, but with 40k miles on them, I'll replace them, knowing I won't have to mess with them again for at least another 40k.
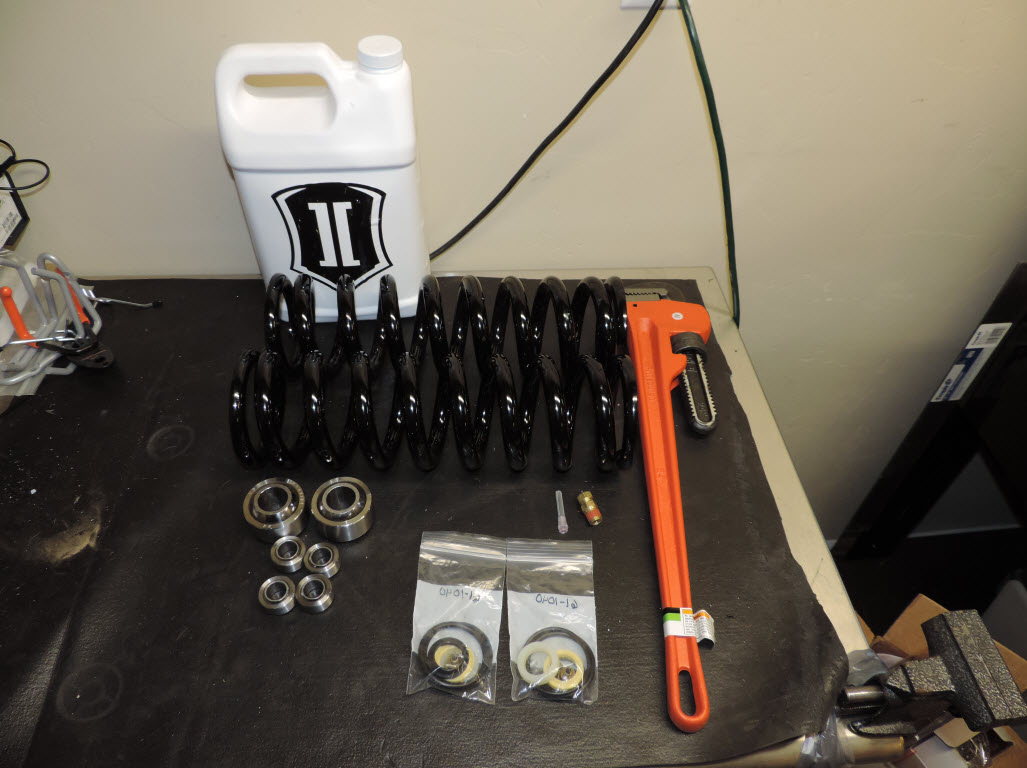
Parts List
1 IVD 254100G - 1 gallon Icon shock oil
2 IVD 158508 - 14" 700 in lb Icon 3" diameter springs
2 IVD 611040 - Icon 2.5 shock rebuild kit. There are 2 versions, 1 for IFP, the other for remote resi.
1 IVD 252004 - Icon nitrogen fill needle
2 WSSX-16T - 1" stainless uniball for TC UCAs
4 COM-10T - Upper and lower spherical bearings for the shocks
I'm not going to cover shock removal/re-install, as that is covered elsewhere.
You'll want to back the preload adjuster ring all the way out, then use spring compressors to compress the spring and remove the lower spring mount bucket.
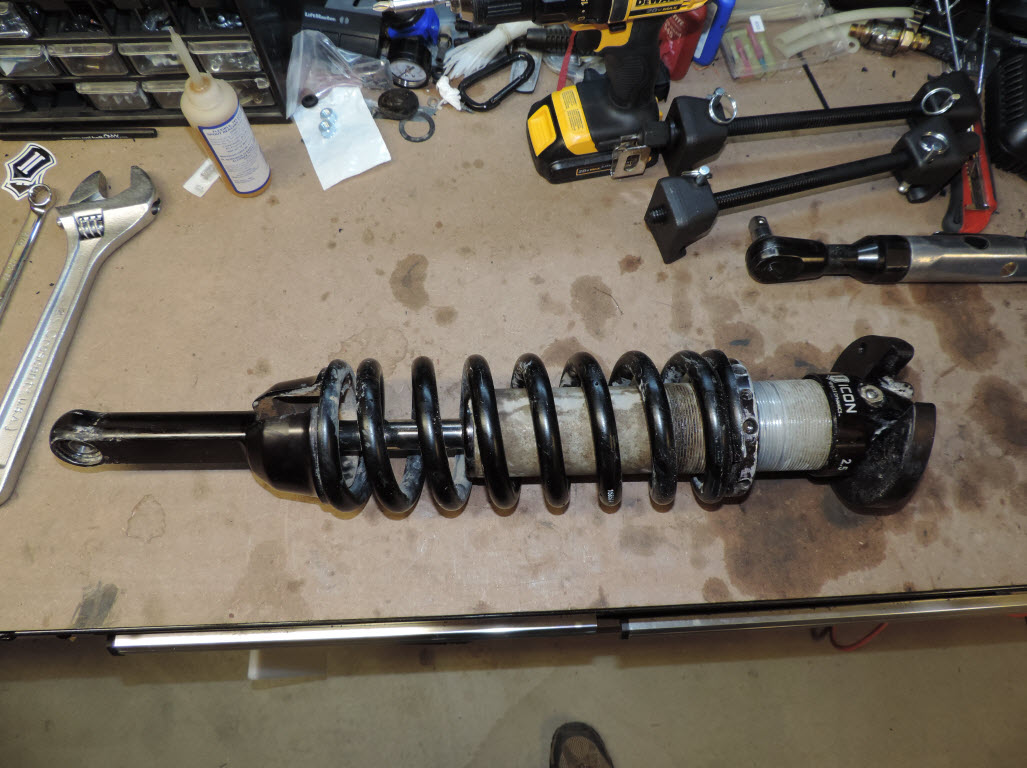
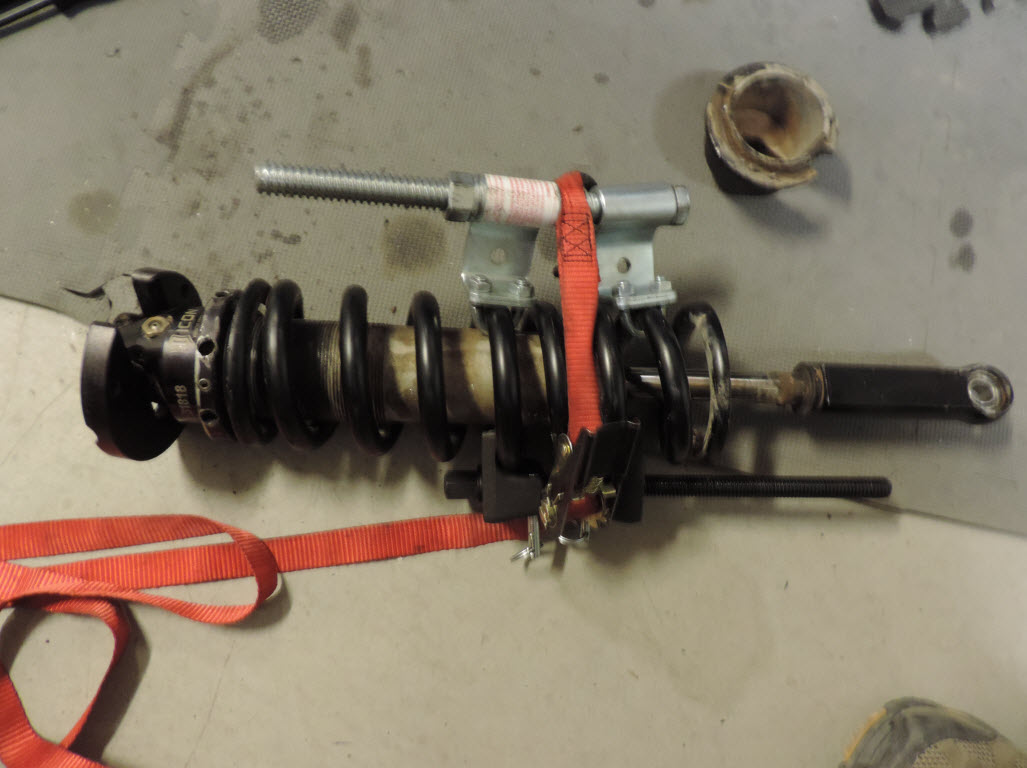
There is very little room between the springs and the shock body, and the coils are pretty thick, so compressing the spring was a bit of a PITA. The 650lb springs only need to be compressed about an inch to an inch and a half. The 700 lb springs will need to be compressed about 3.5 inches, so I will take it to a shop to install the new springs.
Shock with spring removed, and old vs new spring

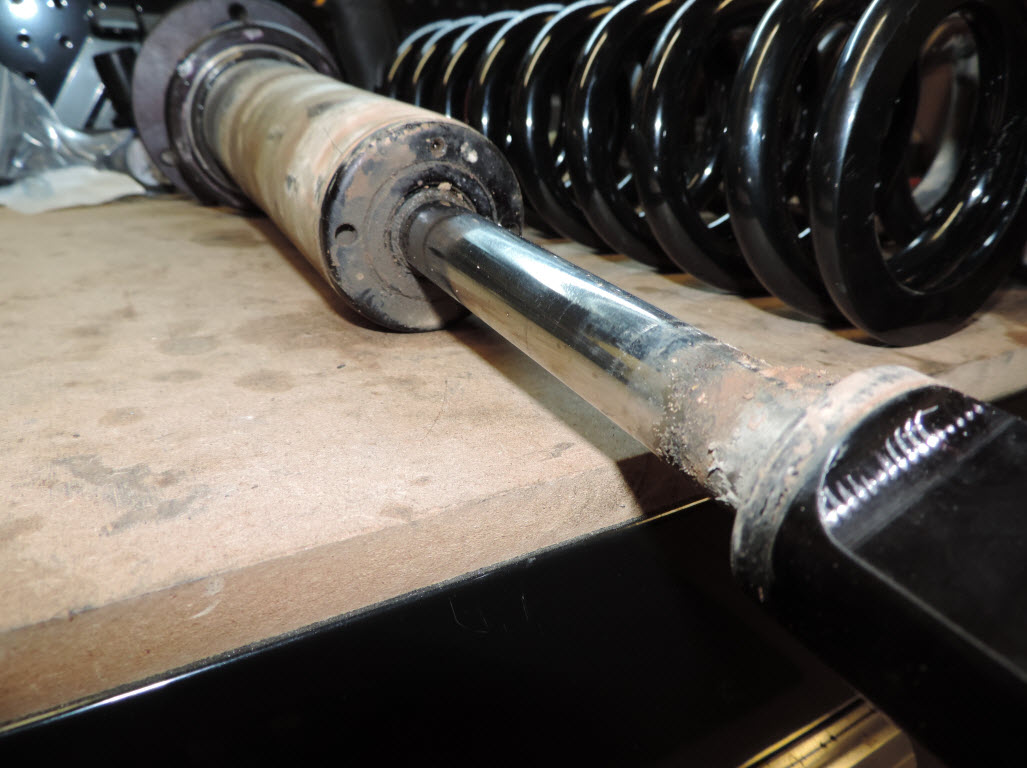
Seals still going strong
The COM10-T spherical bearing. I have replaced these several times before. While these were still good, they're only about $15 each and don't last very long, so I replaced them while the shocks were out.
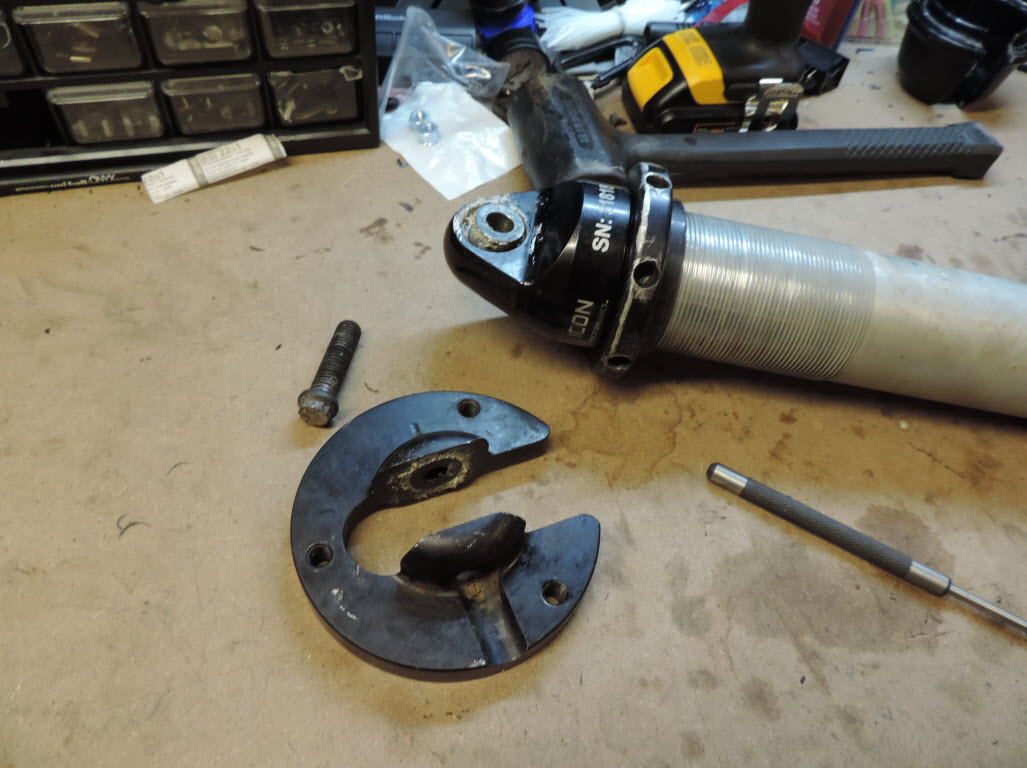
The top bolt can be a pain to get off, the steel bolt and aluminum collar tend to want to stick together, so it helps to soak in some penetrating oil and give it a few taps with a drift punch. It is a 1/2" 12 point bolt. The white stuff is lithium grease. Definitely make sure to use anti seize on the top bolt during re-assembly. Both sides of the top collar are threaded. 100 ft lb for reinstall.
The spherical bearings are held in with internal spiral snap rings. Carefully remove with some jeweler's screw drivers and they can be reused a few times. Basically, remove snap rings from both sides, use a socket large enough to contact only the outer race of the bearing, and hammer it out. Get the new one started, install one snap ring, seat it against the snap ring, then install the other snap ring.
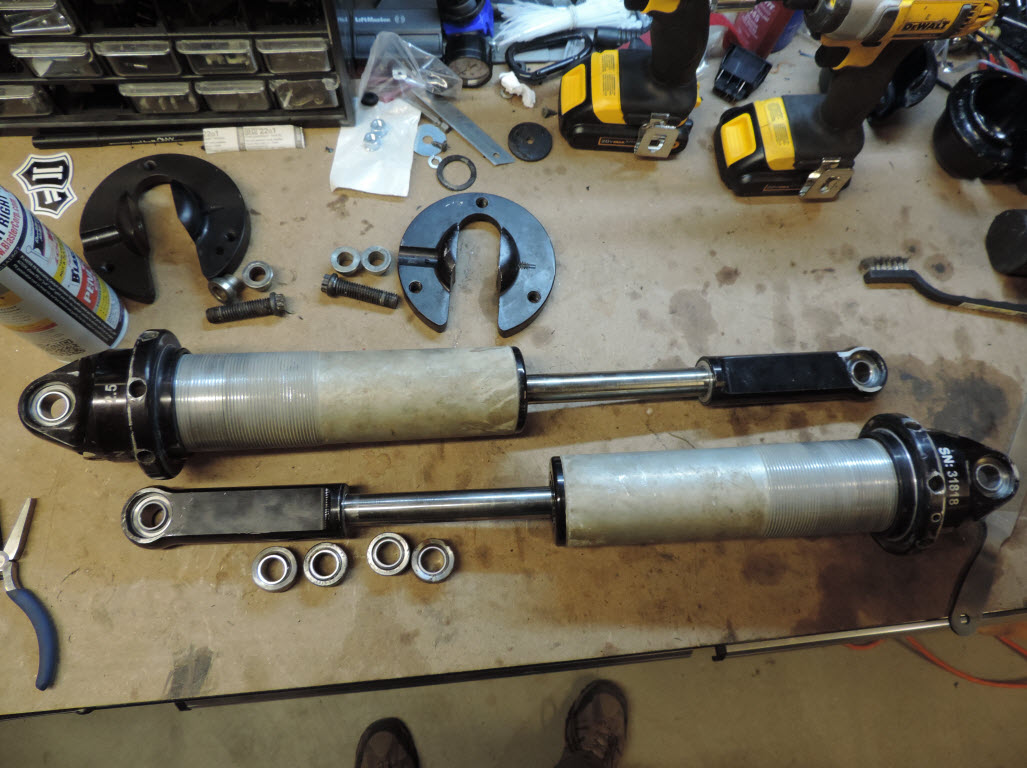
New bearings installed and everything cleaned up. Cleanliness is incredibly important when rebuilding shocks.
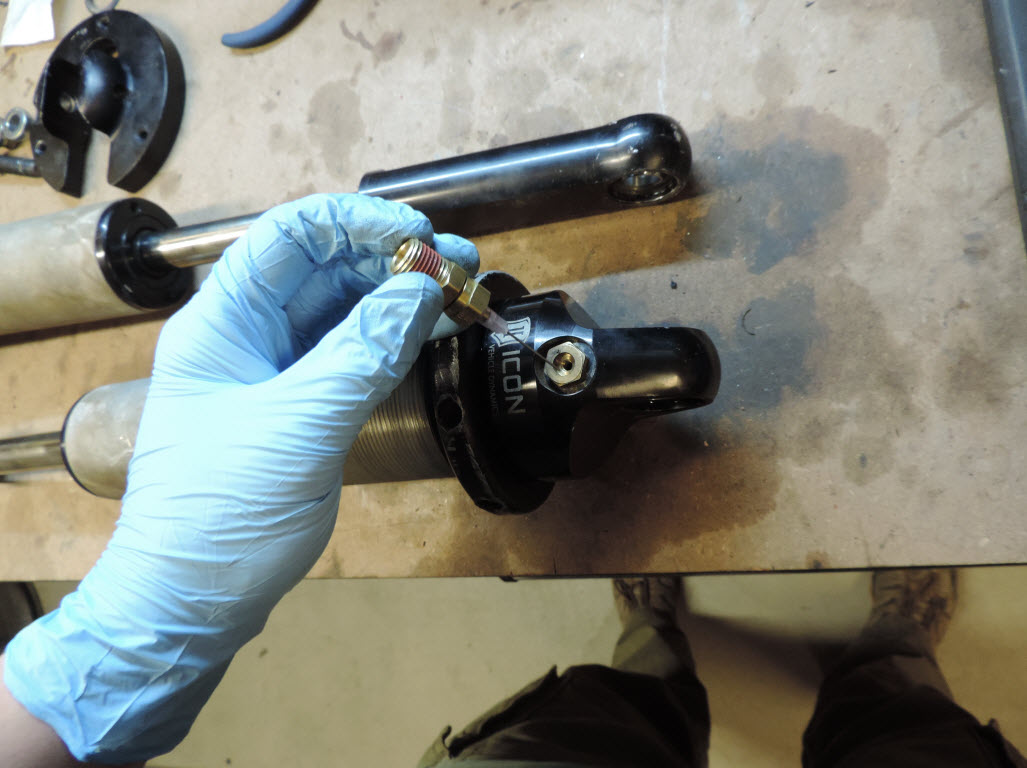
First step, remove nitrogen charge with the fill needle. I was pleasantly surprised that my shocks were still full of nitrogen and had very little oil above the Internal Floating Piston (IFP). After releasing pressure with the fill tool, remove the fill port.
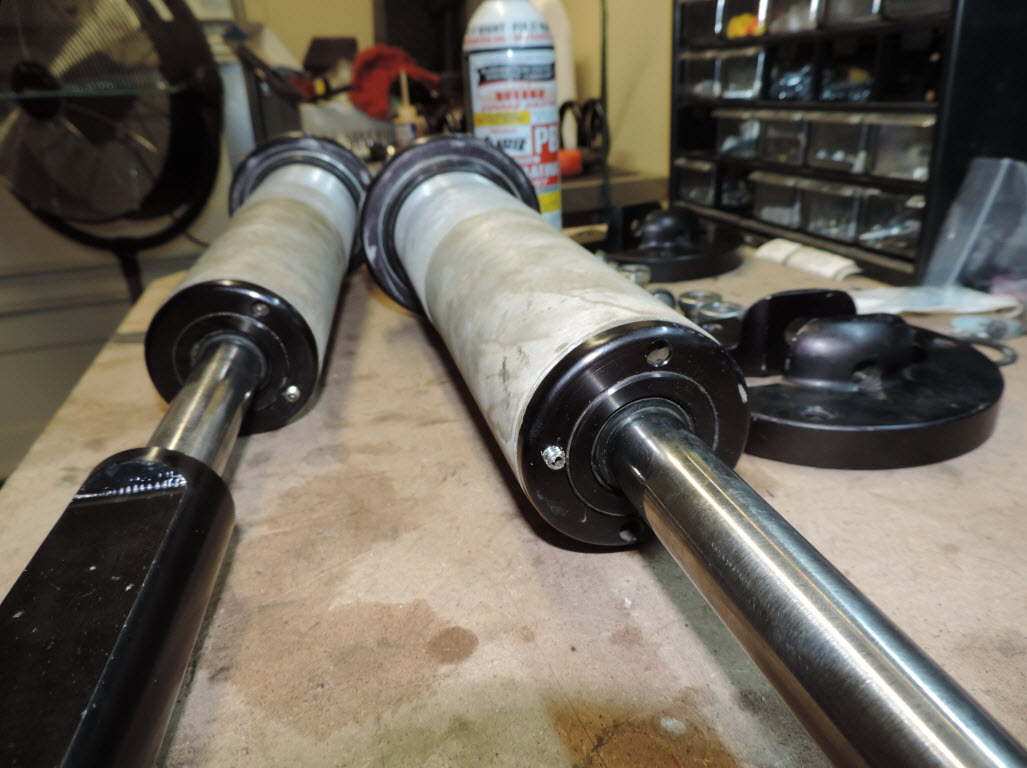
Next, loosen the set screw on the bottom plate. You are supposed to use pin spanners to remove the bottom plate, but I used a large pipe wrench instead.
Below the bottom plate is a snap ring which holds piston and everything inside the shock body. You have to fully compress the shock with a good bit of force to be able to remove the ring. I used a ratchet strap.
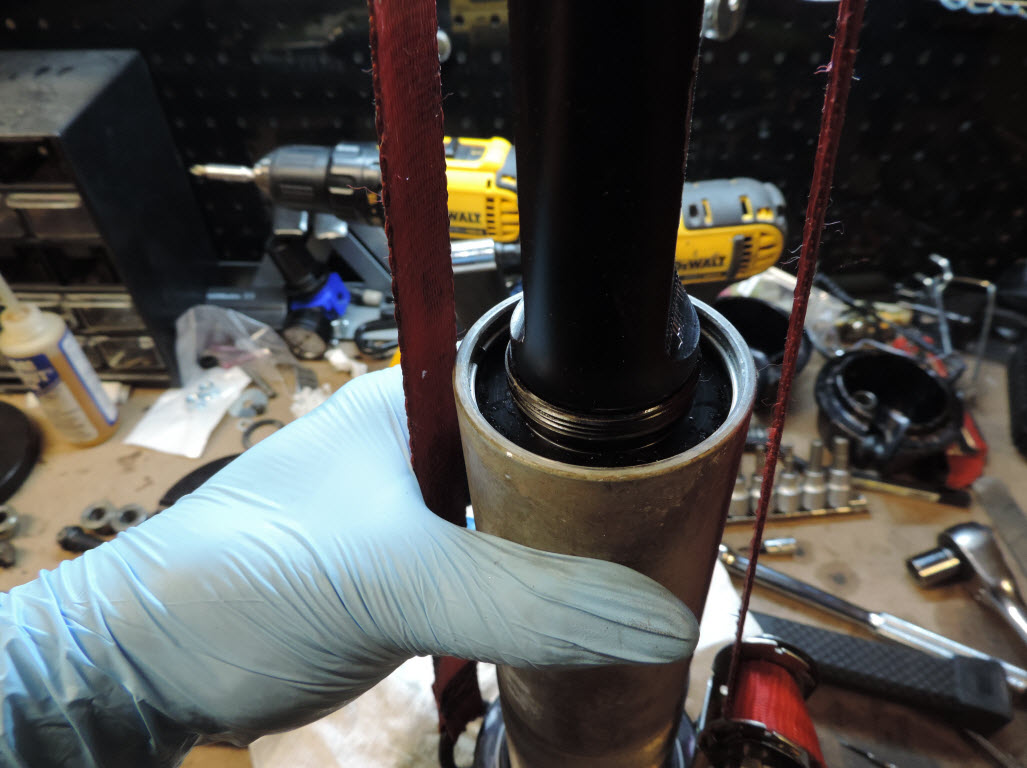
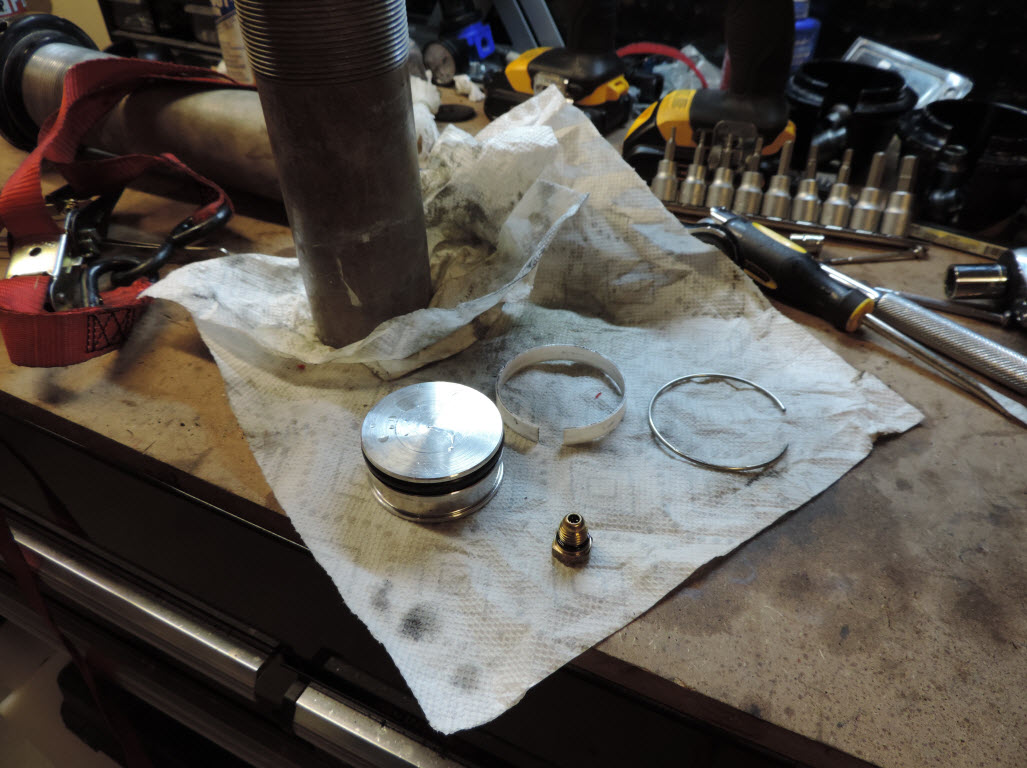
Then pull out the piston over your oil pan and dump out the shock oil. Clean everything with brake cleaner and paper towels. Blow compressed air into the nitrogen fill port to pop the IFP out. Here is the IFP with o-ring still installed, bushing removed, the nitrogen fill port, and the snap ring.
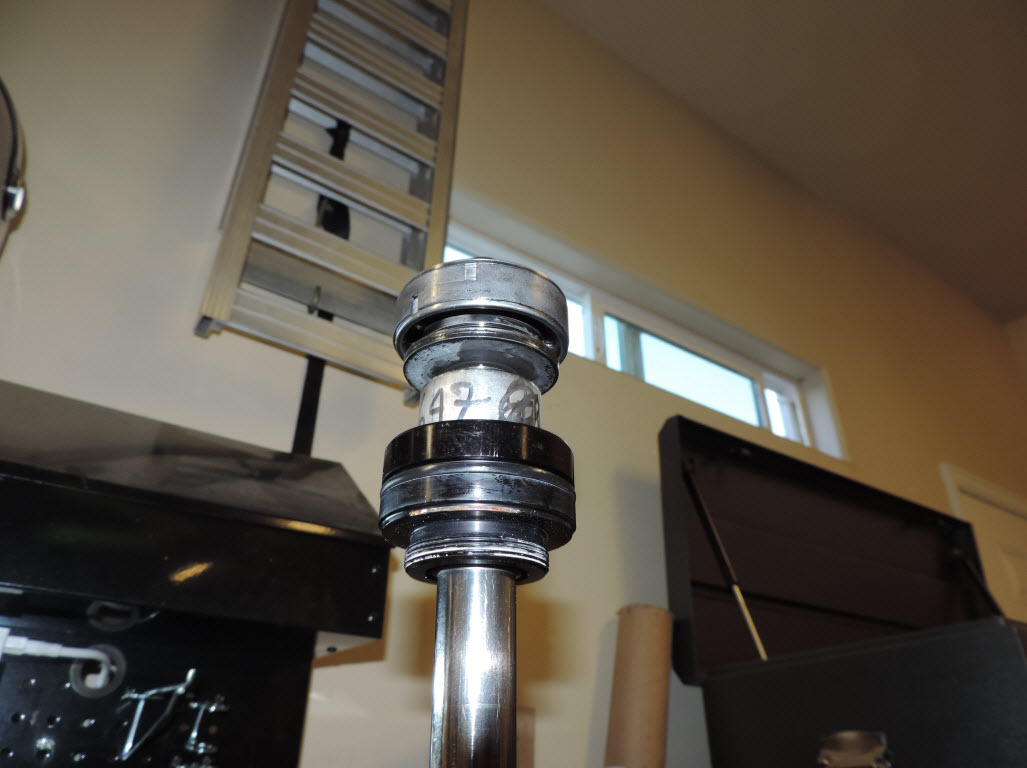
Top nut (35 ft lb, mid strength thread locker), rebound valve shims, piston, compression valve shims, top out washers, spacer, bearing housing. You should use a zip tie or something to keep these in order when you remove them. You don't want to get them out of order.
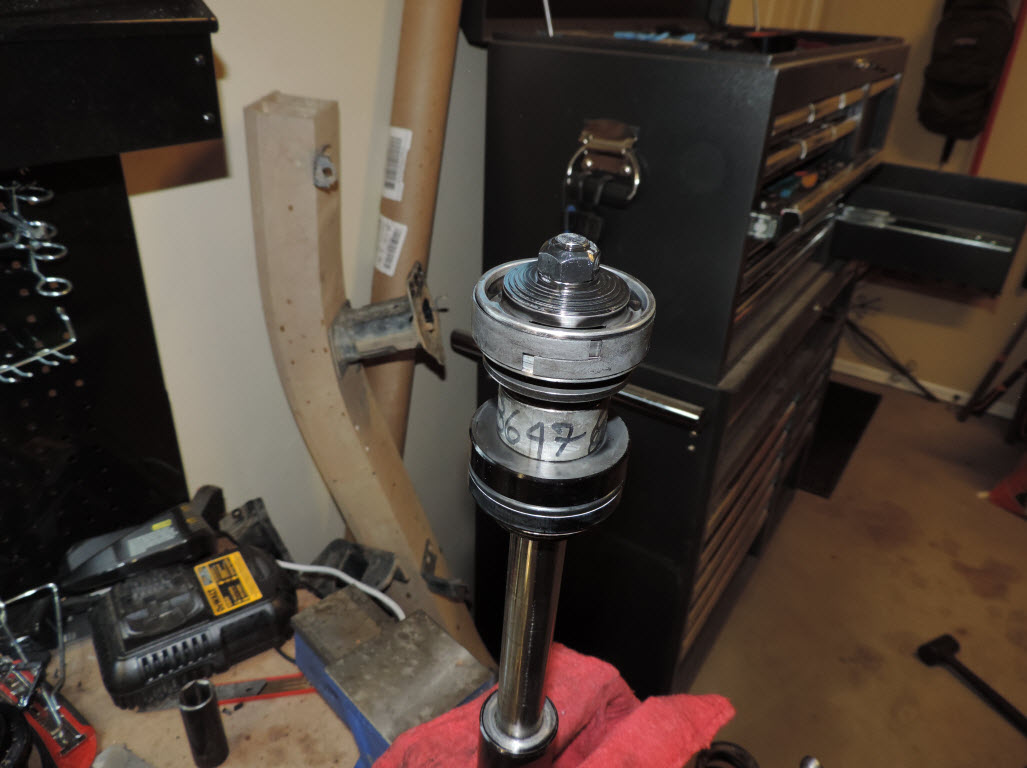
Foreground, rebound stack and rebound side of piston
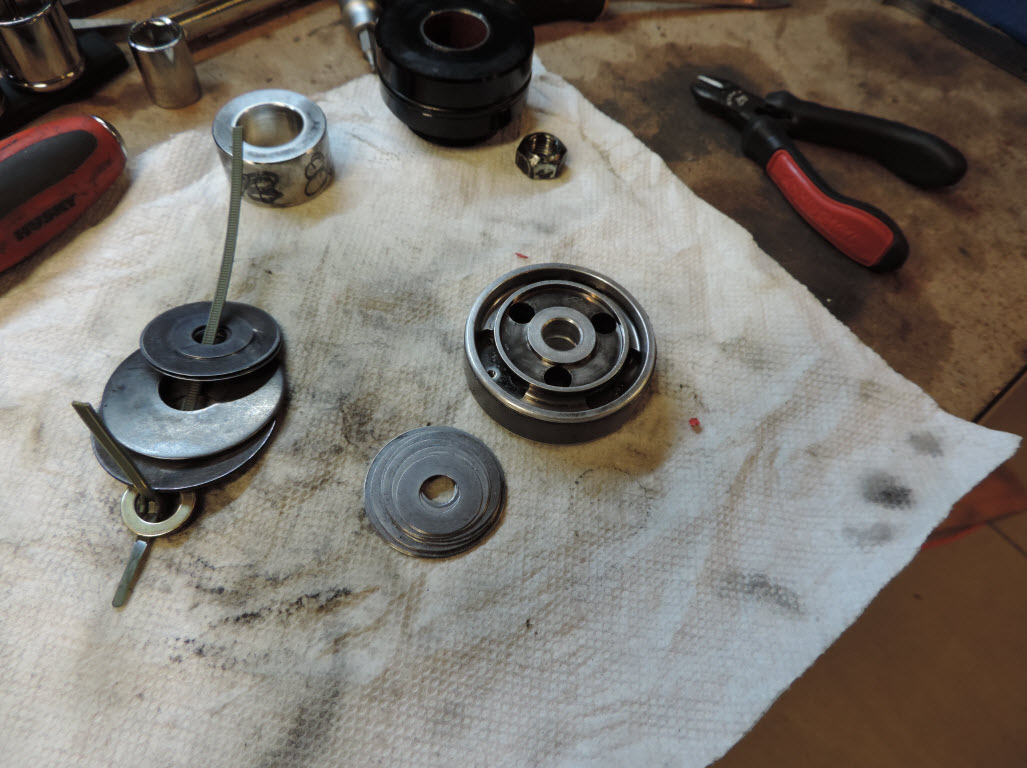
Foreground, compression stack and compression side of piston. The top out washers are the larger concave washers on the right of the zip tie in the background.

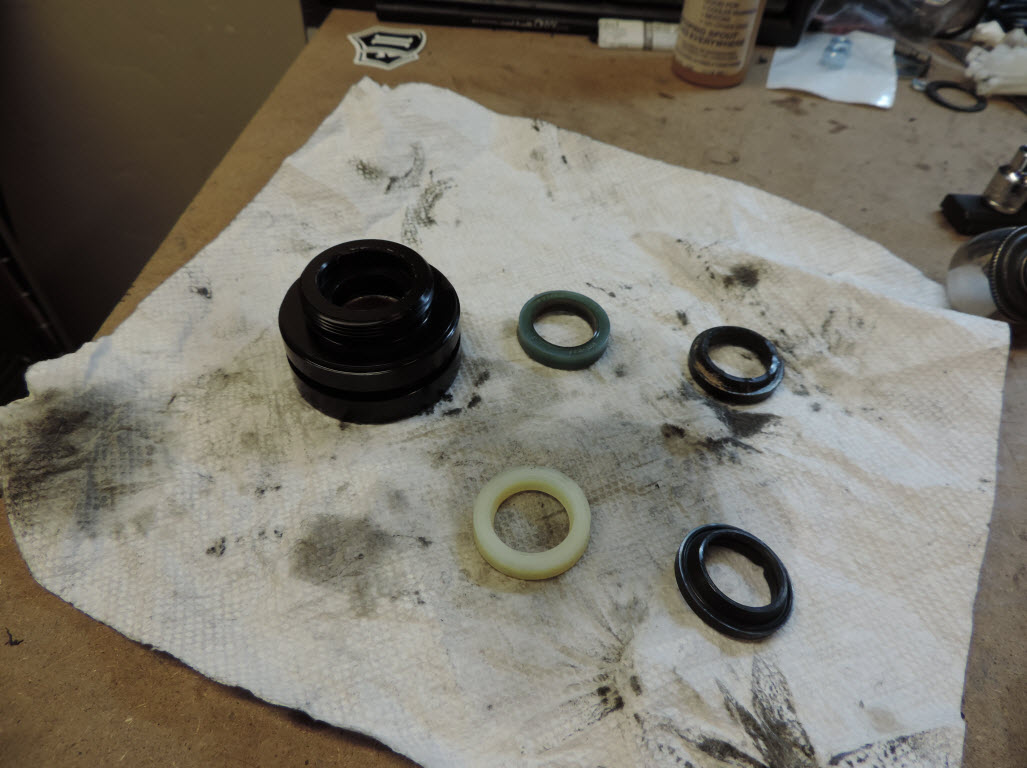
The bearing housing has 2 inner seals and an outer o-ring to be replaced. The Icon rebuild kit includes 3 inner seals, I assume one of them is for a different revision of their shocks (I hope). Old in back, new in front.
Replace the o-ring on the bearing carrier and the IFP, install the new nitrogen fill port, then re-assemble piston and valve shims on the shaft. Measure the length of the piston fully compressed and set the IFP depth to that level, fill the shock with oil, then re-install the piston. I cycle the piston several times in the oil before installing the lower cap to get air out.
Tomorrow, I'll take the springs and shocks to get the new springs installed, and get the nitrogen charged to 250psi.
With all the weight I have added (600+ lbs over stock), the 12" 650 springs aren't really up to the task any more. They were set at a ton of preload, and would still blow through travel pretty easily on big bumps, off road, so I ordered 14" 700 lb springs from Icon.
I figured with the front end apart, I would replace my Total Chaos uniballs and bushings. After inspecting them, they are actually fine, but with 40k miles on them, I'll replace them, knowing I won't have to mess with them again for at least another 40k.
Parts List
1 IVD 254100G - 1 gallon Icon shock oil
2 IVD 158508 - 14" 700 in lb Icon 3" diameter springs
2 IVD 611040 - Icon 2.5 shock rebuild kit. There are 2 versions, 1 for IFP, the other for remote resi.
1 IVD 252004 - Icon nitrogen fill needle
2 WSSX-16T - 1" stainless uniball for TC UCAs
4 COM-10T - Upper and lower spherical bearings for the shocks
I'm not going to cover shock removal/re-install, as that is covered elsewhere.
You'll want to back the preload adjuster ring all the way out, then use spring compressors to compress the spring and remove the lower spring mount bucket.
There is very little room between the springs and the shock body, and the coils are pretty thick, so compressing the spring was a bit of a PITA. The 650lb springs only need to be compressed about an inch to an inch and a half. The 700 lb springs will need to be compressed about 3.5 inches, so I will take it to a shop to install the new springs.
Shock with spring removed, and old vs new spring
Seals still going strong
The COM10-T spherical bearing. I have replaced these several times before. While these were still good, they're only about $15 each and don't last very long, so I replaced them while the shocks were out.
The top bolt can be a pain to get off, the steel bolt and aluminum collar tend to want to stick together, so it helps to soak in some penetrating oil and give it a few taps with a drift punch. It is a 1/2" 12 point bolt. The white stuff is lithium grease. Definitely make sure to use anti seize on the top bolt during re-assembly. Both sides of the top collar are threaded. 100 ft lb for reinstall.
The spherical bearings are held in with internal spiral snap rings. Carefully remove with some jeweler's screw drivers and they can be reused a few times. Basically, remove snap rings from both sides, use a socket large enough to contact only the outer race of the bearing, and hammer it out. Get the new one started, install one snap ring, seat it against the snap ring, then install the other snap ring.
New bearings installed and everything cleaned up. Cleanliness is incredibly important when rebuilding shocks.
First step, remove nitrogen charge with the fill needle. I was pleasantly surprised that my shocks were still full of nitrogen and had very little oil above the Internal Floating Piston (IFP). After releasing pressure with the fill tool, remove the fill port.
Next, loosen the set screw on the bottom plate. You are supposed to use pin spanners to remove the bottom plate, but I used a large pipe wrench instead.
Below the bottom plate is a snap ring which holds piston and everything inside the shock body. You have to fully compress the shock with a good bit of force to be able to remove the ring. I used a ratchet strap.
Then pull out the piston over your oil pan and dump out the shock oil. Clean everything with brake cleaner and paper towels. Blow compressed air into the nitrogen fill port to pop the IFP out. Here is the IFP with o-ring still installed, bushing removed, the nitrogen fill port, and the snap ring.
Top nut (35 ft lb, mid strength thread locker), rebound valve shims, piston, compression valve shims, top out washers, spacer, bearing housing. You should use a zip tie or something to keep these in order when you remove them. You don't want to get them out of order.
Foreground, rebound stack and rebound side of piston
Foreground, compression stack and compression side of piston. The top out washers are the larger concave washers on the right of the zip tie in the background.
The bearing housing has 2 inner seals and an outer o-ring to be replaced. The Icon rebuild kit includes 3 inner seals, I assume one of them is for a different revision of their shocks (I hope). Old in back, new in front.
Replace the o-ring on the bearing carrier and the IFP, install the new nitrogen fill port, then re-assemble piston and valve shims on the shaft. Measure the length of the piston fully compressed and set the IFP depth to that level, fill the shock with oil, then re-install the piston. I cycle the piston several times in the oil before installing the lower cap to get air out.
Tomorrow, I'll take the springs and shocks to get the new springs installed, and get the nitrogen charged to 250psi.
Last edited:


