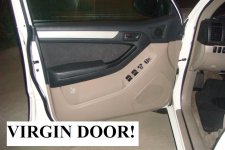
Idiots guide to door panel removal 4th Gen

SamNavy

New member
For the love of sweet baby Jesus, can this please be the last thread on this subject! I was fed up by the laundry list of advice on how exactly the doors should come apart and what special tools you need and blah blah blah... so I took 30 minutes to go figure it out and here you go.

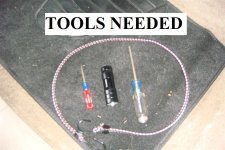
Total tools needed:
1x medium sized phillips screwdriver.
1x very small flat blade screwdriver.
1x 18" bugie cord.
1x free led flashlight from Harbor Freight (if working at night)

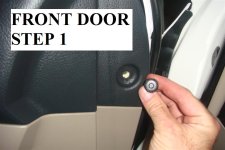
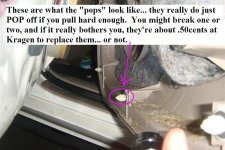
NOTE: All 4 doors are 99% identical. The front doors have a small triangular piece of plastic in the forward top corner for aesthetics... it will pop right off. Just below that triangular piece of plastic is a small round push clip. You don't have to wiggle the center micro-button of the clip up to get the clip out... just pry the body and it'll pop free easily.

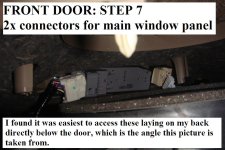
The drivers door also has 2x connectors for the window control panel while the other 3 doors just have one.

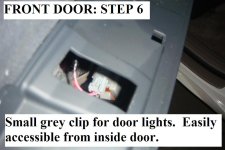
All 4 doors have an identical connector for the door light.

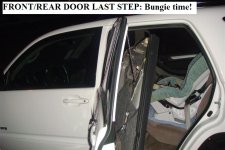
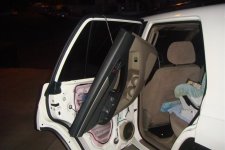
DO NOT REMOVE THE DOOR HANDLE CABLES FROM THE DOOR PANEL!!! Many people have said they're a total ***** to take off and the little plastic clips break easily. Just use a bungie cord to hold the panel up while you work. I did not get good pics of the front door hanging on the bungie, but you get a good idea from the rear door pictures.

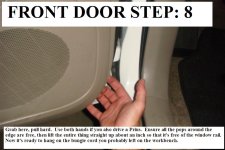
Most people are scared to put too much pressure on the door panel when pulling it off. YOU BOUGHT A 4RUNNER, NOT A PRIUS!!! Sack up and give a strong tug in the forward bottom corner (easiest to get both hands under there) and the thing will pop right off. Once the pops are off, just lift it up and inch to get it off the window track.

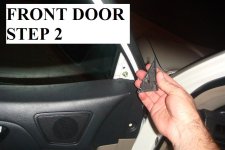
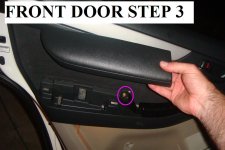
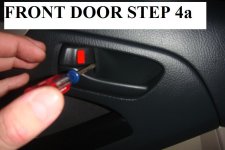
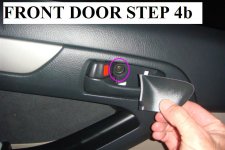
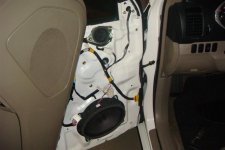
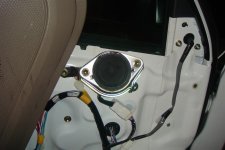
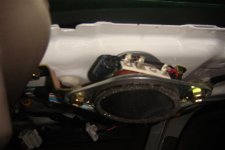
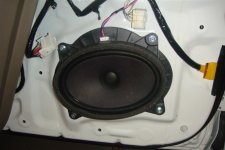
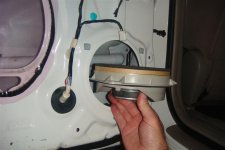
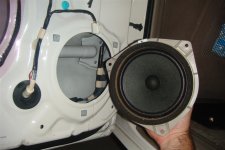
If the pictures were not self-explanatory, I took the liberty of annotating steps in order and making notes. Enjoy!
 

Attachments

  • Tools.JPG
    Tools.JPG
    105.4 KB · Views: 32,071
  • Virgin.JPG
    Virgin.JPG
    88.1 KB · Views: 32,470
  • Step1.JPG
    Step1.JPG
    76.3 KB · Views: 31,190
  • Step 2.JPG
    Step 2.JPG
    91.2 KB · Views: 31,393
  • Step 3.JPG
    Step 3.JPG
    92.5 KB · Views: 31,067
  • Step 4a.JPG
    Step 4a.JPG
    70.1 KB · Views: 33,752
  • Step 4b.JPG
    Step 4b.JPG
    95.5 KB · Views: 30,888
  • Step 6.JPG
    Step 6.JPG
    81.2 KB · Views: 30,836
Register to hide this ad
more...
 

Attachments

  • Step 7.JPG
    Step 7.JPG
    109 KB · Views: 30,706
  • Front Door Last.JPG
    Front Door Last.JPG
    97.1 KB · Views: 31,015
  • Front Door Last2.JPG
    Front Door Last2.JPG
    81.3 KB · Views: 32,548
  • Inside1.JPG
    Inside1.JPG
    82.3 KB · Views: 30,644
  • Inside2.JPG
    Inside2.JPG
    76.6 KB · Views: 31,348
  • Inside3.JPG
    Inside3.JPG
    50.2 KB · Views: 30,196
  • Inside4.JPG
    Inside4.JPG
    71.6 KB · Views: 30,678
  • Inside5.JPG
    Inside5.JPG
    68 KB · Views: 30,628
Step 8 below... Somehow missed uploading earlier!!!
 

Attachments

  • Inside6.JPG
    Inside6.JPG
    84.6 KB · Views: 37,297
  • pops.JPG
    pops.JPG
    116.6 KB · Views: 30,065
  • DSC05774 (Large).JPG
    DSC05774 (Large).JPG
    103.2 KB · Views: 29,987
Last edited:
That was very well done; thanks for taking the photogs as well. That is true no-nonsense, git 'er done, door panel removal.
 
Only thing I would suggest is: if you are doing anything besides changing speakers, scrap the bungee cord and remove the two links that go to the lock and handle. It's kind of hard to explain without being there looking at it but there are little balls on the end of steel cables. If you turn them in the right direction they will slip right out of a little cut in the plastic pieces they are sitting in. To reinstall, do the same backwards. This will allow you to take the whole panel off and move it to somewhere out of the way for window work, tinting, dynamatting, etc.
 
Only thing I would suggest is: if you are doing anything besides changing speakers, scrap the bungee cord and remove the two links that go to the lock and handle. It's kind of hard to explain without being there looking at it but there are little balls on the end of steel cables. If you turn them in the right direction they will slip right out of a little cut in the plastic pieces they are sitting in. To reinstall, do the same backwards. This will allow you to take the whole panel off and move it to somewhere out of the way for window work, tinting, dynamatting, etc.

I hate to resurrect such an old thread, but you can also just remove one screw and push the whole inside door handle assembly through. This way you can leave the cables in place (I broke the white plastic piece removing them), and move the entire door panel out of the way.
 
guys and girls, dont forget to roll down all the windows b4 u even take the panels off, dont want to lock yourself out also, on the tailgate u have to be careful, the bottom panel is keeping the window from hitting the bolt for the track so if u have tint, u might scratch it when u do open or close with no panel back there with the tailgate up.
 
Thank you!

Perfect guide to door panel removal. I removed my door panel this morning for the first time in 3 minutes. Thanks!
 
Great post/how to.

One thing I would disagree with is the caution about the cables: I have removed my door panels at least 10 times already and disconnected (and re-connected) the cables every time. Very easy off and back on... don't know why anyone is breaking anything doing it. Just look at it a minute before you act. You need to support the door panel until you have disconnected them or while you are re-connecting them.
 
might as well throw this up on this thread for the select few who actually search. hehe


<iframe width="480" height="360" src="http://www.youtube.com/embed/bFhs9b_SBz8?rel=0" frameborder="0" allowfullscreen></iframe>
 
RE: Idiots Guide to door removal

Here is a pic showing the location of the screw to release the door handle/locking mechanism. Remove the screw and pop the unit loose and slide back and out thru the opening. Now your door panel is out of the way. Same procedure for all 4 doors
 

Attachments

  • 003.jpg
    003.jpg
    161.8 KB · Views: 28,102
i hate those screws, I usually have a friend help me remove that screw while I hold the door panel because it's so much easier with 2 people, especially when reinstalling the panels
 
Probably the best guide for door panel removal I could find on the Internet. I received my new door check recently and will use this guide on the coming weekend. I have asked a local Toyota dealership for a quote and was told over $300 for labour and new part. They also told me that the upper hinge should be replaced that I did not find any issues with. The total price was close to $500. Purchased the new part online for $78 + shipping to Calgary.
 
Could not wait till the weekend and replaced the old door check yesterday evening. I did not find any issues removing the door panel completely without using bungee cords.

One item that will help remove the panel from the door in addition to the steps above:

  • When the panel is removed from the door ask another person to help you at this step. There is another screw on the other side of the panel that holds the door opener. While another person holds the panel remove the screw and the door opener with two cables will come out no problem. Now you should be able to remove the panel aside from the door.
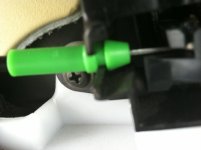
Also there is another clip at the center of the door (Blue-green color). It was left in the door when the panel was removed. Do not forget to install it into the panel when installing it back. See picture from SamNavy, Step 8, this is the clip! I hope SamNavy removed it from the door and installed into the panel before reinstalling the panel to the door :)

My old door check was making terrible clicking sound when it was passing the middle point, almost like something will break inside. I could not stand this sound. Now it opens quiet as other 3 doors :)
 
Last edited:
U.G.N - sorry for the dumb question, but what is the door check? Thanks!

Hi pickerdd, the door check looks like this:

DOOR-CHECK-6862035020.jpg


When you open the driver's (or any door) you will find it between the upper and lower hinges. It prevents the door from opening or closing accidentally, it holds it tight.
 

Members online

Forum statistics

Threads
278,311
Messages
3,554,082
Members
248,016
Latest member
Advally Service

Trending content

Back
Top