Improving stereo sound in 5th gen

surfnturfer

New member
I have not been able to get decent sound in my wifes 5th gen, I installed Kappas in the dash and that helped some but she is not yet satisfied. What would be the next move? I just left a car audio store blinded with a $1200 estimate. I was looking more in the $500 range. I have not found much through the search other than high end and complicated projects.
 
Register to hide this ad
I have not been able to get decent sound in my wifes 5th gen, I installed Kappas in the dash and that helped some but she is not yet satisfied. What would be the next move? I just left a car audio store blinded with a $1200 estimate. I was looking more in the $500 range. I have not found much through the search other than high end and complicated projects.

What part do you consider "complicated"?

On the other hand, even if you simply upgrade all of the speakers, it will not be plug-and-play. You will have to figure out how to mount them. If you are handy, it might not be an issue. The most important thing I could recommend would be to apply sound deading material to the insides of the doors behind the speakers. You will be able to actually hear what the speaker is putting out. It does get spendy for the material, but is well worth it while you have the doors (and tailgate) opened up.

This does involve removing interior panels. If you are creative, you can use the original speaker frames to hold the new ones. And there are Toyota speaker connectors available so you won't have to cut into the wiring at all.

I have done this upgrade myself. No head-unit replacement or amp, and the system (non-JBL) sounds awesome. My total investment for 8 speakers (Kappa Infinity) plus wiring jumpers, sound deadening, etc was right around $450.

If you need a peek at how I mounted the speakers, let me know, I'll post some pics.

Good luck
 
In my opinion the addition of the Kappas without adding an amplifier to run them is a negative. You have added speakers that require more wattage to run correctly without adding the wattage. That being said...

Typically the most satisfying upgrade to a factory stereo system that customers did was a subwoofer and amplifier to run it. If you are interested in the adding a subwoofer route, I would buy an amplifier that can run the subwoofer and the Kappas that you added. They need power to sound awesome. This scenario would be a substantial improvement to the stock stereo system.
 
In my opinion the addition of the Kappas without adding an amplifier to run them is a negative. You have added speakers that require more wattage to run correctly without adding the wattage. That being said...

You are certainly entitled to your opinion. Yes, the Kappas are "rated" for many more watts than the factory speakers, but, the factory head unit has ample power to drive them. It's also is a matter of your personal listening requirements. I am getting to the age where the "quality" of the sound is more important than the "quantity". IMO, simply replacing the factory wimpy speakers with Kappas was a vast improvement in the sound quality, range, theatre, whatever you prefer to call it. The sound deadening has also contributed to that.

Typically the most satisfying upgrade to a factory stereo system that customers did was a subwoofer and amplifier to run it. If you are interested in the adding a subwoofer route, I would buy an amplifier that can run the subwoofer and the Kappas that you added. They need power to sound awesome. This scenario would be a substantial improvement to the stock stereo system.

I wholeheartedly agree with you that a sub-woofer would add to the range of sound. And yes, the Kappas can certainly take all the power you can give them. However, the OP stated that he was looking for a solution in the $500 range, and sounds like he is not interested in ripping his new rig apart to re-wire it (an amplifier would require this).

In summary: I was simply trying to pass along my experience with a reasonably priced improvement. The solution you have proposed would certainly "improve" the sound quality but the cost would probably end up over $1000. Clearly out of the OP's budget if I read it correctly. :peace:
 
In summary: I was simply trying to pass along my experience with a reasonably priced improvement. The solution you have proposed would certainly "improve" the sound quality but the cost would probably end up over $1000. Clearly out of the OP's budget if I read it correctly. :peace:
Just for the heck of it, I went to Crutchfield (most expensive online car audio) and put together a simple subwoofer set up to see what the price would be.

1 JL Audio 10" with enclosure
1 Sound Ordinance 4 channel amp 75x4
Wiring Kit
RCA wires
Line level converter

That's everything except labor to add a subwoofer and amplifier that will run the sub and the Kappas. The total without tax is $363.95, shipping is free.
Install labor would probably push that up to the $500 range. It can be done for his price range but yes it would require removing some trim panels to get the amp installed. Sound quality improvement would be substantial.
 
Just for the heck of it, I went to Crutchfield (most expensive online car audio) and put together a simple subwoofer set up to see what the price would be.

1 JL Audio 10" with enclosure
1 Sound Ordinance 4 channel amp 75x4
Wiring Kit
RCA wires
Line level converter

That's everything except labor to add a subwoofer and amplifier that will run the sub and the Kappas. The total without tax is $363.95, shipping is free.
Install labor would probably push that up to the $500 range. It can be done for his price range but yes it would require removing some trim panels to get the amp installed. Sound quality improvement would be substantial.

Have you included the cost for the other 6 speakers in your estimate? I think that if all of the speakers were replaced and re-wired to an amp, the $1000 mark would be close.

But, hey, isn't this really all about what the OP is willing to spend? And, as I stated earlier, it is all about your personal listening requirements. The OP stated that they were looking to "get decent sound". A very objective term to define. Again, quantity does not equate to quality. :peace:
 
I have not been able to get decent sound

What part do you consider "complicated"?
The most important thing I could recommend would be to apply sound deading material to the insides of the doors behind the speakers. You will be able to actually hear what the speaker is putting out...
I have done this upgrade myself. No head-unit replacement or amp, and the system (non-JBL) sounds awesome. My total investment for 8 speakers (Kappa Infinity) plus wiring jumpers, sound deadening, etc was right around $450.

I'm with Go JayBee. Upgrading to better than stock speakers would improve quality, i.e, sound would be clearer, crisper. Sound deadening would improve things overall, even if you're not listening to the stereo.

If only bottom end is missing and IF stock HU already has a sub-out, simply adding a sub-amp combo would cost under $500 and not too complicated (satisfies OP's requirements).

Also, OP does not define "Decent Sound". To some it's quality, to some, it's volume or amount of bass you can hear and feel. To people who like ballads/standards it's the clarity of the human voice, etc.

BTW, folks, would you please share what kind of soundproofing treatment comes stock with the newer Trucks?
 
I'm with Go JayBee. Upgrading to better than stock speakers would improve quality, i.e, sound would be clearer, crisper. Sound deadening would improve things overall, even if you're not listening to the stereo.

If only bottom end is missing and IF stock HU already has a sub-out, simply adding a sub-amp combo would cost under $500 and not too complicated (satisfies OP's requirements).

Also, OP does not define "Decent Sound". To some it's quality, to some, it's volume or amount of bass you can hear and feel. To people who like ballads/standards it's the clarity of the human voice, etc.

BTW, folks, would you please share what kind of soundproofing treatment comes stock with the newer Trucks?

To best of my knowledge, the stock HU does not have a "sub-out". And the OP has only replaced the dash speakers so far. There may be another 6 speakers to replace if he has the 8 speaker system that I have. So add the sound-deadening material at around $120 and you are looking at a $450 bill.
This is just parts...no labor. Now add the $500 sub/amp and you are approaching the $1000 mark.

Soundproofing treatment is non-existant in the doors, there is a very small patch of something inside the tailgate, carpet on the floors, windows that close. Pretty much: none.

Praise the almighty "Party Mode Switch".......:party:
 
To best of my knowledge, the stock HU does not have a "sub-out"...
Soundproofing treatment is non-existant in the doors
Tnx for the info, Go JayBee.
A sub out would allow a big bang for buck improvement, but too bad that many stock stereos (unless high-end) don't have Sub-outs, while aftermarket ones that cost under $100 have it, aux and USB ports. I got one for my Corolla that does not have aux in.
 
Tnx for the info, Go JayBee.
A sub out would allow a big bang for buck improvement, but too bad that many stock stereos (unless high-end) don't have Sub-outs, while aftermarket ones that cost under $100 have it, aux and USB ports. I got one for my Corolla that does not have aux in.

The stock radio does not have to have a sub out to add a subwoofer.
 
I came here to ask a similar question about my wifes 4th gen.

The sound is all bass and harsh high end, even with a ton of adjustments.

I'd just like better quality sound and wondered if a new head unit with more eq options might help
 
What part do you consider "complicated"?

On the other hand, even if you simply upgrade all of the speakers, it will not be plug-and-play. You will have to figure out how to mount them. If you are handy, it might not be an issue. The most important thing I could recommend would be to apply sound deading material to the insides of the doors behind the speakers. You will be able to actually hear what the speaker is putting out. It does get spendy for the material, but is well worth it while you have the doors (and tailgate) opened up.

This does involve removing interior panels. If you are creative, you can use the original speaker frames to hold the new ones. And there are Toyota speaker connectors available so you won't have to cut into the wiring at all.

I have done this upgrade myself. No head-unit replacement or amp, and the system (non-JBL) sounds awesome. My total investment for 8 speakers (Kappa Infinity) plus wiring jumpers, sound deadening, etc was right around $450.

If you need a peek at how I mounted the speakers, let me know, I'll post some pics.

Good luck

I would for sure like it if you posted some pics of your install... Changing out all of the interior speakers and doing some sound proofing to get the most out of them....

If you could post pics of your install and if you have time the list of speakers to purchase and also which sound deading you went with.

Thanks!
 
:Vegas
First off, here is a list of the speakers and material I installed:

Infinity Kappa 32.9cf (Dash)
Infinity Kappa 32.9cf 3-1/2" 2-way Speakers - Sonic Electronix

Infinity Kappa 652.9i (Doors & Tailgate)
Infinity Kappa 652.9i (6529I) 6-1/2" / 6-3/4" 2-way Kappa Speakers

NVX SDVK4 (6 Pieces)
NVX SDVK4 Versa Kit, 4 Sq Ft of Sound Dampening (1 18"x32" Piece)

Metra 72-8104 (Toyota Speaker Harness f/ Doors & Tailgate)
Metra 72-8104 (met-728104) Speaker Connector for Select Toyota

PAC BB-1PR (Bass Blockers f/ Dash Speakers)
PAC BB-1PR (BB1PR) Pair of 6x9 Bass Blockers / Passive Crossover

Now time for some pics:

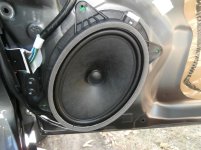
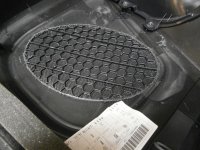
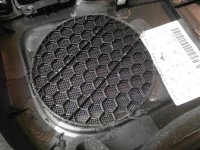
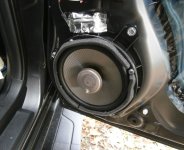
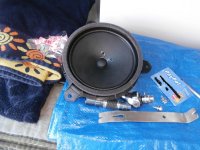
Factory Speaker in Front Door
6x9_01.jpg

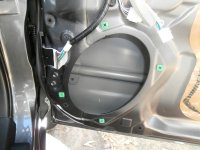
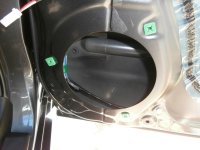
6 x 9 Hole
6x9_02.jpg

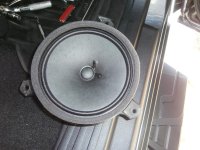
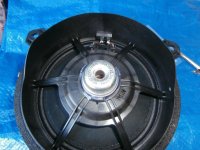
Factory Speaker Rear View
6x9_03.jpg

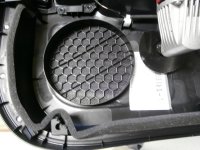
Front Door Panel Speaker Shroud
6x9_04.jpg

Speaker Shroud Removed
6x9_05.jpg

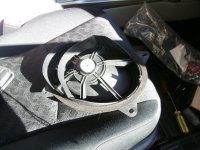
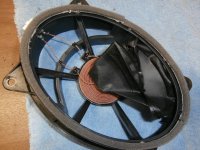
Dis-assembly of 6 x 9 Speaker
6x9_06.jpg

Internals of Speaker Removed
6x9_07.jpg

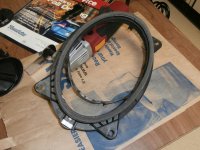
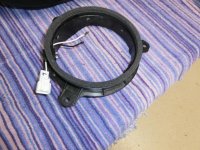
Speaker Mount Cleaned UP
6x9_08.jpg
 

Attachments

  • 6x9_01.jpg
    6x9_01.jpg
    134.4 KB · Views: 17,106
  • 6x9_02.jpg
    6x9_02.jpg
    132.7 KB · Views: 10,990
  • 6x9_03.jpg
    6x9_03.jpg
    136.6 KB · Views: 9,894
  • 6x9_04.jpg
    6x9_04.jpg
    128 KB · Views: 10,609
  • 6x9_05.jpg
    6x9_05.jpg
    134.8 KB · Views: 9,723
  • 6x9_06.jpg
    6x9_06.jpg
    136.4 KB · Views: 10,009
  • 6x9_07.jpg
    6x9_07.jpg
    121.3 KB · Views: 9,680
  • 6x9_08.jpg
    6x9_08.jpg
    136.1 KB · Views: 9,822
Last edited:
More 6x9 Pics...

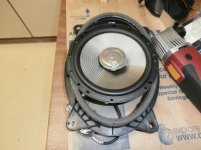
Sizing Up The New Kappa
6x9_09.jpg

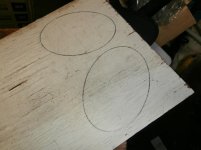
1/4" Plywood Plates Ready for Cutting
6x9_10.jpg

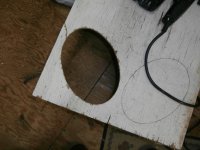
One Done...
6x9_11.jpg

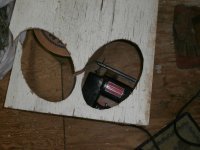
Two Done...
6x9_12.jpg

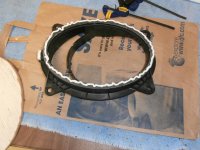
Speaker Mount Ready for Plywood
6x9_13.jpg

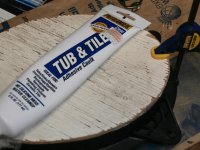
My Favorite Adhesive...
6x9_14.jpg

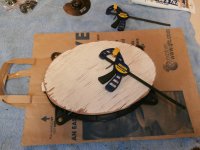
Ready for Clamps...
6x9_15.jpg

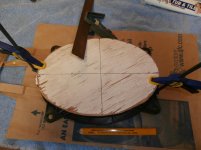
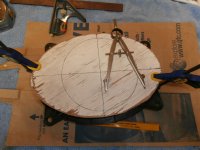
Waiting for Adhesive to Dry...Marking Center for Round Hole
6x9_16.jpg
 

Attachments

  • 6x9_09.jpg
    6x9_09.jpg
    129.9 KB · Views: 9,745
  • 6x9_10.jpg
    6x9_10.jpg
    135.1 KB · Views: 9,585
  • 6x9_11.jpg
    6x9_11.jpg
    129.8 KB · Views: 9,657
  • 6x9_12.jpg
    6x9_12.jpg
    133.7 KB · Views: 9,143
  • 6x9_13.jpg
    6x9_13.jpg
    134.5 KB · Views: 9,440
  • 6x9_14.jpg
    6x9_14.jpg
    131.1 KB · Views: 9,406
  • 6x9_15.jpg
    6x9_15.jpg
    132.9 KB · Views: 9,222
  • 6x9_16.jpg
    6x9_16.jpg
    130.7 KB · Views: 9,297
Last edited:
Yet, More 6x9 Pics...

A Very Usful Tool to Have...
6x9_17.jpg

View from Inside...Good Adhesive Spread
6x9_18.jpg

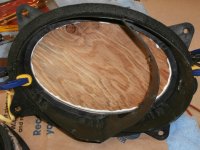
Round Hole Cut, Plywood Covered w/ Sound Deadening Material, Speaker Glued Down
6x9_19.jpg

Ready for Mounting
6x9_20.jpg
 

Attachments

  • 6x9_17.jpg
    6x9_17.jpg
    130.3 KB · Views: 9,658
  • 6x9_18.jpg
    6x9_18.jpg
    132.5 KB · Views: 9,356
  • 6x9_19.jpg
    6x9_19.jpg
    134.5 KB · Views: 9,400
  • 6x9_20.jpg
    6x9_20.jpg
    136.9 KB · Views: 9,434
Last edited:
Now, the Rear Doors & Tailgate...

Rear Door Speaker Removed
Rear_01.jpg

Wimpy Factory Speaker
Rear_02.jpg

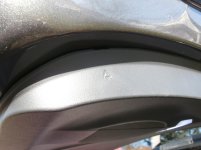
Speaker Shroud - Before
Rear_03.jpg

Speaker Shroud - After
Rear_04.jpg

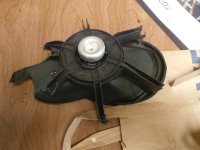
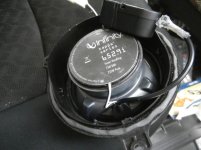
Factory Speaker - Before (Rear Door & Tailgate are Similar)
Rear_05.jpg

Factory Speaker - After (Rear Door & Tailgate are Similar)
Rear_06.jpg

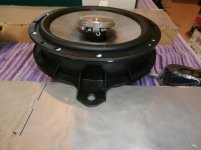
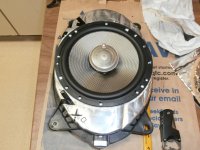
Glueing New Speaker to Factory Mount
Rear_07.jpg

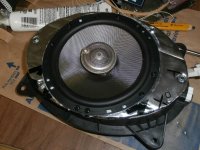
Ready to Mount in Door/Tailgate...Note the Grey Duct-Seal Used as a Vibration Dampener
Rear_08.jpg
 

Attachments

  • Rear_01.jpg
    Rear_01.jpg
    131.2 KB · Views: 10,125
  • Rear_02.jpg
    Rear_02.jpg
    136.8 KB · Views: 9,640
  • Rear_03.jpg
    Rear_03.jpg
    133.8 KB · Views: 9,495
  • Rear_04.jpg
    Rear_04.jpg
    138.7 KB · Views: 9,496
  • Rear_05.jpg
    Rear_05.jpg
    131.8 KB · Views: 9,772
  • Rear_06.jpg
    Rear_06.jpg
    140.3 KB · Views: 9,634
  • Rear_07.jpg
    Rear_07.jpg
    127.7 KB · Views: 9,771
  • Rear_08.jpg
    Rear_08.jpg
    124 KB · Views: 9,672
Last edited:
More Rear Doors & Tailgate...

Rear Door Speaker Mounted
Rear_09.jpg

This is Where You Start Removing Tailgate Panel (See Arrow)
Tail_03.jpg

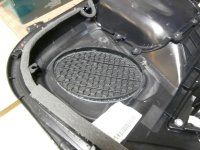
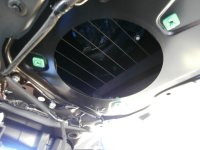
Tailgate Speaker Removed
Tail_01.jpg

Factory Speaker From Tailgate
Tail_02.jpg
 

Attachments

  • Rear_09.jpg
    Rear_09.jpg
    132.1 KB · Views: 14,437
  • Tail_01.jpg
    Tail_01.jpg
    117 KB · Views: 10,004
  • Tail_02.jpg
    Tail_02.jpg
    136.5 KB · Views: 9,302
  • Tail_03.jpg
    Tail_03.jpg
    133.5 KB · Views: 8,597
Last edited:

Forum statistics

Threads
278,312
Messages
3,554,089
Members
248,016
Latest member
Advally Service

Trending content

Back
Top