Improving stereo sound in 5th gen

JayBeeeeeee wow that's a lot of work... Thanks for the list of speakers... Want to make sure I get the right ones... And the correct adapters so that I do not have to cut the factory wires is great.... I wish it wasn't so difficult to swap out speakers... But looks like to do it right even if you cut out the factory speakers center and use the frame as a mounting bracket you still need to have some wood skills to make a mounting plate for each speaker... I guess always another excuse to buy a new tool...

Did you have any issues putting on any of the door covers/hatch cover? Wasn't sure if these speakers might stick out a little farther.

I noticed on the dash speakers some people use the bass blocker and some didn't need too.

This is a great write-up you should also post it in the 5th gen section, sure a lot of people would would find this useful.
 
Kappas in Dash

Dash Speaker Connecting...see this link (post #162 by darkdane)
http://www.toyota-4runner.org/5th-g...ce-kappa-3-5-dash-speakers-11.html#post794787


For Mounting...see this link(post #217 by Kraeken)
http://www.toyota-4runner.org/5th-g...le-difference-kappa-3-5-dash-speakers-15.html

My install...

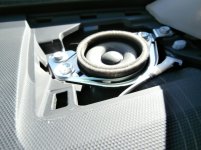
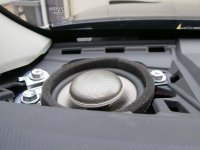
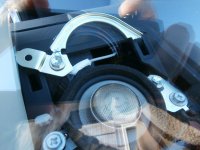
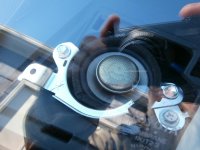
Factory Tweeter? Passenger Side
Dash_01.jpg

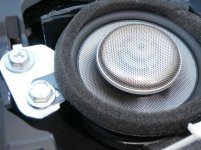
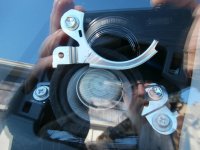
Another View
Dash_02.jpg

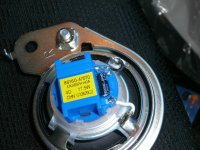
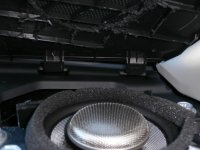
See That Blue Thing?...Don't Throw That Away!
Dash_03.jpg

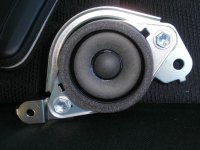
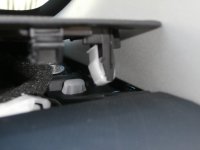
Closeup of Factory Bracket (Don't Throw Away The Bracket....You Will Need it Later)
Dash_04.jpg

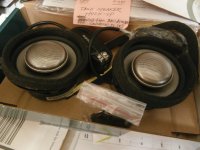
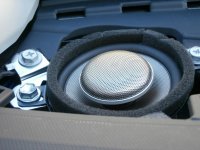
The Kappas...Plastic Ring Removed...Ready to Install
Dash_05.jpg

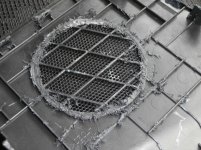
Shroud Removed From Dash Grille
Dash_06.jpg

Kappa Installed...Driver' Side
Dash_07.jpg

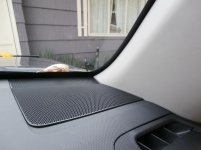
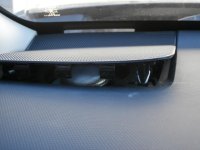
Grille Installed...Passenger Side
Dash_08.jpg
 

Attachments

  • Dash_01.jpg
    Dash_01.jpg
    133.8 KB · Views: 14,700
  • Dash_02.jpg
    Dash_02.jpg
    132 KB · Views: 9,206
  • Dash_03.jpg
    Dash_03.jpg
    136 KB · Views: 13,805
  • Dash_04.jpg
    Dash_04.jpg
    135.8 KB · Views: 9,681
  • Dash_05.jpg
    Dash_05.jpg
    128.9 KB · Views: 9,513
  • Dash_06.jpg
    Dash_06.jpg
    136.7 KB · Views: 9,249
  • Dash_07.jpg
    Dash_07.jpg
    129.5 KB · Views: 9,797
  • Dash_08.jpg
    Dash_08.jpg
    138.2 KB · Views: 9,248
Last edited:
Sound Deadening Install

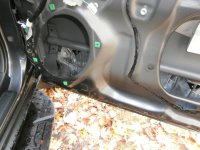
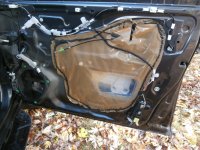
Driver's Side Front Door...Water Does Get in When it Rains
Sound_01.jpg

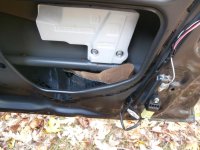
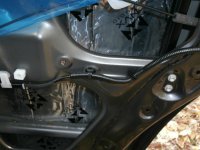
Pass Side Front Door Lower Section...Don't Block the Drain Holes at Bottom
Sound_02.jpg

Remove Styrofoam Block...Save for Re-installation
Sound_03.jpg

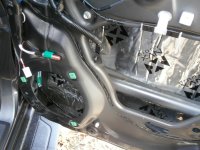
Place the Material Behind the Bracket
Sound_04.jpg

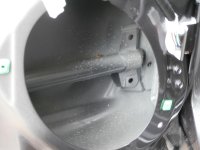
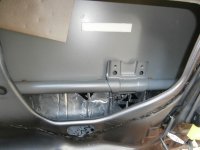
Upper Section Done...Don't Cover the Reinforcement Pipe
Sound_05.jpg

All Done...Vapor Shield Put Back in Place
Sound_06.jpg

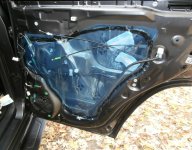
Rear Door Finished
Sound_07.jpg

Ready for Speaker Install
Sound_08.jpg
 

Attachments

  • Sound_01.jpg
    Sound_01.jpg
    119.6 KB · Views: 9,392
  • Sound_02.jpg
    Sound_02.jpg
    127.1 KB · Views: 9,141
  • Sound_03.jpg
    Sound_03.jpg
    125.7 KB · Views: 9,191
  • Sound_04.jpg
    Sound_04.jpg
    139.1 KB · Views: 9,339
  • Sound_05.jpg
    Sound_05.jpg
    128.3 KB · Views: 8,996
  • Sound_06.jpg
    Sound_06.jpg
    137.4 KB · Views: 9,451
  • Sound_07.jpg
    Sound_07.jpg
    118.8 KB · Views: 9,233
  • Sound_08.jpg
    Sound_08.jpg
    134.8 KB · Views: 9,285
JayBeeeeeee wow that's a lot of work... Thanks for the list of speakers... Want to make sure I get the right ones... And the correct adapters so that I do not have to cut the factory wires is great.... I wish it wasn't so difficult to swap out speakers... But looks like to do it right even if you cut out the factory speakers center and use the frame as a mounting bracket you still need to have some wood skills to make a mounting plate for each speaker... I guess always another excuse to buy a new tool....

You could get 6x9s for the front and just glue them like I did the Rear/Tailgate. The plywood plates were not that hard to do. Just put the factory frame on the board face down,
and trace around the outside of the speaker. Borrow a Scroll Saw from your neighbor and cut em out. They don't have to be perfect...nobody is going to see them after the interior
panels are put on.

Did you have any issues putting on any of the door covers/hatch cover? Wasn't sure if these speakers might stick out a little farther..

The new speakers did not stick out alot more than the originals. But I cut those shrouds off because the new speakers were slightly bigger in diameter than the factory ones,
was just trying to avoid any interference and did not want the new speakers touching the door panels at all.

The dash speakers were a different story though. They were a much tighter fit and needed as much room as I could give them. There is a plastic ring glued to the Kappas
that is fairly easy to remove if you are gentle and just give an easy twist.

I noticed on the dash speakers some people use the bass blocker and some didn't need too.

Ya, I mulled over this for quite some time...did a bunch of reading on the subject. Decided to just go for it while I had stuff apart...no regrets so far. They sound great...
no popping as some have experienced.

This is a great write-up you should also post it in the 5th gen section, sure a lot of people would would find this useful.

Well thanx so much. You could always post a link over there for me, rather than double posting all the pics, etc. :peace:
 
Last edited:
Great writeup Go JayBee! Pics will help tremendously too.

How's it all sound now?

Thanks for the comp...

"how's it sound?"...well, I think it sounds awesome.:guitar2:

As stated earlier in this thread, when questioned about not adding a sub-woofer & amp:

"You are certainly entitled to your opinion. Yes, the Kappas are "rated" for many more watts than the factory speakers,
but, the factory head unit has ample power to drive them. It's also is a matter of your personal listening requirements.
I am getting to the age where the "quality" of the sound is more important than the "quantity". IMO, simply replacing
the factory wimpy speakers with Kappas was a vast improvement in the sound quality, range, theatre, whatever you prefer
to call it. The sound deadening has also contributed to that."

"I wholeheartedly agree with you that a sub-woofer would add to the range of sound. And yes, the Kappas can certainly
take all the power you can give them. However, the OP stated that he was looking for a solution in the $500 range, and
sounds like he is not interested in ripping his new rig apart to re-wire it (an amplifier would require this)."

"In summary: I was simply trying to pass along my experience with a reasonably priced improvement. The solution you
have proposed would certainly "improve" the sound quality but the cost would probably end up over $1000. Clearly out
of the OP's budget if I read it correctly."

Hope that answers your question:party:
 
Door & Tailgate Panels

There is a thread that shows this in detail...will link it when found.
Thanks to "sp8ball" & "Antman"...:hail:
http://www.toyota-4runner.org/774421-post389.html

You'll need to remove 3 screws before you can start yanking on the door panels. Be gentle
prying these covers open....the panels are very soft and scratch very easily.
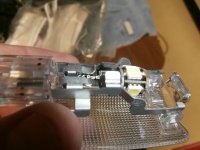
While you are in there, change light to LED.
https://www.superbrightleds.com/mor...bus-led-bulb-5-smd-led-wedge-base-tower/1127/

Door Lights (35 lumen)
LED_Doors.jpg


The 1st time you remove the Tailgate Panel, it will be tight. There is an arrow molded into
the lower/passenger corner. This is where you start pulling.
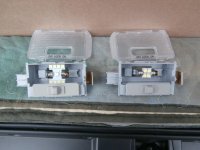
While you are in there, disconnect the tailgate cargo lights and install led panels.

Cargo Area Lights
LED_Tailgate.jpg

The one on the left...(140 lumen?)
https://store.ijdmtoy.com/ProductDetails.asp?ProductCode=LED_9SMD_D31_SKU24

The one on the right...(70 lumen)
https://www.superbrightleds.com/mor...-bulbs/de3175-led-bulb-4-smd-led-festoon/238/


Some Good Tools to Have Handy...Less Than $20
No-Scratch Tools.jpg
 

Attachments

  • No-Scratch Tools.jpg
    No-Scratch Tools.jpg
    59.7 KB · Views: 8,495
  • LED_Tailgate.jpg
    LED_Tailgate.jpg
    138.8 KB · Views: 8,769
  • LED_Doors.jpg
    LED_Doors.jpg
    127.9 KB · Views: 8,621
Last edited:
Good job and thanks for sharing, JayBee.

... simply replacing the factory wimpy speakers with Kappas was a vast improvement in the sound quality, range, theatre, whatever you prefer to call it. The sound deadening has also contributed to that."
+1 Factory speakers seem one-way. One driver would try to reproduce sounds of all frequencies. That's inefficient and "dirty". Vocals or worse yet, treble freqs (fast vibration) sent to heavy, wide speaker cones of stock speakers will sound muddy, muffled.

Two-way speakers like ones you installed send certain frequencies to driver that will reproduce them more efficiently and cleanly, resulting in cleaner, clearer sound.

Re: bass blocker a Ya, I mulled over this for quite some time...did a bunch of reading on the subject. Decided to just go for it while I had stuff apart...no regrets so far. They sound great...
no popping as some have experienced.
Agree. In line with sending frequencies to proper drivers and blocking those from drivers not meant to reproduce them. For example, bass sent to tiny dash speakers will sound like pops. These are best sent to heavier, wider cones of a woofer/sub-woofer.
 
Mounting Dash Speakers

The 3.5" Kappas are a tight fit and trying to use the provided mounting holes won't work unless you can fabricate some sort of strap.
I found that the existing factory brackets could be trimmed with a hacksaw to make the install much easier.

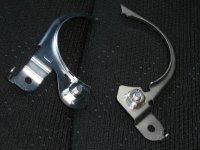
Here are some pics, LH (Drivers Side) & RH (Passenger Side) I took after they were installed. But I set what was left of the factory
bracket next to the Kappas so you could see which end was used. The LH & RH factory brackets are not symetrical, i.e. not mirror images.

The Factory Mounts....The One on The Left Taken FRom The Driver's Side
Dash_09.jpg

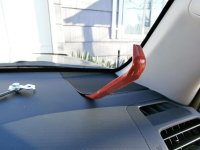
RH-Removing Grille...
RH_01.jpg

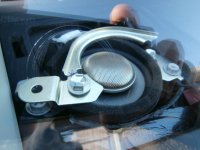
RH-View From Ourside....Bracket on Speaker
RH_02.jpg

RH-View From Outside...Bracket Next to Speaker
RH_03.jpg

RH-View From Inside
RH_04.jpg

RH-Re-Installing Grille
RH_05.jpg

RH-Grille Installation...Careful to Not Let it Rub Against The A-Pillar. It Will Leave a Mark!
RH_06.jpg
 

Attachments

  • RH_01.jpg
    RH_01.jpg
    129.7 KB · Views: 8,414
  • RH_02.jpg
    RH_02.jpg
    120.8 KB · Views: 8,442
  • RH_03.jpg
    RH_03.jpg
    133.5 KB · Views: 8,290
  • RH_04.jpg
    RH_04.jpg
    137.8 KB · Views: 8,284
  • RH_05.jpg
    RH_05.jpg
    124 KB · Views: 8,375
  • RH_06.jpg
    RH_06.jpg
    123.6 KB · Views: 8,377
  • Dash_09.jpg
    Dash_09.jpg
    137.3 KB · Views: 8,356
Last edited:
LH Side Dash

Driver's Side...

LH-View From Outside...Bracket Positioned on Speaker
LH_01.jpg

LH-View From Outside...Bracket Next to Speaker
LH_02.jpg

LH-View From Inside
LH_03.jpg

LH-Grille Re-Install...Don't Let it Scratch The A-Pillar!
LH_04.jpg
 

Attachments

  • LH_01.jpg
    LH_01.jpg
    130.4 KB · Views: 2,896
  • LH_02.jpg
    LH_02.jpg
    132.8 KB · Views: 2,702
  • LH_03.jpg
    LH_03.jpg
    131.1 KB · Views: 3,035
  • LH_04.jpg
    LH_04.jpg
    123.9 KB · Views: 2,699
Last edited:
Dash Speaker Connecting...see this link (post #162 by darkdane)
http://www.toyota-4runner.org/5th-g...ce-kappa-3-5-dash-speakers-11.html#post794787


For Mounting...see this link(post #217 by Kraeken)
http://www.toyota-4runner.org/5th-g...le-difference-kappa-3-5-dash-speakers-15.html

My install...

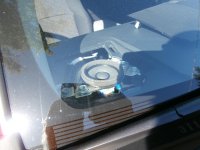
Factory Tweeter? Passenger Side
View attachment 79515

Another View
View attachment 79516

See That Blue Thing?...Don't Throw That Away!
View attachment 79517

Closeup of Factory Bracket (Don't Throw Away The Bracket....You Will Need it Later)
View attachment 79518

The Kappas...Plastic Ring Removed...Ready to Install
View attachment 79519

Shroud Removed From Dash Grille
View attachment 79520

Kappa Installed...Driver' Side
View attachment 79521

Grille Installed...Passenger Side
View attachment 79522

Thank you for this. I used your bracket method and this was a huge help.
 
Awesome write up! Hoping to do this on my 2014 4runner soon.

Hopefully all the parts listed are still the same on mine as yours.
 
Awesome write up! Hoping to do this on my 2014 4runner soon.

Hopefully all the parts listed are still the same on mine as yours.

some of the drivers he used are now discontinued

here is my dream setup
Dash 53.95 per pair
Reference 3002cfx - Infinity US
Reference 3002CFX
3.5" 2way 85-21Khz 3ohm 91db sensativity
25W/75W
Diameter (in) 3-1/2'
Total Depth (in) 1-7/8" ( mag to top of tweeter)
Cut out Diameter (in) 3-1/8"
Mount depth (in) 1-7/16"
Mount flange to top of tweeter 7/16"


Front Door 95.95 per pair
Reference 9602ix - Infinity US
Reference 9602ix
6x9" 2way 46Hz–21kHz 3ohm 94db sensitivity
100W/300W


Rear door/rear hatch $$??
Kappa 62.11i - Infinity US
Kappa 62.11i
6.5" 2 way 45-25Khz 2/4ohm 95db sensativity
75W/225


still working out the the best sub to install in the factory enclosure/ may require additional depth gained by using spacer rings under factory cover and/or possible cutting factory cover open and using spacers right up to the factory exterior
Possible options
Image Dynamics ID8 D2 V.3 85.4db sensitivity
alpine SWR-8D2 83.5db sensitivity
Kicker solobaric ( Square) 83.6db
Pioneer TS-SW2002D2 Shallow Mount 86db sensitivity most efficient
Helix Esprit E8W 85db
 
Last edited:
some of the drivers he used are now discontinued

here is my dream setup
Dash 53.95 per pair
Reference 3002cfx - Infinity US
Reference 3002CFX
3.5" 2way 85-21Khz 3ohm 91db sensativity
25W/75W
Diameter (in) 3-1/2'
Total Depth (in) 1-7/8" ( mag to top of tweeter)
Cut out Diameter (in) 3-1/8"
Mount depth (in) 1-7/16"
Mount flange to top of tweeter 7/16"


Front Door 95.95 per pair
Reference 9602ix - Infinity US
Reference 9602ix
6x9" 2way 46Hz–21kHz 3ohm 94db sensitivity
100W/300W


Rear door/rear hatch $$??
Kappa 62.11i - Infinity US
Kappa 62.11i
6.5" 2 way 45-25Khz 2/4ohm 95db sensativity
75W/225

Gotta ask why you would use a better speaker in the rear than the front doors.
 
in this case look at the db sensitivity differences.

when the rear sound propagates the loss in db from the rear door to the front ears will be about 2 to 3 db lower then the front. negating the effects of the seat blocking sound. So there will be rear fill but would not pull the sound stage back/ down. Also note the rear and front door speakers you can switch the tweeter -3db to also prevent pulling the sound stage to far back and/or down.


of course this is all theory crafting not actually having access to a spectrum analyzer like i had back in my stereo install days.
 
IMHO the best sub to replace the factory one with....

Image Dynamics 8" DVC
The super low FS for an 8" is where its at.

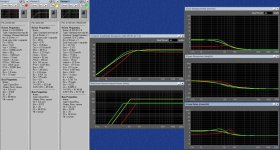
everything was simulated with VC being run separate off of OEM AMP assuming 45 watts RMS per channel.

-3dD point
Best: ID8 D2V4 @ 36hz
Better: Pioneer @50hz
Worst: Alpine @64Hz BAD!!!!!!!

RMS power capability per VC (modled using rms power per VS and not peek per VC so very conservative and safe power/thermal limit numbers.
another way to think about this is any power over the limit at this point is in a major way being converted to heat instead of mechanical/acoustical energy
Best: ID8 D2V4 @ 33 hz with 75w per VC
@ 25 hz with 24.9W per VC
Better: Alpine @ 54 Hz with 175W per VC
@25Hz with 8.13W per VC ( very low thermal limit here but it is only a 8" sub
Worst: Pioneer @83 Hz with 75W per VC thermal roll off point is very hi for a Sub.......
@25Hz with 0.66W per VC

ID8 D2V4 has the best d-phase/d-fq
The Alpine has the best D-msec/d-fq for the really true audiophiles. ( but usually below 60Hz you will never notice group delay unless its extreme on the order of +20msecs)

If including a +12db per octave Cabin gain /transfer function starting at 50 hz ( this was an estimate based on internal volume of the 4 runner)
ID8 D2V2 puts out higher dB than the other 2 subs in the frequencies that everyone wants in a sub woofer.

Cone displacement is good on all and is below mechanical limits

For these 3 the ID8 D2V2 is the best choice only negative is getting the 4.75 mounting depth to work. May require a spacer ring on the front of the enclosure and removal of the internal ribs on the back inside of the enclosure.
Also to improve db recommend to cut the factory cover and use either a 10" grill or 12" grill to allow the pressure wave to couple with the internal volume of the 4 runner more efficiently.


Ya i know guys most likley way more info than you were looking for lol Mechanical engineer with passion for acoustics :)

If you want me to model another driver to compare just let me know; if the manufacture publishes the T/S pentameters I can model it.
 

Attachments

  • sub comp.jpg
    sub comp.jpg
    133.5 KB · Views: 1,400
Last edited:

Members online

Forum statistics

Threads
278,316
Messages
3,554,107
Members
248,016
Latest member
Advally Service

Trending content

Back
Top