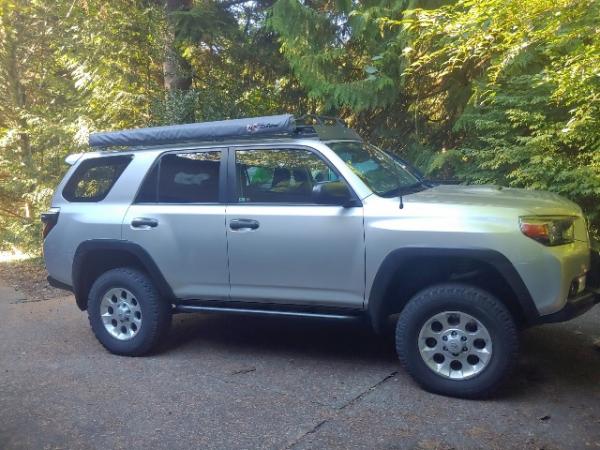
Ironman Foam Cell Pro

Where did yours end up settling?

Also, did you buy their adjustment tool or buy a spanner wrench? I chose the latter.

Here were my numbers:
Stock/Day Of/Final
DF: 19.5"/23.5"/22.5"
DR: 21”/24 1/8"/24"
PF: 19.5"/23.5"/22.5"
PR: 21"/24 3/8"/24.25"

I haven't bought either one. We thought the Dobinson one might fit and didn't. But I haven't had to make any adjustments.
 
Here were my numbers:
Stock/Day Of/Final
DF: 19.5"/23.5"/22.5"
DR: 21”/24 1/8"/24"
PF: 19.5"/23.5"/22.5"
PR: 21"/24 3/8"/24.25"

I haven't bought either one. We thought the Dobinson one might fit and didn't. But I haven't had to make any adjustments.

Wow- four inches in the front right after the lift. Between the lift and my Gobi rack I'm starting to get worried that I may not be able to get my 4runner out of the garage after the lift. I can always air down the tires but I need to get out there with a tape measure to see where I'm at.
 
Let me know if it fits. To lower my 4Runner I adjusted my springs over the weekend with the Ironman tool. I did have to use a pipe wrench for leverage as the tool is too short.
I wish the tool would have a square 1/2" hole for a breaker bar instead of 10mm and 11mm hex holes...

So the 8mm peg on the wrench I bought is too large. I will be exchanging this for one that is 6-7mm.
 
So the 8mm peg on the wrench I bought is too large. I will be exchanging this for one that is 6-7mm.

Look for a wrench that has a square 1/2" hole to get a min 20" breaking bar to use it for leverage.
And I've been looking for a solution to use the hex holes with a hex bit socket and a breaking bar for leverage. Using a heavy pipe wrench for leverage sucks.
I received my hex sockets. I thought the socket size is measured on the hex side not diagonal... 14mm and 9/16" is too small. Measuring with a school ruler, I get 20mm and 21mm diagonal.
 
Last edited:
Wow- four inches in the front right after the lift. Between the lift and my Gobi rack I'm starting to get worried that I may not be able to get my 4runner out of the garage after the lift. I can always air down the tires but I need to get out there with a tape measure to see where I'm at.

It settled to 3" all around. Definitely sits tall.
 
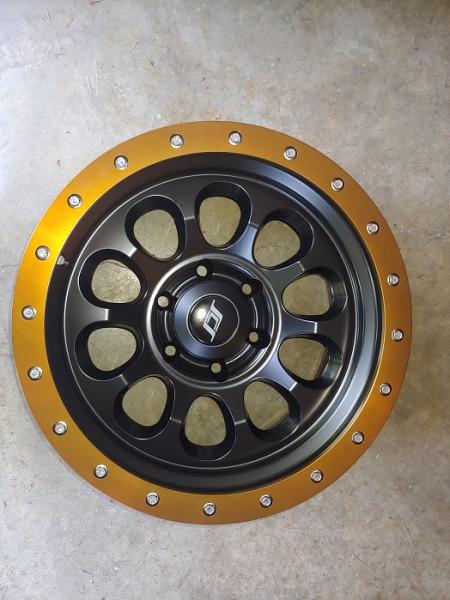
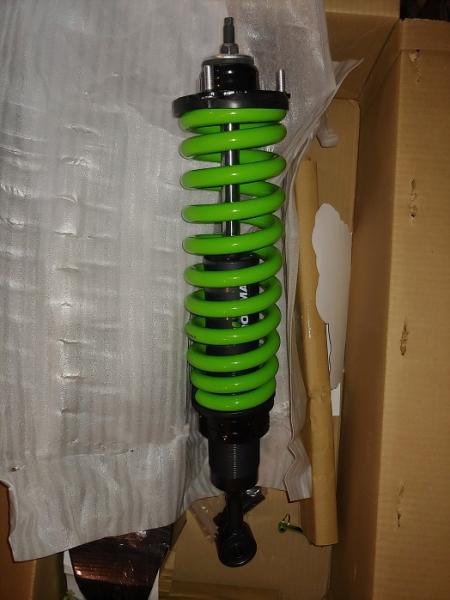
The UPS Driver was good to me today....

bill-z-albums-bz-s-2010-te-picture58835-scs-wheel.jpg


bill-z-albums-bz-s-2010-te-picture58834-ironman-suspension.jpg


Unfortunately it's going to be a couple of weeks before I have time to do the install.
 
So I received my lift today and upon inspection I noticed a couple things that worry me..(I opted for pre built coil overs)

First was the coil labeled “driver side” was actually set lower than the one for “passenger “. Opposite of what they should be to offset driver side lean. It could be that they mixed up labeling the boxes. But I am not about to take my suspension apart to find out it is wrong. Secondly the coil for the “passenger” assembly is seated significantly further from the perch than the “driver” set. It’s about 0.6 inches off as where the “driver” side is lined up snug. Is that acceptable/safe?
9ca585c73c4f1085232a987962cd260f.jpg

8aec87f7a7076e641fb2a97f8aecd524.jpg


Sent from my iPhone using Tapatalk
 
So I received my lift today and upon inspection I noticed a couple things that worry me..(I opted for pre built coil overs)

First was the coil labeled “driver side” was actually set lower than the one for “passenger “. Opposite of what they should be to offset driver side lean. It could be that they mixed up labeling the boxes. But I am not about to take my suspension apart to find out it is wrong. Secondly the coil for the “passenger” assembly is seated significantly further from the perch than the “driver” set. It’s about 0.6 inches off as where the “driver” side is lined up snug. Is that acceptable/safe?


Sent from my iPhone using Tapatalk

Where that coil sits is perfectly safe and acceptable, it’s got that taper to sit reasonably level at the bottom, and yours is flush. Looks great.
As for the driver vs passenger, don’t forget, these are built in Australia, where they drive on the left. Reverse for USA install. **They do mention this in one of their videos.**
 
So I received my lift today and upon inspection I noticed a couple things that worry me..(I opted for pre built coil overs)

First was the coil labeled “driver side” was actually set lower than the one for “passenger “. Opposite of what they should be to offset driver side lean. It could be that they mixed up labeling the boxes. [...] Is that acceptable/safe?
9ca585c73c4f1085232a987962cd260f.jpg

On the driver side (the coilover from the right), I would be concerned with the first coil touching the top edge of the end of the coil (looks like there is probably only 1-2mm space. If they touch that could destroy the paint and allow rust to get a hold on the coil...
 
Question for those who have installed this lift -
I am installing next week on my 19 TRDORP - non kdss. I am going with the JBA UCA's as I purchased them before ordering the lift. I also have the rear sway bar extensions, front sway bar relocation kit, extended front bump stops and a transfer case drop kit.

did any of you need to utilize all of these items? Am I missing anything else? any input would be greatly appreciated.

Roger
 
Question for those who have installed this lift -
I am installing next week on my 19 TRDORP - non kdss. I am going with the JBA UCA's as I purchased them before ordering the lift. I also have the rear sway bar extensions, front sway bar relocation kit, extended front bump stops and a transfer case drop kit.

did any of you need to utilize all of these items? Am I missing anything else? any input would be greatly appreciated.

Roger

I got from them the Foam Pro Stage 3 with extensions and adjustable rear sway bar.
You do need new UCA with increased caster, I got the Ironman 4x4 UCA.
I replaced the extensions as I was disconnecting the OEM to put in the rear coils, so might as well replacing it.
Front bar relocation is a must to avoid front coils banging on the sway bar (I read that for few forum members is not necessary but for me it was.
Initially I setup the front coilovers too high and I need it the front diff drop. After a week, I did not like it and I adjusted the front coilovers for less front lift. I don't need it now. I intend to install it (since I have it) later on when I do a diff oil change and grease the shaft U-joints (I need to remove the M.O.R.E. skid plates to do either so I'll do it the same time).
Bump extensions ... why not, you already have it and is not hard, I did it without removing the wheel.
 
Last edited:
I got from them the Foam Pro Stage 3 with extensions and adjustable rear sway bar.
You do need new UCA with increased caster, I got the Ironman 4x4 UCA.
I replaced the extensions as I was disconnecting the OEM to put in the rear coils, so might as well replacing it.
Front bar relocation is a must to avoid front coils banging on the sway bar (I read that for few forum members is not necessary but for me it was.
Initially I setup the front coilovers to high and I need it the front diff drop. After a week I did not like it and I adjusted the front coilovers for less front lift and I don't need it now. I intend to install it (since I have it) later when I do a diff oil replacement and grease the shaft U-joints (I need to remove the M.O.R.E. skit plats to do either so I'll do it the same time).
Bump extensions ... why not, you already have it ant is not hard, I did it without removing the wheel.


Thanks for the feedback. Looking forward to having it installed.
 
Anyone have any feedback relative to ride quality, on and off road? Comparison against any of the other big name brands? Thanks!
 
One week in..

I put the stage 1 kit on my 17 TRDORP about a week ago. I set up the alignment and yes, the caster is low. Only 1.8-2.0* the truck still drives pretty well. I initially had Cornfed spacers on 2/1”. The front sits just a hair higher and the rear is probably 1.5” higher (I did not measure). As far as the ride goes it’s very similar to the cornfed’s just rolling down the road. Expansion joints and sharp bumps are a bit softer. Nosedive is less, cornering is better. I’m on 285 Nitto Ridge Grapplers. I’m still aching to get it back in the dirt. Getting the fronts pre assembled made for about a 90 minute install time.
 

Attachments

  • B65466BC-27D3-4A28-BF6C-A7C392113ADE.jpg
    B65466BC-27D3-4A28-BF6C-A7C392113ADE.jpg
    132.8 KB · Views: 1,629
Anyone have any feedback relative to ride quality, on and off road? Comparison against any of the other big name brands? Thanks!

My buddy is running the Dobinson IMS and our 4Runners rode very similar on the paved road. We drove them back to back and very very similar.

It is so smooth off-road. I was definitely driving a lot faster on the fire roads than I was with stock suspension. Love the on road feel too. Feels way more plated and no noise dive.
 
Adjusting Foam Pro coilovers

Update on adjusting the Foam Pro coilovers.

Initially I was put off thinking the coil overs can't be adjusted while mounted - I was on chat with Ironman and I was told it is not possible. With a little ingenuity and patience, it can be done.

When I first installed the front springs, it gave me a too much lift putting the front axles at a dangerous angle (I did not install the front diff drop kit) and I could feel bounding at full lock steering wheel. After the springs settle a bit, bounding disappeared but I still had high angle on the axles.
After 1 week I lowered the springs but too much :frusty::frusty::frusty::frusty: giving me a huge nose dive stance.
After another week I raised the springs giving me now a perfect stance, ~1.5" front to back difference.

The sway bar will have to be disconnected (at the frame and at the top sway bar links) and you will need something to leverage the tool. I used a pipe wrench when I lowered the coils and a 25" braking bar when I raised the coils.
It would have been nice if Ironman would provide a 1/2' hole in their tool vs hex. The most opposite hole to the adjusting pin is somewhere between 16mm and 17mm hex so I used some aluminum sheet to snug the 16mm hex.
I have a 19" braking bar as well but it was not sufficient leverage without killing my back so leverage is the key here.
 
Ironman install completed....

Before:
bill-z-albums-bz-s-2010-te-picture58838-as-is.jpg


After:
bill-z-albums-bz-s-2010-te-picture58948-after-pict.jpg


Man those 265/70's look tiny.... Off to Discount tire to have the 285/70 Coopers on my new SCS wheels mounted.

FYI.. The install was almost drama free...... I was tired and F@*'d up on the last bolt of the install. I cross threaded the KDSS cam shaft looking bracket so I had bunch of fun extracting the snapped bolt and re-taping it and then finding a bolt that matched.
 
Ironman install completed....

Before:
bill-z-albums-bz-s-2010-te-picture58838-as-is.jpg


After:
bill-z-albums-bz-s-2010-te-picture58948-after-pict.jpg


Man those 265/70's look tiny.... Off to Discount tire to have the 285/70 Coopers on my new SCS wheels mounted.

FYI.. The install was almost drama free...... I was tired and F@*'d up on the last bolt of the install. I cross threaded the KDSS cam shaft looking bracket so I had bunch of fun extracting the snapped bolt and re-taping it and then finding a bolt that matched.

Looks good!
 

Members online

No members online now.

Forum statistics

Threads
278,312
Messages
3,554,083
Members
248,016
Latest member
Advally Service

Trending content

Back
Top