JerkyDrewster's 2001 4Runner Build V2

I just added them to the original post! It was tough to get a decent shot with just my phone. I hope it's what you're looking for!


Well thanks for taking inspiration from my rig! I noticed that you posted in my other thread some time back. Do you have your own 4Runner now or just looking to pick one up? Keep it up in high school, and let me know if you have any questions about 4Runners (even though there are way more qualified people on here :p)!

No problem :P As of right now I do not have a T4R but I am looking for one! Im thinking 98-02. I'm just trying to gain as much knowledge about them and what I want to do to mine now so I can save that time later. I don't even have a runner and modding is already addicting to me :D . But I will, and thank you... I will friend you in just a second here!
 
September 4th, 2017

Misc. Things

Parts List:
- Blue Sea 100A Common Busbar
- Marine Battery Terminal
- Some exhaust tubing and barbed fitting

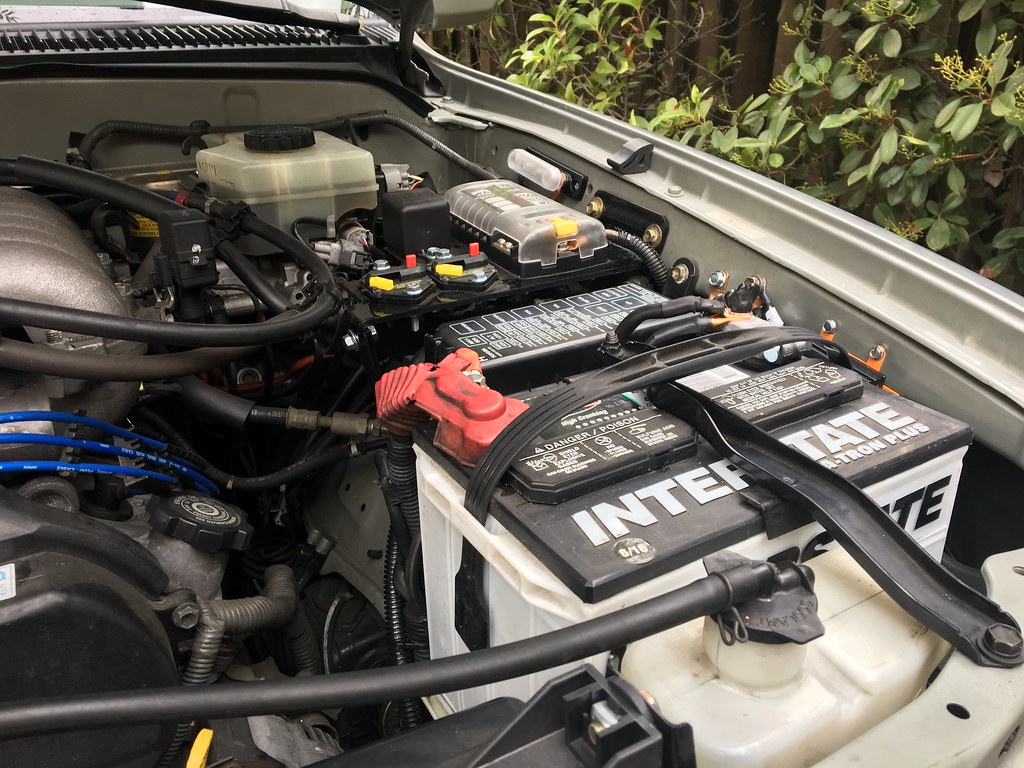
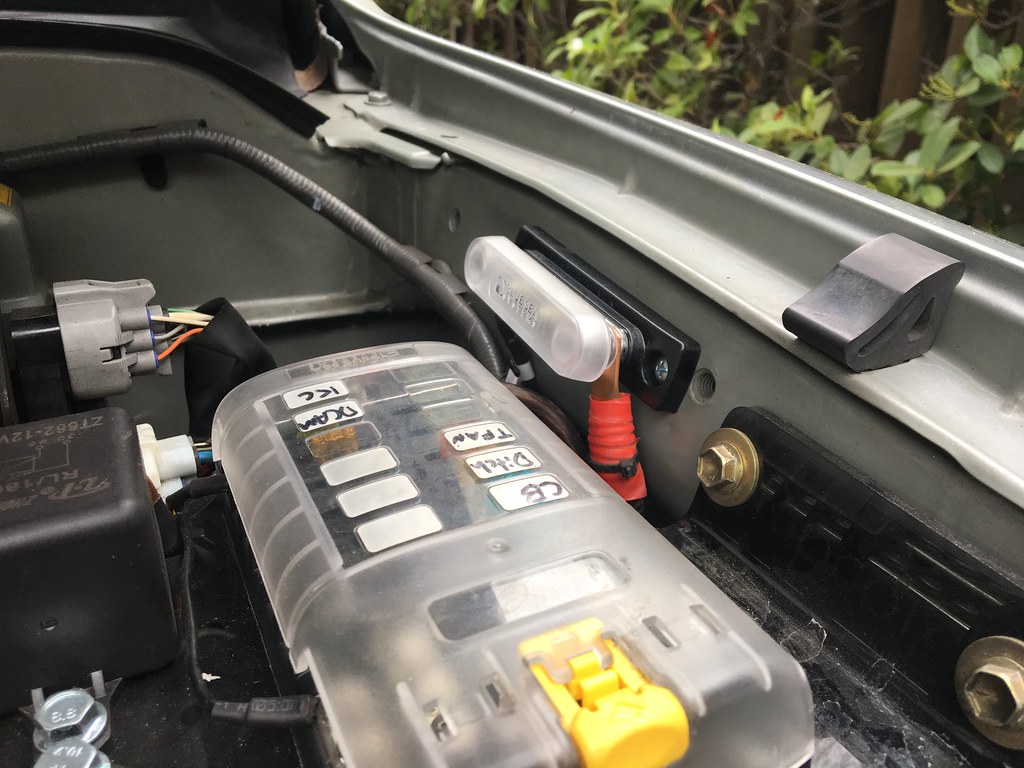
This weekend I was able to work on some small things that I've been meaning to do for awhile now. I started off with installing a Blue Sea Busbar to reduce the clutter on the positive battery terminal. For now, some sheet metal screws are holding it to the fender wall, but eventually I will make an L-bracket to straighten it out and be more presentable. So far, the headlights and the aux fuse block are attached to the bar.

Next up was cleaning up some of the wiring and the way it was routed. I wanted all of the wires I added to be neatly tucked underneath the stock wiring, so pulled everything back to the front, and rerouted them back towards the cab. On the battery side, I removed old electrical tape and used some adhesive-lined heatshrink instead. Since a new set of battery terminals are being used, I had to add ring connectors to the stock negative wires using a torch and some solder. Overall, I am happy with the way the wiring looks!

After installing the HID projectors, I never put the light housing's rubber sealer back on. Since the HID igniter is larger than the stock plug, I had to open the hole of a bit as well as make a slit for the high beams and halo wires to pass through. The back of the housing definitely looks less naked with it back on.

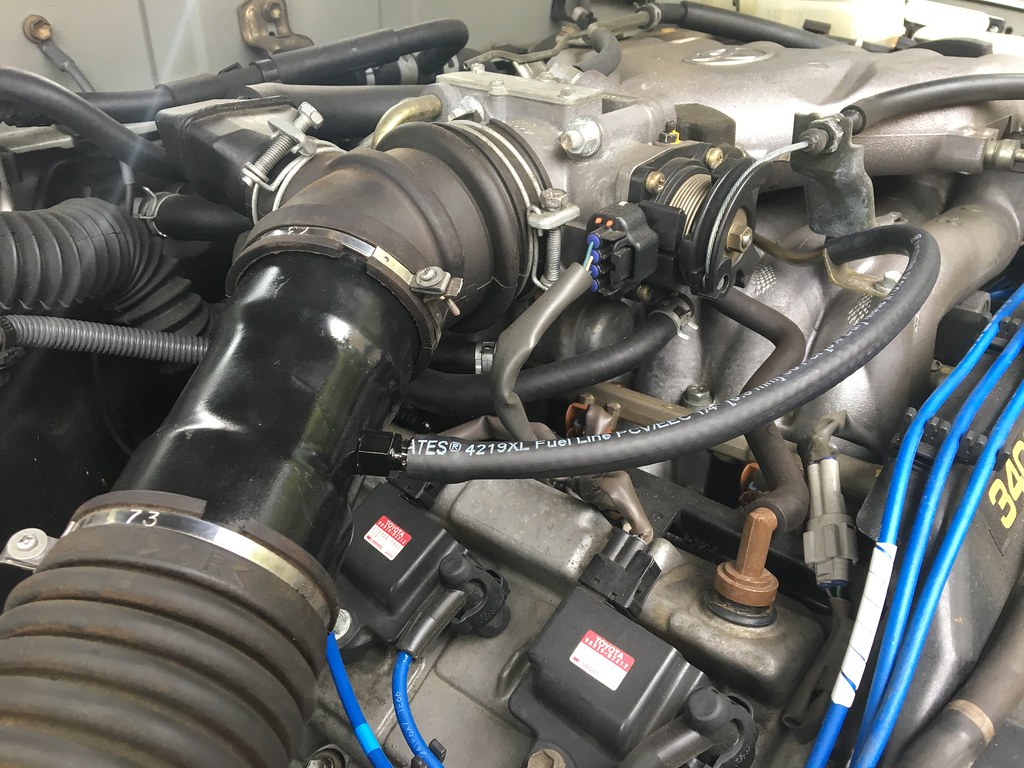
Finally, I removed the intake silencer and added the section of tubing I had on the '99. This time, I drilled a hole in the middle section to add a barbed hose fitting for the stock vacuum line. On the previous 4Runner, I used a t-fitting to seal it off, but I wanted to do it right this time. After a coat of paint and some silicone to seal the fitting, it was good to go! While I don't think it does anything, I do like that it takes up less room and makes the engine bay a little "cleaner".

New terminals and busbar (still need to work on the positive terminal cover)

https://flic.kr/p/YdjQoZ

https://flic.kr/p/YaEVtN

ISR Delete
https://flic.kr/p/YdjQTr
 
Last edited:
Jerkydrewster's 2001 4Runner Build V2

September 24th, 2017

Amp Installation

Parts List:
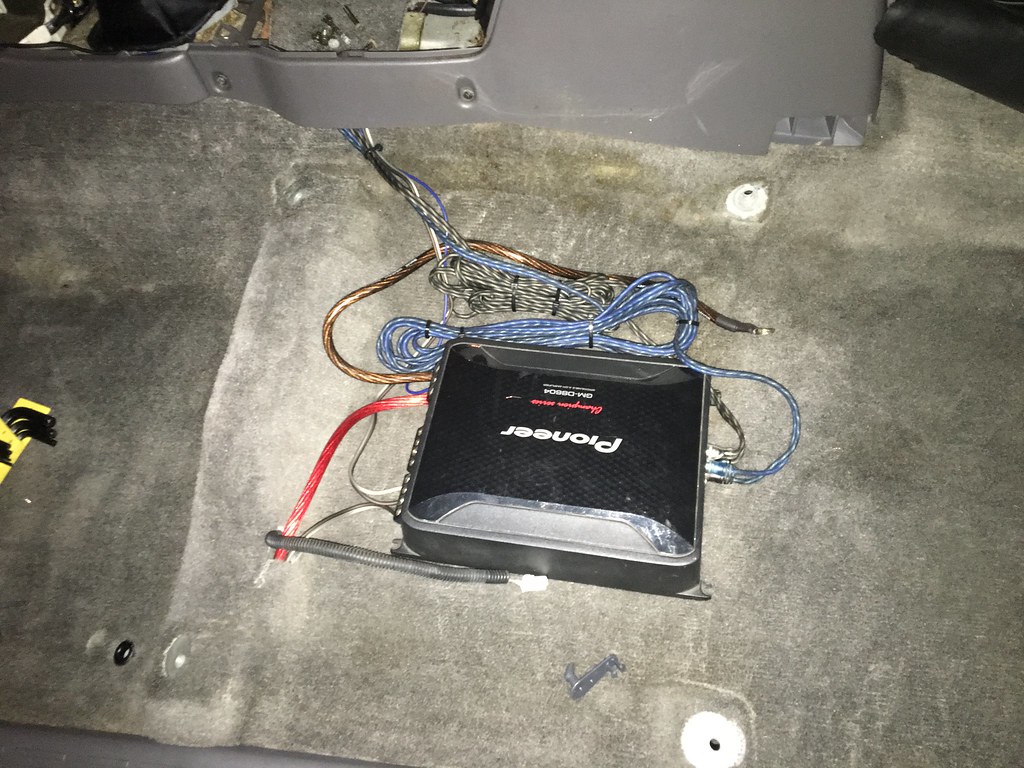
- Pioneer Amp GM-D8604
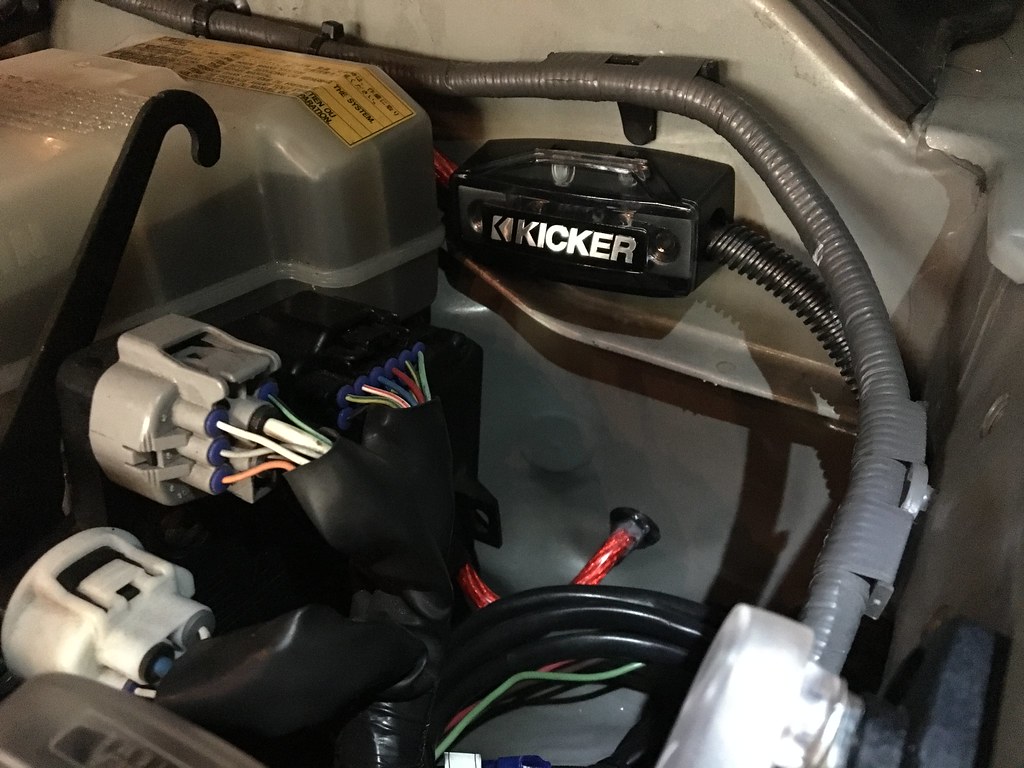
- Kicker FHS AFS Fuse Holder
- T-Spec V8-MANL80 V8 Series Nickel Plated MINI ANL Fuse
- SoundBox Connected 4 Gauge Amp Wiring Kit

This is something that I have been wanting to install since I got the new 4Runner. It's been sitting in a box since the accident, and I finally decided to take the plunge and send my first wire through the firewall. Unlike before, I ended up drilling a hole dedicated to the 4ga wire with a grommet to keep it from rubbing. Overall, this install was quite a bit cleaner, and I'm definitely happy with the results.

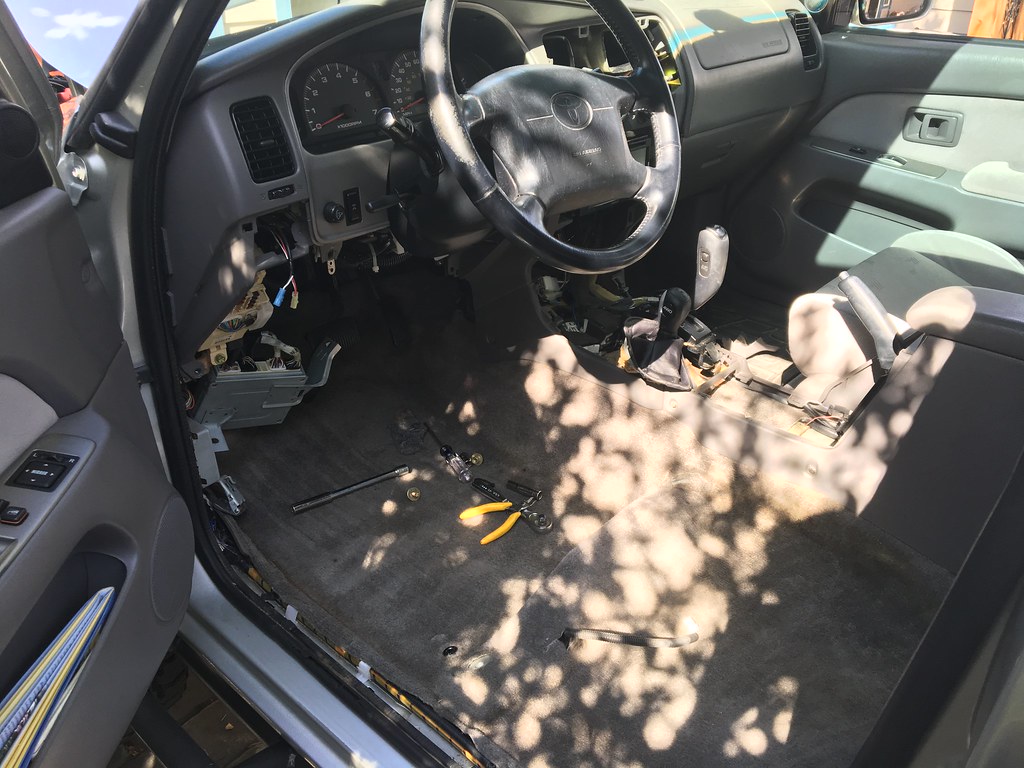
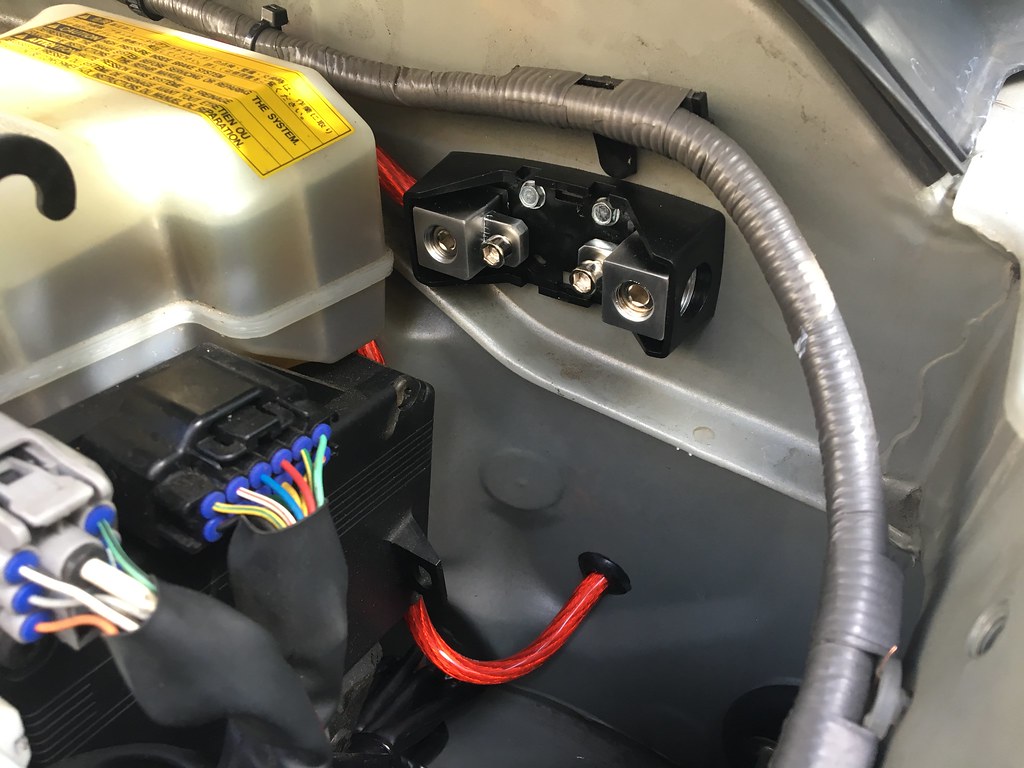
I started by removing the driver seat, the dash covers, and kick panel covers on both sides. I wanted to run all of the wiring first, so I had to clear anything in the way in order to get the drill to the firewall. I used a 1/2" bit to make way for the grommet, then fed the power cable through. Since I'm running out of room in my engine bay, I decided to screw the fuse holder to the back of the firewall. I might find another place for it in the future, but it works for now.

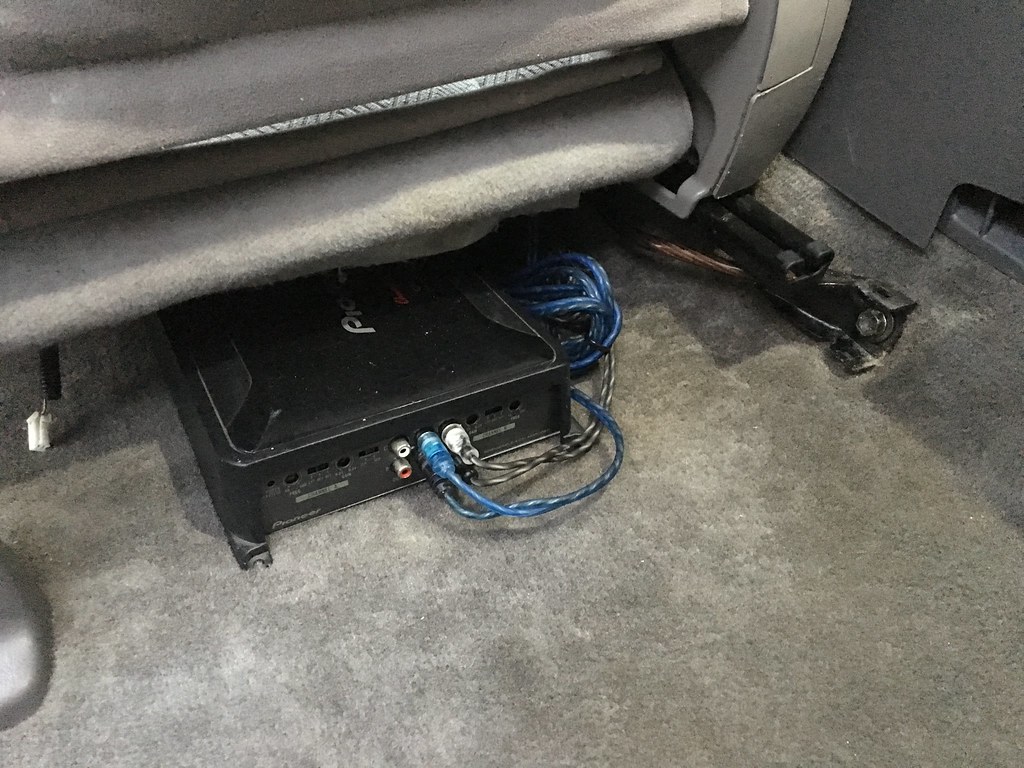
I routed the speaker cables to the doors, and did the same thing I had done on the old rig, where I spliced them to the correct wires. This proved to be the easiest way since I didn't have to route the wires through the doors. Next up was the RCA cables from the pre-amp on the back of the head unit to the amp. These went though the center console and under the seat. Finally was the ground cable, which I attached to the right, rear bolt that holds in the seat. It fit perfectly under the cover, so I was excited that I didn't need to drill anymore, and that it wasn't visible.

Once all that was done, all that was left was to hook the amp up and put everything back into its place. Definitely am happy with the way the speakers sound now, and once I build a new box for the rear, I'll put my small sub back in to get a little more bass.

Starting out
https://flic.kr/p/YUC5v3

Firewall grommet and fuse holder
https://flic.kr/p/XW5iB4

Cover and silicone in place
https://flic.kr/p/YUC3By

Amp wired up from the top
https://flic.kr/p/BRe7hh

Amp from the back of the seat
https://flic.kr/p/XW5h2R
 
Last edited:
November 3rd-4th, 2017

Polygoat's Hollisterween 2017 Trip

Hollister Hills SVRA, CA

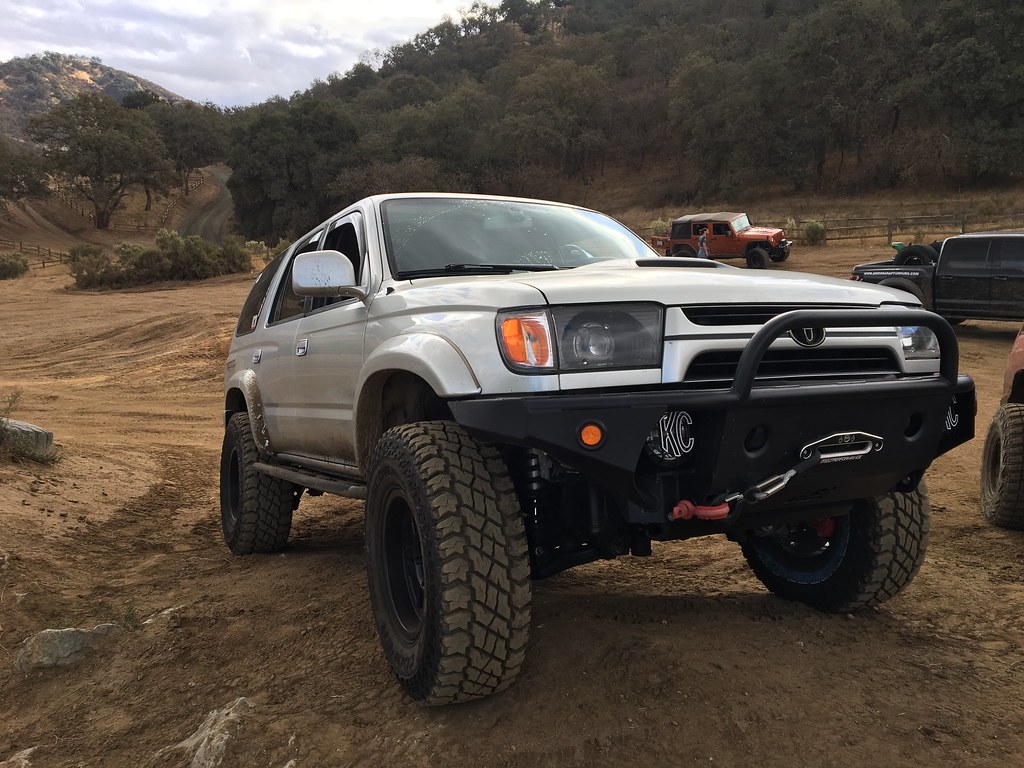
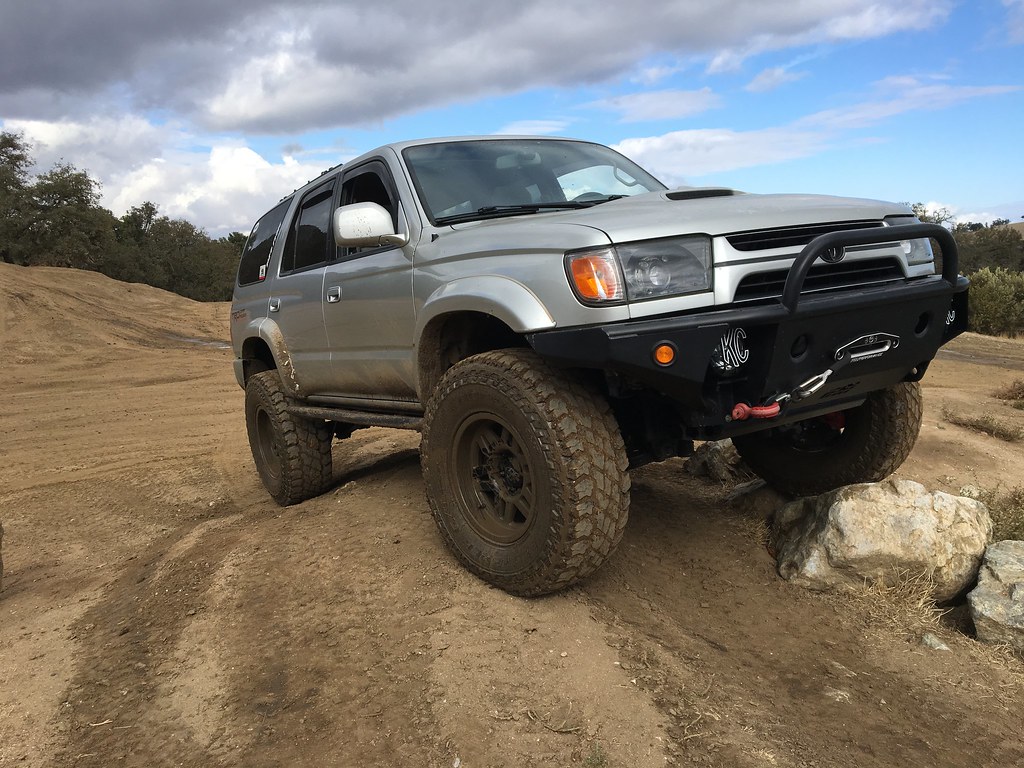
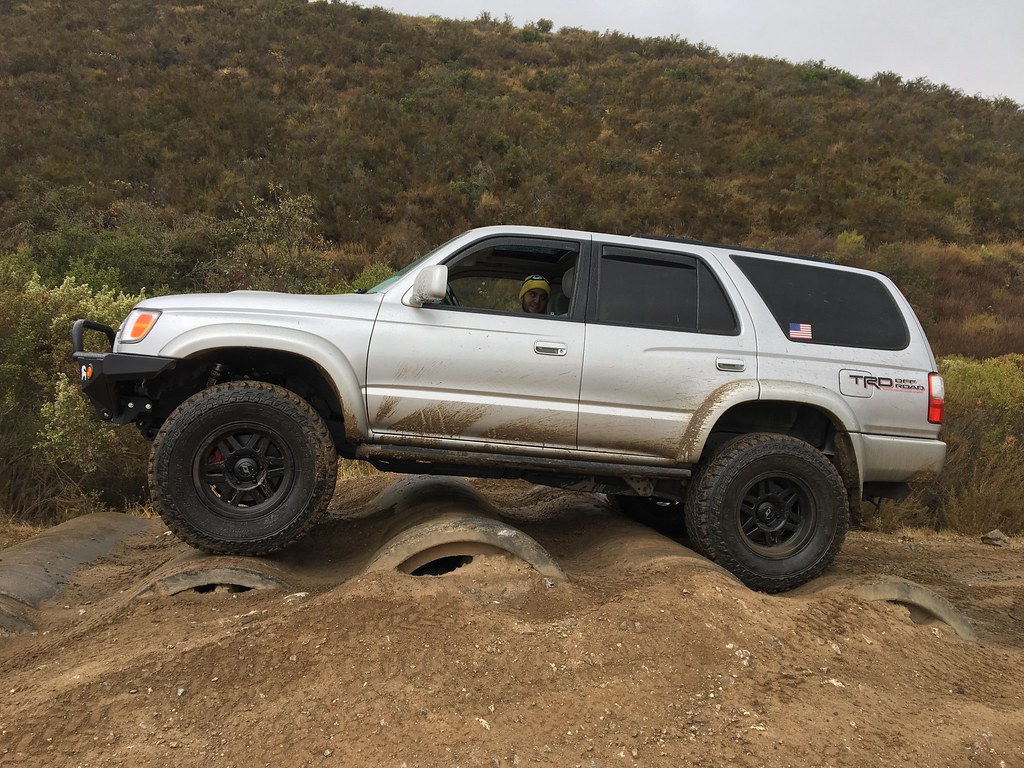
This past weekend I got to meet up with my college's off-roading club at Hollister. This was the first time I was able to bring my rig into the dirt and mud, so I was pretty happy to go and test everything out. While I didn't do anything too crazy, I was able to get a good feel for it and how it performed off-road. From the get-go, I was extremelly happy with the feel of the tires and the suspension. The tires gripped on the pretty muddy terrain and over the obstacle courses that I took it on. They slipped up a little bit when I tried the log pit, but nothing a little skinny pedal couldn't solve! The Icons did not dissapoint off-road either. I was cruising through the park on the midde settings, and it was extremely comfortable...which is a weird thing to say. My passengers even were suprised with the ride quality over the rough terrain. I wanted to try out jungle run (don't know the actual name of the trail; this is just what we have always called it), but with it being so muddy, I didn't want to get super stuck and break something. I decided to spot a few of the rigs instead, which is always fun. The trail was pretty wrecked compared to last year and in the end, our group had 5 or 6 breaks ranging from a u-joint, a locker, cv axle, a battery, as well as some others.

I'm seriously considering some sort of air locker now, and I think the only thing that held me back from that trail was the lack of a locker...even though some guy in our group did the whole thing in a bronco that lost its 4wd. The trip was a ton of fun getting to catch up with some alumni and meeting the younger kids in the club. Hopefully I'll be able to make it out to their JV New Years trip!

Unfortunately I didn't get any pictures on the trail, but I do have a couple of poser shots that I took while the group was re-assembling back together.

https://flic.kr/p/Z5MpR1

https://flic.kr/p/D4tD5S

https://flic.kr/p/D4tCpy
 
Last edited:
Absolutely love your truck! The contrast of the black cbi to silver is too slick. Looks so much better than your original 4runner IMO. And that's coming from someone who owns a black 4runner! Diggin' the tires too, when I upgrade I might go same route.

Just curious, did you take any parts off your black 4runner? Was the black sports hood still good? Please tell me I can stop by tomorrow and buy it off you?!?! :)
 
Absolutely love your truck! The contrast of the black cbi to silver is too slick. Looks so much better than your original 4runner IMO. And that's coming from someone who owns a black 4runner! Diggin' the tires too, when I upgrade I might go same route.

Just curious, did you take any parts off your black 4runner? Was the black sports hood still good? Please tell me I can stop by tomorrow and buy it off you?!?! :)

Thanks dude! While the black paint looked super good when clean, I had always wanted a silver 4runner from the beginning. I too enjoy the black on silver, and one of these I might get another rear bumper. And so far I highly recommend the tires...even though they have not seen too much dirt.

I did take quite a few parts off of the old rig, but unfortunately they are either on the new one (like the bumper and sliders), or I sold them pretty soon after the accident. I would have definitely kept the hood, but it was pretty damaged from the accident. It folded over the fender and ground against the ground for a bit. Sorry man!
 
Great looking truck man. How's the noise on the highway with those coopers?

My truck is setup very similar to yours and I can say that the rear arb locker makes it damn near unstoppable. I will also say that it took me a couple months to get it to function properly though. I kept having issues with it leaking air inside the diff and had to send it back to the company that built it a couple of times before it worked as it should. Haven't had any problems with it since then though, knock on wood.

If I had to do it again, I'd seriously consider the stock electric locker route.
 
Great looking truck man. How's the noise on the highway with those coopers?

My truck is setup very similar to yours and I can say that the rear arb locker makes it damn near unstoppable. I will also say that it took me a couple months to get it to function properly though. I kept having issues with it leaking air inside the diff and had to send it back to the company that built it a couple of times before it worked as it should. Haven't had any problems with it since then though, knock on wood.

If I had to do it again, I'd seriously consider the stock electric locker route.

Thank you! These tires have a very minimal amount of noise when driving on the highway...I would say the wind noise hitting the car itself is louder!

That's interesting about the leaking air though. Was the issue the locker, where it was not sealed properly, or the air line going into the 3rd? Did you send your differential to a company to install the differential, or did you do it yourself? The main draw towards the air locker for me would be having the added functionality of OBA for the tires.
 
Thank you! These tires have a very minimal amount of noise when driving on the highway...I would say the wind noise hitting the car itself is louder!

That's interesting about the leaking air though. Was the issue the locker, where it was not sealed properly, or the air line going into the 3rd? Did you send your differential to a company to install the differential, or did you do it yourself? The main draw towards the air locker for me would be having the added functionality of OBA for the tires.

There is somewhat of a known problem with these diffs and air lockers. The problem is that the diff flexes ever so slightly in the 3rd and causes the seals not to maintain a tight seal and air can escape and the locker won't stay locked. The locker would lock and stay locked for several minutes when still. But when I'd start driving it would immediately start leaking and the compressor would cycle on every few seconds. I ended up having to install/uninstall the diff at least 5 times trying to pin down the issue and I had to send it back to the company that built it (I used a well known company for a mail order exchange program. They sent me a built 3rd member and I sent them my stock one as a core.) a couple times before they rebuilt the whole arb assembly with new internal seals. That finally fixed the problem.

My point is, there's a lot of stuff to go wrong when you're using air to pressurize the locker. I think the stock locker is a simpler setup when all is said and done.

And I wouldn't let an on board air compressor be a deciding factor. You could easily install one and go with a stock e locker set up and be into it for less money than a full arb set up.

I do think a deciding factor is if you're going to regear. If you're going to stay stock gear, I think e locker is definitely the way to go. If you're gonna regear and be rebuilding the diffs with new bearings and everything anyway, then it's more of a toss up between whether arb or e locker is right for you.
 
Those Stealth 6's look beautiful man!

I remember reading through the accident some time ago and it's good to see you made out well and got another 4Runner. Looking forward to seeing where this thing goes for sure.
 
There is somewhat of a known problem with these diffs and air lockers. The problem is that the diff flexes ever so slightly in the 3rd and causes the seals not to maintain a tight seal and air can escape and the locker won't stay locked. The locker would lock and stay locked for several minutes when still. But when I'd start driving it would immediately start leaking and the compressor would cycle on every few seconds. I ended up having to install/uninstall the diff at least 5 times trying to pin down the issue and I had to send it back to the company that built it (I used a well known company for a mail order exchange program. They sent me a built 3rd member and I sent them my stock one as a core.) a couple times before they rebuilt the whole arb assembly with new internal seals. That finally fixed the problem.

My point is, there's a lot of stuff to go wrong when you're using air to pressurize the locker. I think the stock locker is a simpler setup when all is said and done.

And I wouldn't let an on board air compressor be a deciding factor. You could easily install one and go with a stock e locker set up and be into it for less money than a full arb set up.

I do think a deciding factor is if you're going to regear. If you're going to stay stock gear, I think e locker is definitely the way to go. If you're gonna regear and be rebuilding the diffs with new bearings and everything anyway, then it's more of a toss up between whether arb or e locker is right for you.

Thanks for the information...definitely some things to think about. The truck is pretty sluggish on hills making it difficult to maintain speed, so regearing is something I am considering. If I do end up going with an air locker, I'll have to decide whether to go with Yukon, ARB, or a different company altogether as well. If this stops being my daily, I might consider a mechanical locker, but being able to select whether it's on or off is a nice feature to have.

Those Stealth 6's look beautiful man!

I remember reading through the accident some time ago and it's good to see you made out well and got another 4Runner. Looking forward to seeing where this thing goes for sure.

Thanks Matt! Vin at [MENTION=88453]SCSPerformance[/MENTION] did a fantastic job! While it was a bummer about the last one, the new 4Runner has been a treat to work on, and it is definitely better overall! After the accident, I didn't even think about getting a different kind of car.
 
Man, you're all business. When you do a project you do it right.

I get frustrated and cut corners all too often so I admire the
patient, concentrated effort you've put into this.

Very nice T4R! I love the clean simplicity of it. Looks amazing.
 
Man, you're all business. When you do a project you do it right.

I get frustrated and cut corners all too often so I admire the
patient, concentrated effort you've put into this.

Very nice T4R! I love the clean simplicity of it. Looks amazing.

Thanks for that James! I'm glad that the effort I am putting into this one compared to the last is showing. From your avatar, it looks like you have a CBI front bumper...what are your plans with it?
 
November 12th, 2017

HID Halo Wiring

Parts List:
- Panamera LED Projector Shroud

I've been meaning to wire the halos from my projector retrofit for some time, but did not know how I wanted to do it. After some thought, I figured the cleanest way to wire them would be through the OEM fog light harness. Since I don't have fog lights anymore, the harness was just waiting to be used again. Before I added the crimped wires to the new plugs, I tested them out on a power supply I built in college. I checked both the orange and white colors, but went with white in the end (I can always change it in the future...maybe a SPDT switch in the engine bay to change the colors). :p

I cut off the OEM connectors from the harness and put my own on there. I also added a connector to the halo wires, and ran them down to the fog connectors. Overall a very easy addition, and it's nice to just use the fog light switch to turn them off and on. Now I just need to decide if I want to power them independently of the headlights.

Lights with the power supply
https://flic.kr/p/ZpyUk7

https://flic.kr/p/ZpyUtU

Some wiring
https://flic.kr/p/ZpyX9d

https://flic.kr/p/21rYdnm

With headlights on!
https://flic.kr/p/ZpyXpU
 
Last edited:
Thanks for that James! I'm glad that the effort I am putting into this one compared to the last is showing. From your avatar, it looks like you have a CBI front bumper...what are your plans with it?

My project took a different turn and I had to focus on
maintenance and repair more than off-road but my plans
were to get it equipped with additional lighting and a winch.

I would like to add the exact equipment you've added to yours.
 
Last edited:
November 19th, 2017

Auxiliary Electrical Hookup

Parts List:
- Blue Sea Systems 12 Circuit Fuse Block
- Blue Sea 100A Circuit Breaker
- Blue Sea 100A Busbar
- Ripcord's Fuse Block Bracket
- Delphi Weather Pack 22 Position Bulkhead Connector

Tools Used:
- 2" & 1.5" Hole Saw
- Lots of Electrical Tools
- Socket Wrenches
- Screwdrivers

I finally had a chance to complete the wiring for my auxiliary fuse block. I bought the bulkhead connector for my old rig, but gave in to just poking wires through the stock firewall grommet since it was easier. After removing all of the accessories from the other car, and seeing how messy it was, I decided to finally use the connector. I wanted to use this connector over others since it is easy to add new wires in, waterproof with the wires or plugs in each hole, and it is a super clean look compared to wires spewing out of the grommet.

I really liked [MENTION=57546]4-Ripcord[/MENTION]'s placement of the connector, so I decided to mimic it. I tried to cut the 2" hole without taking the hood off, but there wasn't enough room...so off it went! Cutting the firewall would have gone faster if I had a sharp hole saw, but it took about 5 minutes with off-and-on cutting. Once that was done, I had to drill 2 more holes for the screws to pass through, and that was it! I used an add-a-fuse on the ignition part of the in-cab fuse block to power the relay for the system. I crimped that wire and the 2 from my dash cam, and plugged them in to the male-side of the connector. I crimped some more wires for the female side and routed them with split loom to the aux fuse block. Once that was all done, I connected the male and female housings together and called it good.

All of the hard work was done a few months ago, so I only had to create one more wire to give the main relay powers. I made a short one from the busbar to the relay from some 4ga harness I had from the previous rig. With all of the wires where they should be, it was time to start the car up. I turned the key to the on position, and the dashcam powered up properly! I'm very excited to start using the bulkhead connector to pass the wires through the firewall. It makes it very modular and relatively easy (just need to pull off that plastic piece by the windshield to access the connector).

I'll have to put my wiring diagram up here for future reference (and if someone else wanted to use it too). I also need to add some sort of grommet to the 1.5" hole where the wires come into the engine bay. For now, the split loom will be fine, but it will rub over time.

No hood
https://flic.kr/p/21HYCXB

Hole through the firewall
https://flic.kr/p/21D2uu3

A few wires from the connector
https://flic.kr/p/DA94fE

The fuseblock
https://flic.kr/p/Znyq7X

https://flic.kr/p/DA94rb

https://flic.kr/p/21D9aEL
 
Last edited:
November 25th, 2017

CB Radio Install

Parts List:
- Uniden Pro520XL
- FireStik 3 ft Antenna
- FireStik Heavy-Duty Spring
- 18' Coax Cable

One of the last parts I have from the original build is the Uniden CB radio. While I don't use it very often on the trail since not many of my friends have it...it is still nice to have. I liked where I put it on the last rig, so I decided to not change anything about it. I might make a metal version of the bracket, but I had some extra plywood that will work great for the time being. I used a Dremel to cut the back wall of the plastic that holds the ashtray in. I made sure the radio slid through before I screwed the wood in place. I put the CB bracket over the wood and fastened that into place as well.

I always had trouble with removing the center portion of the dash on the old rig since the CB was hardwired in place. Instead of dealing with that, I decided to add a connector behind the panel, but before the bulkhead connector. This will definitely alleviate some headache when working in the dash again.

The last thing I wanted to get to was adding the wires for the KC to the bulkhead. I've had them sitting in the engine bay for a few months, so they needed to be cleaned up. I cut them to length and added the crimps for the connector. One of these days the KCs will get wired to a switch and be working again.

Cutting the panel
https://flic.kr/p/ZyPJLV

https://flic.kr/p/ZPQoAw

https://flic.kr/p/ZyPKfk

Running the coax
https://flic.kr/p/ZyPKLF

Placed in the dash
https://flic.kr/p/ZyPLnF
 

Members online

Forum statistics

Threads
278,312
Messages
3,554,084
Members
248,016
Latest member
Advally Service

Trending content

Back
Top