Joneseyyy's Shrockworks install by Ducmonsta-pic heavy!

Very nice 4R Joneseyyy! I think my truck is going in your direction, the baja utility rack and gobi ladder is on my list :)

I just got my SW bumper installed today and I also love the bumper, can't stop smiling when I look at it. The only thing that bugs me is the gap between the body n the bumper starting from the wheel well. I measured mine to be 3/4" apart, n then as you move further along it's 1". I'll post pics as soon as I can. Is yours the same? anyone else with the SW bumper want to chime in please? I was looking at other threads, but couldn't clearly see the gap due to the angle of the pics. Is there a reason for so much space in between? I'm assuming the install on mine is correct, if not, ####! Sorry if this is considered hijacking your thread (well Ducs actually), I didn't want to start another similar thread.

Very nice though!

Edit: just realized u have a baja rack, but not the utility one, was thinking of Brock's when I was typing. But still nice looking 4R :)
 
Last edited:
The gap I was talking about...

http://i1173.photobucket.com/albums/r584/whodatngu/2012-03-07154018.jpg
2012-03-07154018.jpg~original


Further away
2012-03-07153949.jpg~original
 
Last edited:
I don't have that much gap...maybe 1/8". There is a reason to have a gap though. Unlike the plastic OEM bumper, the SW bumper has no 'give' to it, so if you experience any frame flex offroading you risk having the bumper hit the fender.

I've never seen this actually happen, though. Others may have more experience and chime in.
 
It's a company called BendPak. Mohawk is another one. It's ok for being portable. They're usually about $1800 or so. Not a bad deal for what it is.
 
the gap between the body n the bumper starting from the wheel well. I measured mine to be 3/4" apart, n then as you move further along it's 1".

You do need a gap. More like 1/2"- 5/8". The frame will flex and the bumper will contact the body with anything less.

Apples to oranges but my 3rd gen rear bumper has dimpled my rear quarter panels with a 5/8" gap.

1/8" is no where enough of a gap!
(unless you aren't going to wheel it)
Even at that, I would think that it would be bouncing off it on road too.
 
It's a company called BendPak. Mohawk is another one. It's ok for being portable. They're usually about $1800 or so. Not a bad deal for what it is.

Hey Ducmonsta... it's "work" time.. no wifey here to tell you to get off the computer... where are the rest of those installation pics!?!? LOL. :frisky:

Okki
 
It's a company called BendPak. Mohawk is another one. It's ok for being portable. They're usually about $1800 or so. Not a bad deal for what it is.

Thanks. When you get a sec, please email the model number as I could not find them on the web sites. No hurry though.
 
Looks great!!! The Shrockworks bumpers have really really grown on me.

Mind if I ask how long you waited for it?
 
You do need a gap. More like 1/2"- 5/8". The frame will flex and the bumper will contact the body with anything less.

Apples to oranges but my 3rd gen rear bumper has dimpled my rear quarter panels with a 5/8" gap.

1/8" is no where enough of a gap!
(unless you aren't going to wheel it)
Even at that, I would think that it would be bouncing off it on road too.

Thanks, we are going to adjust the bumper down a bit to leave some breathing room.
 
As of this evening, we've adjusted Joneseyyy's bumper to accomodate some wheeling. I neglected to take photos of the "corrected" height. :redbrick:

Oh well. Anyway, to continue on with the installation....

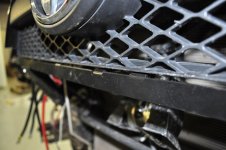
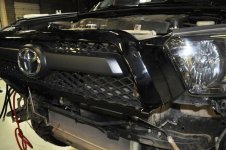
Here is the original factory grill installed. If you've got a satoshi grill mod, you've already or possibly cut out the bottom of the factory grill.
jones29.jpg

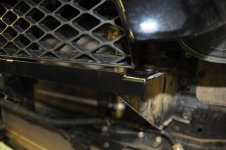
A little closer view. This shows how the Shrockworks piece holds the factory grill. Again, if you've cut this bottom part off for a satoshi grill, you'll skip this step.
jones28.jpg

A little further out.
jones27.jpg
 

Attachments

  • jones29.jpg
    jones29.jpg
    75.3 KB · Views: 1,799
  • jones28.jpg
    jones28.jpg
    64.4 KB · Views: 1,744
  • jones27.jpg
    jones27.jpg
    99.3 KB · Views: 1,752
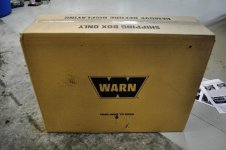
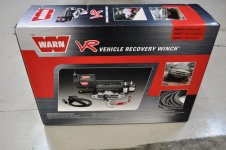
A keen eye may have spotted this earlier. Joneseyyy's weapon of choice!
jones12.jpg

unboxed!
jones13.jpg

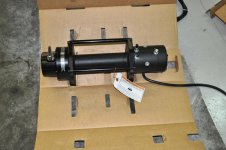
unpackaged!
jones36.jpg

There is no rope there because we've got to install the synthetic line into the WARN VR10000s!

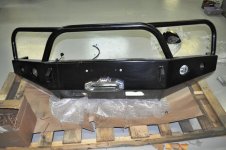
And then....prep the bumper.
 

Attachments

  • jones12.jpg
    jones12.jpg
    69.7 KB · Views: 1,679
  • jones13.jpg
    jones13.jpg
    83 KB · Views: 1,680
  • jones36.jpg
    jones36.jpg
    82 KB · Views: 1,750
Last edited:
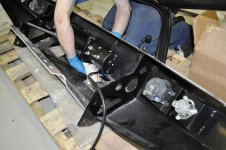
Let's get this bumper set up for the winch.
jones37.jpg

After the winch is partially mounted...

You'll see the relocation of the remote plug near the pass side headlight.
jones38.jpg
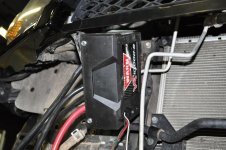
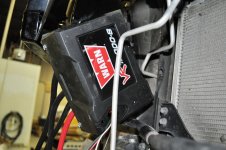
So, Shrockworks requires a seperately mounted solenoid. We found a perfect place for the solenoid to go. Tucked out of the way and close enough for the wiring to reach the drum.

jones32.jpg

jones33.jpg

Close up view from driver's side
jones34.jpg

Passenger side view to show the mounting point of the solenoid
jones35.jpg
 

Attachments

  • jones37.jpg
    jones37.jpg
    100.3 KB · Views: 2,471
  • jones38.jpg
    jones38.jpg
    85.8 KB · Views: 1,923
  • jones32.jpg
    jones32.jpg
    104.4 KB · Views: 1,694
  • jones33.jpg
    jones33.jpg
    120.6 KB · Views: 1,704
  • jones34.jpg
    jones34.jpg
    101.9 KB · Views: 1,712
  • jones35.jpg
    jones35.jpg
    102.8 KB · Views: 1,683
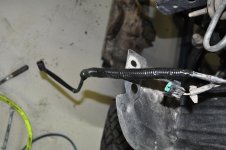
I didn't get into the lighting system into detail here. Shrockworks uses the factory fog light and gives you a hella turn signal. It's a high quality unit and it's the same one used in some of the ARB bumpers. Here is a pic of the wiring after we soldered on the connector.
The connector is very high quality. It has spades in it to connect to the hella light. The rubber boot is nicely insulated. You'll see this at the bottom of the pic.
We've wrapped everything up in some loom and a light touch of electrical tape to keep the loom from "splitting".
jones39.jpg
 

Attachments

  • jones39.jpg
    jones39.jpg
    66.8 KB · Views: 1,702
We opted to keep the Hella lights set to factory specs. I noticed Joneseyyy kept his DRLs on when he brought the truck in. I told my tech that we should keep it so that he could use the Hellas the same way.
Not that big of a deal, but the Hellas are only a two wire system. If you wanted to wire them up separately/independently, this was the time to do it.

So, bottom line is, these ended up as if they came from Toyota that way.
 
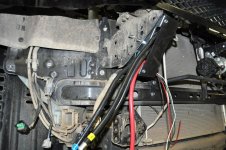
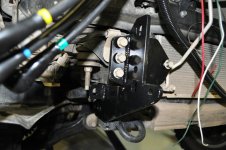
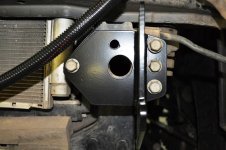
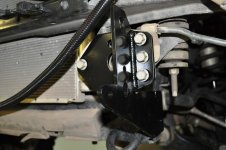
Let's get a look at how the Shrockworks bumper brackets tie into the frame.
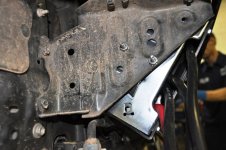
Here you'll see the factory locations of where the original aluminum tie bar went. You'll also notice where the additional bracing is to tie into the Toyota frame below it.

passenger side
jones40.jpg

driver's side
jones42.jpg

a little closer to the driver's side to see the "bottom" bracket tie in
jones41.jpg
 

Attachments

  • jones40.jpg
    jones40.jpg
    91.3 KB · Views: 1,714
  • jones41.jpg
    jones41.jpg
    77.1 KB · Views: 1,747
  • jones42.jpg
    jones42.jpg
    85.6 KB · Views: 1,680
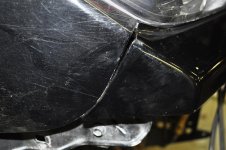
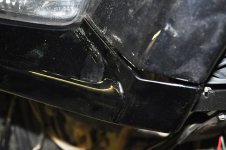
The headlight trim that came with the bumper is powder coated the same as the bumper. Joneseyyy had them painted at a local body shop ($80?). IMO, the only way to do it. The black may be close enough to Toyota 202, but it blends in much better than the powder coat did. I would highly recommend doing this even if your truck is black.
jones43.jpg

This piece allowed very little room for adjustment. There were only 2 ways they could be moved. Up or down. Shrockworks came very close to perfectly matching all of the angles. I'm sure this was a complicated piece to manufacture. I'm overall impressed with how close Shrockworks got it.

It would be very difficult for someone to manage to get this perfectly. Regardless of how you shimmed it, wiggled it, or modified it...this was as close as you get it.
From the pics, it may appear to be "off". But, remember, I am taking photos of this up close.
jones44.jpg
 

Attachments

  • jones43.jpg
    jones43.jpg
    97.3 KB · Views: 1,721
  • jones44.jpg
    jones44.jpg
    76.2 KB · Views: 1,646

Members online

No members online now.

Forum statistics

Threads
278,317
Messages
3,554,129
Members
248,016
Latest member
Advally Service

Trending content

Back
Top