K9 HAULR's Build Thread...

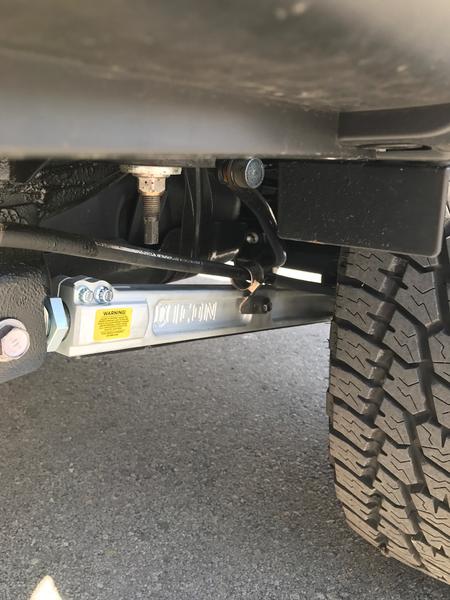
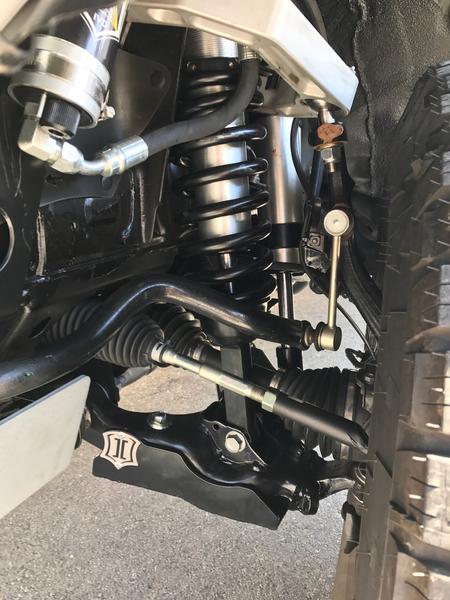
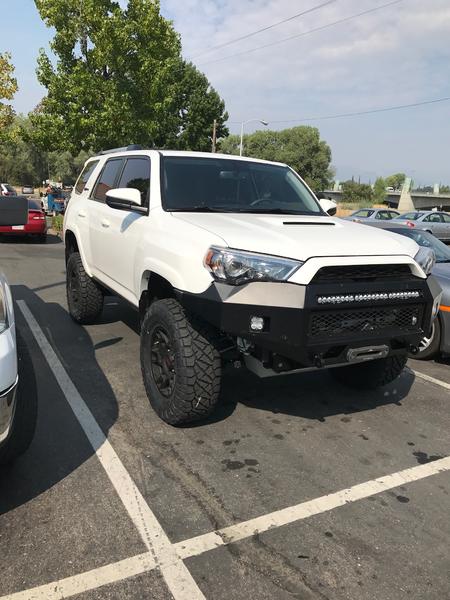
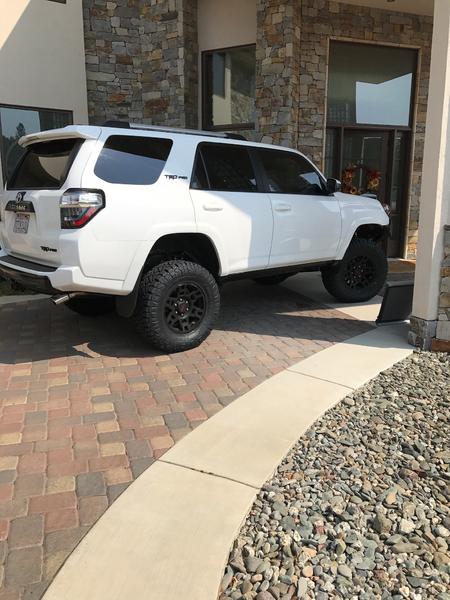
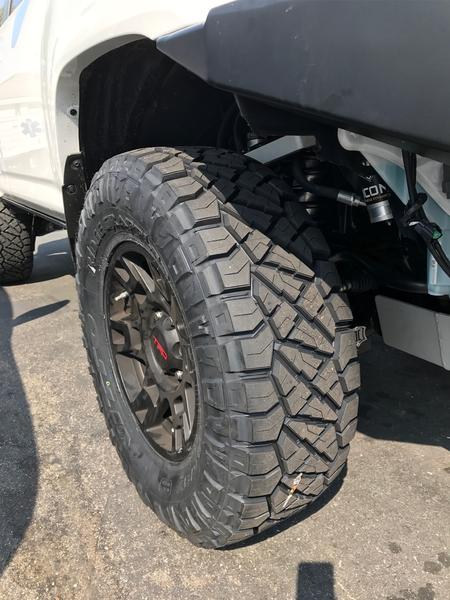
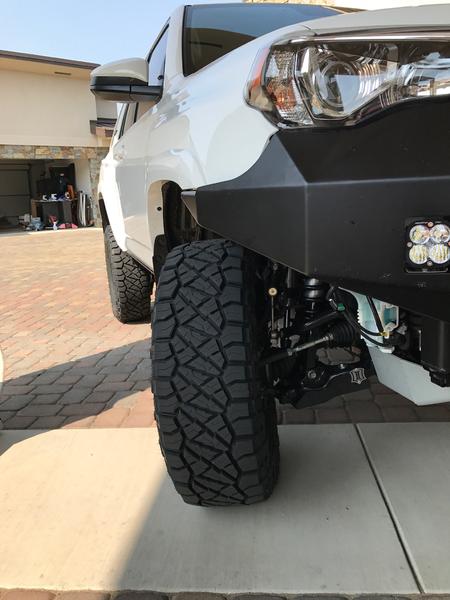
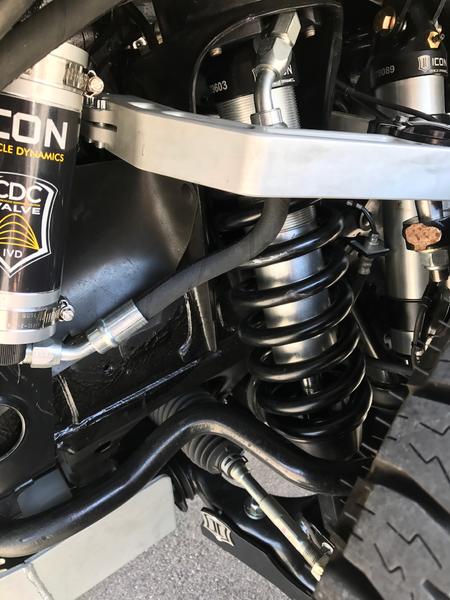
Picked up my truck from the shop having installed the Icon Stage 7 (billet) lift with the dual shocks upfront. Love the Omega dual bypass shocks - an amazing ride, that I look forward to running off-road. She's sitting with a substantial rake, as I purchased the HD springs anticipating the weight of the Shrockworks rear bumper/tire carrier (order, and due mid Oct). Still, feels great driving and looking forward to adding the 285's.

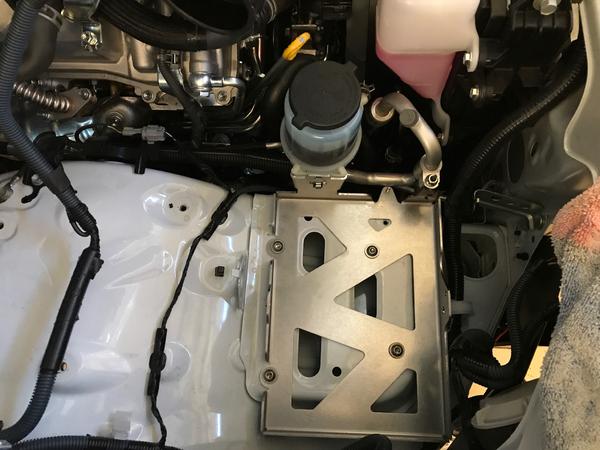
Word of warning - if planning to add the dual shock kit (Icon's S2), relocate your washer bottle first. Icon plans to use the washer bottle spot for your remote reservoir.
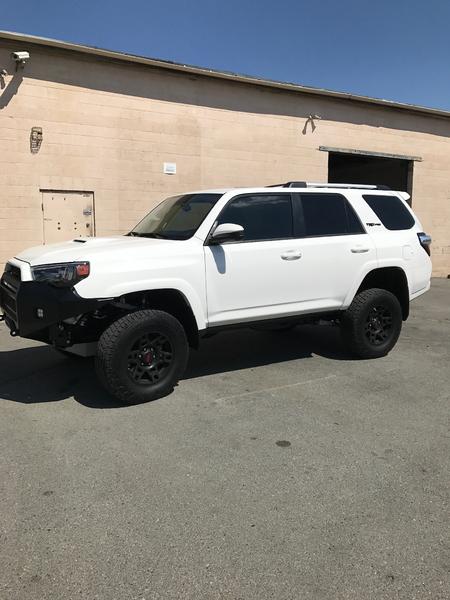
k9+haulr-albums-4runner-picture47747-sitting-w-substantial-rake-hoping-shrockworks-rear-bumper-tire-carrier-helps-little.jpg

k9+haulr-albums-4runner-picture47746-icon-stage-7-billet-w-dual-front-shocks.jpg

k9+haulr-albums-4runner-picture47744-icon-stage-7-billet.jpg

k9+haulr-albums-4runner-picture47743-icon-stage-7-billet-w-dual-front-shocks.jpg


Just got the notice from RCI that my skids will arrive on Friday. Can't wait to get those on next and take another shot at the winch control box relocation (or slight bend/shove to my power steering line).
 
Last edited:
Lots of progress...

Got my Pelfreybilt front bumper back from the powder coater and installed. The black looks much better, IMHO (didn't help the white didn't match). Warn 10-s Plat winch and Baja LED's mounted, but wiring still in progress - both the basics and trying to decide if I'll go Bussman box or Switch Pro. Also did some serious trimming of my fender liners.

Lastly, the final pieces of my Icon lift arrived and got the "sniff of approval" from one of my pups, so off to the installer this coming Monday. Anyone looking for a complete TRD Pro suspension with less than 800 miles on it? Make me an offer...

Awesome build! Noticed that you had a floor jack in one of the pics. Did you use it to position the bumper onto the truck? Did you install it yourself? My Pelfreybilt will be coming soon and I need to figure out if I require a few hands for the install. Thanks much!
 
Awesome build! Noticed that you had a floor jack in one of the pics. Did you use it to position the bumper onto the truck? Did you install it yourself? My Pelfreybilt will be coming soon and I need to figure out if I require a few hands for the install. Thanks much!

Thanks! I used 2 other people to help get the bumper on the truck and then the floor jack to help "fine tune" the position. Might have been doable with just the bumper, but after the winch and lights were installed, it was well over 100lbs.
 
Installed my 285/70 Nitto Ridge Grapplers - love the ride and look so far.

k9+haulr-albums-4runner-picture47856-img-0514.jpg

k9+haulr-albums-4runner-picture47855-img-0516.jpg

k9+haulr-albums-4runner-picture47854-img-0479.jpg

k9+haulr-albums-4runner-picture47857-img-0517.jpg


Thought about the Duratracs, but these seems to have a better reputation for sidewall strength and wear. Can't wait to get my Hutchinson wheels and sliders/rear bumper from Shrockworks, but the time will allow me to straighten out my electrical upgrade plans.
 
Gave "Frosty" some belly protection, because I was told the first time I ran the Rubicon in my almost stock FJ40, "...you can't surf rocks, without a good surf board...." :surfer:

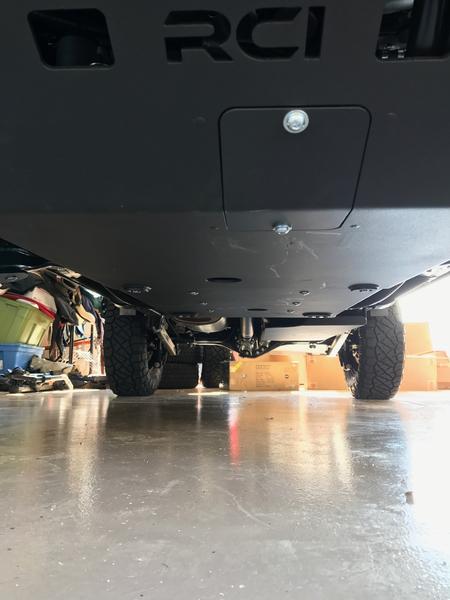
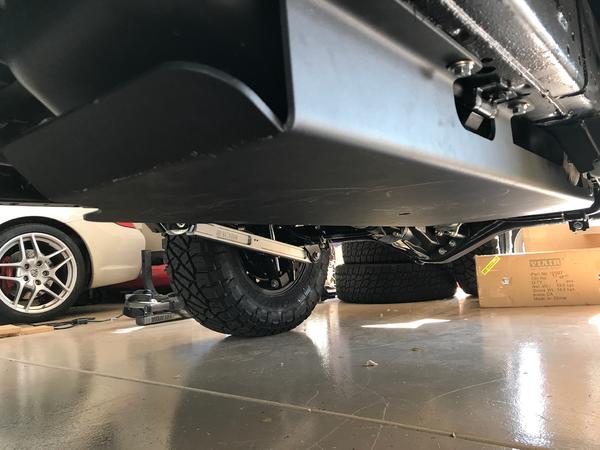
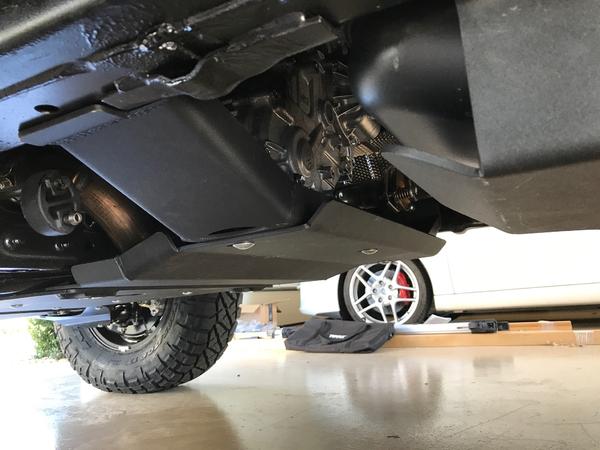
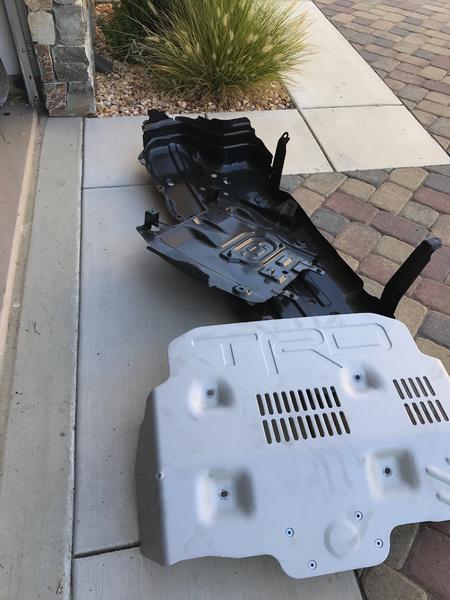
RCI skid plates - great quality and relatively easy to install. The fuel tank plate was the most difficult. Partly due to it's size and weight, and partly due to the ridiculously tight access to the bolts that attach the plate to the hanger brackets. I ended up taking my plate down and getting my front passenger side bolt started/snug before repeating the rest of the install process. Time consuming, but I was determined to have the carriage bolt heads facing out.

k9+haulr-albums-4runner-picture47903-rci-skid-plates-installed.jpg

k9+haulr-albums-4runner-picture47904-rci-gas-tank-skid-plate.jpg

k9+haulr-albums-4runner-picture47909-rci-skid-plates.jpg

k9+haulr-albums-4runner-picture47906-stock-protection-removed.jpg


Still working on my aux wiring and dual battery install. Thinking I'm going to use the Switch Pro as a trigger for a traditional Bussman box to minimize the amount of wires passing thru the firewall and avoid overloading the Switch Pro. Waiting for parts, so I have time to ponder this some more. I *think* I have the following possible circuits available to tap into from the stock fuse boxes:

Underhood:
#9 for Trailer brake lights (30amp)
#25 for Auto Running Boards (30amp)
#26 for Trailer stop/turn lights (30amp)
#42(10amp), #43(15amp), #44(25amp) —spares
#47 for smart key
#49 for trailerbrake controller (30amp)

In cab:
#7 for moonroof (25amp)
#26 for KDSS (10amp)
#27 for Trailer backup lights (10amp)

Probably work on bending/nudging my P/S line out of the way for my winch control box tomorrow...or ????
 
Last edited:
Icon Stage 7 Lift

Nice work on the lift. Curious to know why the rake is so dramatic. I read you put 3" coil springs in the back. Is that why? Did you have the ability to adjust the front shocks to add lift up front?
How are those ICON billet rear trailing arms compared to tubular from Califab, Rokeman, ICON, Total Chaos or Toytech? Califab is in Sacramento. Would have been easy for you to pick up.
Does the secondary shock make a big difference in the ride, in your opinion?
Lift looks great. This is my goal, using the same ICON Shocks and various manufacturers of the trailing arms and UCA.

BTW, I grew up in Redding and Lake Shasta area. Still drive through once in a while on our way to Bend, OR for Christmas. I was in Tahoe over Labor Day weekend. Stayed at Northstar and walked through Kings Beach area one evening. Passed through Incline Village a few times, once on our way to Sandy Bay and again as we left Tahoe.
Dave in So Cal.
 
[MENTION=115572]DesertCanyons[/MENTION] - The lift was purchased as a kit, and I had the option of going with the tubular or billet UCA's and rear trailing arms. Honestly, as an engineer, I can't justify the difference in cost from a structural standpoint, but there's undeniable added strength, not to mention a little "bling," in using billet. Seeing them in person, and the billet stuff is way overkill - VERY beefy. I like most of the tubular stuff out there, and if building on a tight budget, I'd go that route in a heartbeat.

The secondary shock seems to make a difference for bigger bumps in my Raptor - no off road experience in "Frosty" yet, as I'm still working on the "base build" and have things in "temporary drive-able mode" - but not ready for off road, yet. I've rushed things in the past with my old FJ40 and FJ80 and was sorry for it in the long run. This time, patience & planning will provide the desired final outcome.

Lastly, the rake...I knew I'd sit with an extreme rake at first. As mentioned, I have a Shrockworks rear bumper and swing away tire carrier on order (already had the Pelfreybilt front bumper and winch mounted when the lift went on). I'll be placing my larger than stock spare back there and also have a Gobi roof rack on order, so a ladder will be mounted there as well. I figure that's over 200lbs additional weight hanging off the back end, which should drop the back end (reduce the rake) to a desirable amount. I personally like a slight rake, so the truck sits level when loaded up...used OME "J" springs on my old FJ80 to get a similar look/stance. YMMV.

Love the Redding area and can't complain about splitting time down in Incline Village.

Cleaned up the garage today and took a slight break from work. Up to the wheel shop tomorrow to see if they will mount/balance my beadlocks and get a little help on the P/S line.
 
Last edited:
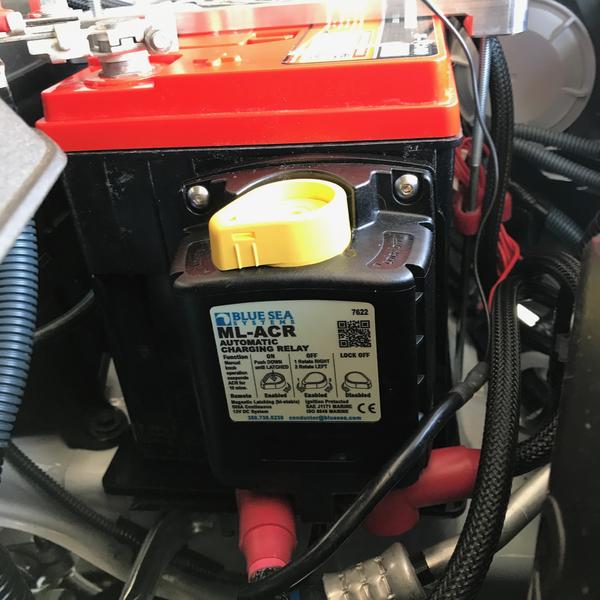
ICON Stage 7 lift and billet arms

Thanks for the detailed reply. That helps me select some of the features for my lift.
Yes, the billet trailing arms are more than needed. The trailing arms for the rear axle only work in tension and once in a rare while in bending when you scrape it over a rock. For the latter the attachment point seems to be the weak link. Several guards are available for protecting the front anchor point.
I have the KDSS which makes adding a secondary shock difficult. I realized that after I asked you about them. I need to look at the Dirt King LCA to see if a shock mount can be added to it.
I like what you say about the rake. When you load the vehicle up with gear the rake may go away.
It's the ladder that's going to weigh down your truck. That's the big one. :cheers:
Thanks again,
Dave
 
Finally picked up a GM crimping tool for weatherpack connectors - what a difference the correct tool for the job makes! I've struggled with getting the crimp just right for over a dozen years - this tool was quick, easy, and provided factory clean crimps. Got my driving lights hooked up and aimed.

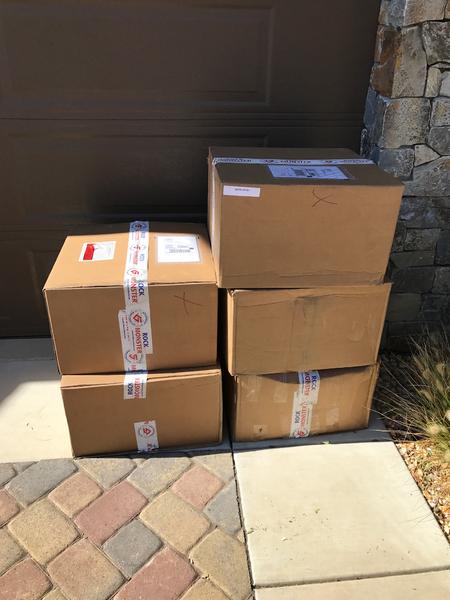
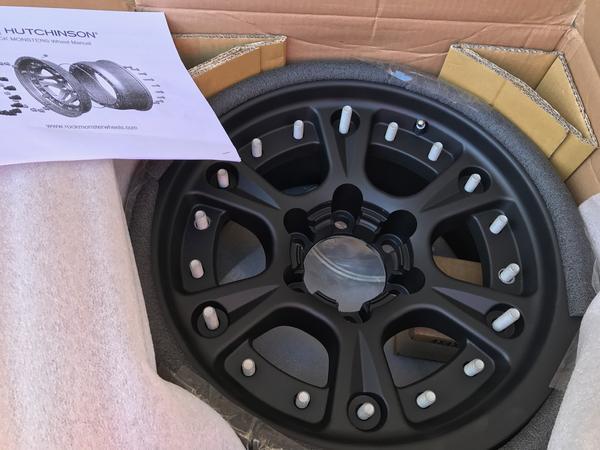
Also, UPS brought "Frosty" the wheels I've been waiting for (Hutchinson Rockmonsters). Hoping the local shop will mount & balance since they're DOT approved. If not - off to 4Wheel Parts next time I head to Tahoe.

k9+haulr-albums-4runner-picture48134-img-0057.jpg

k9+haulr-albums-4runner-picture48135-img-0058.jpg


Build is getting closer and closer to trail worthy :-)
 
Last edited:
did you ever sell the trd bumper? Nice rig btw!

Front bumper did sell. Still have my TRD skid plate, and will now have the stock Nitto 265's and 17" TRD Pro rims. Next coming off the truck should be the rear bumper, and then the last item should be the roof rack.
 
Last edited:
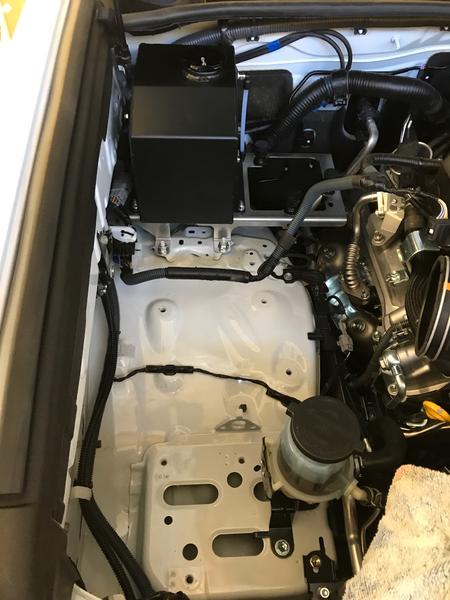
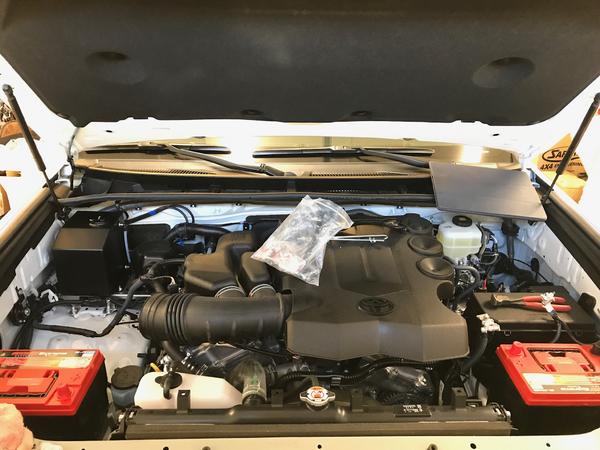
Lots of work today…got to work under the hood. Started off by relocating my washer bottle, using the dual battery tray from Shrockworks. This also provided a relocation for the 2nd air pump. I actually ended up using a combination of the Off Grid kit and the Shrockworks kit, as I liked the replacement tray and battery isolator/mount on the Off-Grid kit, but prefer the location of the 2nd battery the Shrockworks kit provides.

The install was pretty straight forward – on paper. In reality, there were a couple spots I wasn’t able to install the kit as designed/supplied. Mainly, I couldn’t get the rear nut that holds the new washer bottle down closest to the fender wall started/tightened (figured 3 was good enough) and had a heck of a time with the upper reinforcement bolt. All said and done – it looks nice and clean, and would have been even easier if I pulled the air box before I started.

k9-haulr-albums-building-and-modifying-frosty-the-4runner-picture48370-washer-bottle-gone.jpg


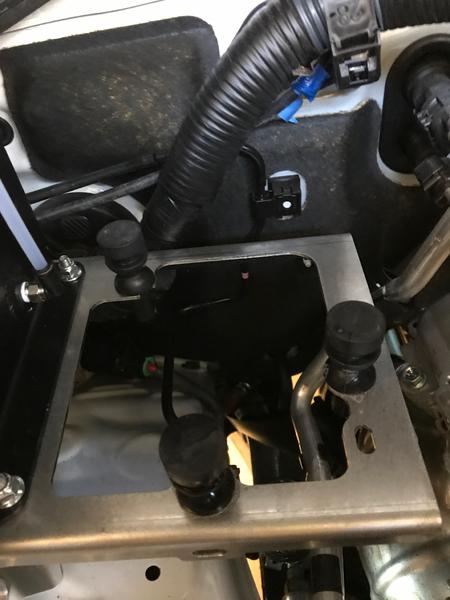
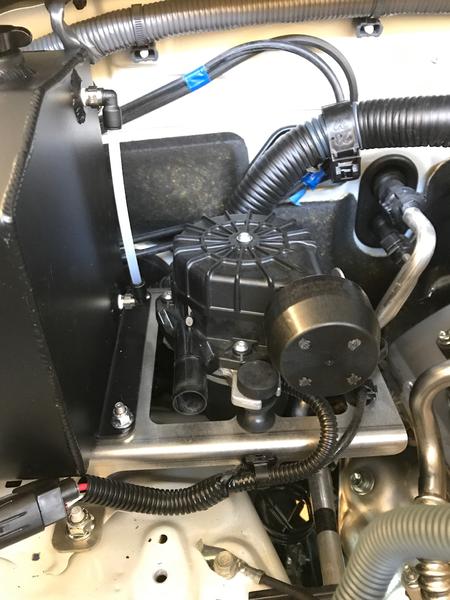
The air pump relocation seemed easy, but got intimidating really fast, once I had to start cutting couplers & hoses – not to mention getting everything lined up again. Once completed, I went ahead and started the dual battery install, since I figured the air box would just get in the way of routing wires. The Shrockworks kit again is pretty complete and easy to work with – providing a new power steering reservoir mount and tie off for an adjacent AC line.

k9+haulr-albums-4runner-picture48372-relocating-washer-bottle-air-pump.jpg

k9+haulr-albums-4runner-picture48373-new-air-pump-location-isolators-installed.jpg

k9+haulr-albums-4runner-picture48374-air-pump-moved.jpg

k9+haulr-albums-4runner-picture48375-modifying-hose-routing-new-air-pump-location.jpg

k9+haulr-albums-4runner-picture48376-re-routing-air-hose.jpg

k9+haulr-albums-4runner-picture48377-re-routing-air-hose.jpg

k9+haulr-albums-4runner-picture48378-new-aux-battery-tray.jpg


Didn’t finish everything today, but got a good start. Next, I’m hoping to complete the dual battery install and get the Switch Pro installed/ready for aux lighting.

k9+haulr-albums-4runner-picture48379-test-fitting-2-new-group-35-batteries.jpg
 
Last edited:
Nice, just did the same install a couple weeks ago. For the back corner washer reservoir bolt I used a wobble head on an extension and taped the nut to it so I could lower it in to position.

For the little support bracket that mounts to the fender, i tightened the bracket first before in the install. I believe the instructions have you tightening it after which seemed impossible. Then to get the small torx bolt in I unclipped the hood strut (have someone hold the hood) and taped the screw on to the driver with an extension. Went in easily after that.
 
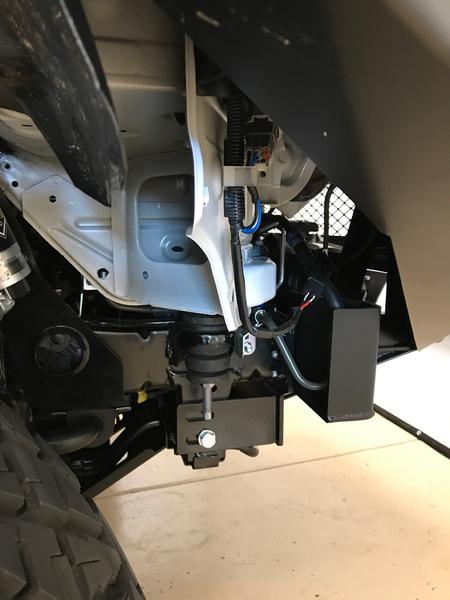
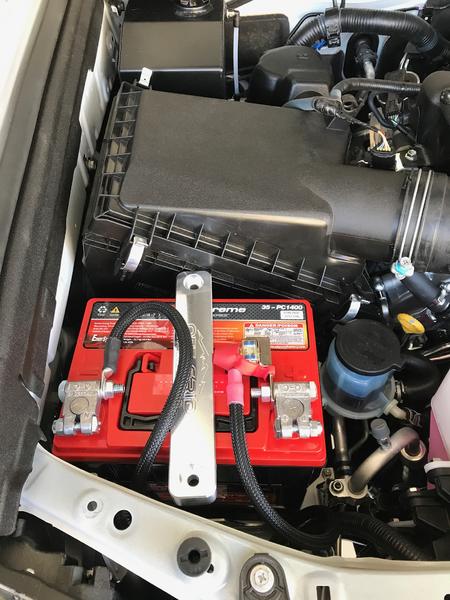
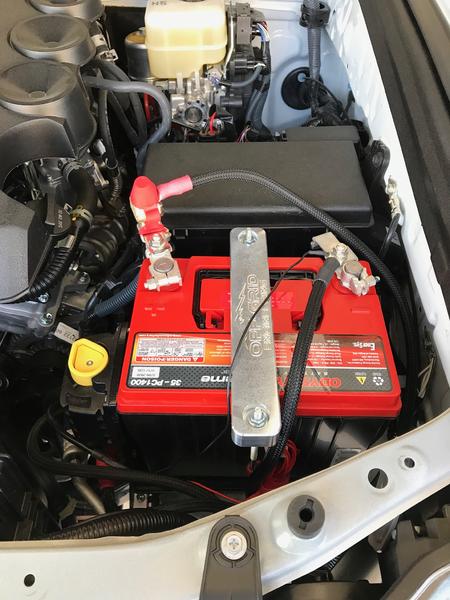
I finished installing my dual battery setup and got my secondary shock reservoir mounted correctly.

Yes, I know the picture shows the hold down bolts are missing on my aux battery - the ones supplied by Shrockworks were too short. I am also going to flip the connections to the other side of the positive terminal to get them away from the hold down cross bar itself.

Also - must have run the wiring 5 times before I was finally happy with it. As a form of additional protection, I added silicon door edging to the edges of the chassis the cables were in contact with.

k9+haulr-albums-4runner-picture48409-aux-battery.jpg

k9+haulr-albums-4runner-picture48410-replacement-main-battery.jpg

k9+haulr-albums-4runner-picture48411-blue-sea-ml-acr.jpg


Re-installed my air-box, hooked everything up, and "Frosty" turned right over :party:

Next on the list - wire in my Switch Pro and begin setting up accessories
 
Last edited:
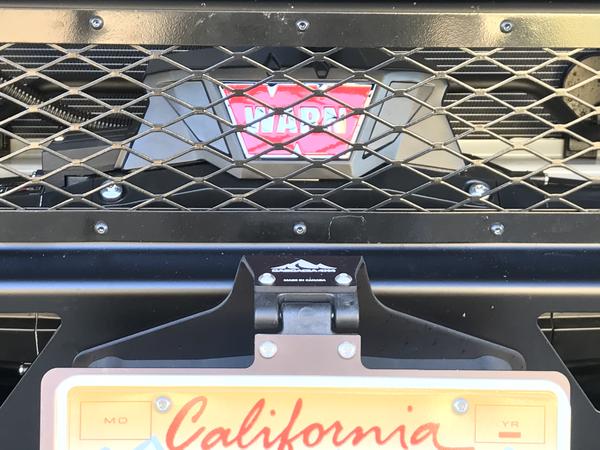
Finally finished getting my winch wired/operational and began getting my switch pro wiring figured out and installed.

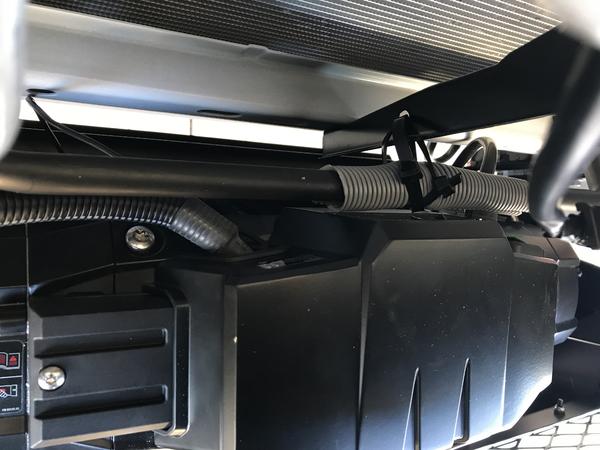
For the winch, I ended up bending the 2 brackets that hold the PS line in front of the radiator. This, in combination with a couple zip ties pulled the line far enough back to allow for the winch control box to be placed on the winch - no relocation with additional wires needed.

k9+haulr-albums-building++modifying+frosty++4runner-picture48553-ps-line-brackets-bent-get-line-out-way-winch-control-box-no-relocation-needed.jpg


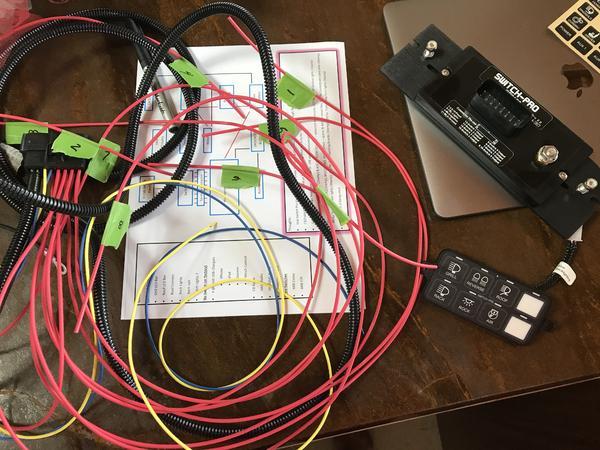
The switch pro, after some research, is much more robust than I originally thought. For higher loads, like my planned 50" LED bar and air compressor, I'll end up using the switch pro output as a trigger for a relay. For lower loads (rock lights, 30" LED bar in grill, etc), I'll let the switch pro do it all.

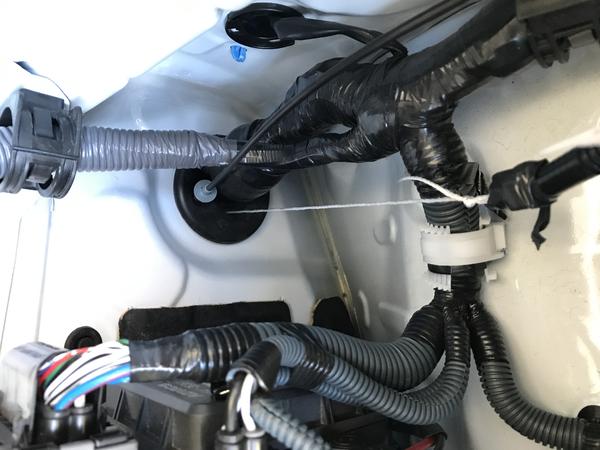
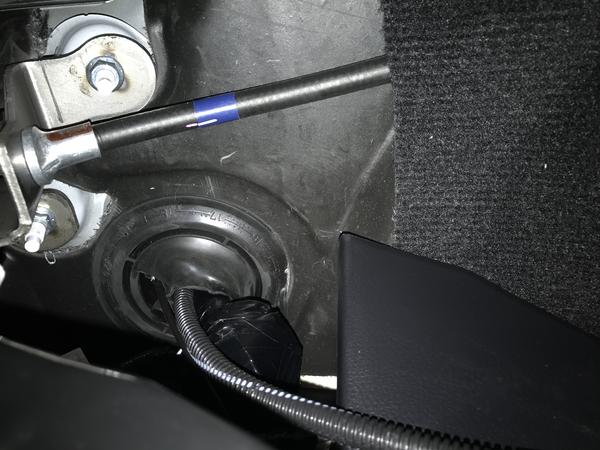
I ended up using an exacto knife to make a small cut in the rubber boot on the drivers side firewall. Then I fished a small piece of string thru using a thin metal rod, and used the string to pull the switch pro control cable into the cab. Still looking at the exact location I'll mount the switch pad, but hope to have it finished by end of the weekend.

k9+haulr-albums-building++modifying+frosty++4runner-picture48558-figuring-out-labeling-mess-wires-switch-pro.jpg

k9+haulr-albums-building++modifying+frosty++4runner-picture48555-fishing-cable-switch-pro-into-cab.jpg

k9+haulr-albums-building++modifying+frosty++4runner-picture48557-fishing-switch-pro-control-cable-into-cab.jpg


k9+haulr-albums-building++modifying+frosty++4runner-picture48554-warn-10s-platinum-finally-operational.jpg
 
The switch pro, after some research, is much more robust than I originally thought. For higher loads, like my planned 50" LED bar and air compressor, I'll end up using the switch pro output as a trigger for a relay. For lower loads (rock lights, 30" LED bar in grill, etc), I'll let the switch pro do it all.


I had initially thought that you would need to use pin 8 and 16 to double load capacity (what they state to do in the instructions for high draw items) for my twin ARB compressor, however after calling Switchpros for some answers on this, they told me with extreme confidence that you only need the compressor to be wired to a single wire. I have had mine on pin 14 (switch 3) for months now with continual use and no issues whatsoever. Also, if you have an ARB compressor I would highly recommend getting the Switchpros quick connect harness for ARB compressors. It's only $16 and saves you from a lot of wiring headache. Just my .02 to maybe save you from wiring up and further relays, etc.
 

Members online

Forum statistics

Threads
278,309
Messages
3,554,075
Members
248,016
Latest member
Advally Service

Trending content

Back
Top