K9 HAULR's Build Thread...

"The switch pro, after some research, is much more robust than I originally thought. For higher loads, like my planned 50" LED bar and air compressor, I'll end up using the switch pro output as a trigger for a relay. For lower loads (rock lights, 30" LED bar in grill, etc), I'll let the switch pro do it all."


I had initially thought that you would need to use pin 8 and 16 to double load capacity (what they state to do in the instructions for high draw items) for my twin ARB compressor, however after calling Switchpros for some answers on this, they told me with extreme confidence that you only need the compressor to be wired to a single wire. I have had mine on pin 14 (switch 3) for months now with continual use and no issues whatsoever. Also, if you have an ARB compressor I would highly recommend getting the Switchpros quick connect harness for ARB compressors. It's only $16 and saves you from a lot of wiring headache. Just my .02 to maybe save you from wiring up and further relays, etc.

So your running your ARB dual compressor straight off the switch pro, without using the relay provided with the ARB unit? This would be nice to avoid any added wiring and keep the install as simple/clean as possible. I did order the ARB connector and was planning to use it.
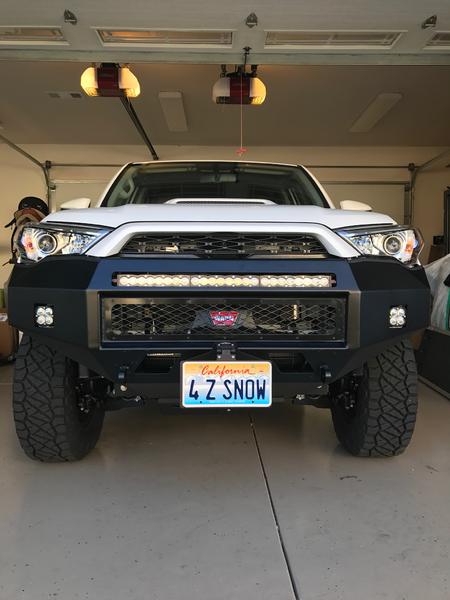
 
Didn't get too much done today other than some basic layout and wire routing...and picked up/installed my personalized license plates. Love the look on the "Protect Lake Tahoe" version, and seemed appropriate since I have a home up there.

k9+haulr-albums-building++modifying+frosty++4runner-picture48562-personalized-plates-arrived.jpg


Lastly - got a call from UPS Freight - my Shrockworks sliders and rear bumper are set for delivery on next Tuesday. Which brings up an interesting possibility for others - anyone thinking about a Shrockworks rear bumper with swing away tire carrier....and not interested in waiting 12-14 weeks? Mine will be available...I was able to secure slot #8 in the pre-order list for the new Pelfreybilt no-cut rear currently in production. Nothing wrong with the Shrockworks unit (actually brand new and uninstalled) - I'm just really happy with my Pelfrey front bumper and figured I'd check their new design. Pickup only, as I'll be eating the shipping cost to me.
 
Last edited:
Finally wrapped up several projects:

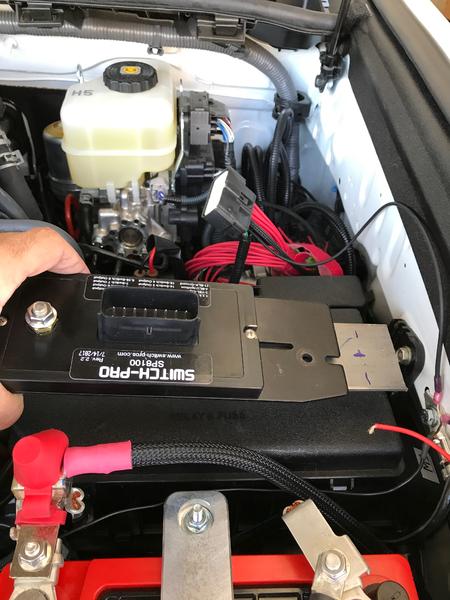
Switch Pro installation completed.

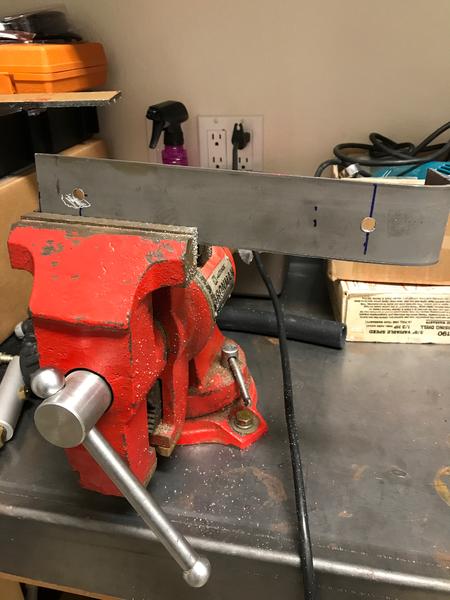
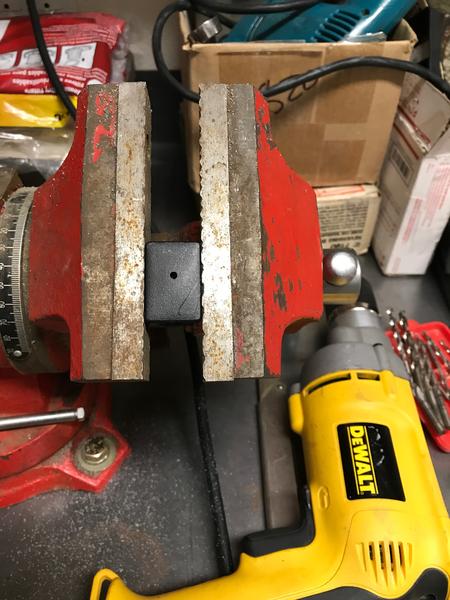
I ended up making a temporary bracket to hold the power module until I could figure something else out. It works for now, but I’m not happy with it (motto of an Engineer working on a design…if it works perfectly well, it must need more features).

k9+haulr-albums-building++modifying+frosty++4runner-picture48612-making-my-temp-bracket.jpg

k9+haulr-albums-building++modifying+frosty++4runner-picture48613-temp-switch-pro-bracket.jpg


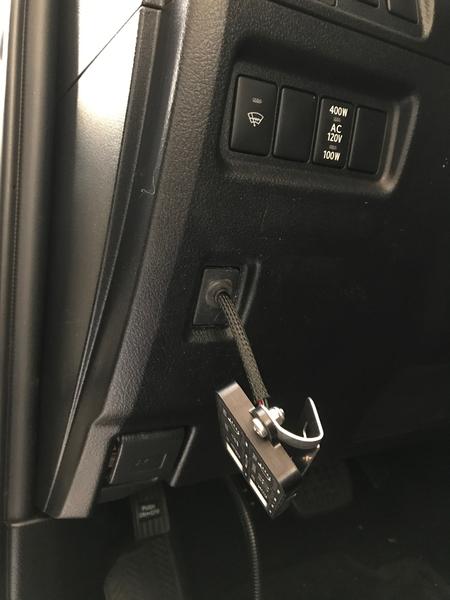
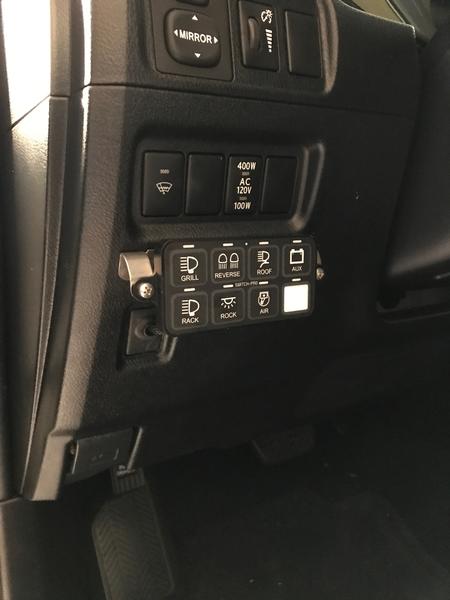
As I tried to find a suitable location for the control panel, I kept coming back to the spot I finally mounted it. I did try to use 2x sided tape to hold the bracket, but didn’t have any luck with the adhesive sticking. So, I ended up removing the switch blank, drilling a hole to pass the control panel wire and then added a grommet to clean up the general appearance. I was really stressed about drilling the 2 holes in my dash to hold the control panel, until I looked over at the yet to be installed snorkel and thought about the hole I’ll be cutting for that. Out came the drill and 2 holes placed in the dash to mount the panel.

k9+haulr-albums-building++modifying+frosty++4runner-picture48614-modifying-switch-blank-pass-my-control-wire.jpg

k9+haulr-albums-building++modifying+frosty++4runner-picture48615-control-wires-fished-thru-dash.jpg

k9+haulr-albums-building++modifying+frosty++4runner-picture48616-control-panel-installed.jpg


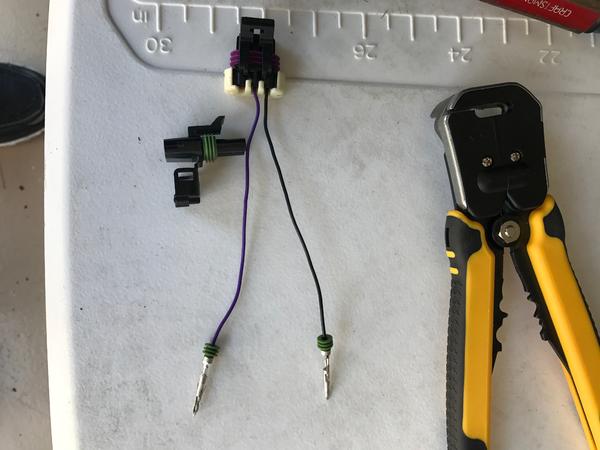
Now that I finally had a method to control accessories, I added/spliced a couple weather-pack connectors in for my grill mounted LED bar and got it all set up.

At this point, it made sense to install my ARB dual compressor since I was working on wiring and placement of things in the area in front of the firewall on the driver’s side. After looking at the manual for the compressor and then looking at the back of the unit, it was obvious the compressor had it’s own internal relay, so I could control it with my Switch Pro without worry. I added appropriate end connectors, routed the main power harness to the aux battery and then modified the included “trigger mechanism” (ie switch harness) to be simpler and easily controlled.

k9+haulr-albums-building++modifying+frosty++4runner-picture48617-modifying-arb-switch-trigger-harness.jpg


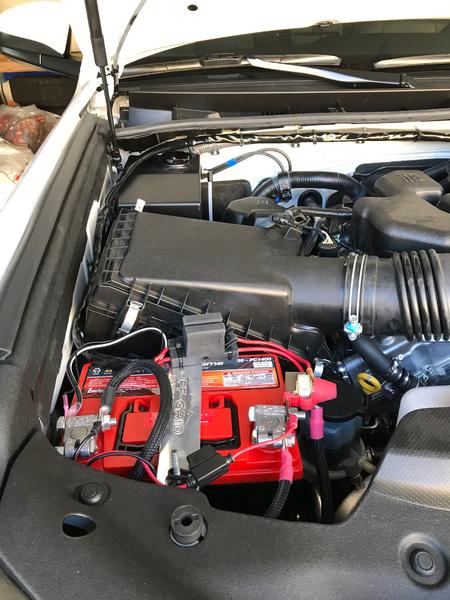
Finally, as a convenience item, I added a CTEK pigtail to both batteries to make topping them off easier. Pardon the green tape – waiting for my wiring labels.

k9+haulr-albums-building++modifying+frosty++4runner-picture48618-drivers-side-switch-pro-arb-dual-compressor.jpg

k9+haulr-albums-building++modifying+frosty++4runner-picture48619-passenger-side-switch-pro-hot-lead-arb-comp-hot-leads.jpg


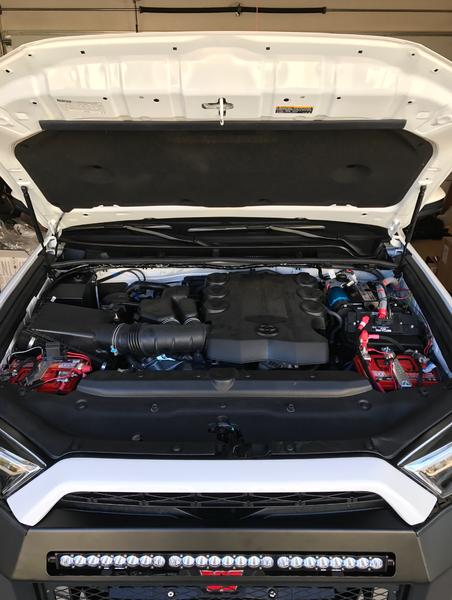
So…Switch Pro up and running, Baja 30” S8 Grill Lights working, and ARB dual compressor installed and running. A productive few days.

k9+haulr-albums-building++modifying+frosty++4runner-picture48620-engine-compartment-work-done-except-re-working-my-switch-pro-bracket.jpg
 
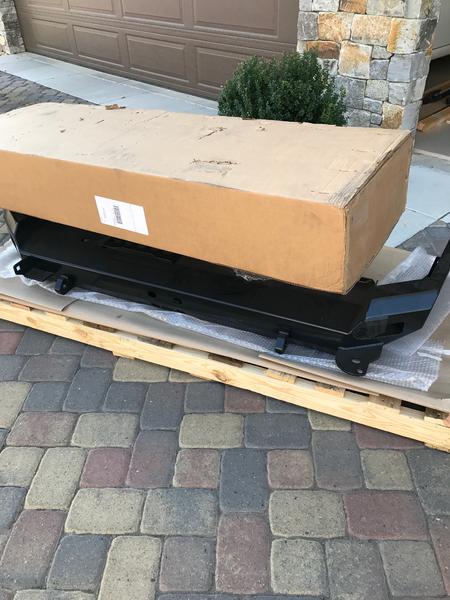
So UPS Freight brought me my much awaited sliders and rear bumper w/swing away tire carrier from Shrockworks. :party:

k9+haulr-albums-building++modifying+frosty++4runner-picture48653-ups-freight-delivery-shrockworks-bumper-sliders.jpg


Since I originally ordered the parts, I've somewhat had a change in heart about the build. As such, the rear bumper is FOR SALE - new and uninstalled. If you had thought about a Shrockworks rear bumper, but didn't want to wait 12 weeks, nor pay shipping and live in Northern CA - contact me. Nothing wrong with the bumper, I'm thinking I'm going to go with the no-cut option Pelfreybilt is working on (unless I just can't sell the Shrockworks).

k9+haulr-albums-building++modifying+frosty++4runner-picture48654-shrockworks-rear-bumper.jpg


I was going to change the sliders to CBI or Pelfreybilts with the kickout, but think I'll run these for a while and see how I like them first. Main thing, is my wife likes the flat step the Shrockworks provide (we had the angled tube Slee sliders on my FJ80 and she hated them for getting in/out).

So, I've already run my fuel tank down in anticipation of the slider install. Time to remove the RCI fuel tank skid and get to work. I also got my email from Gobi indicating my rack will ship this month. Build is getting closer to being done...
 
So UPS Freight brought me my much awaited sliders and rear bumper w/swing away tire carrier from Shrockworks. :party:

k9+haulr-albums-building++modifying+frosty++4runner-picture48653-ups-freight-delivery-shrockworks-bumper-sliders.jpg


Since I originally ordered the parts, I've somewhat had a change in heart about the build. As such, the rear bumper is FOR SALE - new and uninstalled. If you had thought about a Shrockworks rear bumper, but didn't want to wait 12 weeks, nor pay shipping and live in Northern CA - contact me. Nothing wrong with the bumper, I'm thinking I'm going to go with the no-cut option Pelfreybilt is working on (unless I just can't sell the Shrockworks).

k9+haulr-albums-building++modifying+frosty++4runner-picture48654-shrockworks-rear-bumper.jpg


I was going to change the sliders to CBI or Pelfreybilts with the kickout, but think I'll run these for a while and see how I like them first. Main thing, is my wife likes the flat step the Shrockworks provide (we had the angled tube Slee sliders on my FJ80 and she hated them for getting in/out).

So, I've already run my fuel tank down in anticipation of the slider install. Time to remove the RCI fuel tank skid and get to work. I also got my email from Gobi indicating my rack will ship this month. Build is getting closer to being done...

Def keep the sliders. They're high quality and very stout. Their powder coating is top notch as well. Honestly once you get them on the rig I doubt you'd want or see a need to switch sliders. The Shrockworks do what they are meant to do very well. The only thing I hated was the stick nuts.
 
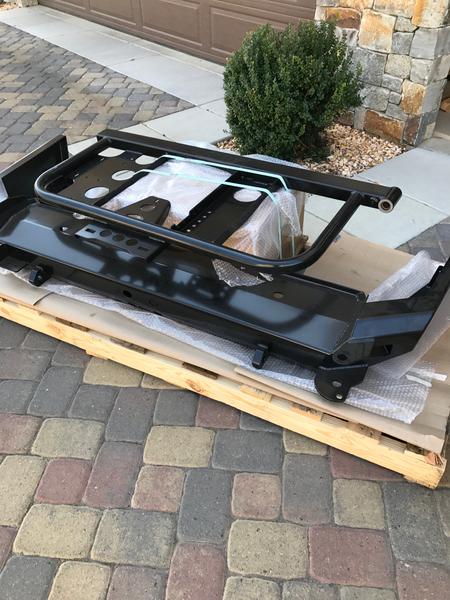
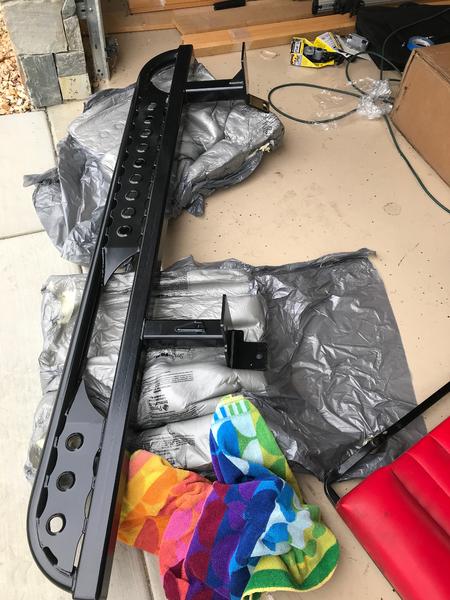
Today’s fun added rocker protection to “Frosty” in the form of Shrockworks sliders. As mentioned, I was in a bit of a dilemma about possibly selling my sliders and rear bumper. But after taking a good look at the other options out there and reading a few reviews, I decided to go ahead and mount the sliders.

k9+haulr-albums-building++modifying+frosty++4runner-picture48661-unboxing-new-sliders.jpg


First off – let me say that I now despise "stick nuts". Fantastic idea to get to hard to reach places, but VERY frustrating at first. Once you get the hang of them, they go much quicker and easier. Next, if you remember to run your tank down (my tank didn’t drop at all when I loosened the strap), you don’t have to remove the fuel tank skid plate. Even with the RCI Metalworks set I have, I could have skipped dropping my skid plate, since the plate has a cut out to get to the bolt that needs to be removed. However, I didn’t realize this until after I had completed the work, so I took an extra 30 minutes for R&R that could have been avoided.

k9+haulr-albums-building++modifying+frosty++4runner-picture48662-fitting.jpg


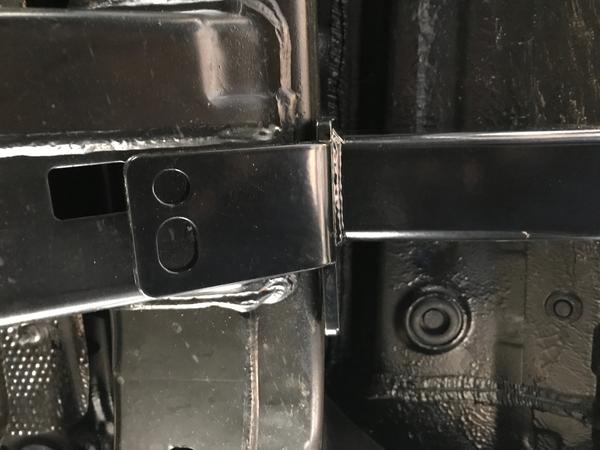
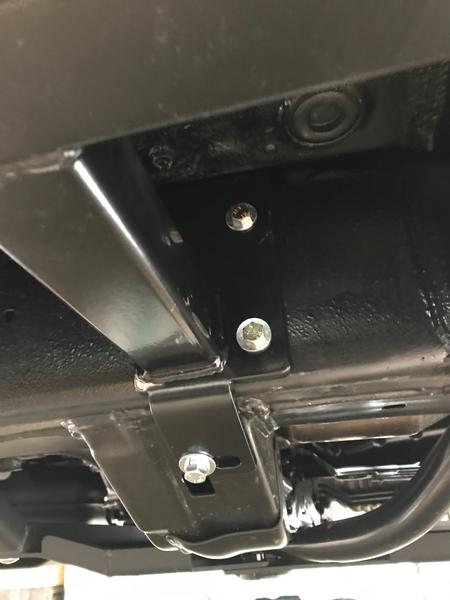
Of note, there is NO hole to line up the passenger side front bracket with the transmission brace as mentioned in their instructions - at least not on my 2017 TRDP. I called and got Mark on the phone. He indicated on some trucks there isn’t a hole, and some it’s there, but not threaded. Regardless, I’d be ok by drilling the 3/8” hole and using one of the provided stick nuts. Also, the hole for the bottom of the frame that the instructions indicated needed to be enlarged, was already big enough. Lastly – gotta be careful and note the length of the bolts for the stick nuts. I accidentally used the 1 that was longer and needed for the drivers side rear where the brace is added in another location. I’d rather go thru dental work than remove all the already placed stick nut connections to look for the 1 that's longer...off to Ace Hardware for a longer bolt.

k9+haulr-albums-building++modifying+frosty++4runner-picture48663-hmm-no-hole.jpg

k9+haulr-albums-building++modifying+frosty++4runner-picture48664-hole-drilled-stick-nut-placed.jpg


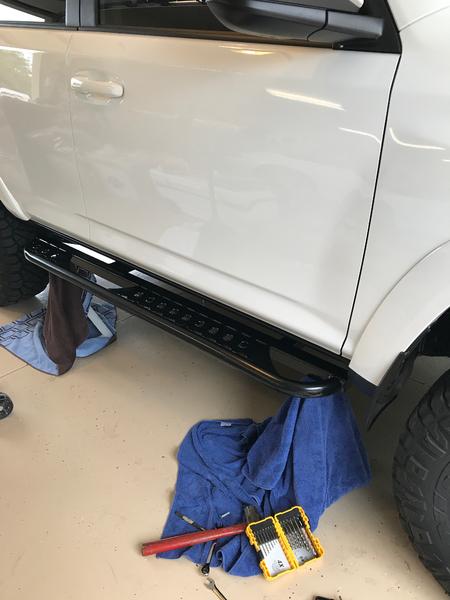
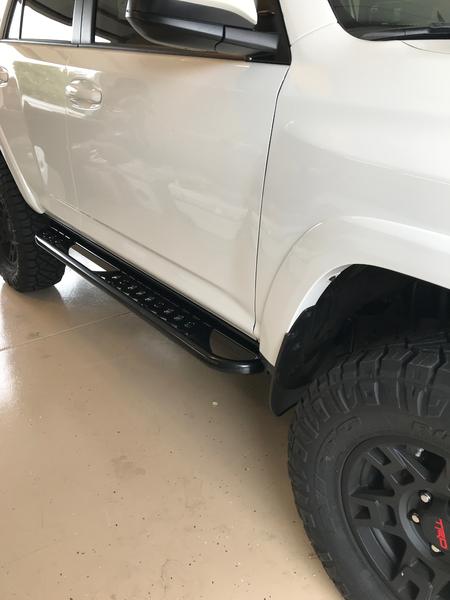
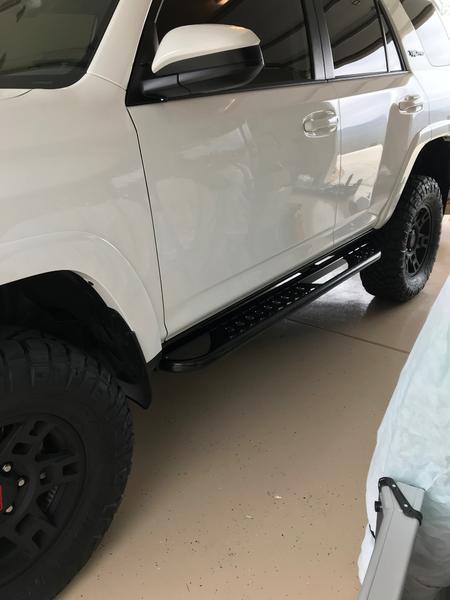
Overall – nice appearance, look well built, and strong enough to lift the truck with – I already gave it a shot.

k9+haulr-albums-building++modifying+frosty++4runner-picture48666-shrockworks-sliders-installed.jpg

k9+haulr-albums-building++modifying+frosty++4runner-picture48665-shrockworks-sliders-installed.jpg
 
Last edited:
Today was a good lesson/reminder about light and reflectivity. While I love the intense bright light my LED's throw/cast in the pitch black darkness of the rural mountain roads I live on and drive all the time, white light sucks in the fog/snow. So, I'm going to set "Frosty" up with Baja's this way:

Fogs: S2 Squadron Race in AMBER - wide/cornering pattern (currently S2 Sports in white)
Grill: S8 Driving combo in WHITE (leave this alone - still drive on rural DARK roads)
Ditch: S2 Squadron Race in AMBER - wide/cornering pattern
Roof: OnX6 40" Arc WHITE and AMBER - driving combo pattern
Roof rack corners: S2 Squadron Sports - thinking AMBER and wide
Rear hatch: S2 Sport work/flood mounted in handle recess
Backups: waiting to see what fits in Pelfrey's new "no cut" rear bumper

To handle all the various power demands, I also placed an order for a DC Power high output alternator - 270amp max and 200amp at idle. Should be about perfect to handle everything I have tied to my dual AGM battery system WITHOUT plugging "Frosty" into the CTEK charger every 2 weeks.

Also going to do the "Big 3" upgrade (add new cables for ALT to BAT, BAT to GND, ENG to GND).

But everything waits until after the holiday...time to take "Frosty" down to Tahoe for a couple weeks. Get to explore a bit now that the truck is closer to being done, take my pups to play, and hope for a couple days on the slopes.
 
So your running your ARB dual compressor straight off the switch pro, without using the relay provided with the ARB unit? This would be nice to avoid any added wiring and keep the install as simple/clean as possible. I did order the ARB connector and was planning to use it.

Sorry, I completely forgot to message you back about this....

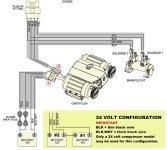
I have the wiring diagram below for reference. The way I have it set up is that plug-in #1 (seen on the bottom left) is attached to my battery with the inline fuses. Then plug-in #2 is set up with disregard for the solenoid plug-ins since I don't have lockers but the top left of the pic shows the plug-in fitting where the SwitchPros ARB connector plugs into. Then I capped off all but the red wire which I connected to a SwitchPros switch outputs.

CKMTA12 DIAGRAM.JPG

I called Switchpros to walk through this and they assured me you do not need to combine outputs 8 and 16 and that any single output wire will work perfectly. I can provide pictures if you'd like (and I guess I should have checked the rest of your thread first) but I'm sure you've already got it sorted. If you want to clean it up you can cut a significant amount of slack out of the ARB harness and then use connectors and adhesive heat shrink tubing to make it a desirable length.

This is a lot of jumbled info so I hope it makes sense.
 

Attachments

  • CKMTA12 DIAGRAM.JPG
    CKMTA12 DIAGRAM.JPG
    61.7 KB · Views: 779
Yea...makes sense when I look at the diagram and the back of the unit confirms it - they have an internal relay. So the switching power is a very low draw, just triggering the internal relay to draw power from the large/fused wires running to the battery. Got mine hooked up and running. Just trying to find a better place for my switchpro mount in the engine compartment. I mounted mine above the fuse box, but not sure I really like the "quickie" bracket I made. Thanks!!
 
I did the same as with the unit mount in the engine compartment except I was even lazier and I got some of the heavy duty 3m velcro and affixed it to the top of my fuse box. I'll be curious to see if you find a good location for it since we have the same engine setup with the twin compressor on driver side.
 
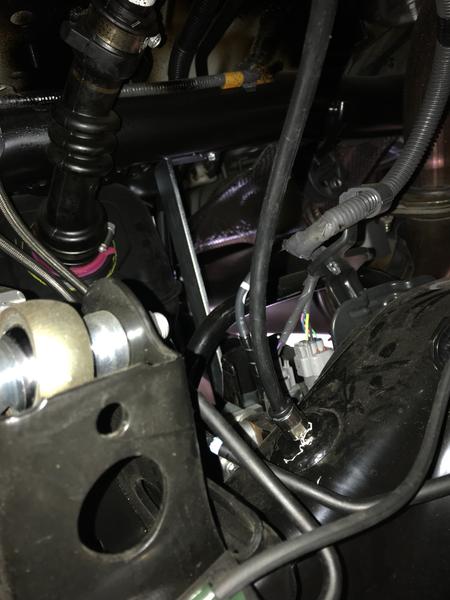
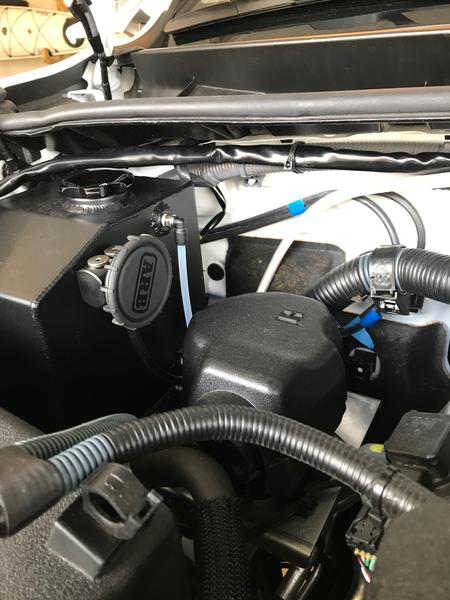
Had a few extra minutes, so I figured it was time to extend rear diff breather line to engine compartment. Bunch of zip ties, a little heat resistant sleeve in engine compartment and some 2x sided 3M 30lb sticky tape to hold the manifold on the side of my Shrockworks washer bottle.

k9+haulr-albums-building++modifying+frosty++4runner-picture48766-rear-diff-breather-extension.jpg


k9+haulr-albums-building++modifying+frosty++4runner-picture48767-manifold-rear-diff-breather.jpg


Now I'm about ready for the snorkel install - just waiting until after I get the Gobi installed, since I can still run thru the car wash for now ;-)
 
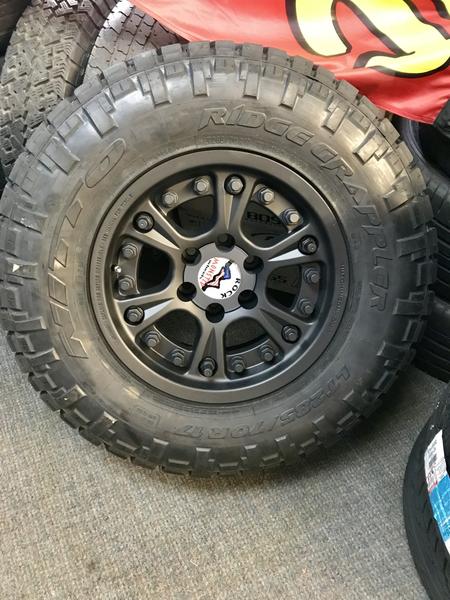
Just got a teaser picture from the shop, with a message to "Come and get it!!"

k9+haulr-albums-building++modifying+frosty++4runner-picture48772-teaser-pic-shop.jpg


Looks like I might have some wheels for sale...more when I get "Frosty" home.

Also got my "box of brightness" from Baja Designs today - fogs getting swapped ASAP and hope to have ditch brackets tomorrow too. Now just need to plan the routing for roof lights - thinking along the windshield weather stripping since I don't need to get any of the wires into the cab now that my switch pro is up and running. Anyone else have a thought?
 
Just got a teaser picture from the shop, with a message to "Come and get it!!"

k9+haulr-albums-building++modifying+frosty++4runner-picture48772-teaser-pic-shop.jpg


Looks like I might have some wheels for sale...more when I get "Frosty" home.

Also got my "box of brightness" from Baja Designs today - fogs getting swapped ASAP and hope to have ditch brackets tomorrow too. Now just need to plan the routing for roof lights - thinking along the windshield weather stripping since I don't need to get any of the wires into the cab now that my switch pro is up and running. Anyone else have a thought?

I am really enjoying your build. Thank you for sharing your experience. Got the led set as well. Have a good sale going on. You like them so far? I got the 6k, hope it isn't too bright.

I'm curious what you sold your front TRD bumper for? I'm debating a hidden winch from Pelfrey, but love their full bumper... Trying to justify the swap cost

Thanks!
 
I honestly don't recall exactly how much, but $200-$250 comes to mind. I was glad to get anything from the stock bumper, because it was a foregone conclusion the OEM bumper was gone before I even decided on which vehicle I was purchasing.

Can't comment on the Baja fog replacement kit - the Pelfrey bumper is set up for a pair of the Baja Squadrons. I was running the driving/cornering pattern sports, but after a day in bad weather, immediately remembered the benefits of amber in dust/fog/snow. My squadron sports are being replaced tomorrow morning with squadron race in amber - same pattern. Same lights being mounted for the ditch lights. Another item to the list of lightly used or new stuff that was purchased, and swapped for something else as "Frosty" gets built up.

Thanks for the interest!!
 
I honestly don't recall exactly how much, but $200-$250 comes to mind. I was glad to get anything from the stock bumper, because it was a foregone conclusion the OEM bumper was gone before I even decided on which vehicle I was purchasing.

Can't comment on the Baja fog replacement kit - the Pelfrey bumper is set up for a pair of the Baja Squadrons. I was running the driving/cornering pattern sports, but after a day in bad weather, immediately remembered the benefits of amber in dust/fog/snow. My squadron sports are being replaced tomorrow morning with squadron race in amber - same pattern. Same lights being mounted for the ditch lights. Another item to the list of lightly used or new stuff that was purchased, and swapped for something else as "Frosty" gets built up.

Thanks for the interest!!

Good to know, not bad and helps pay for the whole front. I also did the interior leds. How are those? I myself did the Rigid dually's in flood amber and it is perfect
 
Good to know, not bad and helps pay for the whole front. I also did the interior leds. How are those? I myself did the Rigid dually's in flood amber and it is perfect

Love the interior LED's - added a more modern feel...especially after coming out of a newer Cayenne.
 
Finally wrapped up several projects:

Switch Pro installation completed.

I ended up making a temporary bracket to hold the power module until I could figure something else out. It works for now, but I’m not happy with it (motto of an Engineer working on a design…if it works perfectly well, it must need more features).

k9+haulr-albums-building++modifying+frosty++4runner-picture48612-making-my-temp-bracket.jpg

k9+haulr-albums-building++modifying+frosty++4runner-picture48613-temp-switch-pro-bracket.jpg


As I tried to find a suitable location for the control panel, I kept coming back to the spot I finally mounted it. I did try to use 2x sided tape to hold the bracket, but didn’t have any luck with the adhesive sticking. So, I ended up removing the switch blank, drilling a hole to pass the control panel wire and then added a grommet to clean up the general appearance. I was really stressed about drilling the 2 holes in my dash to hold the control panel, until I looked over at the yet to be installed snorkel and thought about the hole I’ll be cutting for that. Out came the drill and 2 holes placed in the dash to mount the panel.

k9+haulr-albums-building++modifying+frosty++4runner-picture48614-modifying-switch-blank-pass-my-control-wire.jpg

k9+haulr-albums-building++modifying+frosty++4runner-picture48615-control-wires-fished-thru-dash.jpg

k9+haulr-albums-building++modifying+frosty++4runner-picture48616-control-panel-installed.jpg


Now that I finally had a method to control accessories, I added/spliced a couple weather-pack connectors in for my grill mounted LED bar and got it all set up.

At this point, it made sense to install my ARB dual compressor since I was working on wiring and placement of things in the area in front of the firewall on the driver’s side. After looking at the manual for the compressor and then looking at the back of the unit, it was obvious the compressor had it’s own internal relay, so I could control it with my Switch Pro without worry. I added appropriate end connectors, routed the main power harness to the aux battery and then modified the included “trigger mechanism” (ie switch harness) to be simpler and easily controlled.

k9+haulr-albums-building++modifying+frosty++4runner-picture48617-modifying-arb-switch-trigger-harness.jpg


Finally, as a convenience item, I added a CTEK pigtail to both batteries to make topping them off easier. Pardon the green tape – waiting for my wiring labels.

k9+haulr-albums-building++modifying+frosty++4runner-picture48618-drivers-side-switch-pro-arb-dual-compressor.jpg

k9+haulr-albums-building++modifying+frosty++4runner-picture48619-passenger-side-switch-pro-hot-lead-arb-comp-hot-leads.jpg


So…Switch Pro up and running, Baja 30” S8 Grill Lights working, and ARB dual compressor installed and running. A productive few days.

k9+haulr-albums-building++modifying+frosty++4runner-picture48620-engine-compartment-work-done-except-re-working-my-switch-pro-bracket.jpg


Why not hardwire the CTEK to the starter battery and let the relay connect the batteries and charge both at the same time? I don't want to post my photos in your thread, but you've got everything else onboard why not the charger?
 
I have a bunch of Shrockworks install videos in post production so unfortunately I can't show you right away what I mean but, you don't have to run your fuel tank down to install the sliders. Take off the skid plate, support the tank with a jack and piece of 2x6 and that's it. Remove the support strap bolt and you're ready to install in that hole
 
Why not hardwire the CTEK to the starter battery and let the relay connect the batteries and charge both at the same time? I don't want to post my photos in your thread, but you've got everything else onboard why not the charger?

Guess I hadn't thought of that, but when I recently charged my starter battery, I still found the backup needing a charge? Maybe the mag-lock had disengaged?

:confused:
 

Members online

Forum statistics

Threads
278,310
Messages
3,554,079
Members
248,016
Latest member
Advally Service

Trending content

Back
Top