LightForce 170s Installed - Well, Almost

RL Lemke

New member
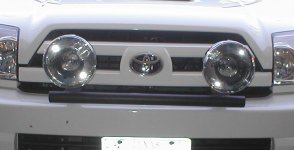
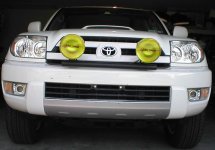
I now have enough information to report on the install of my new LightForce 170 Striker lights.
 

Attachments

  • lightforce-front.jpg
    lightforce-front.jpg
    80.1 KB · Views: 3,077
Register to hide this ad
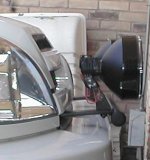
I had the lightbar custom fabricated at a 4X4 shop in Arlington. Since the new lightbar is a prototype, there is a change I want to make to the mounting system befor I finish the wiring of the lights. I think this mounting modification will make it to where these guys could pump out a bunch of these lightbars for $250 each. The mounting will go to the front bumper support bolts on the frame. Very easy install!!!
 

Attachments

  • lightforce-side.jpg
    lightforce-side.jpg
    34.4 KB · Views: 2,663
I bought the lights, harness and lenses from the Hummer dude from St. Louis. http://www.alphaaccessories.com/LightForce.htm I like how I was able to pay with PayPal.

Lightforce uses the Painless wiring harness. I was concerned about the look of this harness from web photos. After receiving it, I am convinced that it is of top quality.

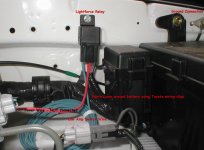
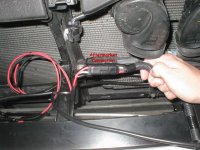
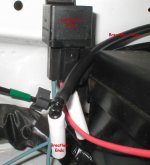
The relay mounted with a sheet metal skrew to a hole on the engine bay, next to the fusebox. The ground wire conneted to the main battery ground, where shown on the photo. The positive will connect to the barrery positive post (not yet though).

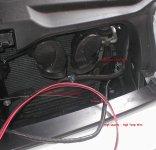
I used a piece of stiff wire to act as a lead for the Lightforce wire loom to pull through the Toyota wire loom retaining clips. These are the clips at the base of the battery and lead to the front of the engine bay. A perfect exit to the front of the 4Runner. I connected the low amp switch wire to the front left fog light wire, connecting to the green power wire with a squeeze clamp. EZ way to switch the Lightforce lights without messing with the dash. I left the remaining low amp wire coiled next to the fusebox, incase I should ever want to add a separate switch on the dash.

When the lightbar is finished, I will solder the light leads to the wiring harness.
 

Attachments

  • lightforce-relay.jpg
    lightforce-relay.jpg
    135 KB · Views: 2,741
Sorry about the dirty engine bay. I still have Moab dust all over the 4Runner. I drove thru a lot of sand there and it got everywhere.

When I wrap the wiring up I can post additional photos required for those interested.
 

Attachments

  • lightforce-wire.jpg
    lightforce-wire.jpg
    123.8 KB · Views: 2,689
I chose this simple lightbar because I did not want to mount anything from under the front of the bumper. Most of the bull bars, and grill guards I see have a mounting that takes away from the approach angle of the 4Runner. They also seem to allow for a lot of vibration as the mounting is leveraged so.

The lightbar is coated with truck bed liner spray. This is a thick coating that should resist constant bug splat and rust.
 
The Wiring Is Now Complete

I finished the wiring this afternoon.
 

Attachments

  • light-front-view.jpg
    light-front-view.jpg
    121.2 KB · Views: 2,815
It seemed important to have connectors which will take the abuse of 100 watts, remain water resistant, and are easy to use. So, I fell back on trailer wiring connectors.
 

Attachments

  • light-connection.jpg
    light-connection.jpg
    130.3 KB · Views: 2,693
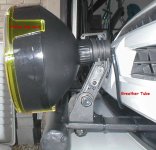
The LightForce lights I received had a breather tube which is supposed to allow for submerged use. Since the bow wave, while driving thru streams, can often roll over the hood, it seemed like a good idea to add these tubes.
 

Attachments

  • light-side-view.jpg
    light-side-view.jpg
    92.1 KB · Views: 2,597
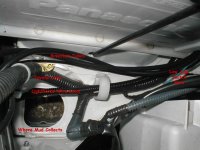
I routed the wiring and breather tubes the same way, which is around the battery. I routed the LightForce wiring loom thru the Toyota brackets.
 

Attachments

  • light-looms.jpg
    light-looms.jpg
    84 KB · Views: 2,630
The breather tubes go up to the fuse box, and LightForce relay. They should remain dry there. If not, I am in real trouble.
 

Attachments

  • light-tube-ends.jpg
    light-tube-ends.jpg
    122.1 KB · Views: 2,536
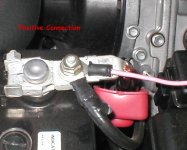
At the very end, I connected the power wire to the positive post of the battery. I really like how toyota uses this sort of battery cable. Sure make adding electrical options easy.
 

Attachments

  • light-power.jpg
    light-power.jpg
    46 KB · Views: 2,535
Nice, I'm like the total look. I agree as well about the bull bar taking some ground clearance. Let us know if those guys are going to go production with them.

how about some pics of when the lights are on.
 
I like the mounting bar. I had thought I was going to get a chance to work on my brackets this weekend, but it was too hectic around here. Good job on the lights, mounting bar and the photos!!:thumb:
 
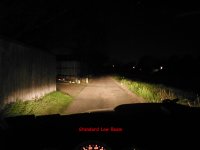
You asked for night photos, well here they are.

First the standard low beam.
 

Attachments

  • 1-lowbeam.jpg
    1-lowbeam.jpg
    94.7 KB · Views: 955
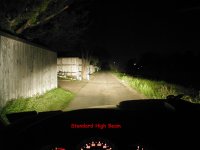
Now for the standard high beam. I have NOT replaced the bulbs that came with the 4Runner.
 

Attachments

  • 1-highbeam.jpg
    1-highbeam.jpg
    106.6 KB · Views: 929
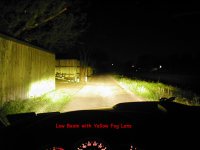
Here is the yellow fog lens, with the lamps set to their spot position. You can see how the beam pattern is modified by the cut in the lens to be wide and low. This will be my night driving setting.

I also have the blue spot lens, which is supposed to be for snow storms, and very heavy rain.

 

Attachments

  • 1-foglens.jpg
    1-foglens.jpg
    106.8 KB · Views: 951
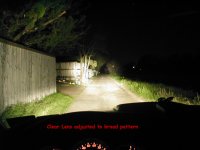
Here is the clear lens adjusted to the wide setting. You see, you can adjust the focus of the light by twisting the outer housing. In is spot, and out just a bit is a wider pattern.
 

Attachments

  • 1-clearbroad.jpg
    1-clearbroad.jpg
    110.7 KB · Views: 926

Members online

Forum statistics

Threads
278,307
Messages
3,554,056
Members
248,016
Latest member
Advally Service

Trending content

Back
Top