LTDSC Build Thread

Painted my LED lights on the dash cam. They randomly would turn on if the camera thought it was dark. I am not sure why because it only added glare off the windshield. So this worked well.

5ca43d5c769f4b175bb571e92a76fc18.jpg


06a7d05749c4097df20c84b171e8532b.jpg
 
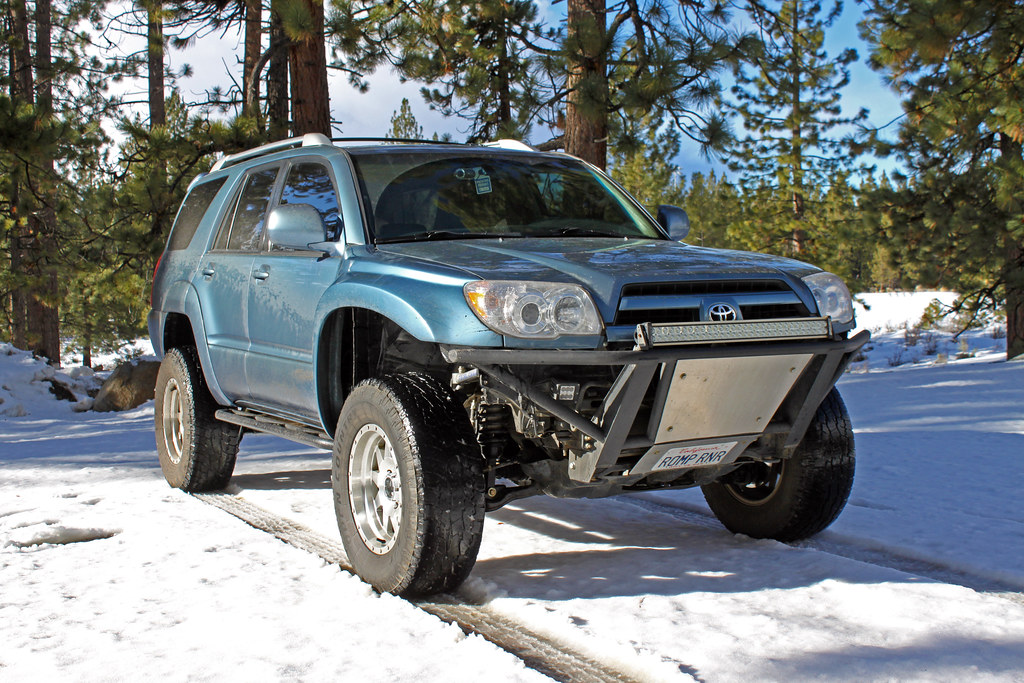
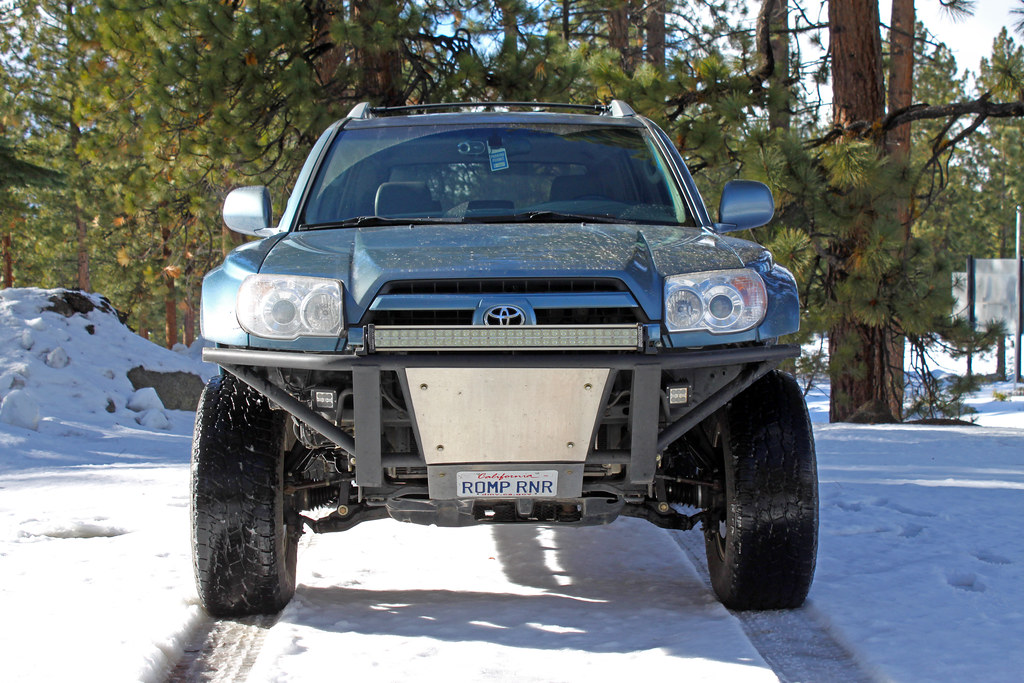
Went up to South Lake Tahoe yesterday for a quick day trip to mess around in some snow. It handled amazing and never slipped even when i tried to get it to. Ill post some videos from the dash cam here after a bit.

24334975902_1a4997a7e5_b.jpg


24360808431_f3eef9e7c9_b.jpg
 
So do the fiberglass fenders and high-clearance bumper help a lot with tire rubbing in the front? Would you only need to trim the body mounts, even with 35's? I know you had mentioned you had wanted to go the 35" route eventually. Those would look great on your truck!
 
So do the fiberglass fenders and high-clearance bumper help a lot with tire rubbing in the front? Would you only need to trim the body mounts, even with 35's? I know you had mentioned you had wanted to go the 35" route eventually. Those would look great on your truck!

i had to trim the body mount and smash the pinch weld. I could clear 35s as is for sure.
 
Installed some raptor grille LEDs today. I found a raptor and had my tape measure on me so I measured the width of the lights as well as the separation measurement. So I installed mine to "raptor spec". Here's my process and pics in progression.

Take the grille off.
99f9bf25dc63a81d27431c38f108f3e2.jpg


0bf5a7ed792d4b08743c22522df86879.jpg


0ca475b684e9a3569041250921043310.jpg


Grabbed this from local hardware store. Was the right length and thin enough to work perfectly.
701851f49ebb5a486413bce25187a94b.jpg


Three LED trailer marker lights from superbrightLED.com.
999d226b1500317afc000abeac81648d.jpg


Measured and drilled mounting holes to line up with the OEM grille securing bolts. Also measured out and drilled the 3/4" holes spaced appropriately.
612b62512c245f26d8f3b77f18ac146d.jpg


2ea3bbe18d0a19be19b58af626d0b907.jpg


88745f17c19a0b881f12d1e4ed75fcb9.jpg


Scuffed and painted the metal to finalize the install. You can also see where I cut and dremel sanded the center bar on the upper grilled opening. Then I smoothed it down and shot it with some black paint to hide and not obstruct the LED in any way.
d0ef2d902b40583b0daa8a21c2586c72.jpg


f6ea35fc7f682a37b261d4dc5c00a432.jpg


7dc48e83a610005b6ced71414c3c2e8b.jpg


I daisy chained the LEDs and soldered them together and ran wire behind the under hood mat and ran down and under the fender and out by the headlight where I soldered in the wires that tap into the parking lights for the power feed. Bolted the grille on and loomed the exposed wire and secured it out of the way of the hood latch.

9a28ad39c7dd0bf72b84808bbadf6283.jpg


5ed63b7d16695356062cb8a9f81aaabe.jpg


216d1dbd7ce89df8aa8c65cd16a4b8b6.jpg


Night pics tonight!
 
I don't think they're on in the second picture. But damn that is the best looking 4Runner I've ever seen.

Think I might hop on the raptor marker light bandwagon LOL
 
Installed some raptor grille LEDs today. I found a raptor and had my tape measure on me so I measured the width of the lights as well as the separation measurement. So I installed mine to "raptor spec".

Lights came out great! I prefer your use of the mounting bracket over simply drilling into the grille's crossmember like others have done. Looks like you went a different route than I did when determining the light spacing. I wasn't able to get measurements off of a Raptor, so I just visually scaled the spacing using the distance between the headlights as a reference. Surprised at how much more spaced out your Raptor spec lights are, but the Ford is a much wider vehicle so I guess it makes sense.
 
Tonight I took the Toyota momentary traction control switch and converted it to an on/off switch.

I took the switch apart
3f738b18c4afdc3ec37e1237c6189fca.jpg


adb0d3ea92d18041ffe617a9c8ac161b.jpg


Then I made two pieces. One straight to a 13/16" length, one Z shaped to a 1/4", 7/16", 1/8" shape.

5fe7e5d5352627be56e461f006395d0d.jpg


Removed the switch stop that didn't allow the switch to fully seat.

925a7724cc7e5c33ea8d20f9960f0922.jpg


Placed the 13/16" straight rod in first, it just sits there. Then place the Z piece long end in first by the rod. I filed the edges to not be sharp as it pressed against the plastic switch with a nail file.

0ce08c64fb9a05d61f339527a7a6bc5f.jpg


Reassemble switch and tested it.
98902c5f773fed92a5106e56633c1018.jpg


Switch worked great, can hear it engage when you press it down and it holds. Then releases once you press again. The switch is now an on/off switch.

 
Bought and installed an LED "pack". Does all the interior lights that's not a dash light. I'm impressed. Incredibly bright and easy install. Took about 10 min total.


IMG_20121201_141858.jpg~original


IMG_20121201_145300.jpg~original


IMG_20121201_145309.jpg~original


Haven't gotten a pic of the door lights and cargo light but you get the idea.


The LEDs look great!!! Going to get a set for my 4R. Your 4R is looking awesome!
 
Last edited:
Tonight I took the Toyota momentary traction control switch and converted it to an on/off switch.

I took the switch apart
3f738b18c4afdc3ec37e1237c6189fca.jpg


adb0d3ea92d18041ffe617a9c8ac161b.jpg


Then I made two pieces. One straight to a 13/16" length, one Z shaped to a 1/4", 7/16", 1/8" shape.

5fe7e5d5352627be56e461f006395d0d.jpg


Removed the switch stop that didn't allow the switch to fully seat.

925a7724cc7e5c33ea8d20f9960f0922.jpg


Placed the 13/16" straight rod in first, it just sits there. Then place the Z piece long end in first by the rod. I filed the edges to not be sharp as it pressed against the plastic switch with a nail file.

0ce08c64fb9a05d61f339527a7a6bc5f.jpg


Reassemble switch and tested it.
98902c5f773fed92a5106e56633c1018.jpg


Switch worked great, can hear it engage when you press it down and it holds. Then releases once you press again. The switch is now an on/off switch.

Looks great! This is where I stopped until I read up more on the VSC-Off Mod...but the switch looks great in it's spot on the dash! Keep us posted and what method are you using to turn VSC off?
 
Hey LTDSC, I read somewhere you were going to upgrade to 2.5 rears I think. If/when you do, I'd be interested in your fox resis if no one has called a dibs yet !!
 
Tonight I took the Toyota momentary traction control switch and converted it to an on/off switch.

I took the switch apart
3f738b18c4afdc3ec37e1237c6189fca.jpg


adb0d3ea92d18041ffe617a9c8ac161b.jpg


Then I made two pieces. One straight to a 13/16" length, one Z shaped to a 1/4", 7/16", 1/8" shape.

5fe7e5d5352627be56e461f006395d0d.jpg


Removed the switch stop that didn't allow the switch to fully seat.

925a7724cc7e5c33ea8d20f9960f0922.jpg


Placed the 13/16" straight rod in first, it just sits there. Then place the Z piece long end in first by the rod. I filed the edges to not be sharp as it pressed against the plastic switch with a nail file.

0ce08c64fb9a05d61f339527a7a6bc5f.jpg


Reassemble switch and tested it.
98902c5f773fed92a5106e56633c1018.jpg


Switch worked great, can hear it engage when you press it down and it holds. Then releases once you press again. The switch is now an on/off switch.

Nicely done! I am at the same point you are. Took a long time to get my switch to work right. I eventually used one piece from FJ Aux light switch in there, and put one homemade piece in the FJ switch. For some reason I couldn't get things just right to only modify one. But oh well, the FJ one works, and so does this one. What method are you going to use for the vsc off?
 
Nicely done! I am at the same point you are. Took a long time to get my switch to work right. I eventually used one piece from FJ Aux light switch in there, and put one homemade piece in the FJ switch. For some reason I couldn't get things just right to only modify one. But oh well, the FJ one works, and so does this one. What method are you going to use for the vsc off?


Since mine is an 03, I'm going to tap into the wire under the glove box cover and run it over to the existing blue plug that leads to nothing and then tap it into that. So it will be in the left side by the center diff lock.
 

Members online

Forum statistics

Threads
278,306
Messages
3,554,045
Members
248,016
Latest member
Advally Service

Trending content

Back
Top