Madcanvis- Build Thread

madcanvis

New member
2000 4Runner. Looking to add a little height, a few upgrades, and document the maintenance with some lessons learned (100% New England vehicle). I'm the 3rd owner.

Ideally, my daily driver will become more capable of moderate off road recreation, can be loaded up for weekend camping with family, and maybe (maybe) still be around in a few years for my boys to enjoy.

There a some sweet rigs and good people out there and I want to thank all for the inspiration to do this work (past, present,and future). I'm not to sure I'll ever be the ROTM but you never know! :naughty:
 
Register to hide this ad
Here are some minor things that I've done from take home day (157,000 miles) to this past spring (200K). I'll then fill in what's happened 200K+
1st year: In the 1st week when it failed inspection because the CEL bulb was burnt out and I didnt realize it when I bought the truck...1 CEL bulb, a URD rear O2 sensor simulator, and replaced the clear plastic cover over the guages (old one had a small crack). 5 months later... new starter, air filter, floor mats.
 
Year 2

Year 2: Seafoam treatment, clean MAF, new PCV Valve, NGK plugs and wires. Attempted the dash clock fix and it did not work for me. Rotate tires (they were new when I purchased the vehicle).
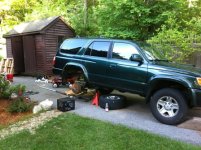
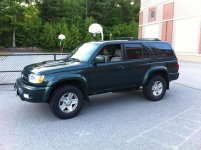
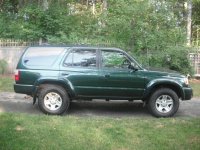
Here's a pic from 2011 shortly after it was bought.
 

Attachments

  • DSCF3838.jpg
    DSCF3838.jpg
    141.1 KB · Views: 820
There was some "disfigurement" on the driver's side rear bumper. It was pushed in and approximately 1-2 inches closer to the wheel than it should've been. It didn't bother me until I wanted to add a tow bar. Wrapped with chain to tree. Had a spotter and gas it. Perfect!! :)

Grabbed an OEM tow bar off CL ($50) from a guy who lifted his 3rd Gem T4R and didn't need it. Sweet :)
 
Thanks Arkmaster for the comment. Hopefully, by doing a butt load of work it'll take a small step towards some of the rigs on here.
 
Rear Suspension (PIC HEAVY)

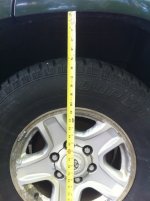
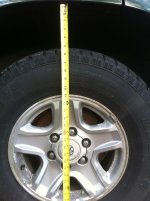
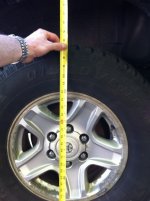
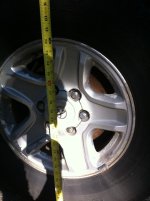
Here I've measured from the fender to center of wheel (I think this is the preferred method to alleviate tire size, pressure, hole in ground, etc.)

Installed are 99 tall coils (thanks to JEFF16758 here)
OME 10mm spacers, Bilstein 4600's (thanks to Kevin at Toytec)
Energy Suspension poly sway bar bushings
Moog rear swaybar links
Salvage yard lower control arm w/ low miles (removed torque steer!- holy cow was it noticeable when the bushing failed)

1st 2 pics are pre , 2nd 2 are post ride height
 

Attachments

  • 20140520_DS_Rear.JPG
    20140520_DS_Rear.JPG
    97.5 KB · Views: 699
  • 20140520_PS_Rear.JPG
    20140520_PS_Rear.JPG
    96.1 KB · Views: 670
  • 20140531_DS_Rear.JPG
    20140531_DS_Rear.JPG
    92.9 KB · Views: 655
  • 20140531_PS_Rear.JPG
    20140531_PS_Rear.JPG
    86.3 KB · Views: 685
There was some "disfigurement" on the driver's side rear bumper. It was pushed in and approximately 1-2 inches closer to the wheel than it should've been. It didn't bother me until I wanted to add a tow bar. Wrapped with chain to tree. Had a spotter and gas it. Perfect!! :)

Grabbed an OEM tow bar off CL ($50) from a guy who lifted his 3rd Gem T4R and didn't need it. Sweet :)

I don't know if that was an accident or not but that was pretty cool.
 
Rear Suspension (PIC HEAVY)

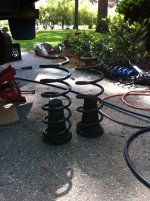
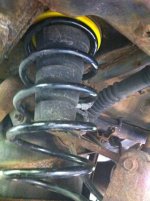
edit: Found pics from installing the springs! But I did not need a spring compressor. I just jacked the opposite side to get the flex. The old were in there pretty good and used my 4 way tire iron with the screw driver edge to persuade them out/in. Worked like a charm.
IMG_1349.JPG
IMG_1350.JPG

A few weeks ago in preperation of this and the front I hit the yota dealership for some hardware.
IMG_1304.jpg
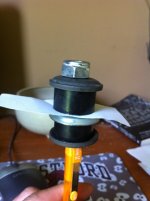
Not much info on installing the Bilstein 4600 on 3rd gen 4runner (assembly of bushings and hardware). Through a member on t4r.org I got it done and salvaged my weekend.
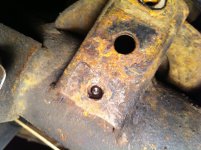
Removed the swaybar and links (broke the bottom 2 bolts on the axle's bracket. The tops came out fine!)- set asside
20140605_PS_rearsway_bracket_02.jpg
Notes:
The paper is in place of the body's shock mount.
20140601_Bilstein_assembly_inst.JPG
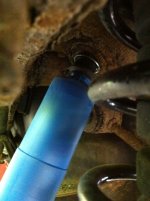
I had to take a sawzall to the old ones per the instructions of the knowledge base here.
I did the passenger side coil 1st, then the DS (removed RLCA, bottom bolt of shock)
Got sawzall and did shocks the following day. Passenger side 1st
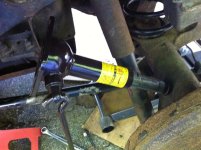
20140601_Bilstein_install_01.JPG20140601_Bilstein_install_03.JPG
Used anti-seize on all bolts fastened to frame

I did need to use the OEM bottle jack from wheel well to axle housing to line up the shock's lower boss to the shock base along with jacking the axle up/down. IMG_1353.JPG
The passenger side did not need as much lining up. The LCA was a...you know.

I think this was my 1st time doing major auto repair where I did not throw anything or swear at a part or busted a knuckle!!!!!
 

Attachments

  • 20140601_Bilstein_assembly_inst.JPG
    20140601_Bilstein_assembly_inst.JPG
    45 KB · Views: 810
  • 20140601_Bilstein_install_03.JPG
    20140601_Bilstein_install_03.JPG
    92.7 KB · Views: 711
  • 20140601_Bilstein_install_01.JPG
    20140601_Bilstein_install_01.JPG
    59.3 KB · Views: 683
  • IMG_1304.jpg
    IMG_1304.jpg
    136.3 KB · Views: 756
  • 20140605_PS_rearsway_bracket_02.jpg
    20140605_PS_rearsway_bracket_02.jpg
    136.8 KB · Views: 747
  • IMG_1349.JPG
    IMG_1349.JPG
    92.1 KB · Views: 622
  • IMG_1350.JPG
    IMG_1350.JPG
    72.4 KB · Views: 674
  • IMG_1353.JPG
    IMG_1353.JPG
    125.1 KB · Views: 715
Last edited:
The Sway Bar

Since I broke those 2 lower bolts...

Spent a few minutes a day working them with heat and PB blaster. Then drilled and used a reverse drill bit. No go. More heat and PB Blast. Then a tap extractor. No go! Drilled a thru hole. See the shiny spot in the last thread? Yup. Hit the axle housing. Not too bad. (JB weld in future). Air chiseled the nut off (2 seconds each side).
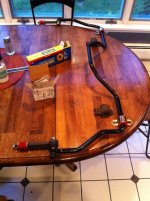
So since I couldn't get the broken bolts out quickly, I sanded and primed my Swaybar
20140603_rearsway_restore01.JPG

I kept spraying it with Professional Rustoleum over those few days!
20140603_rearsway_restore02.JPG

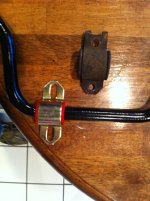
The old bracket and the new...
20140603_rearsway_restore03.JPG

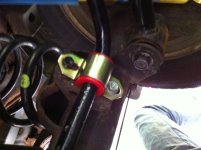
What I did for the lower 2 bolts. Grabbed 1" long 1/2" hex heads, flat washers, and locking nuts.
IMG_1392.JPG

Doesn't look right but I think it's ok. Thoughts anybody?
IMG_1400.JPG

FYI: drove around for a week without the rear sway bar and didn't notice a HUGE difference w/ or w/o. But then again I did do the springs and shocks which was night and day. For the record, the back setup ROCKS!!! Maybe 906s? Hmmmm....
 

Attachments

  • 20140603_rearsway_restore01.JPG
    20140603_rearsway_restore01.JPG
    70.7 KB · Views: 710
  • 20140603_rearsway_restore02.JPG
    20140603_rearsway_restore02.JPG
    78.3 KB · Views: 680
  • 20140603_rearsway_restore03.JPG
    20140603_rearsway_restore03.JPG
    72.6 KB · Views: 690
  • IMG_1392.JPG
    IMG_1392.JPG
    100.2 KB · Views: 686
  • IMG_1400.JPG
    IMG_1400.JPG
    85.9 KB · Views: 797
Fate: Salvage yard and LCA rears

So my plans where to get 2 rear trailing arms (lower control arms). I paid $75 each (they took them off). 1 was sweet! OEM like new: i.e. no rust and bushing still smelled like rubber and flawless. I installed it.

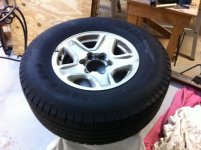
The other...not so much. I figured I could press out the bushing on mine that failed and the 2nd one from the junk yard, restore them, and re-install. But I read that from 96 to mid 97 the bushings could NOT be changed (true- IDK?) but didn't want to risk it and these were off a 97. So I went back to the junkyard. 1st guy was not happy but said I could get something in "the yard today". 3 runners all DESTROYED. Oh well. But then!!! A T100 with 5 spoke with a Michelin 50% tread! Talked to a 2nd guy who was totally cool and said take it and we'll call it even! IMG_1404.JPG

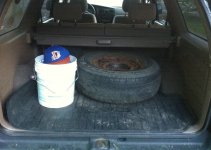
So good bye steelie, rusty, spare with a nail that still holds air!
IMG_1302.JPG

Pay no attention to that Subaru mat. It came with the car and honestly, I like it. The way the left side flaps up- it stops Nalgene bottles from rolling around :)
 

Attachments

  • IMG_1404.JPG
    IMG_1404.JPG
    63.8 KB · Views: 687
  • IMG_1302.JPG
    IMG_1302.JPG
    101.1 KB · Views: 693
Last edited:
Post rear suspension

Post rear install-
99 tall coils (color code: yellow/red or y/r for those searching)
OME 10mm trim spacer
Bilstein 4600s part# BE5-2451 or 24-024518 (same thing)
Wheels are stock 16"
Tires Cooper Discovery M+S 265/70 R16 (46,000 miles)
20140602_99talls_bilstein_rear.jpg
 

Attachments

  • 20140602_99talls_bilstein_rear.jpg
    20140602_99talls_bilstein_rear.jpg
    59.8 KB · Views: 833
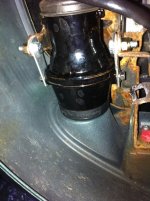
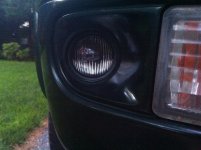
Install Hella Micro HDs using the old OEM bracket (modified it).
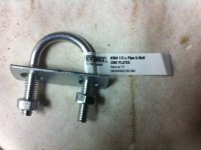
4: 1/2" pipe brackets $4
6: 1/4-20 nylock auto grade nuts $1.80
2: 1/4-20 1" long socket head cap screws $0.80
4: 1/4-20 3/4" hex head bolts $1.20
8: 1/4 auto grade washers $1.75
6: 3/8 auto grade washers $1.50
IMG_1676_uboltbracket.JPG

All you need are the slotted brackets. These will allow you to pivot on the bracket and the light.

I used the bolts and the washers from the light's hardware to attach them to the u-bolt bracket.


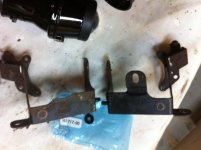
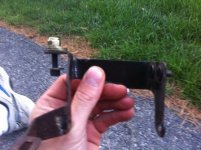
here is the OEM bracket stock and the one I had to mod. You need to cut the back tab off and remove some of the material because the lights are long and otherwise they won't have enough travel to adjust properly. You can see the black mark I made- after a trial fit it wasn't enough. Cut a nice arc out from inside edge to inside edge would give you plenty. I ultimately had JUST enough afterwards. You can kinda see it in the photo below if my thumb wasn't in the way.
IMG_1564_bracket.JPG

I then drilled out the hole with a 1/4" drill in the bracket that stays on the truck and the light's alignment bracket (photo below) so the 1/4 socket head cap screw would fit. The welded nut on the topside couldnt be taken off so I stacked 2 3/8" washers around it and then a 1/4" washer- then nut.
IMG_1677_washers.JPG

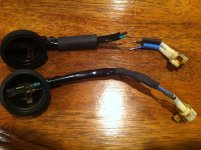
Cut the old connector from the OEM light housing and the new light housing. Stripped, soldered, and shrink tubed. Green to Blue/ Black to Black
IMG_1679_rewire.JPG

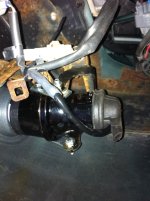
Aligning sucks cuz there's so little room but not too bad. Shot of the bracket from the underside.
The pass side.
IMG_1691.JPG

Drivers side
IMG_1697.JPG

Here they are from the front.
IMG_1678_install.jpg
IMG_1681_fogson.JPG

Note about the Hella Micro HDs: attaching the lugs to the light housing needs to be better thought out by the manufacturer. Not hard but a little dicey when plugging the back rubber boot on.
 

Attachments

  • IMG_1676_uboltbracket.JPG
    IMG_1676_uboltbracket.JPG
    58.9 KB · Views: 545
  • IMG_1564_bracket.JPG
    IMG_1564_bracket.JPG
    89.6 KB · Views: 523
  • IMG_1677_washers.JPG
    IMG_1677_washers.JPG
    74.2 KB · Views: 494
  • IMG_1679_rewire.JPG
    IMG_1679_rewire.JPG
    78.8 KB · Views: 496
  • IMG_1678_install.jpg
    IMG_1678_install.jpg
    139.1 KB · Views: 497
  • IMG_1681_fogson.JPG
    IMG_1681_fogson.JPG
    64.4 KB · Views: 504
  • IMG_1691.JPG
    IMG_1691.JPG
    106.7 KB · Views: 448
  • IMG_1697.JPG
    IMG_1697.JPG
    125.9 KB · Views: 461
Last edited:
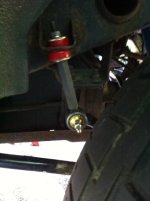
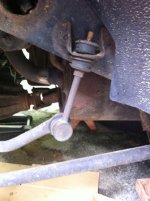
I'm thinking those links need to be a little longer. The links should be as close to perpendicular with the ground as possible.

Just saw a post that says when lifting a 3rd gen, use 3rd gen fronts on the rear and 2nd gen fronts on front. Maybe if/when I go up to a 2" I'll make that switch.
Now Im all messed up because I found a pic of the link before the swap. Maybe when aligning the rearend on the trailing arm before installing the swaybar threw it (swaybar link) out of true. But the rig tracks well and took an avoidance maneuver at 70mph on the freeway today (I pee'd a little and my wife FREAKED! LOL)

Still needs to be addressed tho (here's the old swaybar link)
IMG_1346.JPG
 

Attachments

  • IMG_1346.JPG
    IMG_1346.JPG
    64.3 KB · Views: 527
Last edited:
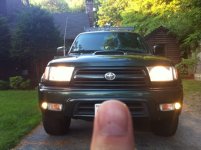
Hella Micro DE retro fit

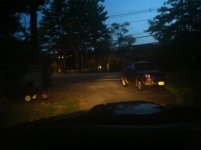
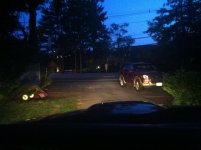
Here are the results: off/on
Sorry for the delay
20140420_hella_micro_off.jpg
20140420_hella_micro_on.jpg
 

Attachments

  • 20140420_hella_micro_off.jpg
    20140420_hella_micro_off.jpg
    107 KB · Views: 432
  • 20140420_hella_micro_on.jpg
    20140420_hella_micro_on.jpg
    115.4 KB · Views: 401

Members online

Forum statistics

Threads
278,307
Messages
3,554,054
Members
248,016
Latest member
Advally Service

Trending content

Back
Top