Mark_BC's 2000 Limited Salvage Build

Mark_BC

Senior Member
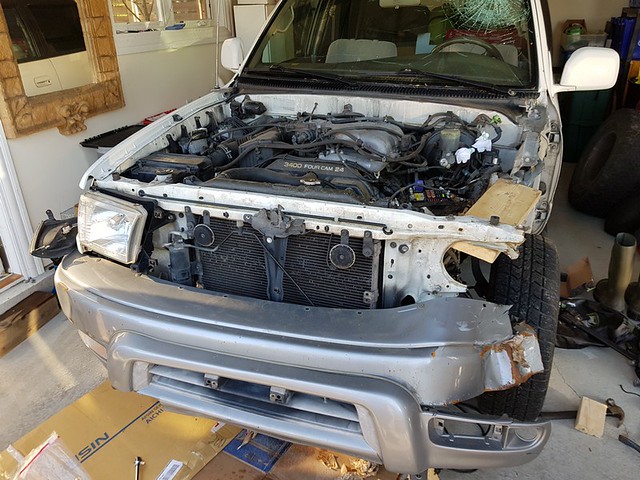
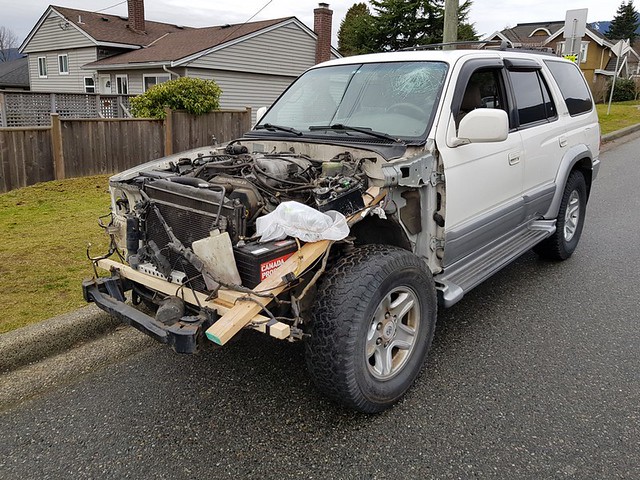
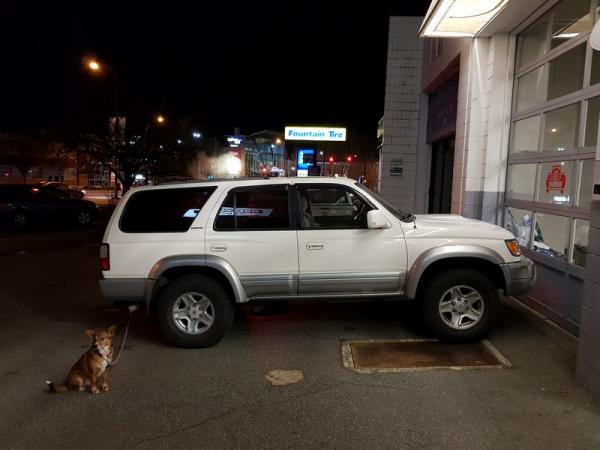
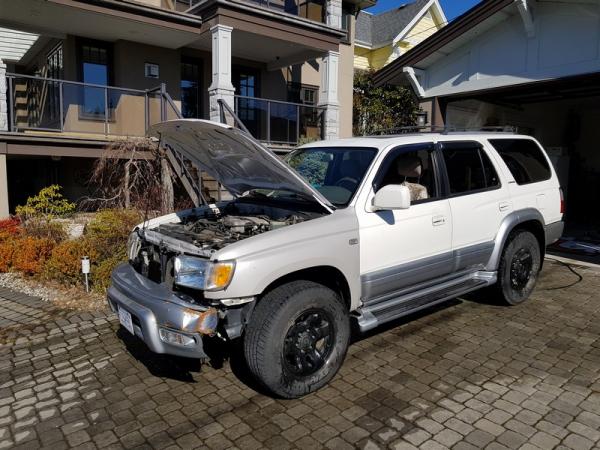
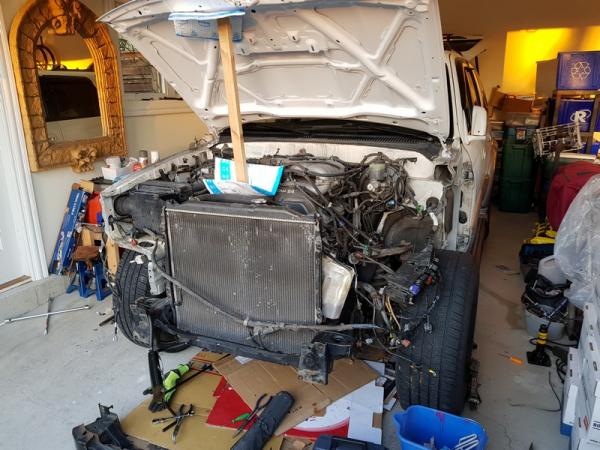
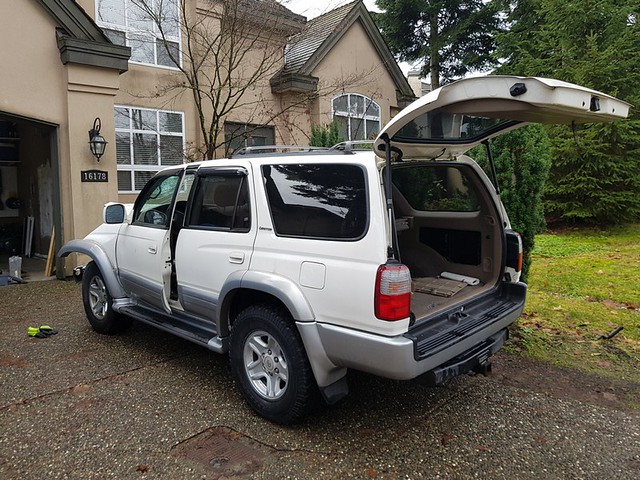
My friend wanted to get this truck for the nice leather seats and rear lights. I was going to go in it with him and part out the rest to make some cash. After looking at it I decided to bring it back to life. These things can go for $10,000 in good condition, which this one is, or rather could be. The features of this one are the e-locker, multi-mode transfer case and Limited trim. And best of all, it's rust free!!!! Well, relatively rust free. Rust free in Canada-speak. Everything worked at the time of the purchase except for the antenna.

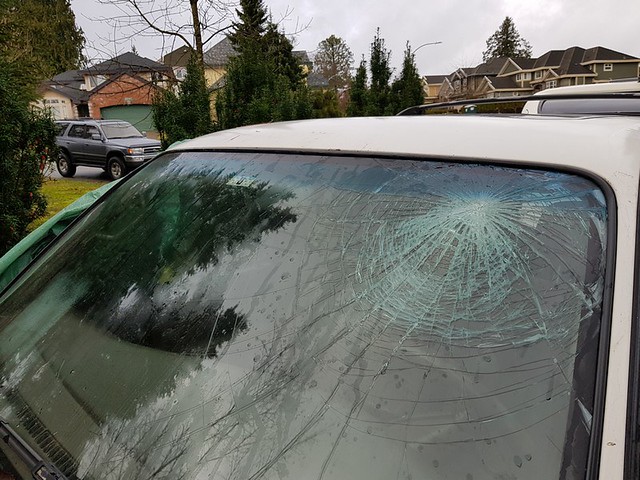
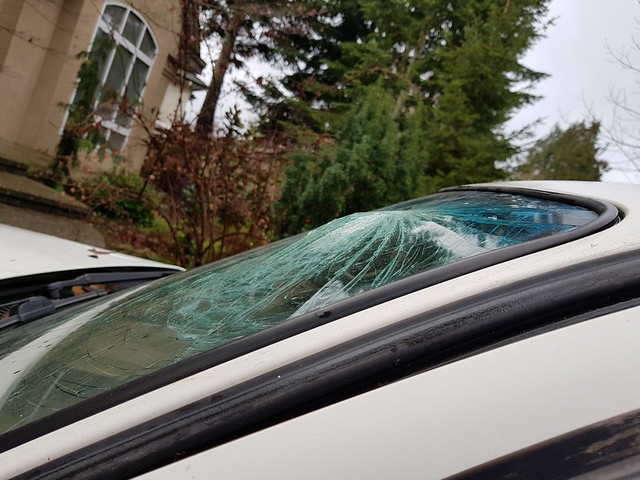
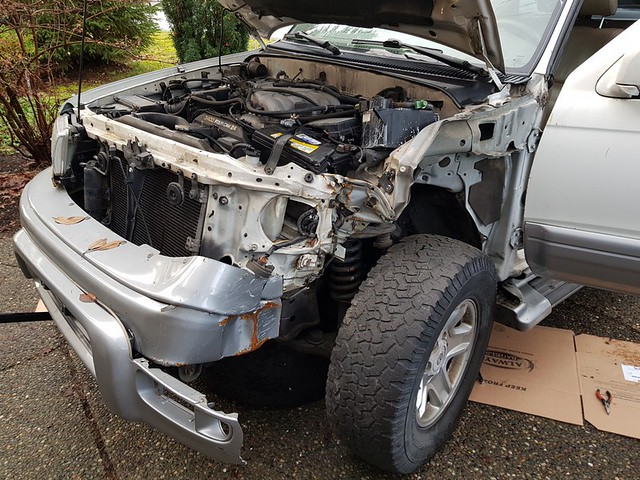
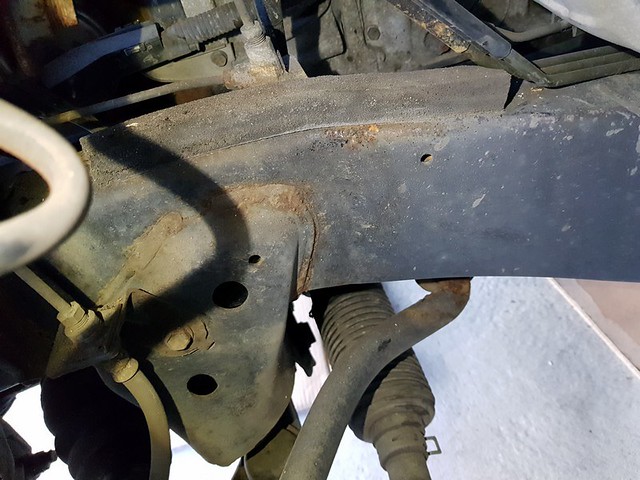
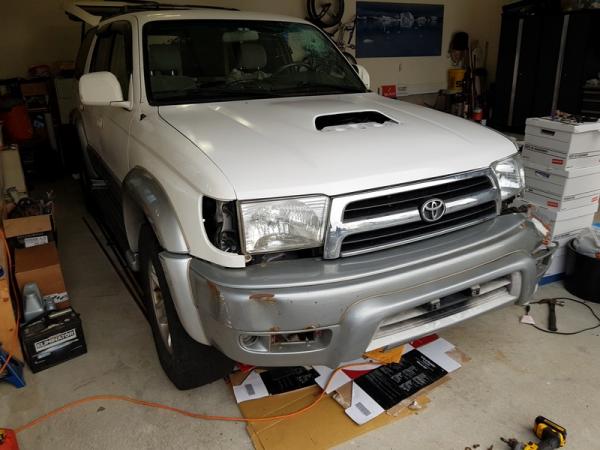
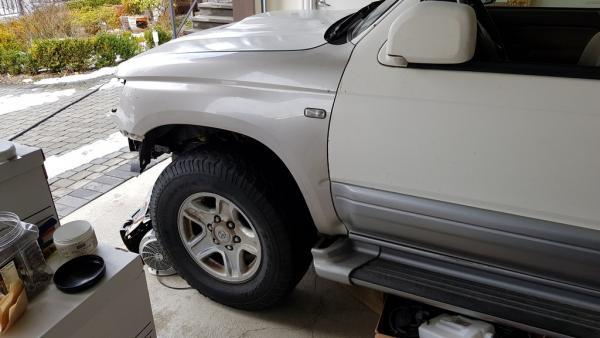
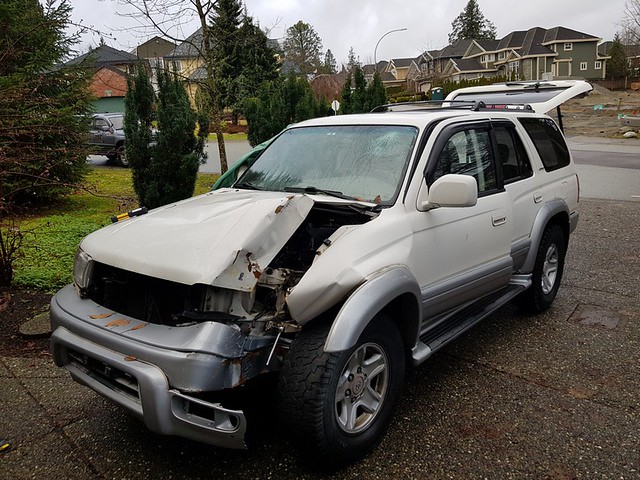
It has clean title because the guy drove it drunk and hit a power pole so he didn't report it. That impact on the windshield is from his head because he wasn't wearing a seat belt. The damage (edit: I thought) is minor. It couldn't have hit in a better location, basically straight into the wheel. The frame rail is untouched (edit: actually, it buckled behind the LCA bracket).
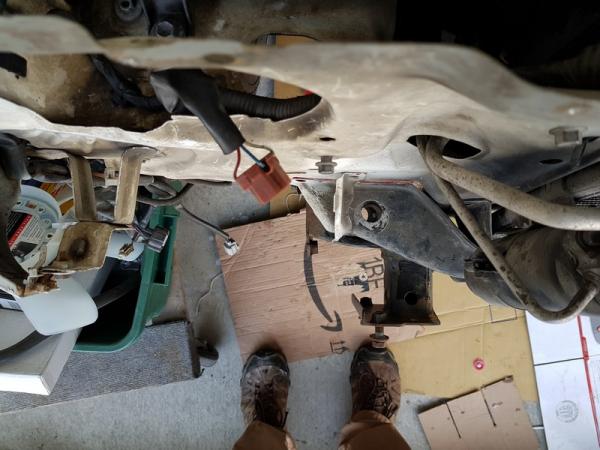
46267264401_f8cbef0c4d_z.jpg


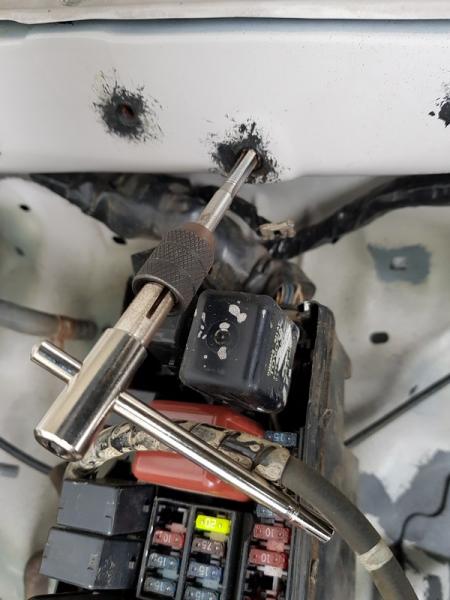
46216840682_876ba8c209_z.jpg


46216840692_5257e1fc47_z.jpg


46216840152_3217c87639_z.jpg


46267263581_8e6d10f214_z.jpg


I'm in it for $2000 plus a running tab. I'm sure I could sell it for a profit (edit: not much) but I might keep it as my second rig.
Here is a list of things needed to fix it from the impact:

  • Purchase -- $2000 CDN
  • Transfer and tax -- $90 CDN
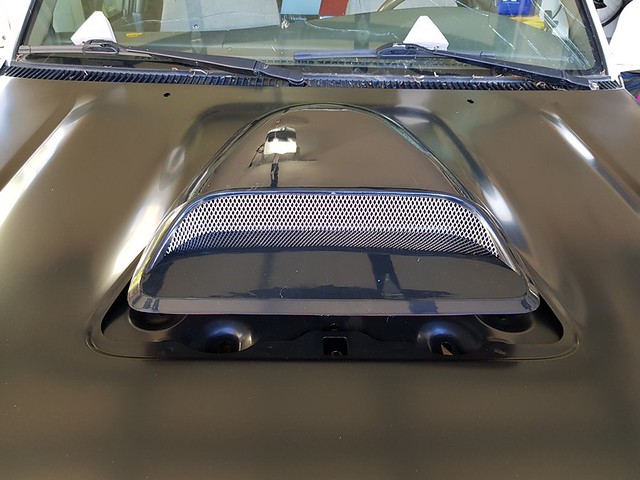
  • Hood -- Aftermarket with hood scoop from Certifit -- $100 USD
  • Paint white and clearcoat
  • Hood Scoop insert from Ebay -- $20 USD. This was the wrong one. Still need to source one.
  • New hood release cable
  • Core support from wrecker + squished items + cloth seats -- $800 CDN
  • Replacement evap box -- DONE
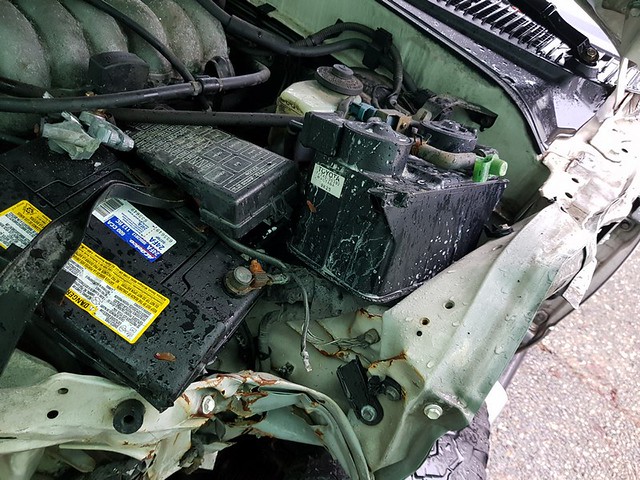
  • Put in new fuse box and fix damaged wires throughout bay from impact -- all electrical works with the squished box.
  • Weld in new donor piece with weld-through primer and white / black paint
  • New oil fill cap from Camelback Toyota -- $12 USD
  • Fix frame at shop -- $1000 CDN
  • Windshield -- $465 CDN
  • New radiator fan -- $
  • New battery
  • New headlight (I already have a spare)
  • I'll do LBJ's and radiator while I'm in there but those are regular maintenance -- driver side done
  • Replace upper and lower control arms
  • New bumper (undecided what I'll do)
  • Glue broken clip mounts on grill
  • Rear lights to replace the ones my buddy took (for now, taken from my 97)
  • A/C system discharge -- $50
  • A/C system recharge -- not yet
  • I'll need to cut out and install a new battery tray from a 99+ model as those have the airbag sensor mount
  • Gas running around getting all these parts -- $200 estimate

Running total: About $5500 so far not including any of my labour

Here is a list of things I have done / want to do as regular maintenance and repairs not directly related to the accident:

Set up tranny fluid temperature measurement
Right mirror mount is messed up; need new assembly
Passenger door doesn't have lock cylinder
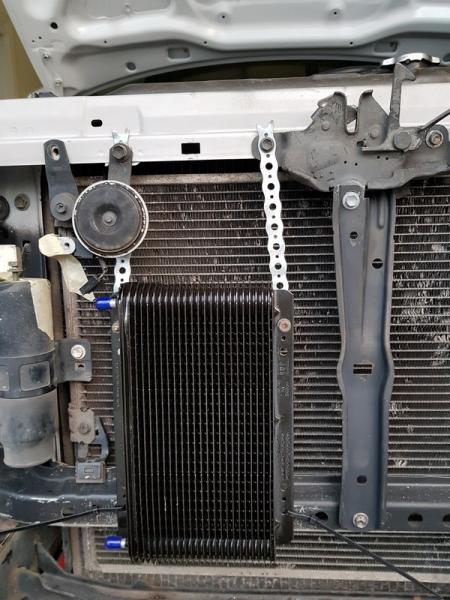
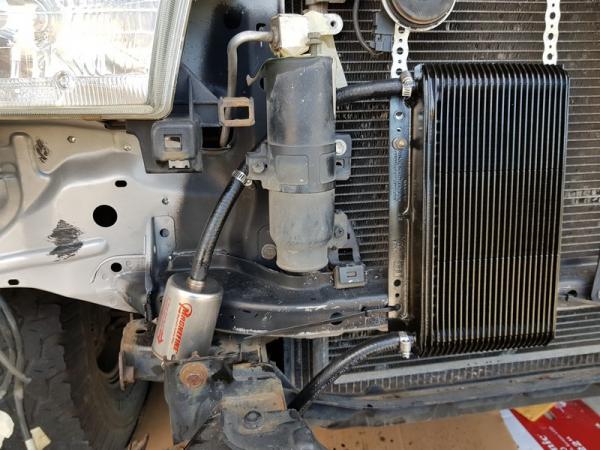
Mount K&M transmission cooler bypass from radiator -- DONE but I want to mount it on top under the hood scoop at some point.
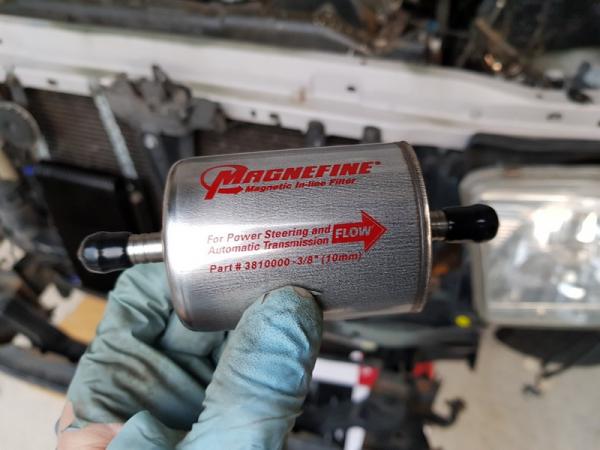
Inline tranny fluid filter downstream of cooler -- DONE
New Radiator
New A/C condenser and dryer
New spark plugs
New fan clutch
Timing belt and water pump since I have no idea when it was done last
New PCV
New fuel filter
New air filter
Clean throttle body, MAF sensor
Replace all 3 gear box fluids
Tranny fluid flush
Coolant flush
Replace power steering fluid
Brake fluid replacement
Check rear brakes
Check rear axle seals and replace with new bearings
New muffler since it has a few rust holes
Rust-proof the holes made through the floor from the amplifier install
Investigate and fix airbags
Broken power antenna
New keys
Paintless dent repair for dings in left rear door and rear bumper
Touch up paint scratches
Clay, polish and wax paint
Paint roof rack
Paint Limited trim
Replace rear license plate bezel trim gasket
New rear hatch struts
Hood strut mod
Remove rust from rear axle and paint
Diff breather relocation mod
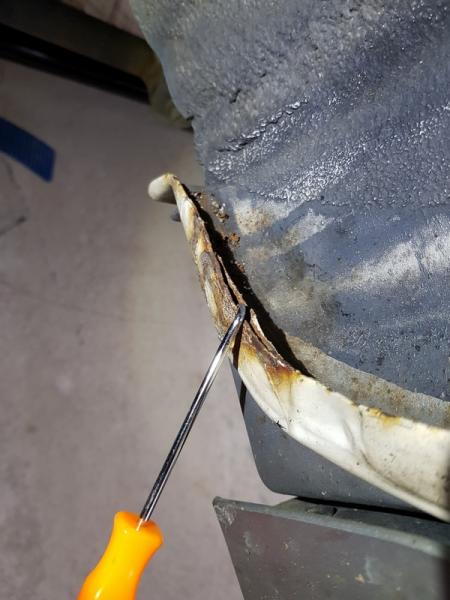
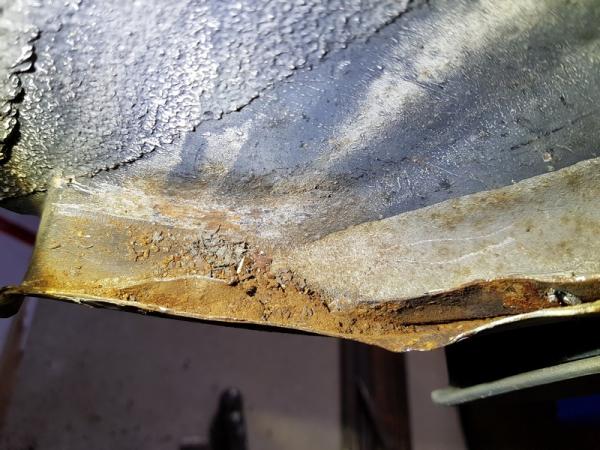
Fix rust on passenger side rear wheel well lower lip; common area for rust to develop
Rust-proof underside and inside rocker panels with some oil based protectant
Cut and weld shut rear heater lines -- DONE
Sand blast and repaint wheels
New tires
New front sway bar bushings
Camping sleeping compartment in rear.


Look at what a good body repairman can do. Looks easy.
YouTube

 
Last edited:
Register to hide this ad
Maintenance record:

Oil change Jan 9, 2019 at 234,009 km with Mobil 1 synthetic 5w30 (on sale at Canadian Tire). I put in a Napa Gold 1348 filter. The previous oil looked OK and it had a Valvoline filter in it so was probably decently cared for.

Second oil change July 1, 2020, 241,260 km with Mobil 1 synthetic 5w30, and Mobil 1 M1-102 filter.

Oil change Aug 7, 2021, 248,454 km, Mobil1 Synthetic 5w30, Napa Gold 1348 filter. (before trip)

Oil change Aug 2, 2022, 257,262 km, Mobil1 Synthetic 5w30, Napa Gold 1348 filter. (before trip)

Oil change Nov 5, 2023, 263,820 km, Mobil1 Synthetic 5w30, Napa Gold 1348 filter. (no trip this year)

Oil change May 19, 2024, 267,312 km, Mobil1 Synthetic 5w30, Napa Gold 1348 filter.

Oil change July 18, 2025, 279,053 km, Mobil1 Synthetic 5w30, Napa Gold 1348 filter. After big Oregon trip.

Oil change June 21, 2026, 286,357 km, Mobil1 Synthetic 5w30. Didn't change filter.

Complete transmission fluid flush, Apr 17, 2021 with Valvoline Maxlife Full Synthetic at 246,0xx km. The previous issue of shift hunting at highway speed seems to have gone away after this. The fluid didn't look great coming out but not too bad.

Changed transfer case oil July 19 2025 at 279,947 km. Looked half decent coming out. Replaced with mixture of 2/3 Motomaster 75W-90 Synthetic gear oil, 1/3 Lucas 80W-90 gear oil.

Cleaned MAF sensor Apr 15, 2022. 255,627 km. Cleared P0171

New tires June 25, 2021; 248,264 km

Put in Bilstein 5100 / OME 906 rear suspension Aug 1, 2021; 248,3xx km

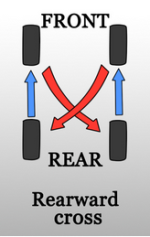
Rotated tires as per pattern below, Aug 8, 2022; 257,316. Previous rear tires 11.2 mm tread depth; previous front 11.5 mm.
Tread depth Sept 15, 2022 after trip: 11.0 mm; 260,400.
Rotated tires again July 6 2025 at 276,945 km.

Applied Aero Cosmetics Rubber Care to tires Jan 14, 2023; around 261,5xx? km

Changed front brake pads Aug 16, 2022; 257,695 km with OEM pads and resurfaced OEM used rotors. Re-used anti squeal shims already in there.
 

Attachments

  • Tire rotation.png
    Tire rotation.png
    37 KB · Views: 532
Last edited:
A re-post of what was lost after the site got hacked...

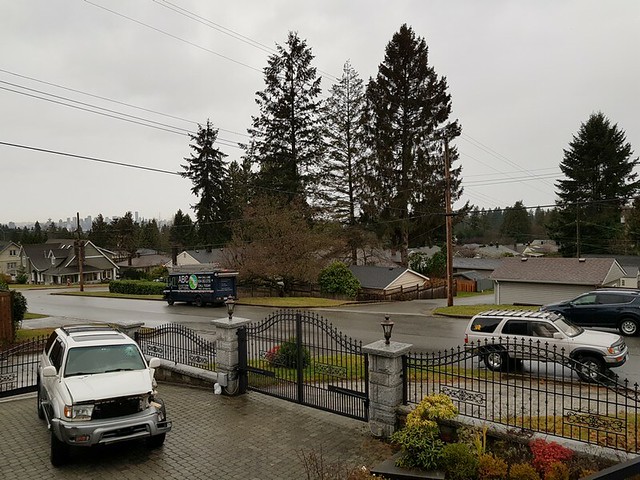
So I worked on it in my friend's driveway for a few days in the rain under tarps held up between the two antennas of the 4runners, a kayak paddle, and a light fixture on the house. I needed to get it moving on its own power so I could get it in my driveway and garage because there's no way to get it in there.

I spent a day cutting off the smunched up metal. They call it a crumple zone for a reason.

45427935085_8a6faa3c1f_z.jpg


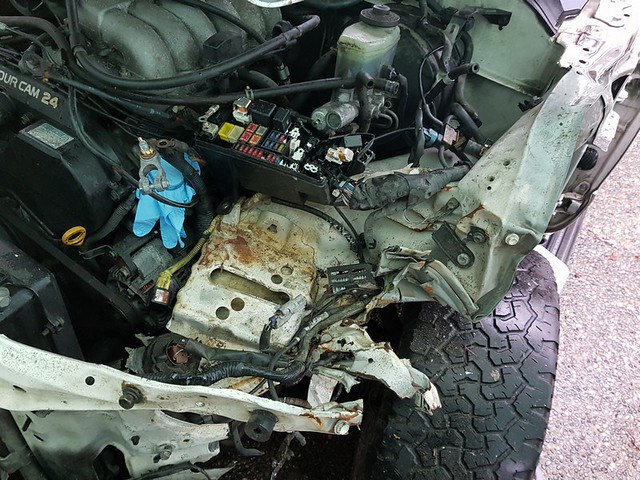
Then I freed the engine. One of the radiator fan blades was broken off so I had to remove the fan and just go without it, which isn't a problem since it won't be on for more than a few minutes. You'll notice that a blue glove appears in the next photo. This is from when I lifted the battery out and the lower lip grabbed the oil fill cap and broke it off... so I put a glove and rubber band on it to keep debris out.

45427934505_bcf3d83a0d_z.jpg


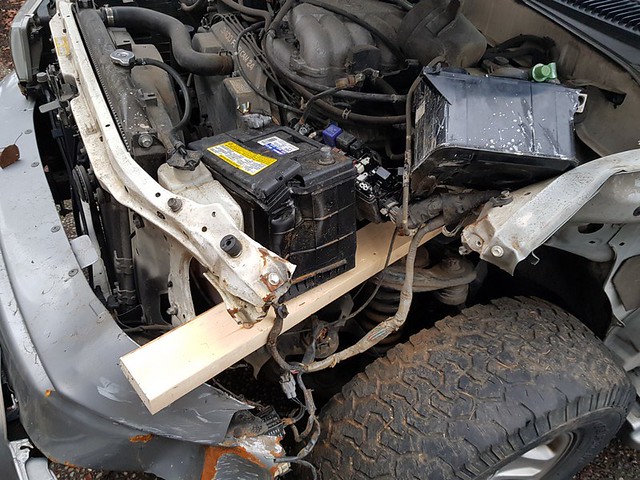
I rigged up a wooden plank for the battery to sit on.

45427930605_e0100f1325_z.jpg


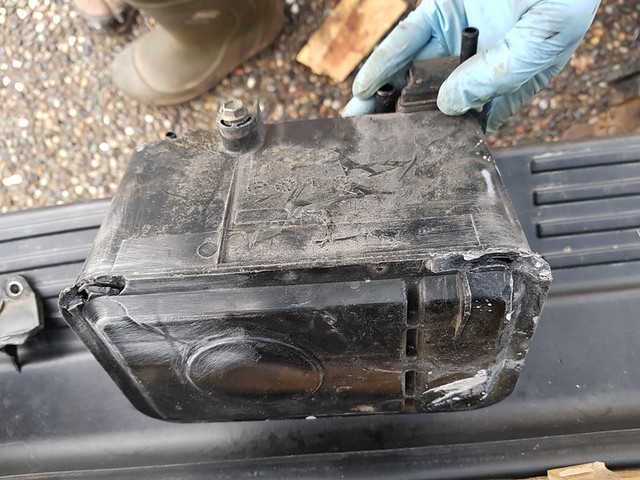
I also had to bondo up the charcoal canister since the mounting tabs broke off and this broke the housing so it wouldn't hold a vacuum.

45427932625_6f710d6fdc_z.jpg


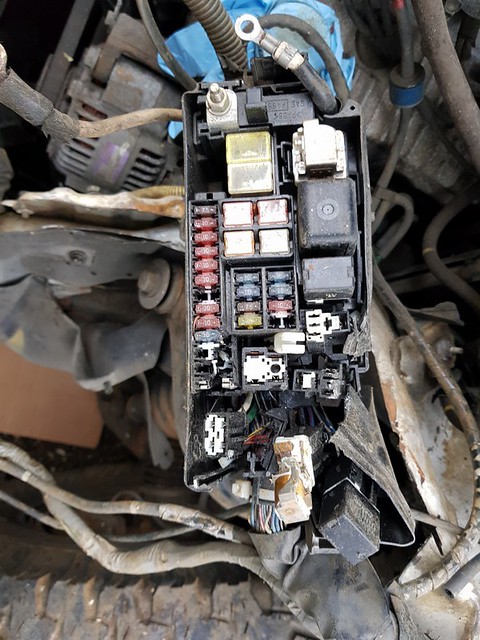
The engine would turn over but not fire. The fuel pump fuse and relay were destroyed... that would do it. Good thing since it killed the engine on impact.

31401396477_f8c0d19396_z.jpg


Then it was time... it fired right up!!! IT'S ALIVE!!!! And no codes!!!

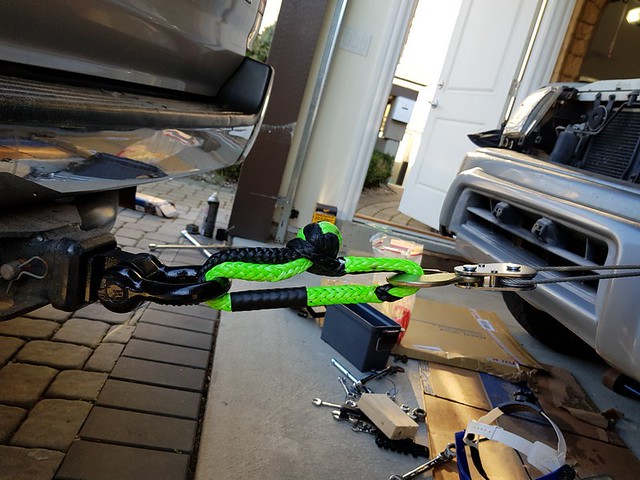
I then got it towed to my house which wasn't cheap. Managed to drive it into the garage with the limited turning radius of the bent suspension.

32808849238_d9175b8f90_z.jpg


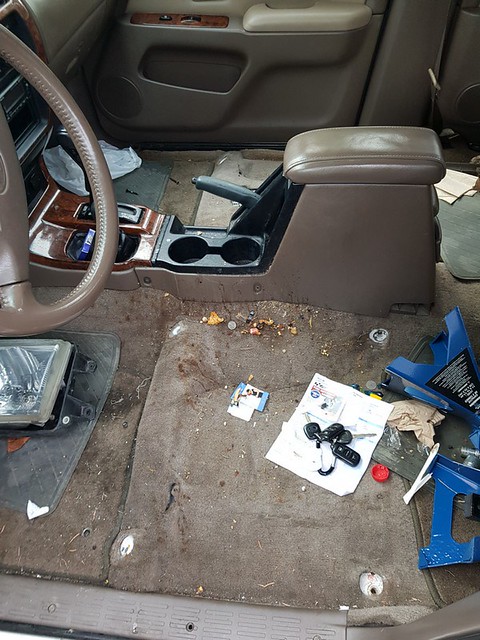
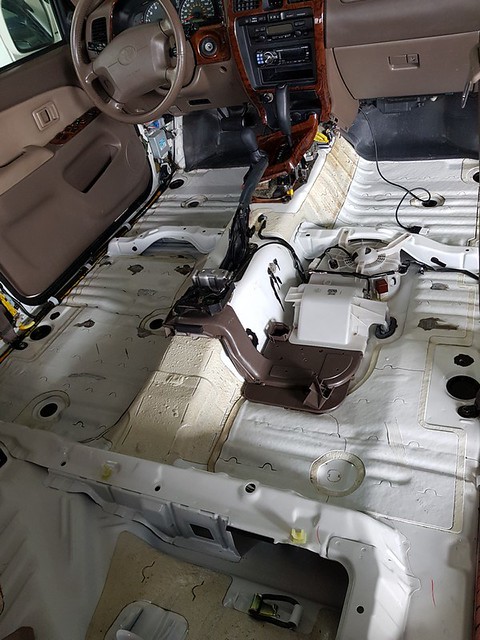
The first thing to do was clean the carpet since it was disgusting. I took that out and hosed it for hours. There must have been a full coke drink dried up in it.

45427932525_548cb72050_z.jpg


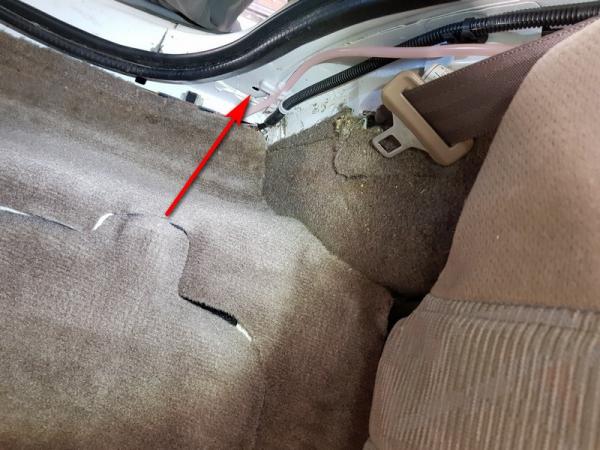
I discovered some holes drilled though the floor under the seats for some amp or something so I had to clean those out to make sure they weren't rusting and then bondo them up.

45959114334_20e46b4daa_z.jpg


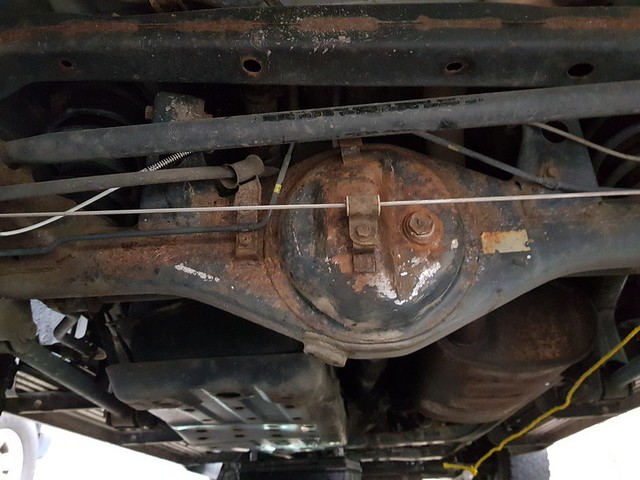
This thing is "rust free", up here in Canada. Seriously though, this is the most rust on the truck. 5 minutes with a flathead and hammer removed most of it then I sprayed with WD40 for protection. So nice to work on a truck where you can just turn bolts... that's why I decided to save it, since it's in such good shape other than some minor fixable issues.

31401396017_0696254974_z.jpg


I did notice that the coolant lines to the rear heaters were rusting out so I cut them off and welded shut. That's great, now I can be sure that it didn't overheat from coolant loss. :thumb:

I was worried that the stress of the impact may have caused a pink milkshake in the radiator so I minimised running the engine until today when I bypassed the transmission cooler lines around the radiator. I just hooked the two hoses together which means I won't have any cooling for the transmission which is OK for now. I have a B&M external cooler on its way.

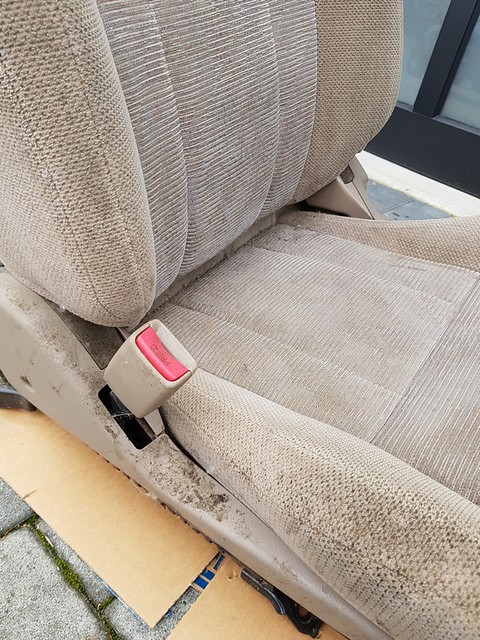
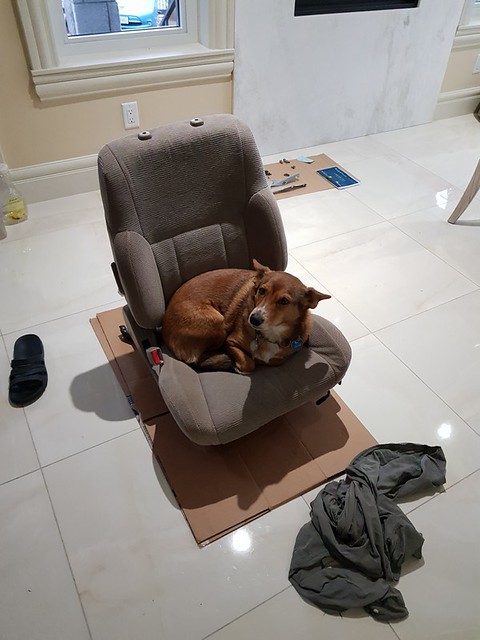
I picked up a set of cloth seats from the wreckers the other day since my friend took the leather seats. They have mildew and are a bit rusty underneath but otherwise in near perfect shape. I don't really care about the leather Limited seats. If I ever want to sell this thing for top dollar I can take the leather seats out of my mom's 97 Limited.

32808849158_37ed0e5c61_z.jpg


Oh, one other thing. Some moron at a tire shop used an impact to put the lug nuts on and I literally had to jump on the iron with my friend holding it to budge them. Of course we stripped the key. So I had to weld little nubs on the side of the keyed nuts and then whack on a big socket over them to be able to turn them. Luckily these lug nuts stick out far enough that you can weld on them. If they were recessed it would be a lot more difficult.
 
Last edited:
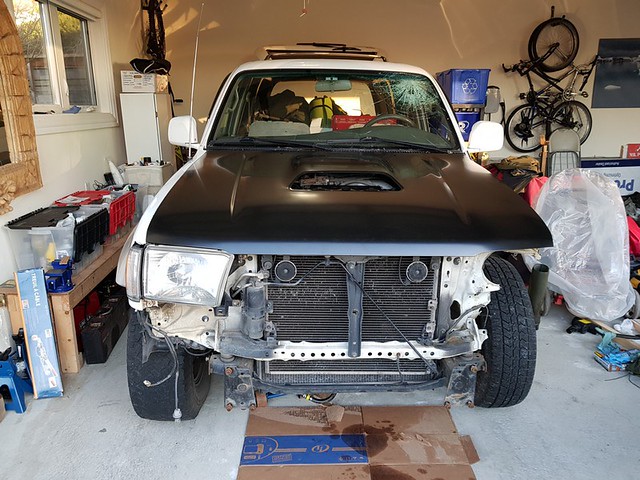
Today I made good progress on Snowy. Took off the old bent up hood and put on a new one from Certifit. It seems to fit well. But you can really tell the metal is thinner. I took off the ugly fat lip bumper which looked even worse mangled up. Look what good shape she is in under there! Frame is untouched except for the lower control arm bracket.

46021860014_553aa405fe_z.jpg


46021859914_452a0a7258_z.jpg


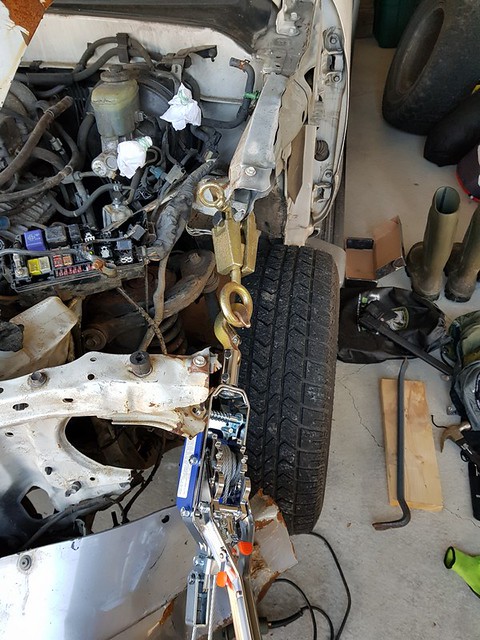
But first I had to straighten some of the mangled metal underneath so the hood would fit. I used this jaw puller which is pretty cool. The harder you pull, the tighter it grips.

46021860084_533514d417_z.jpg


39781368713_2b7b1d2173_z.jpg


And I test fit the hood scoop. Ummmm, doesn't look like it fits. Can anyone please measure theirs, the widest part at the front? The scoop is 14" wide and the hood section for it is 17". Hopefully it's the hood scoop that's wrong. Oh well, it was only $20. I got it on Ebay here. Any insight anyone?

39781368613_b4665548e8_z.jpg
 
This is turning into an awesome thread with a ton of progress so far, props to ya, OP! A little insight on the hood scoop:

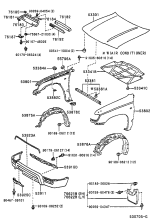
You are going to need a few things to match the opening in the 3rd gen hood, OEM or aftermarket. Unfortunately you might be looking at spending close to $150 for these parts below!

53301-35170 Hood Sub-Assy, Sport Hood ($325.29) (which you have already)
76181-35901 Bulge Hood ($114.15)
76192-35010 Plate, Hood Bulge ($13.20)
76182-35020 Guide, Hood Air ($13.58)
90263-04054 Rivet ($0.57) X 2
90167-45005 Screw, Pan Tappin ($0.72)
76183-12030 Protector, Hood ($0.71)
90179-06324 Nut ($2.20) X4
76187-35010 Retainer, Hood ($0.89)
76184-12020 Protector, Hood ($0.71) Don't Buy
76185-35010 Protector, Hood ($7.00) Don't Buy

from this thread here

Hope this helps man. Keep up the revival pics!
 

Attachments

  • 530705G.png
    530705G.png
    19 KB · Views: 1,535
This is great (subscribed). I look forward to your progress. I have to say, I chuckled a little when you noted that windshield damage was from the gentleman's head. Glad the wreck wasn't worse for him.
I'm in the rust belt as well and was lucky to find a minimal frame rust car. Every single bolt is rusted though because the majority of the undercarriage was never worked on by the original owner. So most of my jobs take a bit longer, but otherwise it's in impressive shape.
Where do you think this car spent the majority of it's life to have had that little rust damage? And what was the mileage on it when it was salvaged??
 
This is great (subscribed). I look forward to your progress. I have to say, I chuckled a little when you noted that windshield damage was from the gentleman's head. Glad the wreck wasn't worse for him.
I'm in the rust belt as well and was lucky to find a minimal frame rust car. Every single bolt is rusted though because the majority of the undercarriage was never worked on by the original owner. So most of my jobs take a bit longer, but otherwise it's in impressive shape.
Where do you think this car spent the majority of it's life to have had that little rust damage? And what was the mileage on it when it was salvaged??

Sorry, I missed this post, my alerts are going to junk mail. It has 260,000 km. I'm not sure why it's so rust free. It's from Vancouver but we have salt in winter. The rear bumper is new so that got replaced. I can say that if it wasn't so clean otherwise I wouldn't be doing this, it would be a parts car.
 
I've been making progress. It's been a couple weeks' work now.

The seats turned out pretty good but there's still a few black mold stains. Not sure how to remove those, I guess I'll have to remove the seat fabric which I don't how to do yet. Later.

32014847477_cbc7ece768_z.jpg


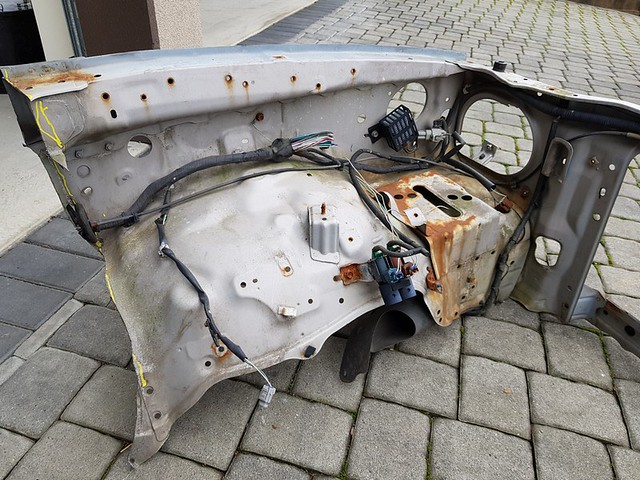
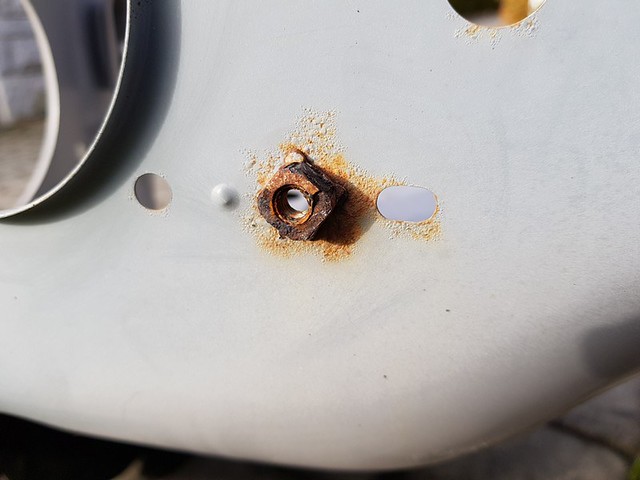
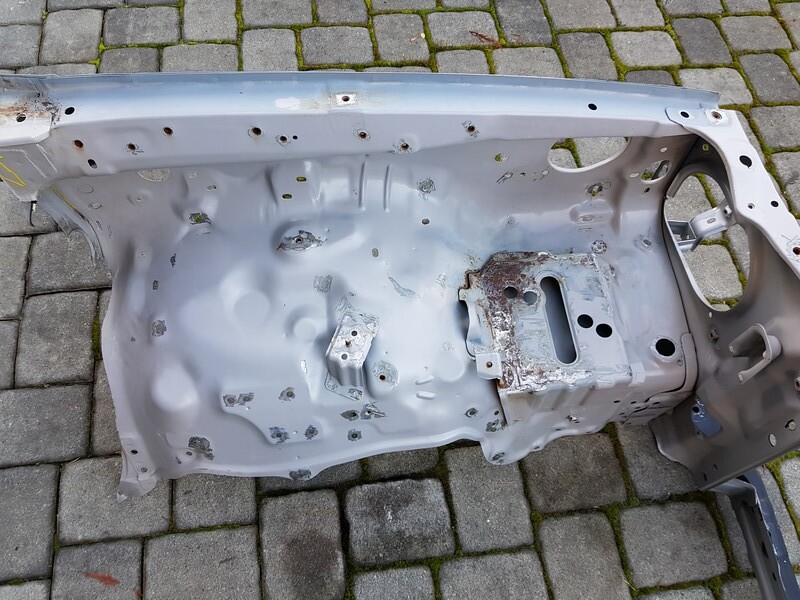
The new piece has some rust.

39991381883_63268997f6_z.jpg


39991381453_5077d33e6e_z.jpg


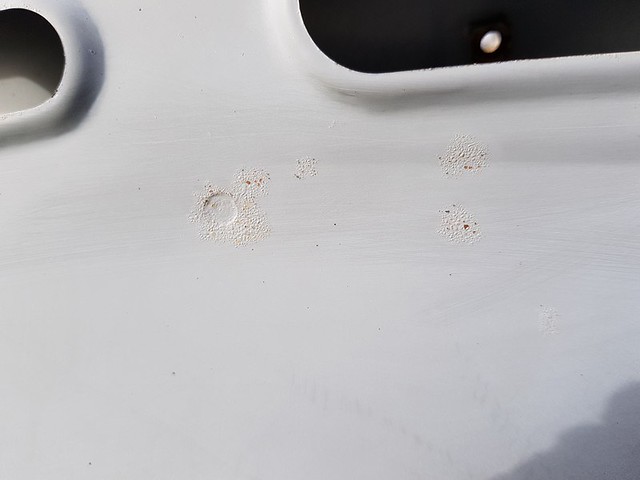
And those really annoying travelling rust bubbles. I looked on the truck which is pretty rust free and it also has them. Seems like it's from poor paint.

46903756412_0d0b8fe471_z.jpg


I removed most of it and I'll paint it up. Nothing deep, except for the battery tray which has heavier rust. I'll use rust encapsulator on that first and maybe eventually just swap it out with a clean one. It would have been nice to search around for a nicer donor piece but I had limited time and this one will do.

46903755942_5e1d814b6a_b.jpg


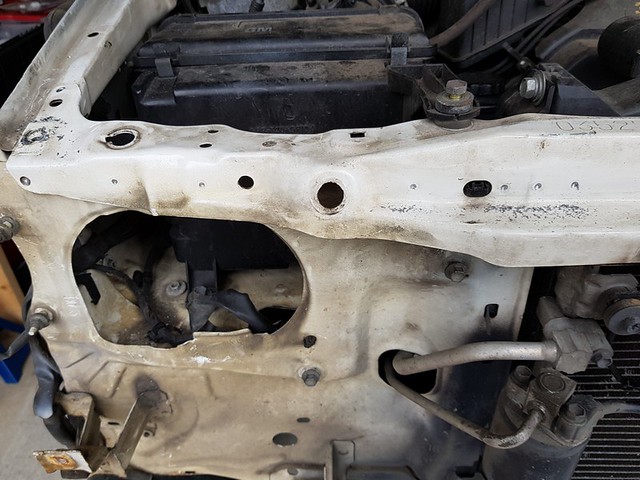
I removed the upper core support using the spot weld removal drill bit. Out of the 9 spot welds, I drilled through 2 completely by accident.

46903756612_99d558465c_z.jpg


33080476158_40ce112dde_z.jpg


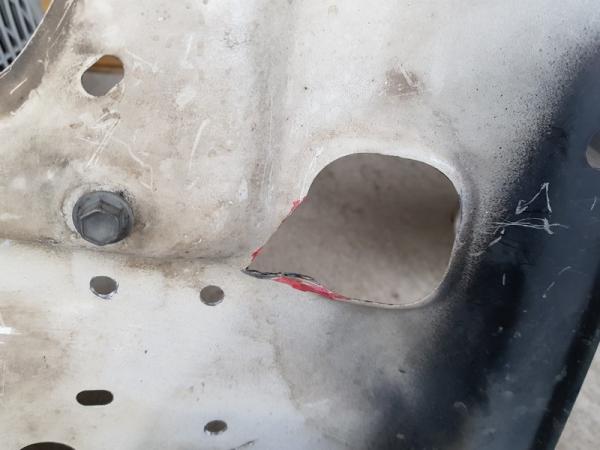
You can see in the above photo the lines to the A/C condenser going through the front piece. I'd rather not have to dismantle the A/C to replace that piece but it is a little bit damaged form a previous accident. Not sure what I'll do.

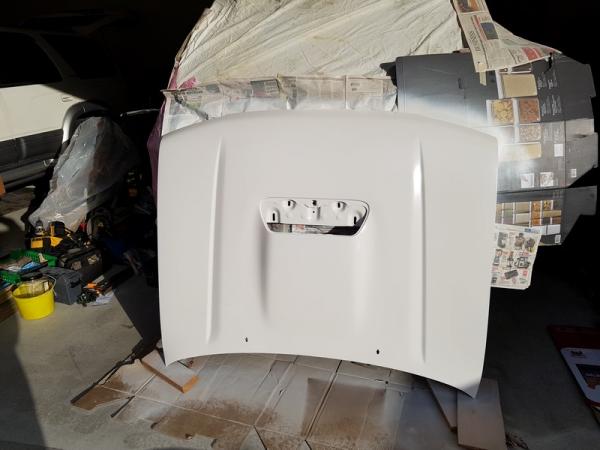
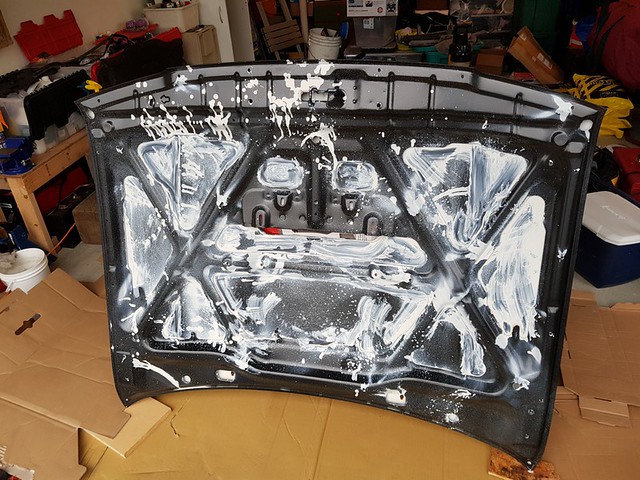
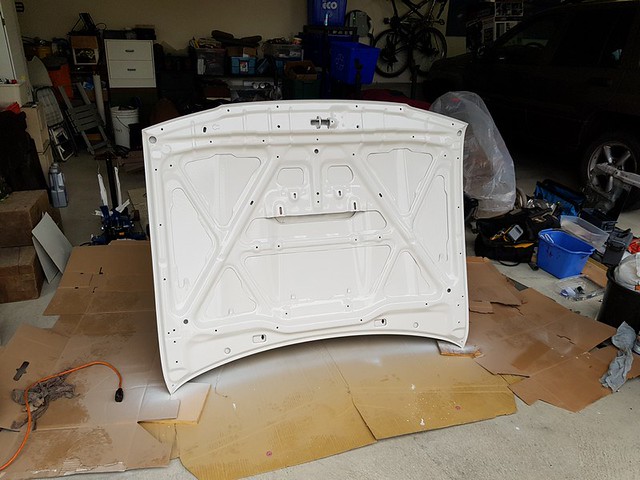
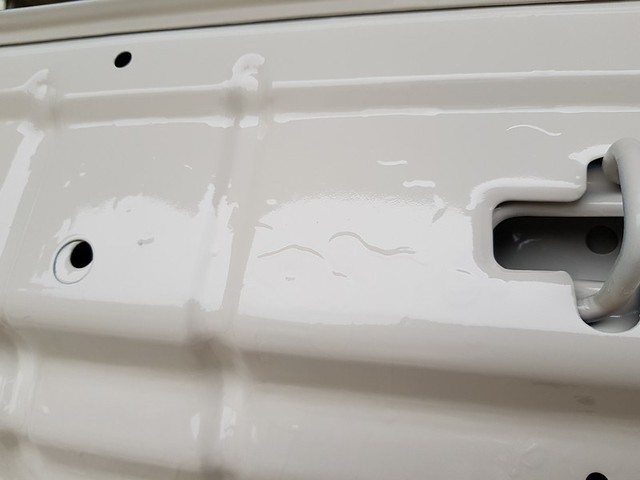
I painted the underside of the Certifit hood. I wanted to spray in all the recessed areas so I used the spray hose that comes with the Eastwood frame coating paint. Well that really sprayed out excessive amounts so it was pooling everywhere. And it seems Certifit put some brown substance in there so I was getting brownish paint dripping out. But is seemed to dry OK.

33080476568_900aa05408_z.jpg


Good from far.

46903756112_6db681dacf_z.jpg


But far from good. LOL this is the worst paint job. Whatever, I just need to get this thing painted and the underside of the hood isn't a critical area. For a $100 hood I'm not going to sweat it. In the summer I'll sand it down and give it a few more coats. I'll paint the top side tomorrow which is a flat surface so I'll do a much better job.

33080476268_714e99e424_z.jpg


I used Rustoleum Automotive White Gloss paint which is an exact match. I thought there was multiple shades of white but this one is bang on. I tested it on the old hood and you have to know where I sprayed to see it. Then in the summer maybe I'll clearcoat it.

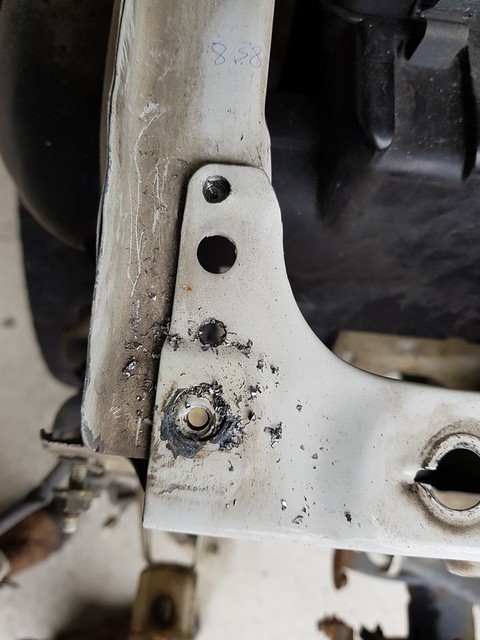
I noticed that the frame actually had some buckling and was skew. I'm not sure how I missed that buckling before.

33080476108_dc85324d6c_z.jpg


So after I put it back together with 2x4's I had it towed to the frame shop. It's amazing what those guys can do. He heats it up and the buckle just pulls right back out like new. The wheel sits about 1/2" back compared to the passenger side which is probably due to some bent suspension components; he thinks the upper control arm. But for now it works.

I would have driven it home bit I think a police man would have given me a ticket...

46903755852_8feafa1d94_z.jpg
 
Pictures aren't working unfortunately so I'll add them anther time.

Progress is being made more difficult with the sub freezing weather here. Nasty, I hate cold weather.

I dug into the wiring and lights and managed to piece together a complete set for the front with the donor pieces and some 99 headlights I had bought previously. The only thing I am missing now is the driver side turn signal on the bumper which I have on order. I tested everything and they all work.

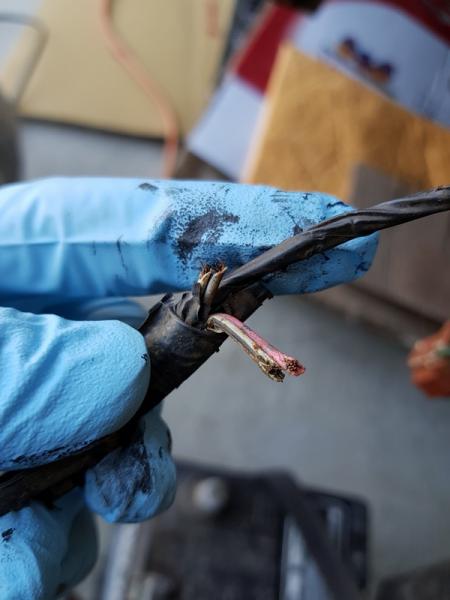
I then had to assess the damaged wire from the impact and decide what needed replacing and what could be just cleaned up. I can't leave any exposed wire since it will corrode and cause either a short or a fault. I soldered up the new joints and tonight I coated them in Gardner Bender Liquid Tape.

This was the fog and turn signal wires

mark_bc-albums-mark_bc-s-salvage-2000-limited-picture54351-20190206-120905-tn.jpg


I painted the top side of the hood last week. It actually turned out well except for the dust that was getting stuck to it. I'll give it a sand in the summer with another coat and then clearcoat.

mark_bc-albums-mark_bc-s-salvage-2000-limited-picture54349-20190203-152305-tn.jpg


An A/C guy came over to evacuate the system for $50. He'll give me a good deal on the recharge later. He actually pulled up in a 2000 SR5 4runner. I looked underneath and it was the cleanest 4runner underside I've seen, virtually no rust.

I used the port-a-power with the jaw to try to bend the bumper back into shape so it could go back on and be legal (is it illegal to drive without a bumper?) All good, for now at least until I decide what I'm doing for a new one.

Back off it came today and I finished drilling out the spot welds to remove the front support.

Now the issue is that the front of the frame is offset to the side by 1/2" compared to the body so I need to take it back to the frame shop. But I can't afford another tow so I'll drive it over next week hopefully. I'll just use screws to hold the new front end together for that. You can see how the body mount hole doesn't line up here

mark_bc-albums-mark_bc-s-salvage-2000-limited-picture54350-20190204-111323-tn.jpg
 
Last edited:
Today I pretty much got it back together. Well, not really. It's just together enough to check fitment and to drive to the frame shop to get the front mounts fixed. But it sure is satisfying putting things back together. All the gaps with the doors, fenders and hood are good. So I know the frame is out. It lined up fine before I took it to the shop but after he "fixed" it, the front was all out of whack.

Had to chase all the threads on the donor piece since it had been outside for so long the threads were rusted up.

mark_bc-albums-mark_bc-s-salvage-2000-limited-picture54443-20190216-135004-tn.jpg


After taking these photos I discovered that the hood cable ball end wasn't in the latch anymore and I couldn't open the hood. So off came the bumper and grill again... which is OK since I still need to do the tranny cooler hoses tomorrow.

mark_bc-albums-mark_bc-s-salvage-2000-limited-picture54440-20190216-163613-tn.jpg


mark_bc-albums-mark_bc-s-salvage-2000-limited-picture54439-20190216-163609-tn.jpg


mark_bc-albums-mark_bc-s-salvage-2000-limited-picture54438-20190216-130056-tn.jpg


mark_bc-albums-mark_bc-s-salvage-2000-limited-picture54441-20190216-171131-tn.jpg


Mark_BC's ghetto tranny cooler mount job with plumbers tape and zip ties. Just temporary though since the whole front end will be coming off again to get properly painted and welded in.

mark_bc-albums-mark_bc-s-salvage-2000-limited-picture54442-20190216-171159-tn.jpg


Plan for tomorrow is to insure it, hook up the tranny cooler lines, put in the lights and some other electrical stuff, then turn the key.
 
Last edited:
This is how I routed the hoses for the tranny cooler. Not perfect but the hose supplied with the cooler was more than enough and at this stage, cost is something I need to keep down so I can save buying more hose, for now. Eventually I want to mount it over the engine with a fan, below the hood scoop.

mark_bc-albums-mark_bc-s-salvage-2000-limited-picture54457-20190217-112749-tn.jpg


She rides again!!! Got it all finished up to be legal to drive. Look at the license plate I got -- HG3... I hope that doesn't mean head gasket #3 'cause it looks like I blew the HG on my other 2 runners.

mark_bc-albums-mark_bc-s-salvage-2000-limited-picture54458-20190217-153157-tn.jpg


No problem with the drive around the block a few times. Everything works although I haven't tried the sunroof yet. There's still a lot of work to do, big stuff like welding and painting the new piece, and lots of little things.
 
just a suggestion but while you got access to this location, cut a small 3" section of half inch hose, split it along the middle and make a grommet to protect the AC aluminium hoses passing through the front ..
i did this on my truck which was in a front end hit. It adds protection to the tubes and prevents fretting on the pipe due to contact caused by vibration or any bending not noticed from the collision.
 
just a suggestion but while you got access to this location, cut a small 3" section of half inch hose, split it along the middle and make a grommet to protect the AC aluminium hoses passing through the front ..
i did this on my truck which was in a front end hit. It adds protection to the tubes and prevents fretting on the pipe due to contact caused by vibration or any bending not noticed from the collision.

Yeah I was wondering about that. I actually had to cut a notch out to get the new front to fit over the A/C line. One line was removable but the other one looks like it goes into the firewall and I'm not screwing around with that. I'll have to weld the notch back in when I'm done.

mark_bc-albums-mark_bc-s-salvage-2000-limited-picture54459-20190210-165318-tn.jpg
 
Got the windshield replaced a few weeks ago. I drove it down in the dry weather between rain and snow. Don't want to get any road salt or moisture in the open pinch welds.

mark_bc-albums-mark_bc-s-salvage-2000-limited-picture54694-20190220-190130-tn.jpg


Then I drove it to the frame shop across town and it had no issues; a pleasure to drive despite the front not being held on... in a previous post I showed that the front body mount holes were off by 1/2". The guy had a look at it and confirmed that the frame was bang on. So it must be the body that was out. But all the fender, doors and hood lined up fine so the body wasn't bent. But what he discovered is that the whole body shifted on all the mounts to be off-kilter. So he loosened all the body mounts and pulled the body back into position and it fits now.

Back in the garage I decided to do some repair of the few rust spots before they get wet.

Yuk

mark_bc-albums-mark_bc-s-salvage-2000-limited-picture54695-20190224-133948-tn.jpg


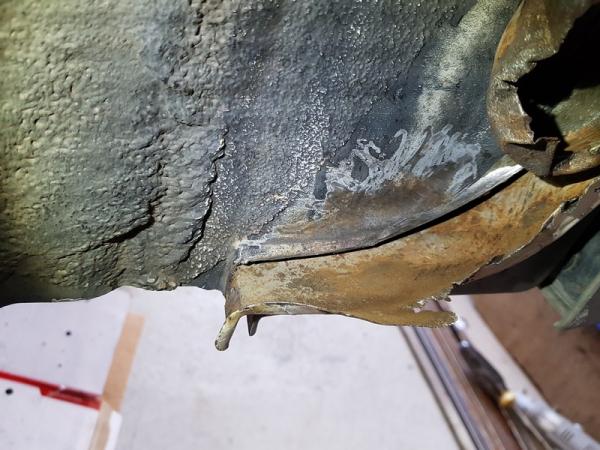
Ugly. This is such a common rust area for 4runners. If you get one little nick on the paint there between the two layers of metal the moisture and crap then just seeps in and starts rusting.

mark_bc-albums-mark_bc-s-salvage-2000-limited-picture54696-20190224-140416-tn.jpg


I found you can access inside the rear most rocker panel from this hole when you take the trim off the C panel. I put my snake camera in there to have a look and there wasn't much rust.

mark_bc-albums-mark_bc-s-salvage-2000-limited-picture54697-20190224-151245-tn.jpg


Basically the two metal sheets come together there so I cut and peeled the upper layer back and cleaned all the rust out. The metal was still good underneath for the most part.

mark_bc-albums-mark_bc-s-salvage-2000-limited-picture54703-20190224-150451-tn.jpg


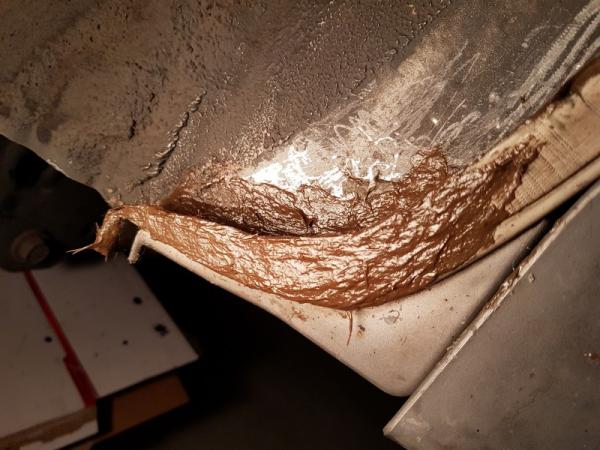
Then I blew it all out with compressed air and sprayed down with alcohol, then put the metal back and bondo'd it up. Then I sanded it and painted it white. I don't have a picture of anything beyond the bondo but I'm sure you get the idea.

mark_bc-albums-mark_bc-s-salvage-2000-limited-picture54698-20190224-204509-tn.jpg


I'll now spray some WD40 or Rust Cure 3000 in the rocker panel and that should be the end of it.

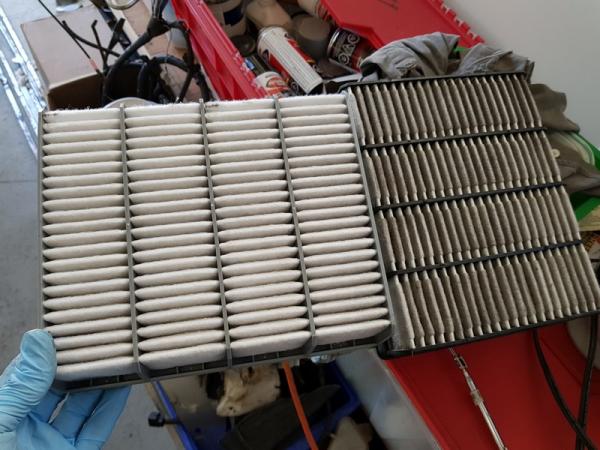
Put in a newish air filter.

mark_bc-albums-mark_bc-s-salvage-2000-limited-picture54699-20190309-130007-tn.jpg


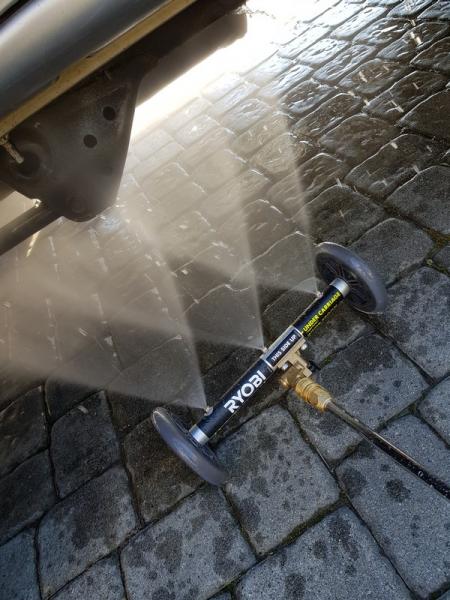
Today I gave her a bath. But only underneath since I don't want water running down the windshield into the spot welds. I got one of those pressure washer brooms. It actually works pretty well; super easy to get under and spray off all the salt. You can lift it up too if you need to get some different angles.

mark_bc-albums-mark_bc-s-salvage-2000-limited-picture54700-20190309-132119-tn.jpg


mark_bc-albums-mark_bc-s-salvage-2000-limited-picture54701-20190309-133619-tn.jpg


Then 2 hours later the whole front end was off again.

mark_bc-albums-mark_bc-s-salvage-2000-limited-picture54702-20190309-175404-tn.jpg


Tomorrow I'm going to do the final painting and prep of the donor piece and the areas on the truck to be welded. Then next weekend I'm finally going to weld it in. I have to do it next weekend because I need it to go on a trip the weekend after.
 
Last edited:
Members online

Forum statistics

Threads
278,313
Messages
3,554,090
Members
248,016
Latest member
Advally Service

Trending content

Back
Top