Mellow77's Build Thread

Any chance you have part numbers for the Taco components? Great build so far by the way.:driving:

Certainly; here you go!

Parts List:
  • 4Runner CV Axles - 43430-35030 - Qty 2
  • Taco Parts:
    • 43330-39815 - RLBJ - Qty 1
    • 43340-39585 - LLBJ - Qty 1
    • 45046-39295 - ROTRE - Qty 1
    • 45047-39175 - LOTRE - Qty 1
    • 45503-39075 - ITRE - Qty 2

If you decide to go this route I highly suggest buying new boots that cover the ITREs. I did not think to do so and although they are basically just a dust guard you'll have to break the ITREs and OTREs to get them off the old setup w/o tearing them. Mine required a good heating with a torch to break them loose.
 
Last edited:
Less Turning Radius?

It could be my imagination but I think the new taco parts have reduced the turning radius of my rig just slightly. It's not anything drastic but I think I have just a bit less turning lock to lock.

It's too late to measure now but I really would be interested in before and after measurements for anyone else attempting this swap.
 
Wheel Spacers

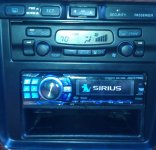
Finally got my new radio deck installed so I have Satellite Radio again!

Radio Console.jpg

While I had the center dash apart I tore into the climate control module to clean up the contact points. Since buying the rig the auto climate module has functioned correctly to control the temperature setting but the buttons didn't work very well. They had to be pushed extremely hard, or pushed in conjunction with the "mode" or "off" button to get them to work. :confused:

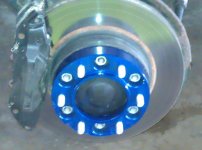
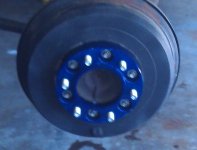
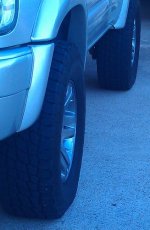
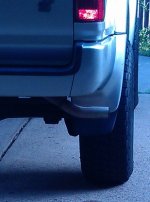
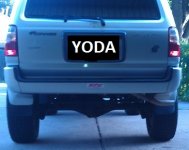
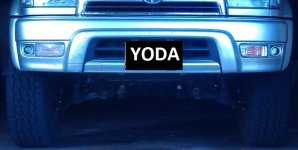
Wanted to bump the wheels out to the edge of the fender flares so I slapped on a set of Spidertrax 1.25" wheel spacers and am very happy with the results. :guitar3:

Front Spidertrax.jpg Rear Spidertrax.jpg
Wheel 1.jpg Wheel 2.jpg
Wheel 3.jpg Wheel 4.jpg

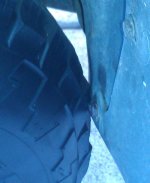
Have a slight bit of rubbing on the front drivers side inner fender molding to fix. And never mind the missing badges....next mod in progress. :artist2:

Wheel Rub.jpg
 

Attachments

  • Radio Console.jpg
    Radio Console.jpg
    89.3 KB · Views: 2,852
  • Front Spidertrax.jpg
    Front Spidertrax.jpg
    78.4 KB · Views: 2,842
  • Rear Spidertrax.jpg
    Rear Spidertrax.jpg
    51.5 KB · Views: 2,841
  • Wheel 1.jpg
    Wheel 1.jpg
    73.4 KB · Views: 2,854
  • Wheel Rub.jpg
    Wheel Rub.jpg
    56.6 KB · Views: 2,835
  • Wheel 2.jpg
    Wheel 2.jpg
    51.1 KB · Views: 2,855
  • Wheel 3.jpg
    Wheel 3.jpg
    42.9 KB · Views: 2,866
  • Wheel 4.jpg
    Wheel 4.jpg
    83 KB · Views: 2,846
Last edited:
Nice build Mellow! I like the Herculiner idea for your rear cargo hatch. I've been debating going that route myself since I tend to load my truck with tools and they just end up scraping the carpet. I guess it's that or a Weathertech mat.

I'm also curious what route you take with the cargo hatch shocks. Mine work well enough for now, but I plan on replacing them in the future, after I finish about 2,000 other mods I have in mind.

And I feel your financial pain. I basically had my front end and entire driveline rebuilt since I bought my truck 3 months ago. I agree with you about getting stuff done all at once. I just wish I knew about the Tundra brake upgrade before I swapped out my brakes. That's another one of the future mods.

Anyway, keep up the great work. I always like to see what other guys are doing to their rigs.
 
Thank you sir; I really appreciate the compliments!

I like how the Herculiner turned out from a functional perspective. If I had it to do over again I would put down Dynamat or something like it to reduce the noise levels first and then Herculiner over it. I still use my stock cargo mat (rubber on the backside) to help keep the noise level down and just flip it over when the dogs are with me.

For the hatch shocks I left in the Monroe replacement shocks since I really couldn't send them back. They work pretty good but don't extend up the last 12"s or so. I'm 6'3" so w/o them going all the way up I have to duck under the lid. I've gotten used to just pushing it up the rest of the way when I open it. Once it's up the shocks are sufficient to hold it there but it's something that bugs me slightly. I'll update my thread if I come up with a better solution.

The Tundra upgrade was a really nice one. They work great!

Nice build Mellow! I like the Herculiner idea for your rear cargo hatch. I've been debating going that route myself since I tend to load my truck with tools and they just end up scraping the carpet. I guess it's that or a Weathertech mat.

I'm also curious what route you take with the cargo hatch shocks. Mine work well enough for now, but I plan on replacing them in the future, after I finish about 2,000 other mods I have in mind.

And I feel your financial pain. I basically had my front end and entire driveline rebuilt since I bought my truck 3 months ago. I agree with you about getting stuff done all at once. I just wish I knew about the Tundra brake upgrade before I swapped out my brakes. That's another one of the future mods.

Anyway, keep up the great work. I always like to see what other guys are doing to their rigs.
 
Did cleaning up the contacts help with the climate control? My buttons are the same way and it gets to be a bit annoying at times.
 
Shock & Spring Swap

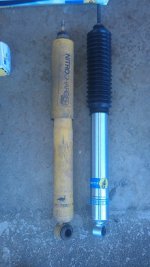
Finally got around to swapping my OME 891 rear springs out for the softer OME 890 springs. Also swapped the 60028 Comfort Ride shocks for Bilstein 5100's.

Shocks Compared.jpg

One of these came with a really buggered up nut to use. I didn't notice it until after the first shock was installed and the second one was impossible to get tightened down properly. Learn from my mistake; make sure you run the nuts all the way on & off before trying to install anything onto your rig. News flash, the upper shock mount on these trucks is complete crap; given the chance I would backhand the guy that designed them. :confused:

Anyway, I failed to do so and it literally would've saved me a whole lot of blood, sweat and curse words. :redbrick: :ak472:
 

Attachments

  • Shocks Compared.jpg
    Shocks Compared.jpg
    43.5 KB · Views: 1,938
Last edited:
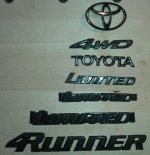
De-Badged

Also got around to taking the badges off the truck and getting them painted. I'll put up some finished pics once I get them back on the rig.

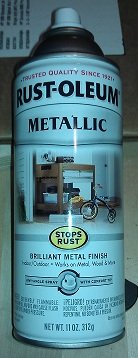
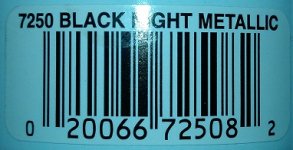
Went with Rust-oleum's Black Night Metallic.

Paint Color.jpg Paint Label.jpg

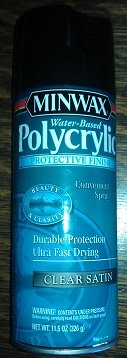
Then covered them with 3 coats of clear Polycrylic.

Clear.jpg

I think they look pretty good but the pictures are pretty poor. What appear to be little bumps are actually metallic flake in the paint. I will try to get some better pics in the daylight and on the rig.

Painted Badges.jpg
 

Attachments

  • Clear.jpg
    Clear.jpg
    27.2 KB · Views: 1,858
  • Paint Color.jpg
    Paint Color.jpg
    30.7 KB · Views: 1,892
  • Paint Label.jpg
    Paint Label.jpg
    44.1 KB · Views: 1,851
  • Painted Badges.jpg
    Painted Badges.jpg
    66.3 KB · Views: 1,931
B&M Tranny Cooler

Finally got around to installing my B&M 70268 SuperCooler Transmission Cooler. :banana:

It was a project type of weekend so I also knocked out some tranny maintenance by having it serviced for a cleaning, new filter and new fluid. :zoom: Got some great news from my tranny guy; "that's a really clean truck; everything looks great! There wasn't any crud in the bottom of the pan or shavings to indicate problems. Bring it back to me when you're ready for the rebuild to accommodate the supercharger". :boink:
 
Last edited:
Replacement Radiator

FINALLY got around to swapping out my stock radiator and eliminating the dreaded pink milkshake problem. Phew, I have been slacking on getting that done and I'm happy to have it completed! :party:

I had another thread going to discuss options and opinions, thank you to those that contributed. I ultimately decided to save some coin for other things in lieu of having an aluminum replacement radiator made for the rig at this time. I think the cooling system is something most people seriously overlook and did not want to neglect the rig while replacing the radiator but I felt chosen solution is up to the task.

For now, I went with a Koyorad A1998 direct replacement radiator and decided to spend a little extra on a nice SPAL electric fan as I was determined to make the switch. The KOYO was super easy to replace! Also added the B&M Tranny Cooler I had previously purchased to cool the fluid before it reaches the radiator. Not necessary but the radiator won't have to dissipate as much heat and it will still ensure the tranny fluid is at the desired temperature for its return trip.
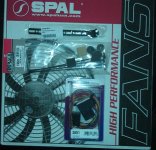
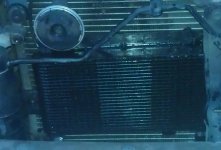
SPAL Fan.jpg Tranny Cooler.jpg

Once I upgrade to a supercharger I will probably swap out the radiator for a better aluminum two rail one and remount the SPAL fan while swapping over to an electric water pump.

:pimp: I really like how it turned out but it was definitely an adventure. I also wired the fan up so that even when the truck is turned off and the key is removed the fan will continue to run until it brings the rad temp down to under 185*.

Rip had some solid advice I chose to follow in swapping out my stock thermostat for a 170* thermostat. I went this route because on these trucks when they start to get hot they have a hard time coming back down to normal temperatures without a lot of air being forced through them. This way the thermostat will open a little earlier to circulate the coolant in the radiator a little more frequently. I live in Texas and it's always f'n hot down here so I'll keep an eye on it and see how she does. So far so good; tried my hardest to get the old girl hot afterwards and no dice; the gauge wouldn't budge and I could barely get it hot enough to kick the electric fan on. :bluejump:

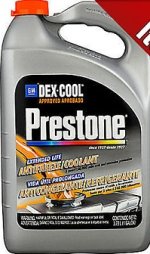
Coolant definitely needed to be changed out. Was pretty brownish/pink and watery when I stuck my hand in it. Went back with a 60/40 mixture of Dexcool & H2O.
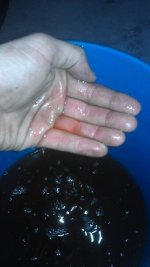
Coolant Bucket.jpg Coolant.jpg Dexcool.jpg
 

Attachments

  • SPAL Fan.jpg
    SPAL Fan.jpg
    111.1 KB · Views: 1,882
  • Dexcool.jpg
    Dexcool.jpg
    39.4 KB · Views: 1,893
  • Coolant Bucket.jpg
    Coolant Bucket.jpg
    37.9 KB · Views: 1,842
  • Tranny Cooler.jpg
    Tranny Cooler.jpg
    43.2 KB · Views: 1,858
  • Coolant.jpg
    Coolant.jpg
    32.7 KB · Views: 1,843
Last edited:
Sneaky Thermostat Install No Workie

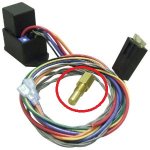
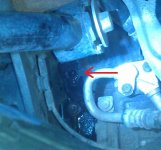
NOTE - If you wanted to be slick and use a probe in place of the 14mm engine block drain plug, THIS METHOD DID NOT WORK FOR ME. :happens: I failed to realize the way that plug is designed is so you don't have to remove it for the coolant to drain. It has a smooth "plug" after the threads and a drain hole on the bottom to allow for draining w/o removal of the plug. Made perfect sense once I removed the plug and tried it. I couldn't see the actual drain hole beforehand. :dammit:

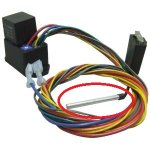
Hayden Thermostat Probe.jpg 14mm Drain Plug.jpg

I prefer tapping directly into the cooling system liquid for an exact reading with option 1. I had to settle for the second option of running a probe into the radiator fins because my super sneaky approach did not work.

Hayden Thermostat Needle.jpg

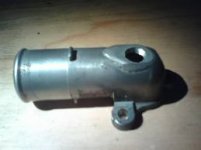
One possible future solution I came across. By building up the neck of the coolant return tube (requires aluminum welding resources) you can tap it for a spot to screw in the thermostat probe. :girl:

coolant weld.jpg
 

Attachments

  • Hayden Thermostat Needle.jpg
    Hayden Thermostat Needle.jpg
    27.2 KB · Views: 1,853
  • Hayden Thermostat Probe.jpg
    Hayden Thermostat Probe.jpg
    27.2 KB · Views: 1,870
  • 14mm Drain Plug.jpg
    14mm Drain Plug.jpg
    94.9 KB · Views: 2,048
  • coolant weld.jpg
    coolant weld.jpg
    5.7 KB · Views: 1,851
Last edited:
New Battery

The old girl got a new YellowTop Optima battery last night. I was performing a compression test and noticed the battery was really struggling. I took it out and had it tested while I was replacing the 120 amp alternator fuse I blew being a dummy. :redbrick:

Test came up saying the battery was bad after it's 7 years of service.
 
Compression Test Results

I have to say I'm extremely pleased with the compression test results after 131k miles and a rough trip to Colorado for some elk hunting. :guitar3:

1 - 210 / 2 - 210
3 - 205 / 4 - 200
5 - 210 / 6 - 210

Makes me wonder what's up with the cylinders 3 & 4. The results are fine but I'm wondering why the drop in the middle of both sides compared to the others? :confused:
 
Thanks Ark, I definitely had some pucker going on. At one point I was looking directly at the sky and wondering if I was going to end up on my head. :wow:
 
ODBII Bluetooth Reader & Torque Pro App

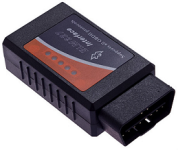
Decided I wanted some additional info on what was going on with my truck during the last road trip to Colorado. Picked up a Android Torque ELM327 OBDII Bluetooth Car Diagnostic Code Reader from Amazon and downloaded the Torque Pro Android App on my phone. It works pretty well for coolant temp, engine advancement...etc and also shows me the transmission temps which is specifically what I was interested in. A lot of info for a pretty small price.

I really would like to sort out what engine temp sensor is being used. I'm convinced it has to be a block sensor but I would like to know where it's located based on some of the engine temps I was seeing.

ODBII Reader.PNG Torque Pro.PNG
 

Attachments

  • Torque Pro.PNG
    Torque Pro.PNG
    38.2 KB · Views: 1,811
  • ODBII Reader.PNG
    ODBII Reader.PNG
    75 KB · Views: 1,846
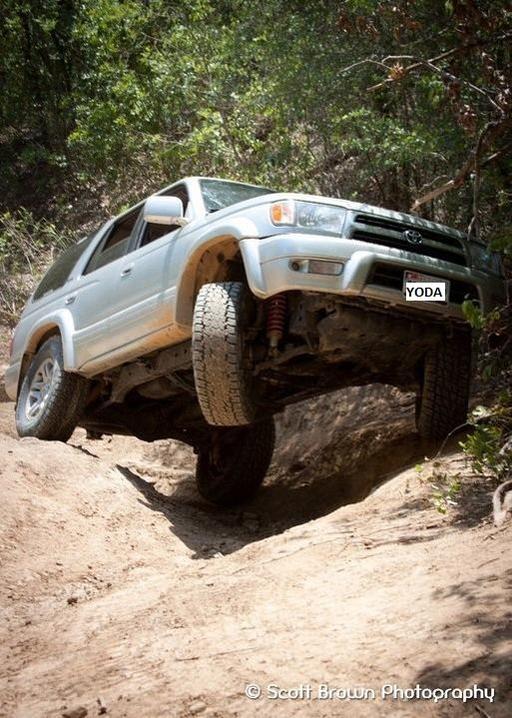
Picked up the panhard drop bracket from Toytec and had it welded on a few days later
View attachment 57045

Hey just wondering did the drop bracket help that much? I'm looking into buying the whole rear adjustable links set from toytec and they have the drop bracket and pan hard bar in the set......which doesn't make sense because if your going to use the drop bracket cant you just use the stock bar. would save me $$$ if I don't have to buy the adjustable bar :naughty:
 

Members online

Forum statistics

Threads
278,305
Messages
3,554,043
Members
248,016
Latest member
Advally Service

Trending content

Back
Top