Mellow77's Build Thread

Mellow77

New member
Starting a build thread is long overdue. Many thanks to all of you contributing members I have been able to glean knowledge from prior to making a purchase decision. I continue to do so with each step along the journey. If the build thread format looks familiar it's because I shamelessly stole formats from other member's build threads I admired.

As purchased:
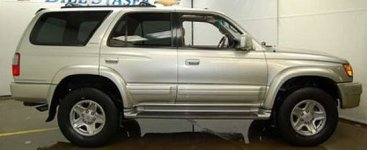
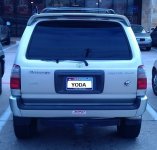
Day 1.jpg

Officially named "Fenix" (based on my wacky rules for naming vehicles) but affectionately nicknamed ""YODA"
Purchased Jan 27th 2011
'99 T4R Limited Auto 4-Speed
Millennium Silver Metallic
3.4L 5VZ-FE V6 4x4 with 129k miles
Rear E-Locker

Current State and (Future Plans) Modifications:
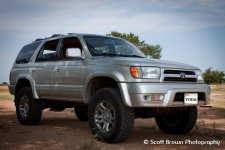
Vanity Pic.jpg

Engine:
5VZ-FE 3.4L V6
Deckplate Mod
14" Free-Flowing Magnaflow
Future Plans: TRD 2nd Gen Supercharger
Future Plans: URD Additional Injector Controller & Fuel/Timing Controller
Future Plans: TRD 7th Injector
Future Plans: Headers
Future Plans: Hi-Flow Exhaust
Future Plans: Denso IK22 Iridium Spark Plugs
Future Plans: High Flow Cat

Transmission:
Stock A340F 4 Speed Automatic with a clean pan, new filter, gasket and Dexron VI Synthetic ATF
B&M 70268 SuperCooler Transmission Cooler
Transmission Serviced - Pan Dropped; Filter & Fluid Replaced

Differentials/Transfer Case:
Front - stock 4.30 gearing
Rear - Toyota factory installed e-locker
1" Toytec Differential Drop up front
Extended Rear Differential Breather
Royal Purple Synthetic Fluids in F/R Diffs & Transfer Case

Cooling:
Koyorad A1998 replacement radiator
Spal 30102113 16" Curved Blade Extreme Performance Electric Fan
Hayden Automotive 3647 Adjustable Thermostatic Fan Control

Instrumentation:
Future Plans: ScanGauge II
Future Plans: Inclinometer

Electrical:
Future Plans: Dual battery setup

Lift/Suspension:
Toytec Ultimate Lift:
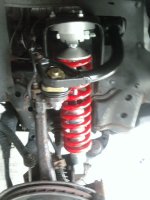
Front: Red 600 LB coils, TTAFCS-600: ToyTec / Bilstein adjustable front coilovers (featuring Bilstein 5100 shocks adjustable for 0 to 3 1/2" front lift)
Rear: OME 890 coils & Bistein 5100 shocks
UCAs: 25460 Light Racing UCAs
Toytec Panhard Drop Kit
Taco LBJs
Taco OTREs
Taco ITREs
Replaced stock CVs
Steering Rack Guide Swapped out to newer designed parts
Future Plans: Wheeler's Off Road Poly Sway Bar Bushings

Wheels & Tires:
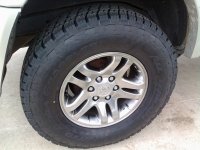
17" Gunmetal Tundra Wheels
285/70/17 Nitto Terra Grapplers
Spidertrax 1.25" Wheel Spacers

Brakes:
13WL 231mm Tundra Brake Upgrade
Toyota OEM Tundra Rotors
Toyota OEM Tundra Pads & Shim Kit
NAPA Re-man Calipers

Armor:
Future Plans: Plate Bumper, Rock Sliders, Skid Plates

Recovery:
Future Plans: 8kWinch, D-Shackles

Lighting Upgrades:
Sylvania Silverstar Ultra Headlight Bulbs
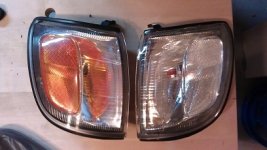
Clear Corner Lenses (Burtman Industries)
Clear LED tail lights (Burtman Industries)
Future Plans: Projector Retrofit
Future Plans: Replace stock Dash / Climate Control Lighting
Future Plans: Replace stock cabin lighting

Exterior Appearance Mods:
Re-design of Jaos Style Rear Spoiler (Burtman Industries)
Gun metal painted badges
Future Plans: Sport Hood
Future Plans: Satoshi Grill Mod
Future Plans: Mud Flap Mod

Interior Upgrades:
Cargo Area Carpet Removed & Herculined
Front Speakers - Pioneer TS-A1684R A-Series 6 1/2" 4-Way 350 Watts
Rear Speakers - Pioneer TS-A1374R A-Series 5 1/4" 3-Way 300 Watts

Permanent Stowaways:
16" Mag Light
Scanguage
Maps

Things to get:
Hi-Lift Jack
Low Profile Roof Basket
 

Attachments

  • Day 1.jpg
    Day 1.jpg
    40.9 KB · Views: 5,442
  • Vanity Pic.jpg
    Vanity Pic.jpg
    98.1 KB · Views: 5,538
Last edited:
Register to hide this ad
Looking good, so...are we gonna get a glimpse of your futute plans for the truck sometime soon?.....Oh but I don't mean to rush you..just seems like you started real well already.:biggrin2:
 
Looking good, so...are we gonna get a glimpse of your futute plans for the truck sometime soon?.....Oh but I don't mean to rush you..just seems like you started real well already.:biggrin2:

Thank you sir! I have a pretty good vision of the exhibition rig I have in my head but it's a matter of time & money to get it there. Stay tuned!
 
Muffler Replacement

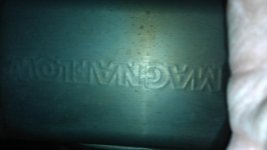
First mod was more of a necessity. I had to replace the rusted out stock muffler so I went with a 14" Free-Flowing Magnaflow. It works but I can't say I'm a big fan of the sound. It's a little noisier than I would like it to be (wanna trade???).

Magnaflow.jpg
 

Attachments

  • Magnaflow.jpg
    Magnaflow.jpg
    68.1 KB · Views: 5,272
Air Box Mod

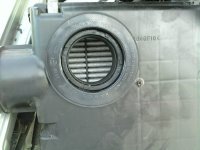
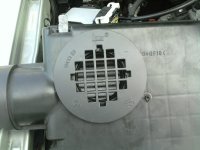
Decided the air box mod was something I wanted to try. I decided on going with a little smaller hole (option to add another if I wanted to later) and it was a pretty simple mod to do. Also performed the blue/gray wire mod so I can use my e-locker on my schedule; not Toyota's.

Airbox Mod.jpg
Airbox Mod 2.jpg

I was drag racing ricers in no time! Caution-I'm rarely serious... :nono:

Made a slight difference; nothing major.
 

Attachments

  • Airbox Mod.jpg
    Airbox Mod.jpg
    69.5 KB · Views: 5,456
  • Airbox Mod 2.jpg
    Airbox Mod 2.jpg
    67.5 KB · Views: 5,461
Last edited:
Herculined Cargo Area

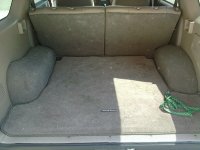
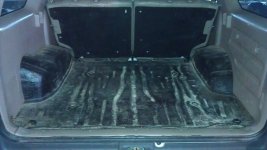
Next mod was out of pure laziness. I have a yellow lab that does plenty of shedding and I swear that factory carpet is the world's best dog hair entrapment device. Once it's in there it's pretty difficult to get out. To remedy that situation I decided to remove all the carpet from the cargo area and Herculine it.

It works really well and makes cleanup (of anything) quick and easy. I've even been know to open the rear passenger doors and take a hose to it. :happens:

Rocks, rain, mud and the muffler do add additional interior noise to the cabin without the carpet's buffering effect. I drive A LOT and it doesn't bother me but it is a noticeable difference.

Problem Area
Dog Hair Carpet.jpg

Solution (It's dirty and I still need to wrap the back seat pieces for a cleaner look)
Herculiner.jpg

Also tinted the windows to combat the heat in TX.
 

Attachments

  • Dog Hair Carpet.jpg
    Dog Hair Carpet.jpg
    79.9 KB · Views: 5,244
  • Herculiner.jpg
    Herculiner.jpg
    126.1 KB · Views: 5,201
Last edited:
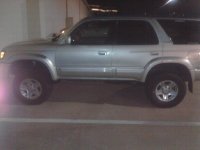
Lift Time!

I finally bit the bullet and decided on a Toytec Ultimate Lift! :guitar2: I'm glad I did because it gave me a chance to address a couple of things while I was at it. Ditched the stock running boards during the process.

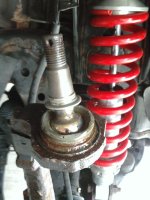
Ball Joint was on it's last leg
Bad Upper Ball Joint.jpg

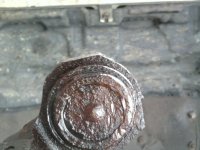
Found some rust that needed attention
Top Ball Joint Rust.jpg

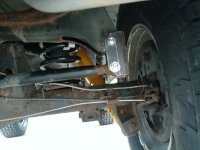
Old UCAs got upgraded to some from Light Racing to make space for some planned upgrades down the road
Stock UCA.jpg Toytec Coilovers.jpg

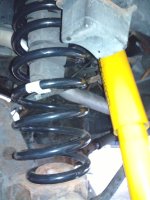
New Shocks & Springs in the rear
Rear Shocks and Springs.jpg

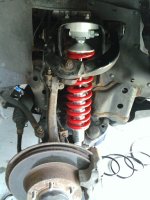
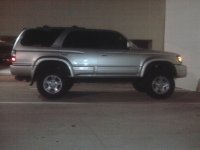
Crappy cell pics late at night but I was so excited I didn't care
After Lift.jpg After Lift 2.jpg

Picked up the panhard drop bracket from Toytec and had it welded on a few days later
Panhard Drop Bracket.jpg
 

Attachments

  • Bad Upper Ball Joint.jpg
    Bad Upper Ball Joint.jpg
    79.7 KB · Views: 5,603
  • Top Ball Joint Rust.jpg
    Top Ball Joint Rust.jpg
    73.4 KB · Views: 5,289
  • Stock UCA.jpg
    Stock UCA.jpg
    80.7 KB · Views: 5,235
  • Toytec Coilovers.jpg
    Toytec Coilovers.jpg
    66.6 KB · Views: 5,898
  • Rear Shocks and Springs.jpg
    Rear Shocks and Springs.jpg
    71.7 KB · Views: 5,183
  • After Lift.jpg
    After Lift.jpg
    58.7 KB · Views: 5,249
  • After Lift 2.jpg
    After Lift 2.jpg
    57.9 KB · Views: 5,229
  • Panhard Drop Bracket.jpg
    Panhard Drop Bracket.jpg
    70.9 KB · Views: 10,040
Last edited:
Tundra Rims & Tires

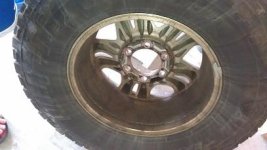
I've always loved the look of the 17" Gunmetal Tundra Rims so I picked up a pair and then wrapped them with 285/70/17 Nitto Terra Grapplers!

Nittos on Tundra Wheels.jpg Nittos on Tundra Wheels 2.jpg
 

Attachments

  • Nittos on Tundra Wheels.jpg
    Nittos on Tundra Wheels.jpg
    106.1 KB · Views: 9,920
  • Nittos on Tundra Wheels 2.jpg
    Nittos on Tundra Wheels 2.jpg
    91.4 KB · Views: 7,187
Tundra Stopping Power

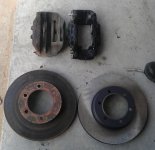
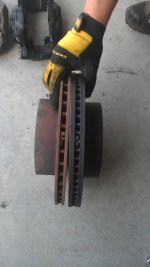
Had the well documented rotor warp after 116k on the rig so it came time for a serious upgrade. I went with reman'd 231mm (13WL) Tundra calipers from NAPA and Toyota OME Tundra rotors.

After the install I couldn't bleed the brakes for the life of me and finally took it to a shop. After some digging they figured out the culprit was a faulty seal within one of the calipers. After a swap-out, re-install, drum adjustment and brake bleed the rig was back on the road.

Caliper Compare.jpg Rotor Compare.jpg

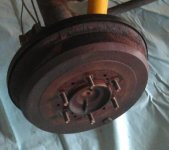
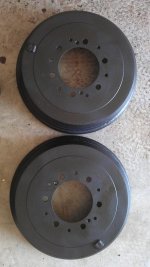
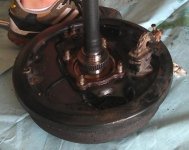
I also took the opportunity to rebuild the stock drum brakes on the rear end considering the parking brake didn't work. Cleaned them up and painted them as well.

Rusty Rear Drum 2.jpg Painted Hubs.jpg
 

Attachments

  • Caliper Compare.jpg
    Caliper Compare.jpg
    69 KB · Views: 5,341
  • Rotor Compare.jpg
    Rotor Compare.jpg
    102.3 KB · Views: 5,323
  • Rusty Rear Drum 2.jpg
    Rusty Rear Drum 2.jpg
    16 KB · Views: 5,246
  • Painted Hubs.jpg
    Painted Hubs.jpg
    50.6 KB · Views: 5,066
Rear Axle Rebuild

I got hit with the famed rear axle seal leak.

Rear Seal Leak Inside Rim.jpg

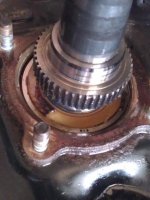
Since I'm a big fan of the "WHILE IT'S APART" mentality I basically rebuilt the whole axle with new seal, bearings..etc so I was sure it would be solid going forward.

Old Bearings.jpg New Bearings.jpg
 

Attachments

  • Rear Seal Leak Inside Rim.jpg
    Rear Seal Leak Inside Rim.jpg
    15.3 KB · Views: 5,057
  • Old Bearings.jpg
    Old Bearings.jpg
    38.8 KB · Views: 5,365
  • New Bearings.jpg
    New Bearings.jpg
    37.8 KB · Views: 5,091
Jaos Style Rear Spoiler

I intended to upgrade the look with LED brake lights but didn't like the option of leaving the original third brake light in stock form when I couldn't find a suitable LED upgrade for it so I held off.

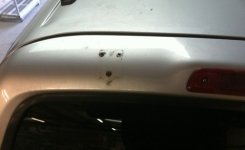
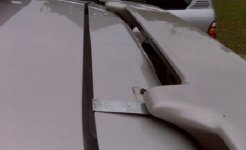
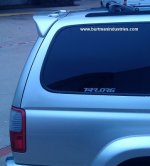
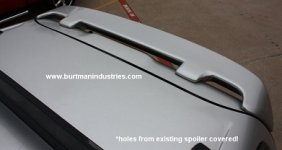
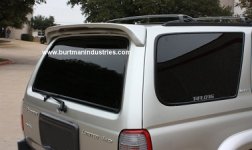
I have always like the Jaos style rear spoilers on T4Rs; especially with the integrated LED third brake light. I DID NOT like how the orignal design mounted to the rig as it used a metal tab to orient it on the top side and it didn't cover the stock mounting holes that were left when removing the stock deflector. :nono: :barf:

Spoiler Mounts.jpg Spoiler Strap.jpg

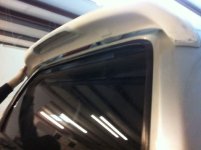
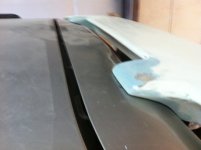
When Burtman Industries decided to address those issues and needed a guinea pig for mock-up and testing I decided to go along for the journey. :snacker:

Spoiler Mockup.jpg Spoiler Mockup 2.jpg

Finished Product - I love it!

Rear Spoiler.jpg Spoiler Side.jpg
Spoiler Top.jpg Spoiler Angle.jpg
 

Attachments

  • Spoiler Mounts.jpg
    Spoiler Mounts.jpg
    31 KB · Views: 5,082
  • Spoiler Strap.jpg
    Spoiler Strap.jpg
    31.1 KB · Views: 5,057
  • Spoiler Mockup.jpg
    Spoiler Mockup.jpg
    46.9 KB · Views: 5,015
  • Spoiler Mockup 2.jpg
    Spoiler Mockup 2.jpg
    39.8 KB · Views: 4,967
  • Spoiler Side.jpg
    Spoiler Side.jpg
    46.2 KB · Views: 4,931
  • Spoiler Angle.jpg
    Spoiler Angle.jpg
    31.5 KB · Views: 4,997
  • Spoiler Top.jpg
    Spoiler Top.jpg
    23.4 KB · Views: 5,040
  • Rear Spoiler.jpg
    Rear Spoiler.jpg
    60.4 KB · Views: 4,491
Last edited:
Lift Supports / Hatch Struts

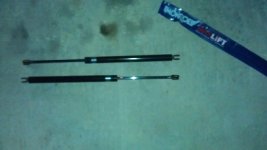
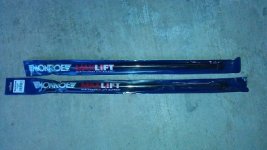
My stock hatch struts are still lifting the rear gate about 65% of it's opening height but I would like it to open all the way. I swapped out my stock struts for Monroe 901446 Max-Lift Hatch Lift Supports. They performed exactly like my worn stock struts did. :bash:

Old Struts.jpg New Struts.jpg
 

Attachments

  • Old Struts.jpg
    Old Struts.jpg
    28.2 KB · Views: 4,960
  • New Struts.jpg
    New Struts.jpg
    43.3 KB · Views: 4,931
Hitch Removed

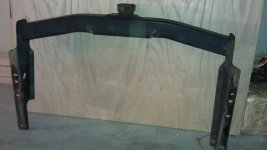
Decided the hitch had to go. I rubbed it some while off-roading but have plans to replace the rear bumper with a swing-away.

Hitch.jpg
 

Attachments

  • Hitch.jpg
    Hitch.jpg
    92.5 KB · Views: 1,977
LED Tails & Clear Corners

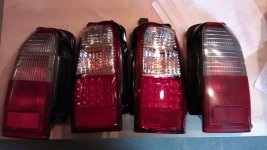
To match the LEDs in the rear spoiler I picked up some Clear LED tails from Burtman Industries. I didn't want to stray far from the stock look but I really think the LEDs look clean.

LED Tails.jpg

I also went ahead with replacing the amber corner lenses with clear ones. I'll take care of the turn signals when I replace the front bumper.

Side Light.jpg
 

Attachments

  • LED Tails.jpg
    LED Tails.jpg
    133.7 KB · Views: 2,028
  • Side Light.jpg
    Side Light.jpg
    45.9 KB · Views: 1,875
Mmmmmmm. Love the look of shiny new coilovers. Dig the list too. Can't wait to see the process.

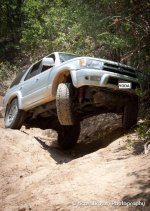
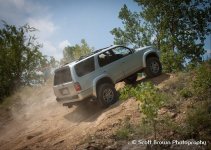
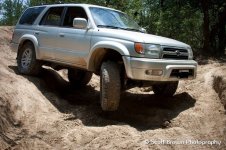
Thanks; I've really been pleased with the Toytec Ultimate Kit! So far I've really only posted pics of the work...so here are some of the fun with the suspension at work.

Wheelin 1.jpg

Wheelin 3.jpg Wheelin 2.jpg

A big thank you to Scott Brown for capturing these pics. Next time I promise to disconnect the sway bars!!! :rtfm:
 

Attachments

  • Wheelin 1.jpg
    Wheelin 1.jpg
    82.8 KB · Views: 2,520
  • Wheelin 2.jpg
    Wheelin 2.jpg
    103.1 KB · Views: 1,571
  • Wheelin 3.jpg
    Wheelin 3.jpg
    107.6 KB · Views: 1,560
Last edited:
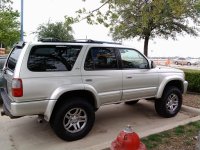
The build is coming right along Mellow. The truck looks great, and the future plans sound good too.

For some reason though, something about the formatting, sub headings, and even the verbiage of the items listed in your build summary in post #1, remind me of another build. I'm pretty sure it's one that I've looked at alot, because it looks VERY familiar to me.
 
The build is coming right along Mellow. The truck looks great, and the future plans sound good too.

For some reason though, something about the formatting, sub headings, and even the verbiage of the items listed in your build summary in post #1, remind me of another build. I'm pretty sure it's one that I've looked at alot, because it looks VERY familiar to me.

It should, I really liked the way you organized yours so it was obviously the major influence on how I chose to do mine. Not only do you contribute knowledge, creative mod ideas and advice; your now a grammarian contributor as well! :reddance:
I love both of your rigs by the way.
 

Members online

Forum statistics

Threads
278,304
Messages
3,554,040
Members
248,016
Latest member
Advally Service

Trending content

Back
Top