MNT4R's Build thread

MNT4R

New member
Love this forum and the information anyone can find here! Thank you to those who contribute. After putting about 170K on my old rig and saving a little bit every month I was able to by a 2013 slightly used when the '05 finally needed a new engine. Of course, I also hid money from my wife to build this baby out :tongue1:

**Be sure to check out some of the separate research and install threads. Feel free to thread rate, comment, or like so I know how to improve.**

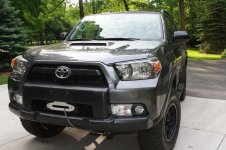
2013 MGM 4runner Trail (Update 1/1/2017)

Wheels & Suspension

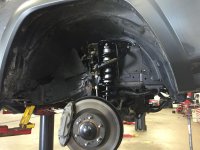
-Icon Stage II w/ tubular UCA's
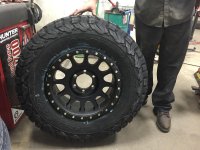
-Method NV wheels 17x8.5
-BFG KO2 285/70r17

My Research & Install Thread for this (heavy on info for installing different wheels and tires):
http://www.toyota-4runner.org/5th-g...es-285%92s-rub-here-some-things-consider.html


Lighting & Wiring

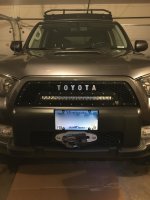
-Rigid SR20" with upper grill insert and J40 emblem
My Research & Install Thread for the grill :
http://www.toyota-4runner.org/5th-gen-t4rs/229749-rigid-fj40-grill-mod-2013-trail.html
-Rigid E Series 6" x 4 mounted to Gobi
-Shrockworks Relay Distribution module
-Bussman RTMR
My Research & Install Thread for the lights and relays:
http://www.toyota-4runner.org/5th-g...h-shrockworks-relay-distribution-install.html
-Xprite rock lights,RGB 8 pack
-Rigid SR-Q Backup Kit
-KC under hood lighting kit #355


Offroad and Overland

-Gobi Stealth Roof Rack w/ ladder, deflector, gas struts
- RCI front skid plate***
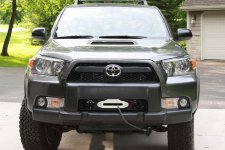
-Budbuilt Hidden Winch Mount**
-Smittybilt X2O 10K Winch w/ synthetic rope**
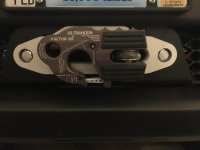
-Factor 55 Ultrahook**
** Details posted in thread below


Performance & Exterior

-Westin 4" nerf bars (black)
-Stubby AM/FM antenna
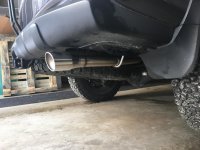
-Borla Exhaust (made a video comparing stock to borla sound)
My Research & Install Thread for the Borla exhaust:
http://www.toyota-4runner.org/5th-gen-t4rs/229765-borla-exhaust-intall-comparison-stock-video.html

Acoustics
-Infinity reference 3.5" dash
-Kicker 44ksc69304 6x9" front door
-Polk db651 6.5" rear door and cargo hatch
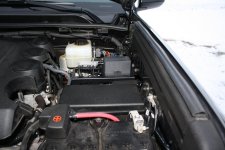
-Dynamat Extreme: front/rear/cargo doors (inner and outer shell), cargo bay, floorboard
-Hood insulation (also dynamat) trimmed with stock limited hood liner

Before:
4d77dabc4c172d2586e14fee1bc94a17.jpg


After:
92747f2058ae797b37617ca8cef600c4.jpg


a9b50acf8befdbf92fb9a409321ead52.jpg


23a75a7f1a980ec108311c766f2ea9e3.jpg


7707443b63198ccfa926a0f5ca335d20.jpg
 
Last edited:
Register to hide this ad
From the Garage to Rig

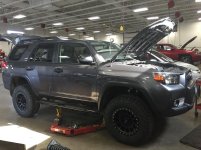
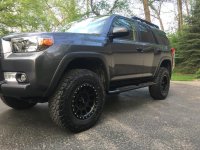
1) Icon stage 2 lift kit with tubular UCA's (3.5" lift front, 2" rear)
2) Method NV 17X8.5, matte black
3) BFG KO2 285/70r17, laces in
Here goes nothing. I have to get her aligned. I will post the final pics when I get some good ones!
 

Attachments

  • image1-4.jpg
    image1-4.jpg
    129.1 KB · Views: 4,153
  • image1-2.jpg
    image1-2.jpg
    128.7 KB · Views: 4,136
  • image1.jpg
    image1.jpg
    132.1 KB · Views: 4,267
Last edited:
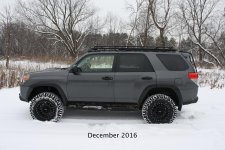
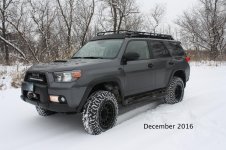
Stage I done

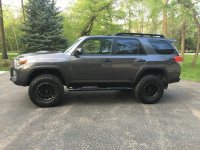
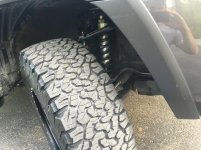
Very satisfied with the setup. Happy to field any questions or comments. Again:
1) Icon stage II with tubular UCA's
2) BFG KO2's 285/70r17 (mud flaps gone, Harper7 fender mods, no BMC)
3) Method NV 17x8.5

*** No they don't rub ;)
 

Attachments

  • IMG_0406.jpg
    IMG_0406.jpg
    139.3 KB · Views: 4,506
  • IMG_0407.jpg
    IMG_0407.jpg
    139.4 KB · Views: 3,984
  • IMG_0412.jpg
    IMG_0412.jpg
    135.6 KB · Views: 4,209
Last edited:
Does yours have KDSS? How does the Icon ride? I'm kind of leaning toward going that route.
I do not have KDSS and just installed recently. After some limited use, however, I can say the following:
1) The icon rides beautifully. It brings the front end up and "allows the front end to run over things," so you will notice a little more of a pillow when you jack on the breaks. Responsiveness is mildly muted, too, if you throw some bigger tires under there, but this I accommodated for during the first drive and never noticed again. That said, it takes some of the body roll out of the ride and for all other purposes appears to be comparable to or better than stock on the road. Completely awesome off road...
2) The tires I selected add to this: The BFG KO'2 are all terrain, not mud, so they aren't as aggressive and ride quieter than the biggun's you hear humming down the freeway. That certainly adds to the ride quality so please consider this.
3) No regrets. Be patient. Icon, like many other reputable suspension manufacturers, is on backorder and if you order today it won't be around for a month. Worth the wait. If you are thinking about it and have the money, you will be happy in the end:)

Let me know if something else comes up.
J
 
Last edited:
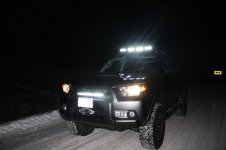
Getting out there, Iron Range

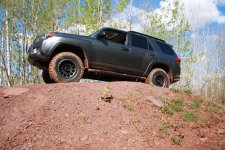
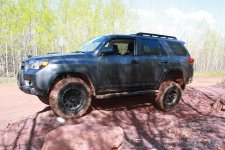
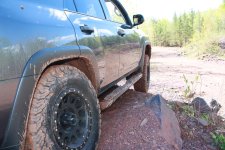
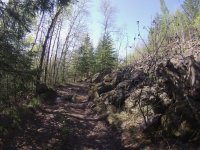
Got out to the Iron Range, MN today to challenge the wheels/tires/suspension. The Icons worked like a dream, BFGs got a little slick after a heavy dose of mud. Rode all of the easy and difficult routes, saved some of the expert and rock crawling routes for after my winch install. Fun Times! (No, dude, they didn't rub :becky:).
 

Attachments

  • IMG_6932.jpg
    IMG_6932.jpg
    143.4 KB · Views: 3,721
  • IMG_6935.jpg
    IMG_6935.jpg
    140.5 KB · Views: 3,728
  • IMG_6937.jpg
    IMG_6937.jpg
    141.7 KB · Views: 3,743
  • G0020943.jpg
    G0020943.jpg
    138 KB · Views: 3,689
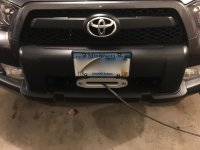
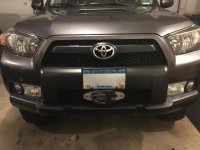
Budbuilt Winch Mount with Smittybilt Winch

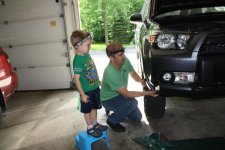
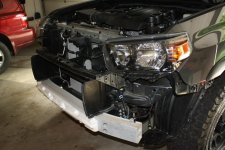
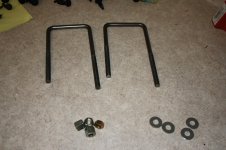
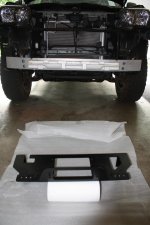
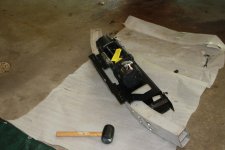
Took the day (literally) yesterday to install the bud built hidden winch mount with the smittybilt winch. This I researched through the threads and all you need to know is:
1) How to get the bumper off (lots of threads, but a video is king) https://www.youtube.com/watch?v=cm58R6CJKl8
2) How to install the mount (If you email bud, he will literally send you this writeup) http://www.toyota-4runner.org/4th-gen-t4rs/152556-bud-built-hidden-winch.html

Couple things:
1) Bring a darn friend, at least for the part where you load the winch, plate, and front end reinforcement back on the chassis. People have written this for a reason. The assembly easily weighs 125 bounds, more if you have a cable loaded on there already. It SUCKS to lift this on your own at 9pm and have your wife hand you bolts.
2) Some folks have written about removing the middle bolts, but just loosening the outside bolts to slide the mount in. There is no slide, particularly when you are cramming 100+ pounds of winch plus mount directly where your radiator tubing is. You can certainly try, but be prepared to do it exactly how [MENTION=86678]ebg18t[/MENTION] wrote it up.
3) The front end reinforcement bolts are tough, particularly in the setting of corrosion, rust penetrant and a long torque wrench are your friends!!!
4) Get the winch on the plate before you attach the reinforcement (I am an ass, that cost an hour)
5) Get a wireless winch or be prepared to move the solenoid (control box) under the hood using 2-4ga marine electrical wire and the internet
6) The U-bolts supplied are little long. Be prepared to cut the smaller side so that it doesn't abut the winch.
7) There are some brackets holding the radiator tubing (black, crossing the field). Loosen those. The tubing can go up about two inches.
***8) Remove all of the meshing out of the lower valence. My pics show it in, but I have actually trimmed it with a dremmel. This resulted in two 7 inch pieces that I then trimmed on the bottom and sides to "pop" into place. I can push on them and the pop off for access to the clutch and control box. I think this looks clean, and can avoid you having to stare at the ugly bolts and cluster of wires around the winch.

Enjoy!
 

Attachments

  • IMG_6981.jpg
    IMG_6981.jpg
    131.4 KB · Views: 3,705
  • IMG_6992.jpg
    IMG_6992.jpg
    135.3 KB · Views: 3,754
  • IMG_6996.jpg
    IMG_6996.jpg
    134.6 KB · Views: 3,738
  • IMG_6998.jpg
    IMG_6998.jpg
    128.6 KB · Views: 3,689
  • IMG_7001.jpg
    IMG_7001.jpg
    131.2 KB · Views: 3,768
  • IMG_7003.jpg
    IMG_7003.jpg
    136.8 KB · Views: 3,751
  • IMG_7004.jpg
    IMG_7004.jpg
    138.8 KB · Views: 3,644
Factor55 Ultrahook Install

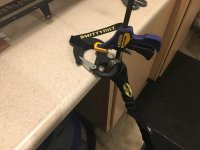
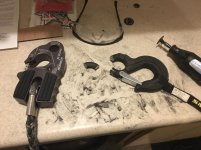
Although I felt the price was a bit high, I decided to front the cash for the factor55 ultrahook to have a lightweight, ergonomic, flat-lying winch hook that had both clasp and shackle mount options. The smittybuilt winch hook (that came with my winch) required a little work with the dremel to get off. In the end, I love the Ultrahook look, it keeps the hook off of the frame and out from under the vehicle, and keeps the synthetic rope out of the elements and under tension, which is claimed to be better for it. Let me know your thoughts.... :)
 

Attachments

  • IMG_1342.jpg
    IMG_1342.jpg
    131.3 KB · Views: 3,612
  • IMG_1345.jpg
    IMG_1345.jpg
    133.6 KB · Views: 3,597
  • IMG_1348.jpg
    IMG_1348.jpg
    159.8 KB · Views: 3,634
  • IMG_1344.jpg
    IMG_1344.jpg
    131.2 KB · Views: 3,627
  • IMG_1347.jpg
    IMG_1347.jpg
    130 KB · Views: 3,608
Last edited:
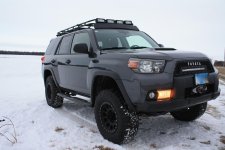
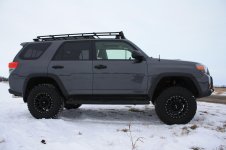
Stage II of Build - Gobi Rack/ladder/deflector, Rigid Grill, Borla exhaust

Busy weekend:

Rigid Grill - http://www.toyota-4runner.org/5th-gen-t4rs/229749-rigid-fj40-grill-mod-2013-trail.html Read the thread, look at the pics, and cast your vote for black versus chrome grill screws if you have an opinion https://www.surveymonkey.com/r/5BSTTMF

Borla exhaust (video!) - http://www.toyota-4runner.org/5th-gen-t4rs/229765-borla-exhaust-intall-comparison-stock-video.html

Gobi Rack - See pic below. really nothing to add technically after reading [MENTION=59081]W8kbrder[/MENTION] 's awesome thread http://www.toyota-4runner.org/5th-gen-t4rs/194234-diy-gobi-stealth-roof-rack-ladder-install.html

I will post an update after I get the shrockworks distribution box under the hood, the AOB switches in the cab, and the rigid E-series lights on the rack.

Enjoy
 

Attachments

  • IMG_1380.jpg
    IMG_1380.jpg
    127.1 KB · Views: 3,439
  • IMG_1400.jpg
    IMG_1400.jpg
    131.5 KB · Views: 3,451
  • side 12-11.jpg
    side 12-11.jpg
    139.9 KB · Views: 3,381
  • Quarter without licence.jpg
    Quarter without licence.jpg
    140.2 KB · Views: 3,346

Attachments

  • IMG_7649.jpg
    IMG_7649.jpg
    123.8 KB · Views: 3,340
  • IMG_7692.jpg
    IMG_7692.jpg
    127.4 KB · Views: 3,334
  • IMG_7693.jpg
    IMG_7693.jpg
    122.2 KB · Views: 3,350
  • IMG_7703.jpg
    IMG_7703.jpg
    130 KB · Views: 3,299
Last edited:
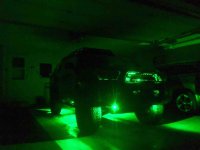
Xprite rock lights installed, 8 pack. They are cheap, fun, bright and have nice red, green, and blue colors (which you can change with Bluetooth). The white is not a true white, so I may change up or add legitimate cool white lights later. I realize they are not for everyone, but I kinda like 'em and my kid is having a blast "Zombie Hunting" on farm roads with his dad.IMG_1894.JPG
 

Attachments

  • IMG_1894.JPG
    IMG_1894.JPG
    52.2 KB · Views: 742
Last edited:
Second stage of the build done. Wifey was kind enough to give me a break from the kids to put the time in. Been posting along the way. Finally got her out of the garage and out for some snowshoeing today. Happy new year!
9480f7654d8c83a8729923e5dd4e2fcd.jpg


Sent from my iPhone using Tapatalk
 
Last edited:
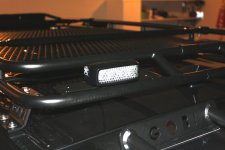
Rigid SR-Q Backup Kit 4Runner

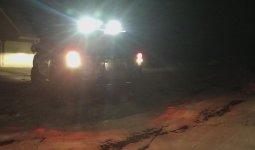
I live around deer, dogs, kids, and dark. I thought that the backup kit from rigid would be a nice fit.
1) I mounted the lights with the provided hardware in the center mounting hole on each side at the rear of my Gobi Rack
IMG_7766.jpg

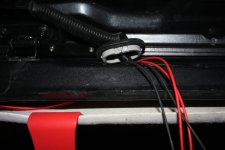
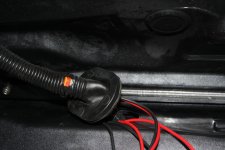
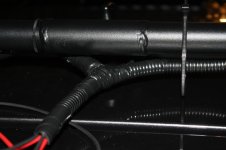
2) I pried up the rubber grommet coming from the body to the hatch, after removing the hatch rubber trim and gently prying the hatch roof trim down with a trim tool, ran the harness through the hole in the body then through the grommet itself (through a small hole that I made). I then thoroughly taped the grommet with heat shrink tape. These wires would then run through the gap between the body and the hatch where it does not pinch, be loomed, zipped to the Gobi, then connected to the lights.
IMG_7777.jpg
IMG_7779.jpg
IMG_7780.jpg

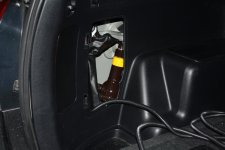
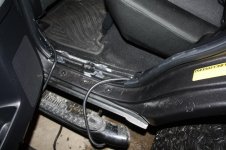
3) I ran the part of the harness with the relay toward the driver kick panel, using a trim tool kit to carefully remove the hatch trim, run the wire harness toward the jack storage box, then remove the hatch side trim, run toward the rear passenger door frame floor trim.
IMG_7782.jpg
IMG_7784.jpg

4) I ran with the stock wiring long the door frame floor trim, removed the driver kick panel, zipped to other wiring under the dash, and ran toward the center console
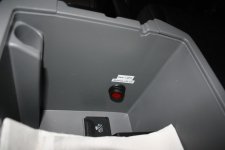
5) The power I hooked to my Bussman RTMR at one of the constant draw outputs, the switch wires off of the relay provided with the harness I ran to the center console storage
6) Leery of drilling my dash, and to provide a barrier from turning these on in the face of tailgaters, I drilled the center console, 3/4", and mounted switch inside of the center console storage box.
IMG_7786.jpg

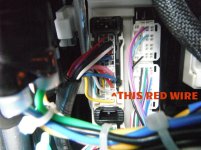
7) I tapped the reverse wire at the kick panel origin, photo provided
reverse wire.jpg

8) Labeled and ready to rock

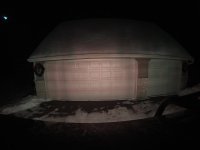
The next post will show the difference. It is substantial!!!
 

Attachments

  • IMG_7766.jpg
    IMG_7766.jpg
    132.3 KB · Views: 822
  • IMG_7779.jpg
    IMG_7779.jpg
    135.1 KB · Views: 832
  • IMG_7777.jpg
    IMG_7777.jpg
    126.7 KB · Views: 859
  • IMG_7782.jpg
    IMG_7782.jpg
    135.4 KB · Views: 828
  • IMG_7784.jpg
    IMG_7784.jpg
    137.2 KB · Views: 809
  • reverse wire.jpg
    reverse wire.jpg
    118.1 KB · Views: 854
  • IMG_7786.jpg
    IMG_7786.jpg
    129.6 KB · Views: 808
  • IMG_7780.jpg
    IMG_7780.jpg
    132.9 KB · Views: 815
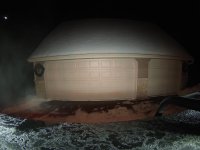
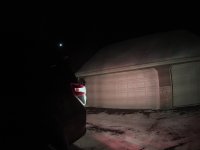
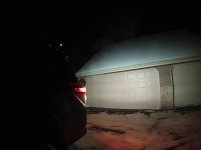
The final Product?


Before (Roof)


IMG_1676.jpg


After (Roof)


IMG_1675.jpg


Before (Side)


IMG_1673.jpg


After (Side)


IMG_1672.jpg


Before (Rear View)


IMG_1668.jpg


After (Rear View)


IMG_1669_2.jpg


I am loving the extra visibility and the potential for use camping. Lemme know if you have thoughts or questions.
-Jeff
 

Attachments

  • IMG_1676.jpg
    IMG_1676.jpg
    124.5 KB · Views: 799
  • IMG_1675.jpg
    IMG_1675.jpg
    128.9 KB · Views: 790
  • IMG_1673.jpg
    IMG_1673.jpg
    122.5 KB · Views: 805
  • IMG_1672.jpg
    IMG_1672.jpg
    125.3 KB · Views: 786
  • IMG_1669_2.jpg
    IMG_1669_2.jpg
    79.8 KB · Views: 788
  • IMG_1668.jpg
    IMG_1668.jpg
    84.3 KB · Views: 777
Last edited:
Members online

Forum statistics

Threads
278,307
Messages
3,554,050
Members
248,016
Latest member
Advally Service

Trending content

Back
Top