momo.75's '03 Sport 4.7L V8 Build

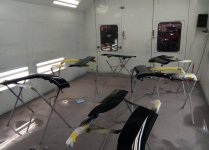
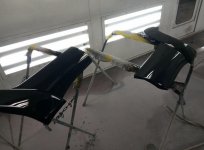
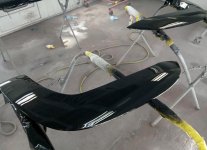
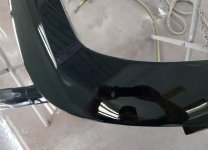
I got a few pics from the painter today.........needless to say i will not be able to sleep for a few nights.
 

Attachments

  • IMG_7782.jpg
    IMG_7782.jpg
    90.5 KB · Views: 526
  • IMG_7783.jpg
    IMG_7783.jpg
    73.4 KB · Views: 533
  • IMG_7784.jpg
    IMG_7784.jpg
    101.5 KB · Views: 538
  • IMG_7785.jpg
    IMG_7785.jpg
    77.9 KB · Views: 526
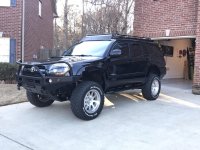
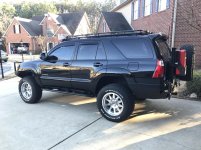
I had the painted pieces for over a week before i had a chance to work on it. Pulled the old panels off was pretty straight forward. I would say the hardest part of the project was prepping all the surfaces. Some of the panels use a rubber stripping as a bumper/gasket. Some of them use a double stick weather stripping. After pulling the old pieces off there was a lot of residue to remove. I just took my time to make sure i did it right. I am so pleased with the results. I really wish i could have done this years ago. These are just a couple shots right after i finished. I will have some better shots later
 

Attachments

  • A9C31B9A-C12D-4E71-9C6C-86B72451B822.jpg
    A9C31B9A-C12D-4E71-9C6C-86B72451B822.jpg
    137.2 KB · Views: 497
  • B83E02DD-EFFA-41EA-AC22-4941A2F06326.jpg
    B83E02DD-EFFA-41EA-AC22-4941A2F06326.jpg
    138.3 KB · Views: 493
A few weeks ago I installed this GTA Car Kit. I still have the stock head unit in my truck.....lol. Still has the cassette player and 6 disc changer. The main thing I have wanted was to be able to use my phone via bluetooth. I have tried several different gadgets. None of them had decent sound quality. When I came across this kit is sounded promising.......and it was just what I wanted. I can use my phone via bluetooth, I have handsfree calling and I can use my steering wheel controls with it. The clarity is perfect.

https://www.gtacarkits.com/product/toyota-4runner-2003-2009-iphone-aux-kit/
 
I had the painted pieces for over a week before i had a chance to work on it. Pulled the old panels off was pretty straight forward. I would say the hardest part of the project was prepping all the surfaces. Some of the panels use a rubber stripping as a bumper/gasket. Some of them use a double stick weather stripping. After pulling the old pieces off there was a lot of residue to remove. I just took my time to make sure i did it right. I am so pleased with the results. I really wish i could have done this years ago. These are just a couple shots right after i finished. I will have some better shots later

Great work..looks Good!
 
I had the painted pieces for over a week before i had a chance to work on it. Pulled the old panels off was pretty straight forward. I would say the hardest part of the project was prepping all the surfaces. Some of the panels use a rubber stripping as a bumper/gasket. Some of them use a double stick weather stripping. After pulling the old pieces off there was a lot of residue to remove. I just took my time to make sure i did it right. I am so pleased with the results. I really wish i could have done this years ago. These are just a couple shots right after i finished. I will have some better shots later

Wow, your 4runner looks incredible man. Nice work. I'm going for a very similar build. Roof rack is on its way, and then the only big project left will be a rear swingout bumper. It's just a very very expensive project and a lot of the rear end suspension will have to be upgraded as well. Cheers!
 
Wow, your 4runner looks incredible man. Nice work. I'm going for a very similar build. Roof rack is on its way, and then the only big project left will be a rear swingout bumper. It's just a very very expensive project and a lot of the rear end suspension will have to be upgraded as well. Cheers!

I appreciate that!
 
I had the painted pieces for over a week before i had a chance to work on it. Pulled the old panels off was pretty straight forward. I would say the hardest part of the project was prepping all the surfaces. Some of the panels use a rubber stripping as a bumper/gasket. Some of them use a double stick weather stripping. After pulling the old pieces off there was a lot of residue to remove. I just took my time to make sure i did it right. I am so pleased with the results. I really wish i could have done this years ago. These are just a couple shots right after i finished. I will have some better shots later

Huge improvement over the factory grey parts. Good job.
 
Ever since i removed my lighted running boards and replaced them with the step tubes, I (as well as my wife and kids) have missed having lights on the steps. I was glad to find these Eagle Eye LED lights on ebay, for around $4 a pair shipped. These are 3w lights, which doesn't sound like much but they put out plenty of light....... I had clipped the wires from my running boards, so all i had to do was tie them into those. They come on when i unlock and open the doors. I am very happy with these as well.

Alright Momo, I'm bringing back one of your old posts (2013 I believe :bump:) on here, sorry to clutter your build thread. I've read through this thing a long time ago and enjoyed it alot, the rig looks great, especially with that new color matched cladding.

I found the LEDs you used on amazon, and I'm modifying your mounting procedure as I'm just removing the running boards and not adding steps/sliders. I crawled under there today to get a good look at everything to do this mod and I'm left with a question. What wires did you connect the Red/Black ones from the LEDs too on the running board wiring harness?

 
Alright Momo, I'm bringing back one of your old posts (2013 I believe :bump:) on here, sorry to clutter your build thread. I've read through this thing a long time ago and enjoyed it alot, the rig looks great, especially with that new color matched cladding.

I found the LEDs you used on amazon, and I'm modifying your mounting procedure as I'm just removing the running boards and not adding steps/sliders. I crawled under there today to get a good look at everything to do this mod and I'm left with a question. What wires did you connect the Red/Black ones from the LEDs too on the running board wiring harness?

I appreciate that. From what I recall I just cut off the harness and spliced in the wires for the new lights. I think it was pretty straight forward once I got in there.
 
Wanted to update my lift comparison pics too.

LiftComparisons.jpg~original


LiftComparisonsClose.jpg~original

Dang! I can’t believe that I missed that you have the 884 springs and we have the same model and everything...love the look and hopefully I’ll have mine installed within a week or two. Do you have any idea about alignment problems If any after the 884’s? Roll with stock UCA’s for awhile?
 
Dang! I can’t believe that I missed that you have the 884 springs and we have the same model and everything...love the look and hopefully I’ll have mine installed within a week or two. Do you have any idea about alignment problems If any after the 884’s? Roll with stock UCA’s for awhile?

I can't recall having any alignment issues. I really can't remember if I had my SPC UCA's before I put those springs on or not. I have since switched to Camburg UCA's because I don't trust the SPC's
 
I can't recall having any alignment issues. I really can't remember if I had my SPC UCA's before I put those springs on or not. I have since switched to Camburg UCA's because I don't trust the SPC's

I hope I can keep my stock UCA’s cause that’ll leave me in the position to buy a new set of wheels with more poke out from the fenders...or sliders...we’ll see
 

Members online

Forum statistics

Threads
278,401
Messages
3,554,736
Members
248,100
Latest member
NVBASSJUNKIE

Trending content

Back
Top