momo.75's '03 Sport 4.7L V8 Build

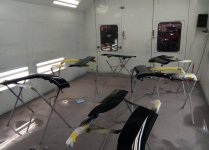
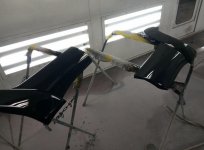
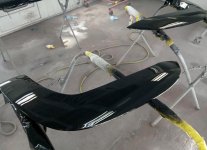
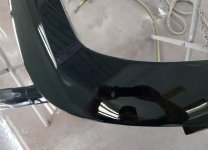
I got a few pics from the painter today.........needless to say i will not be able to sleep for a few nights.
 

Attachments

  • IMG_7782.jpg
    IMG_7782.jpg
    90.5 KB · Views: 525
  • IMG_7783.jpg
    IMG_7783.jpg
    73.4 KB · Views: 533
  • IMG_7784.jpg
    IMG_7784.jpg
    101.5 KB · Views: 536
  • IMG_7785.jpg
    IMG_7785.jpg
    77.9 KB · Views: 525
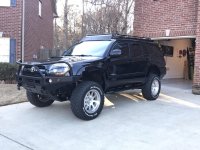
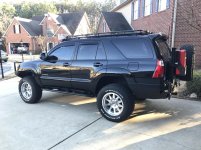
I had the painted pieces for over a week before i had a chance to work on it. Pulled the old panels off was pretty straight forward. I would say the hardest part of the project was prepping all the surfaces. Some of the panels use a rubber stripping as a bumper/gasket. Some of them use a double stick weather stripping. After pulling the old pieces off there was a lot of residue to remove. I just took my time to make sure i did it right. I am so pleased with the results. I really wish i could have done this years ago. These are just a couple shots right after i finished. I will have some better shots later
 

Attachments

  • A9C31B9A-C12D-4E71-9C6C-86B72451B822.jpg
    A9C31B9A-C12D-4E71-9C6C-86B72451B822.jpg
    137.2 KB · Views: 497
  • B83E02DD-EFFA-41EA-AC22-4941A2F06326.jpg
    B83E02DD-EFFA-41EA-AC22-4941A2F06326.jpg
    138.3 KB · Views: 493
A few weeks ago I installed this GTA Car Kit. I still have the stock head unit in my truck.....lol. Still has the cassette player and 6 disc changer. The main thing I have wanted was to be able to use my phone via bluetooth. I have tried several different gadgets. None of them had decent sound quality. When I came across this kit is sounded promising.......and it was just what I wanted. I can use my phone via bluetooth, I have handsfree calling and I can use my steering wheel controls with it. The clarity is perfect.

https://www.gtacarkits.com/product/toyota-4runner-2003-2009-iphone-aux-kit/
 
I had the painted pieces for over a week before i had a chance to work on it. Pulled the old panels off was pretty straight forward. I would say the hardest part of the project was prepping all the surfaces. Some of the panels use a rubber stripping as a bumper/gasket. Some of them use a double stick weather stripping. After pulling the old pieces off there was a lot of residue to remove. I just took my time to make sure i did it right. I am so pleased with the results. I really wish i could have done this years ago. These are just a couple shots right after i finished. I will have some better shots later

Great work..looks Good!
 
I had the painted pieces for over a week before i had a chance to work on it. Pulled the old panels off was pretty straight forward. I would say the hardest part of the project was prepping all the surfaces. Some of the panels use a rubber stripping as a bumper/gasket. Some of them use a double stick weather stripping. After pulling the old pieces off there was a lot of residue to remove. I just took my time to make sure i did it right. I am so pleased with the results. I really wish i could have done this years ago. These are just a couple shots right after i finished. I will have some better shots later

Wow, your 4runner looks incredible man. Nice work. I'm going for a very similar build. Roof rack is on its way, and then the only big project left will be a rear swingout bumper. It's just a very very expensive project and a lot of the rear end suspension will have to be upgraded as well. Cheers!
 
Wow, your 4runner looks incredible man. Nice work. I'm going for a very similar build. Roof rack is on its way, and then the only big project left will be a rear swingout bumper. It's just a very very expensive project and a lot of the rear end suspension will have to be upgraded as well. Cheers!

I appreciate that!
 
I had the painted pieces for over a week before i had a chance to work on it. Pulled the old panels off was pretty straight forward. I would say the hardest part of the project was prepping all the surfaces. Some of the panels use a rubber stripping as a bumper/gasket. Some of them use a double stick weather stripping. After pulling the old pieces off there was a lot of residue to remove. I just took my time to make sure i did it right. I am so pleased with the results. I really wish i could have done this years ago. These are just a couple shots right after i finished. I will have some better shots later

Huge improvement over the factory grey parts. Good job.
 
Ever since i removed my lighted running boards and replaced them with the step tubes, I (as well as my wife and kids) have missed having lights on the steps. I was glad to find these Eagle Eye LED lights on ebay, for around $4 a pair shipped. These are 3w lights, which doesn't sound like much but they put out plenty of light....... I had clipped the wires from my running boards, so all i had to do was tie them into those. They come on when i unlock and open the doors. I am very happy with these as well.

Alright Momo, I'm bringing back one of your old posts (2013 I believe :bump:) on here, sorry to clutter your build thread. I've read through this thing a long time ago and enjoyed it alot, the rig looks great, especially with that new color matched cladding.

I found the LEDs you used on amazon, and I'm modifying your mounting procedure as I'm just removing the running boards and not adding steps/sliders. I crawled under there today to get a good look at everything to do this mod and I'm left with a question. What wires did you connect the Red/Black ones from the LEDs too on the running board wiring harness?

 
Alright Momo, I'm bringing back one of your old posts (2013 I believe :bump:) on here, sorry to clutter your build thread. I've read through this thing a long time ago and enjoyed it alot, the rig looks great, especially with that new color matched cladding.

I found the LEDs you used on amazon, and I'm modifying your mounting procedure as I'm just removing the running boards and not adding steps/sliders. I crawled under there today to get a good look at everything to do this mod and I'm left with a question. What wires did you connect the Red/Black ones from the LEDs too on the running board wiring harness?

I appreciate that. From what I recall I just cut off the harness and spliced in the wires for the new lights. I think it was pretty straight forward once I got in there.
 
Wanted to update my lift comparison pics too.

LiftComparisons.jpg~original


LiftComparisonsClose.jpg~original

Dang! I can’t believe that I missed that you have the 884 springs and we have the same model and everything...love the look and hopefully I’ll have mine installed within a week or two. Do you have any idea about alignment problems If any after the 884’s? Roll with stock UCA’s for awhile?
 
Dang! I can’t believe that I missed that you have the 884 springs and we have the same model and everything...love the look and hopefully I’ll have mine installed within a week or two. Do you have any idea about alignment problems If any after the 884’s? Roll with stock UCA’s for awhile?

I can't recall having any alignment issues. I really can't remember if I had my SPC UCA's before I put those springs on or not. I have since switched to Camburg UCA's because I don't trust the SPC's
 
I can't recall having any alignment issues. I really can't remember if I had my SPC UCA's before I put those springs on or not. I have since switched to Camburg UCA's because I don't trust the SPC's

I hope I can keep my stock UCA’s cause that’ll leave me in the position to buy a new set of wheels with more poke out from the fenders...or sliders...we’ll see
 

Members online

Forum statistics

Threads
278,317
Messages
3,554,129
Members
248,016
Latest member
Advally Service

Trending content

Back
Top