

emmwhat
New member
I traded my Audi s4 for my 4runner about 8 or so months ago, I loved the s4 but I needed something bigger, I love my 4runner and have no regrets about the trade, BUT I missed those bright ass HID's.
I have an 04 4runner and I've been contemplating swapping out the 06+ headlights / trim pieces / grille, and then putting some HID's in, but from doing months worth of back and forthing, reading reviews and blah blah blah..... I finally decided that I wanted to retrofit projectors into my stock 04 headlight housings
This is the story...
Parts:
Bi-Xenon Morimoto Mini D2S Stage III Kit from TRS
-Morimoto 5Five 50watt Ballasts
-Morimoto 5Five 5000k D2S Bulbs
-Gatling Gun Shrouds
-Centric Rings (make the shrouds fit the projectors)
-I also bought their headlight resealing 'glue', it really wasn't necessary, there's plenty enough already in the headlight to reseal with no problem.
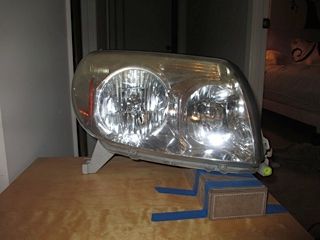
After removing the headlights from the truck, I set them up on a table so that I could mark off the beam pattern on the wall
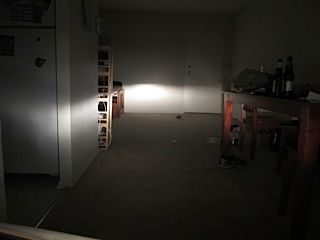
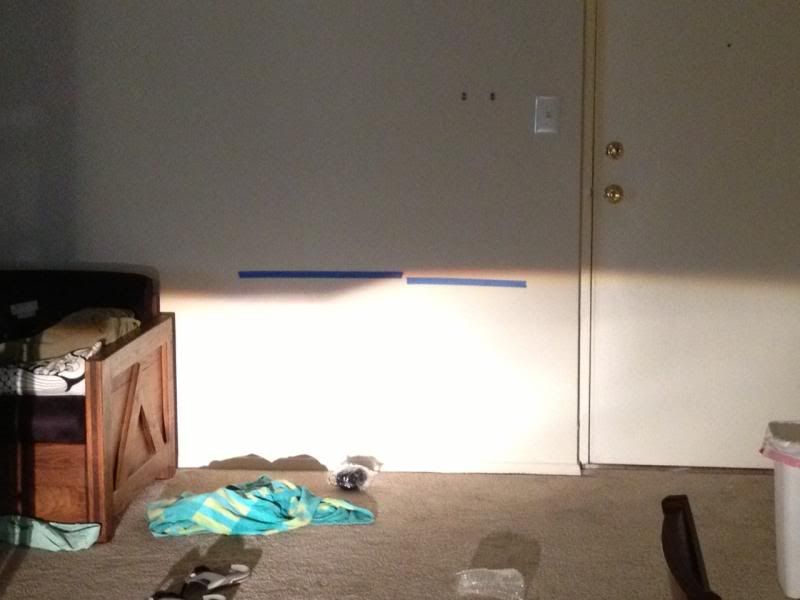
This is the stock halogen reflector beam pattern on the wall from 20'
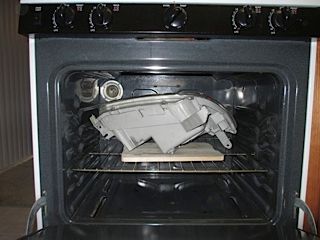
Then I was getting a little hungry so.. baked some headlights, I set it at 225 for 8 minutes (make sure you remove everything you can from the headlight before putting it in the oven, like the rubber gaskets around the bulbs, the bulbs, the bulb holders, the screws holding on the lens..)
Once out of the oven, just pry the lens from the headlight, I used a putty knife and put it between the two and then twisted, it's pretty easy, once you get one corner started just pull the lens off. To get the reflector out you have to turn both headlight adjustment screws all the way "loose" and then use a flat head to pop the pivot point ball out (sorry I didn't get any pictures of this, I had headlight glue all over me)
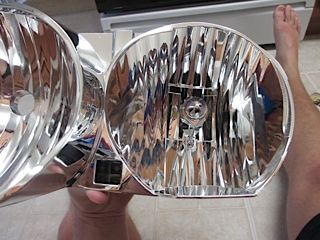
This is where the factory halogen bulb mounts
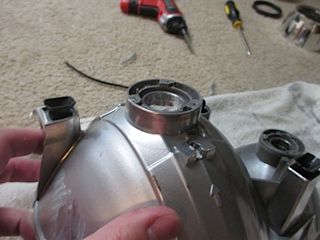
This is a problem, the shaft on the projector has a bigger diameter than the hole that's currently present, and the shaft is sort of short, so even if that hole was big enough, you wouldn't be about to utilized the treads on the shaft for mounting. (I know.. that's what she said) So first step was to dremel
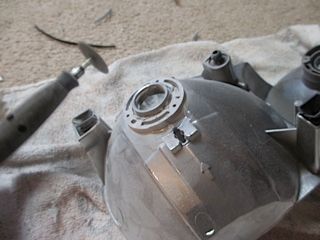
Next, a hole saw
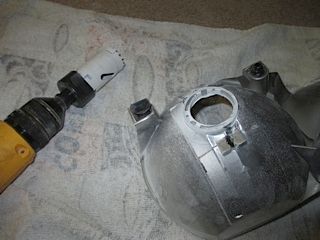
Now I could put the projectors shaft through and put the nut on the back to hold it in place (note: do not tighten it down to hard at this point, you actually have to test fit the headlights on the truck first in order to make sure both projectors are rotationally correct before tightening the nut down all the way, it is a really soft metal designed to deform when tightened hard)
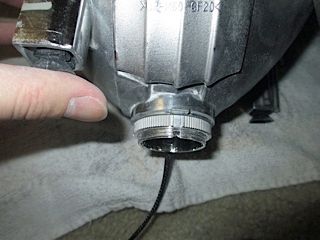
And this is what the front looks like
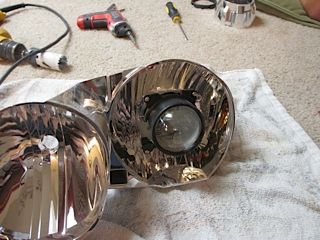
Now back in the headlight housing, you see the shroud mounted on the projector here, I had to cut some of the mounting tabs in the shroud to make it fit flush, then used JB weld to hold the centric ring onto the mounting tabs, then used a little JB weld to mount the centric ring onto the projector, it's pretty straight forward, unfortunately I don't have any pictures of the process.
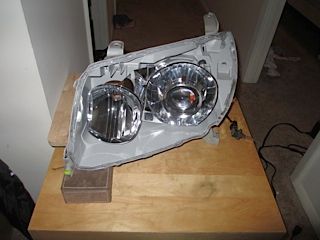
Now to test out the beam (this is a standard halogen bulb, I didn't have a 12v power supply with enough current to fire the HID's, didn't really matter, just checking for beam pattern right now)
Now compare it to the factory headlight
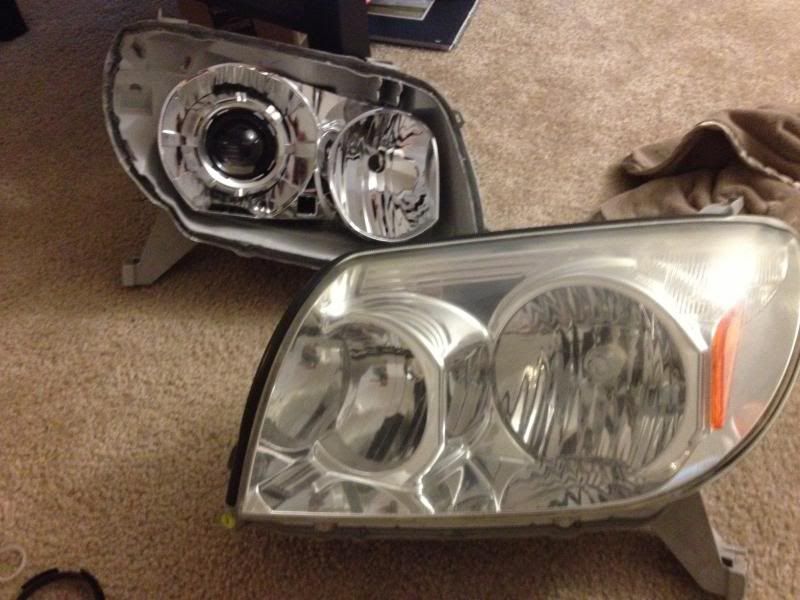
Then do the other headlight (that's my helper)
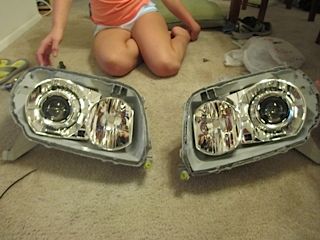
Then you have to test fit both on the truck, but keep the front lens off, you do this to make sure the projector's horizon line is level, as long as they both over lap you're good, but if one is rotate just a little bit, then one headlight beam will look like this / and the other one will look like this -
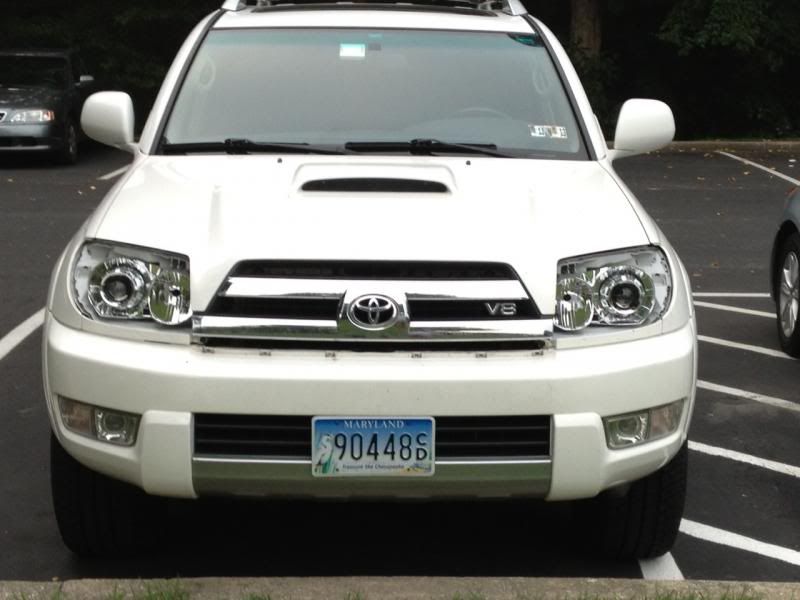
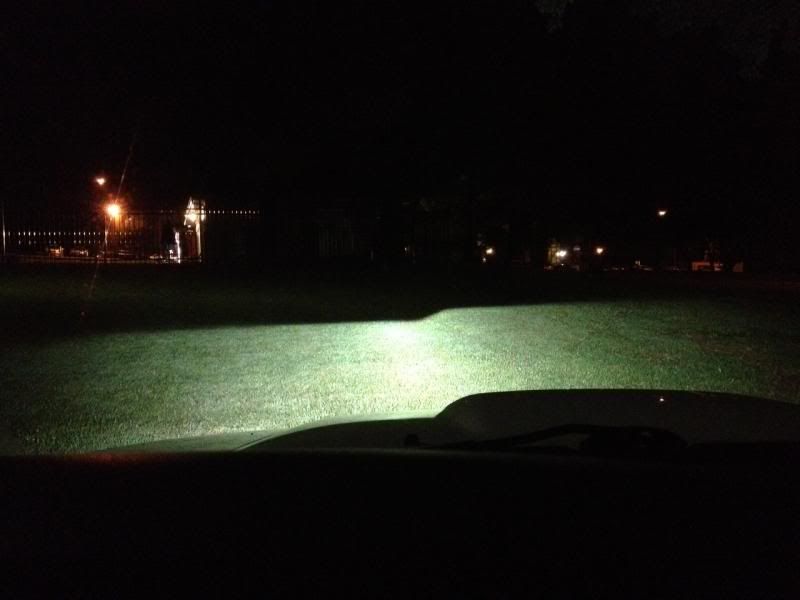
Wait till night and make sure both cutoffs lines over lap, if they don't, rotate the projectors until they do, once you do this tighten down that nut on the projector shaft as hard as you can while making sure the projector doesn't rotate (I used needle nose pliers)
After you get them rotationally correct, and the nut is tightened down, take them back off the truck, at this point I put JB weld all around that lock nut and dripping down onto the back of the headlight reflector, just to make certain the nut wouldn't come loose and let my projectors rotate later on
Then blow all the dust out of the head light and off the lens, put the two back together, put back in the oven for 8 mins at 225, when you pull the headlight out of the oven, put clamps all around the edges so that it seals tight. Once the headlight cools, take the clamps off and remount all the hardware you took off before the original baking. Time to remount your headlight.
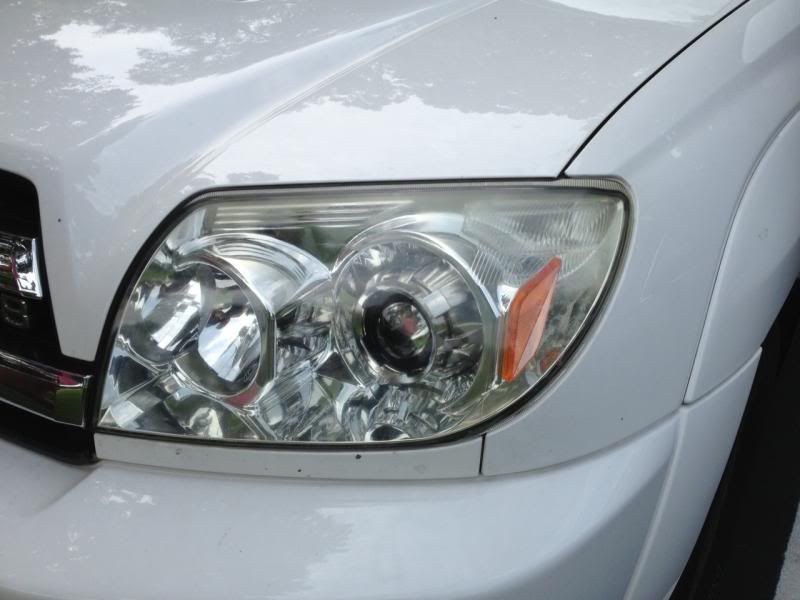
and BOOM
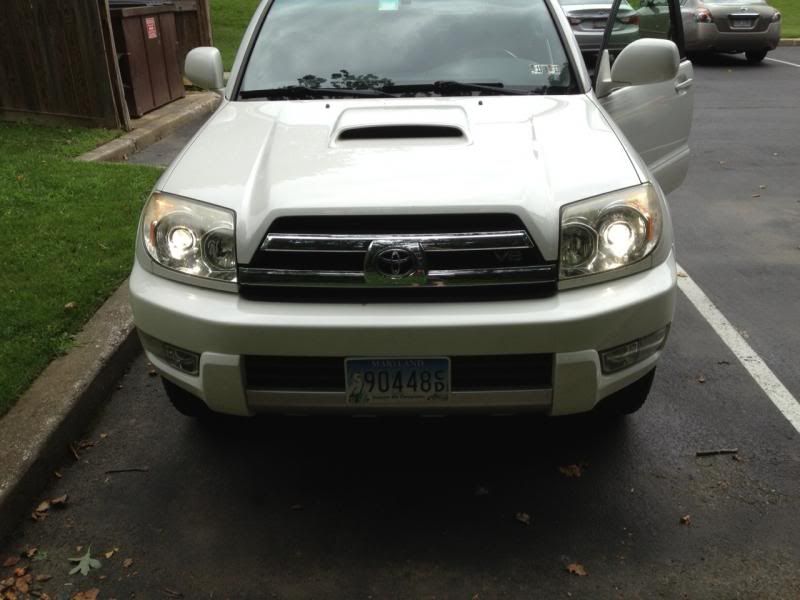
Got some awesome freaking headlights!
Just make sure you align your lights after you're done.
I was really surprised how much the projectors / shrouds looked like they were supposed to be in my headlights, they look like they came like that from the factory.
The Morimoto stuff was amazing, it's some really high quality stuff, and the guys over at TRS were great.
Sorry I didn't show cutting / mounting of the shrouds, wiring / mounting the ballasts, I thought we got pictures of everything but, some parts were a little intense and I guess we just forgot.
I have an 04 4runner and I've been contemplating swapping out the 06+ headlights / trim pieces / grille, and then putting some HID's in, but from doing months worth of back and forthing, reading reviews and blah blah blah..... I finally decided that I wanted to retrofit projectors into my stock 04 headlight housings
This is the story...
Parts:
Bi-Xenon Morimoto Mini D2S Stage III Kit from TRS
-Morimoto 5Five 50watt Ballasts
-Morimoto 5Five 5000k D2S Bulbs
-Gatling Gun Shrouds
-Centric Rings (make the shrouds fit the projectors)
-I also bought their headlight resealing 'glue', it really wasn't necessary, there's plenty enough already in the headlight to reseal with no problem.
After removing the headlights from the truck, I set them up on a table so that I could mark off the beam pattern on the wall

This is the stock halogen reflector beam pattern on the wall from 20'

Then I was getting a little hungry so.. baked some headlights, I set it at 225 for 8 minutes (make sure you remove everything you can from the headlight before putting it in the oven, like the rubber gaskets around the bulbs, the bulbs, the bulb holders, the screws holding on the lens..)

Once out of the oven, just pry the lens from the headlight, I used a putty knife and put it between the two and then twisted, it's pretty easy, once you get one corner started just pull the lens off. To get the reflector out you have to turn both headlight adjustment screws all the way "loose" and then use a flat head to pop the pivot point ball out (sorry I didn't get any pictures of this, I had headlight glue all over me)

This is where the factory halogen bulb mounts

This is a problem, the shaft on the projector has a bigger diameter than the hole that's currently present, and the shaft is sort of short, so even if that hole was big enough, you wouldn't be about to utilized the treads on the shaft for mounting. (I know.. that's what she said) So first step was to dremel

Next, a hole saw

Now I could put the projectors shaft through and put the nut on the back to hold it in place (note: do not tighten it down to hard at this point, you actually have to test fit the headlights on the truck first in order to make sure both projectors are rotationally correct before tightening the nut down all the way, it is a really soft metal designed to deform when tightened hard)

And this is what the front looks like

Now back in the headlight housing, you see the shroud mounted on the projector here, I had to cut some of the mounting tabs in the shroud to make it fit flush, then used JB weld to hold the centric ring onto the mounting tabs, then used a little JB weld to mount the centric ring onto the projector, it's pretty straight forward, unfortunately I don't have any pictures of the process.

Now to test out the beam (this is a standard halogen bulb, I didn't have a 12v power supply with enough current to fire the HID's, didn't really matter, just checking for beam pattern right now)

Now compare it to the factory headlight

Then do the other headlight (that's my helper)

Then you have to test fit both on the truck, but keep the front lens off, you do this to make sure the projector's horizon line is level, as long as they both over lap you're good, but if one is rotate just a little bit, then one headlight beam will look like this / and the other one will look like this -

Wait till night and make sure both cutoffs lines over lap, if they don't, rotate the projectors until they do, once you do this tighten down that nut on the projector shaft as hard as you can while making sure the projector doesn't rotate (I used needle nose pliers)

After you get them rotationally correct, and the nut is tightened down, take them back off the truck, at this point I put JB weld all around that lock nut and dripping down onto the back of the headlight reflector, just to make certain the nut wouldn't come loose and let my projectors rotate later on
Then blow all the dust out of the head light and off the lens, put the two back together, put back in the oven for 8 mins at 225, when you pull the headlight out of the oven, put clamps all around the edges so that it seals tight. Once the headlight cools, take the clamps off and remount all the hardware you took off before the original baking. Time to remount your headlight.

and BOOM

Got some awesome freaking headlights!
Just make sure you align your lights after you're done.
I was really surprised how much the projectors / shrouds looked like they were supposed to be in my headlights, they look like they came like that from the factory.
The Morimoto stuff was amazing, it's some really high quality stuff, and the guys over at TRS were great.
Sorry I didn't show cutting / mounting of the shrouds, wiring / mounting the ballasts, I thought we got pictures of everything but, some parts were a little intense and I guess we just forgot.


