Mstudt's SR5 Build & Adventure Thread

I am pretty sure that my cam bolts are the opposite of how yours are. I think my little lines are facing outboard.

Those fancy spindles and all the new parts make your calipers look awful! haha Are they as bad as they look?

I notice that about the cam bolts as well. I'm going to have the ship flip them around tomorrow.

The calipers are toast, and so are the hard lines. I have calipers ready to the put on, and new soft lines to run from the caliper up the frame. I didn't have enough time to get everything done over the weekend. Rebuilding the shocks, and addressing the brakes will be done in a couple weeks.
 
wow. what is your center hub to fender measurement now?

I'd have to get a measurement when I pick it up tonight. I really wish I would have taken before, and afters. I can't tell if the front is a lot higher, or if it's just me. I'm kind of thinking it's just me since everything was replaced with OEM parts.
 
This past weekend I was able to continue on the front end. It's been a long time coming, but I finally got a much needed face lift. I'm also getting ready to start my Satoshi mod.

I took the entire front end off to access the rust. It wasn't as bad as I thought, and I was able to remove all the bolts with not issues. The bumper, and horns have been removed.
20160402_091222_zpszwafkzkx.jpg~original

20160402_091232_zpswljclm9i.jpg~original


All cleaned up, and the new horns installed.
20160402_172747_zpsauzrrgaz.jpg~original

20160403_093416_zpsu1wvbbac.jpg~original

20160403_093428_zpspr6a8run.jpg~original


The new 4xInnovations bumper installed with Rigid Dually's.
20160404_181549_zps8mfalevb.jpg~original

20160404_181605_zpscya9a1g4.jpg~original
 
Parts are starting to come in for my manual hub swap. I picked up some used Aisin manual hubs off eBay for $50. I did decided to buy all new OEM parts for the rest of the swap. I still have to get a few more parts, and that'll have to wait until after the New Year.

20151220_164910_zpsef6gqyl2.jpg~original

Ive been looking into doing the same mod for my truck. What year tacoma did you get your parts off of? Have to change the axles to manual hub ones?
 
Ive been looking into doing the same mod for my truck. What year tacoma did you get your parts off of? Have to change the axles to manual hub ones?

Locking hubs need to come from a 95-04 Tacoma. Need to find a bare bone base model for them as well. Grab the entire spindle, and cv shafts. A good list of parts to replace can be found here.
 
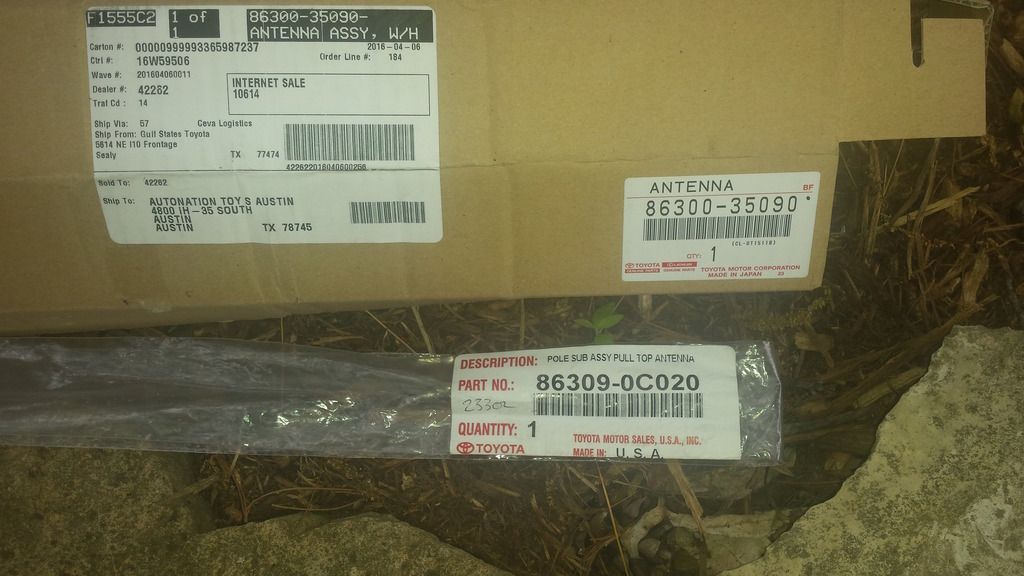
I'm slowly working on the front end. Still need to swap out to Tundra calipers, rotors, and some new soft lines from the caliper up. I was able to get a couple things taken care of this weekend. I added a driver side ditch light bracket for my CB antenna, and a Tacoma antenna.

These are the parts that I used for the Tacoma whip mod. This is the antenna, and the black mast.
20160508_175232_zpstndj0wa8.jpg~original

20160508_175140_zps7npuss2d.jpg~original


Next was installing the ditch light bracket. This was pretty easy, but took two of us to do it. I'm sure one person could have done it, but having an extra hand was pretty helpful.
20160507_073534_zps53xjieap.jpg~original

20160508_175134_zpssi0wbbru.jpg~original

20160508_175155_zpsi2megn66.jpg~original
 
My projects today were long overdo. I was able to knockout my TBU, and replace my fan clutch. The TBU took me about 4 hours from start to finish. I replace all the brake line from the engine bay to the calipers. I replaced the upper hard lines with new OEM's. From those to the calipers I used Tacoma soft lines. I purchase the Stoptech kit that came with rebuilt calipers, and new pads. I also purchase Stoptech slotted rotors. Since everything else was new I also purchased some OEM caliper bolts.

Before:
IMG_01321_zpsgqhak4ym.jpg~original


After:
IMG_0134_zpst2o3dg6e.jpg~original

IMG_0140_zpsd5kdpj6j.jpg~original

IMG_0142_zpszzy6tbnr.jpg~original


I also replaced my fan clutch today since it was out, and it's still hot around here. This only took about 30 minutes from start to finished, I had to remove the 4 10mm screws from the fan shroud, and the 4 12mm nuts holding the fan clutch to the pulley. Once the clutch is out you remove the 4 10mm nuts holding the fan to the clutch. Install in reverse order.

Before:
IMG_0144_zpsewufemzw.jpg~original


After:
IMG_0145_zpslsfsi2we.jpg~original
 
Last edited:
We just returned from another great trip to Colorado. This time we were hiking, and camping in Pike National Forest. We did a short 22 mile loop in Lost Creek Wilderness, and had a blast. This was our first time to the area, but this is one of the area's that we'll be returning to next summer.

Pike's Peak is just left of the frame. We camped here after spending 2 nights on the trail.
7497E6B3-D85A-4493-B7CC-7E713C09205A_zps7kqrt1gz.jpg~original

8819FD11-C1D4-43C2-B1FD-37D1CED14D7E_zpshn5sh8ae.jpg~original


Here are some random pictures from the trail.
82D2E4DA-4A23-46E1-BB0A-9706A8CD11AB_zpstbktnyt3.jpg~original

5130EBCA-1559-4709-A4A5-D8AAF9018D55_zpso53awvxk.jpg~original

EBAC0A47-5820-4767-8B42-98F65019C8CB_zpsxwkexv0t.jpg~original

462B0547-3B40-4826-BEF0-095737AF71DE_zpsncovr8qm.jpg~original

C99251B6-230E-487E-AEBC-49E77670DA02_zpsx3iyillj.jpg~original

7BDB9BCA-4D00-4D80-BE1A-4BF975B4057A_zpsoh6aiis7.jpg~original
 
A couple weeks ago I decided to order a Prinsu Design roof rack, and a CVT awning to go with it. This weekend I was able to get everything mounted up, and I'm pretty happy with how it turned out.

Mounting was very straight forward for the rack, and only took me about 1 hour to install in it. The awning took almost as long since I had to mount it a little differently.

20151212_102806_zpsi82ogh3a.jpg~original

20151212_102824_zpsjif5e7xa.jpg~original

20151212_102835_zpsbltwktej.jpg~original

20151212_102844_zpsnwpfigf9.jpg~original

20151213_145853_zpsipz2caiu.jpg~original

20151213_145927_zpsjhiwe3fx.jpg~original

Where did you get these white rubber/plastic spacers, and what are they called?
 
Where did you get these white rubber/plastic spacers, and what are they called?

Ace hardware has them, and they're just nylon spacers.

Did you weld your spindle gusset while the spindle and everything else was still on the vehicle?

These were welded off the vehicle. I bought used spindles off of eBay that I cleaned up before welding on, and then painted them. I bought the entire front end, build everything up, and then swapped everything over.
 
Ace hardware has them, and they're just nylon spacers.


These were welded off the vehicle. I bought used spindles off of eBay that I cleaned up before welding on, and then painted them. I bought the entire front end, build everything up, and then swapped everything over.

I notice you only did the top row, not attaching any bolts to the lower slat.. have you found any problems doing this? Flapping... wind noise...?
 
Ace hardware has them, and they're just nylon spacers.


These were welded off the vehicle. I bought used spindles off of eBay that I cleaned up before welding on, and then painted them. I bought the entire front end, build everything up, and then swapped everything over.

Do you think it will be safe to weld the spindle gusset while everything is attached. I do not want to remove my new OEM wheel bearings, LBJ and more. I read on Tacoma forum that some one did weld it with everything on. Your opinion matters to me. Thanks
 
Do you think it will be safe to weld the spindle gusset while everything is attached. I do not want to remove my new OEM wheel bearings, LBJ and more. I read on Tacoma forum that some one did weld it with everything on. Your opinion matters to me. Thanks

You can, but I'd disconnect your battery before doing so.

You don't need to remove the wheel bearing or LBJ to weld them on. You can take out the 4 LBJ bolts, and leave the LBJ attached to the LCA. You'll have to remove the UBJ from the UCA though. Make sure you protect the UBJ so you don't burn a hole through the boot.
 
You can, but I'd disconnect your battery before doing so.

You don't need to remove the wheel bearing or LBJ to weld them on. You can take out the 4 LBJ bolts, and leave the LBJ attached to the LCA. You'll have to remove the UBJ from the UCA though. Make sure you protect the UBJ so you don't burn a hole through the boot.

Thanks
 
So it looks like this thread is coming back to life. Due to recent issues with my wife's "dream car" the 4runner now gets to enjoy an adventure. Im not going into details but, the Rover is out and the 4runner is in. The 4runner will be getting a much needed face lift. This is going to be a major over haul in 2-3 weeks.

Let's start from the top. I have some work to do on my Prinsu roof rack since it needs to carry some items now. The roof rack will now hold a 99" CVT awning, Port-a-Shower, TRED's, fishing pole holder, and 2 Alu-Box's full of gear.

The inside is getting an entirely new platform, and will have a design similar to what I build for the Rover. It'll have dual drawers that are 34" long, 2 large compartments up front, and 2 small compacts up front. The front of the platform will hold 2 one gallon Rotopax, and maybe more.

The rear end is getting new springs, shocks, and bump stop extensions. I'm also going to rebuild the rear drums, and install new seals and bearing in the axle. Today I ordered a new 4xInnovations rear bumper with tire carrier, hilift mount, Jerry can mount, and fold down table to finish it off.

New Faulken tires are on the way, and now I'm hunting for a full size rim for a spare. I need to install our winch on my 4xInnovations from bumper, and touch up the paint a little. I'm also adding an ARB compressed under the hood with some updated electrical work. Some light pods are getting installed for ditch lights, maybe a backup light, and a new switch cluster on the dash.

Hope I'm not missing anything.

 
Last edited:
Up first is the new sleeping platform. It'll be made from 1 x 1 x .065 box tubing, and will be completely welded. It'll have a 1/2" deck, and some kind of cover for it. The back section will have two 32" long drawers, and a few compartments up front. I should be able to get started on this Wednesday, and hopefully complete it on Thursday.

This is what I have to work with.
20170626_174150_zps5n1apkrc.jpg~original
 
Sorry to hear about the rover. This is going to be an awesome set of updates. Wish I was closer to help out. Good luck!
 

Members online

Forum statistics

Threads
278,309
Messages
3,554,063
Members
248,016
Latest member
Advally Service

Trending content

Back
Top