

dalandshark
New member
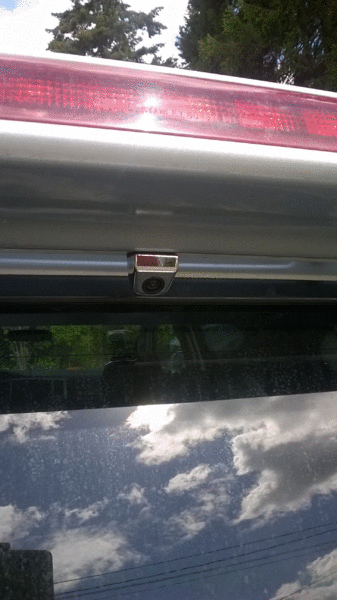
I just finished installing a back up camera on the rear spoiler of my 03 Sport.

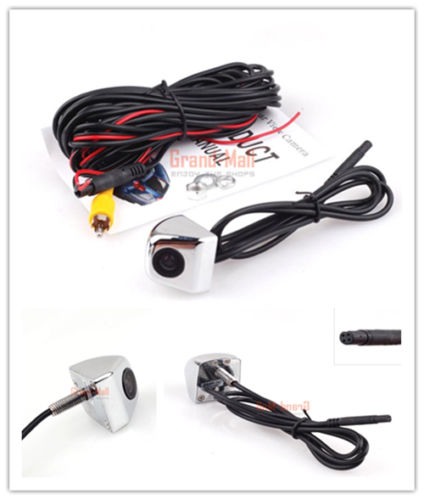
Camera is from GrandMall on Ebay for $16:
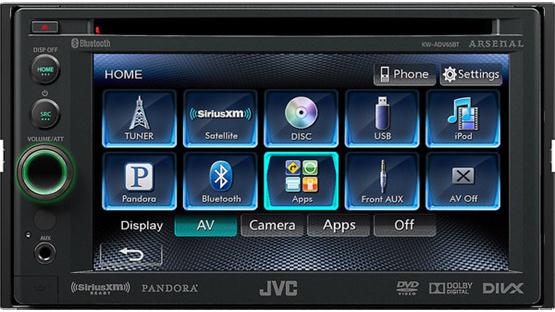
My head unit is a JVC Arsenal ADV65BT I installed 2 years ago.
Here's how I did it:
1. Remove rear spoiler brake light. Using the right tool you won't have to remove the whole spoiler, especially if you roll down the window.

2. Drill a hole for the camera to fit in.
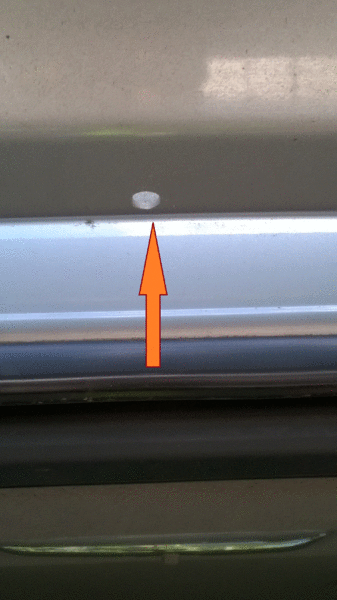
3. Install camera in to hole (I made a rubber gasket to put between camera and spoiler. Route wires through spoiler. Sorry, lost the picture.
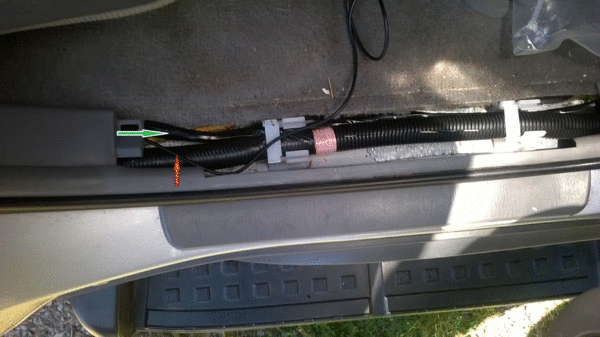
4. Wires routed out from spoiler (Orange Arrow). Then route through the conduit (Green Arrow).
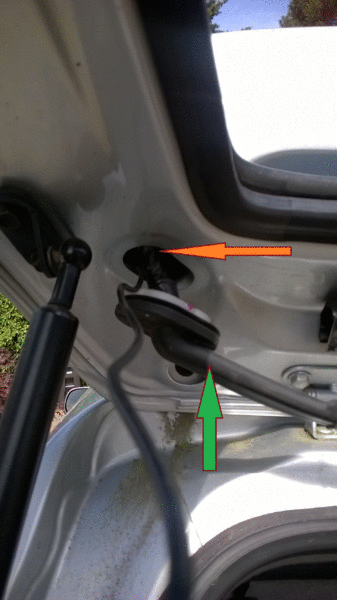
4a. Route the wires through conduit and then plug together with the other cable from the following steps. Tape together. This is where I capped and stowed the extra power wires (Green Arrow).
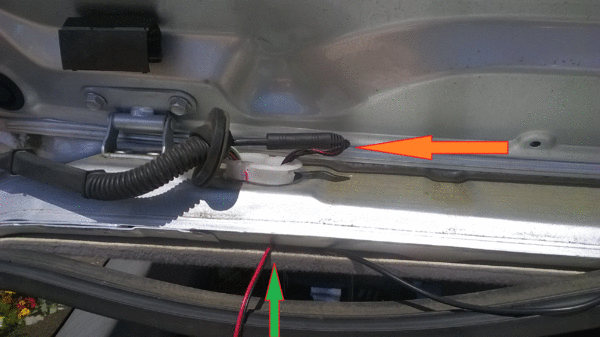
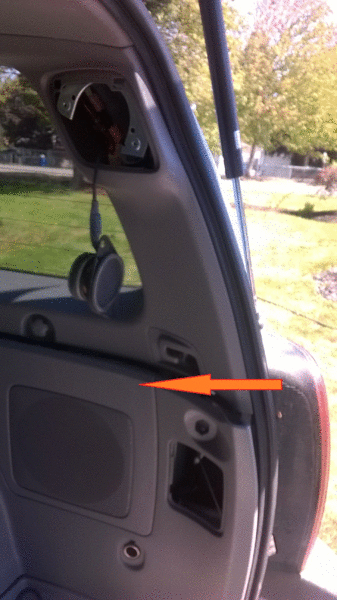
5.Route the other part of the wire up through the area behind the passenger side cargo mirror or speaker (w/JBL) and behind the tailgate gasket. Second pic shows transition from behind tailgate gasket to inside the rear mirror/speaker area.
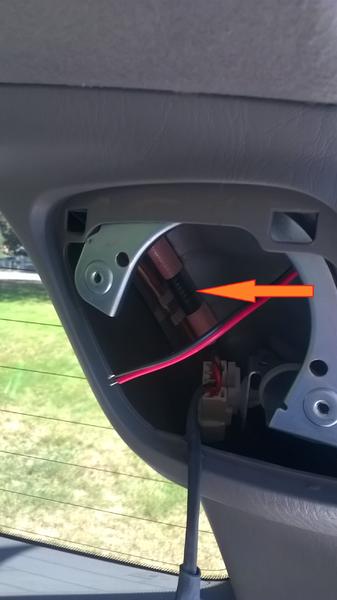
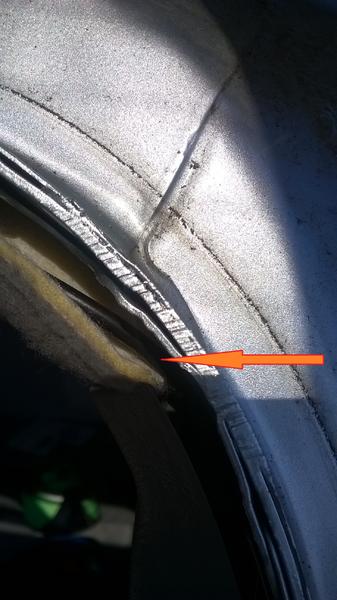
6. Route the rest of the wire behind the luggage panel or subwoofer panel if JBL, under the door sills, and up to the radio head unit. I ran mine up above the inner glove box along where I had routed my wire harness for the UN-JBL conversion. The arrow points at the level where there are wires running forward.
Passenger Rear Door Sill. Orange Arrow is the Camera RCA wire. Green Arrow is the wire bundle I installed to convert this thing from JBL to Non-JBL.
7. Plug the rca connector into the radio (White Arrow).
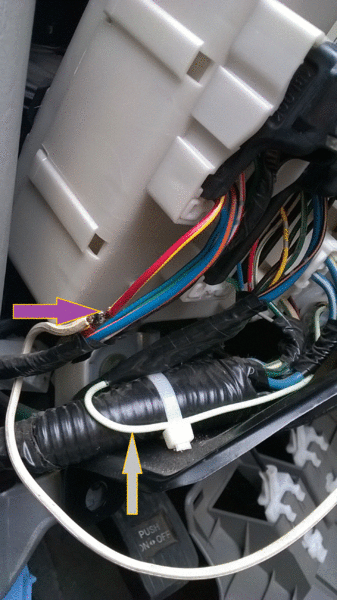
8. Run another wire down under the steering column just left of the fuses. Connect this wire to Red wire w/yellow strip. I followed the wire that I had used for the parking brake wire. I soldered my connection, but do whatever you feel comfortable with. My solder job is better than it looks in the Pic. Purple arrow is the Reverse Light Wire. The Gray Arrow is the Parking Brake Wire (for dvd).

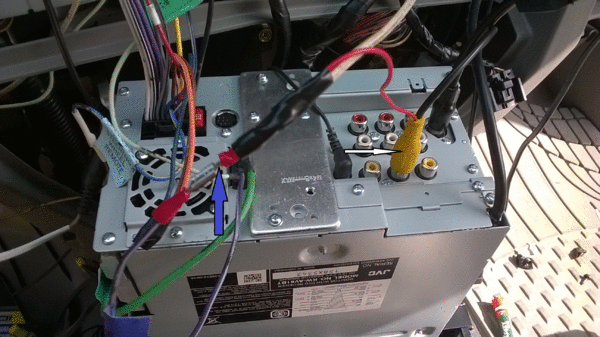
9. Connect the other end of this wire to the "Reverse Gear" wire from the head unit and also the red wire coming out of the Yellow rca connector from the camera. Blue arrow shows the three wires connected, wrap with connectors with tape. I used the male/female spade in case I have to remove the head unit.
10. Check head unit settings and test.
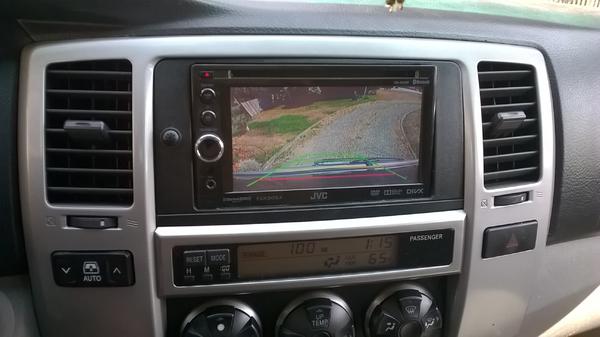

** I can see just behind the ball of the trailer hitch, so pretty good considering I didnt have to dig into the tailgate area of the truck.**
Camera is from GrandMall on Ebay for $16:
My head unit is a JVC Arsenal ADV65BT I installed 2 years ago.
Here's how I did it:
1. Remove rear spoiler brake light. Using the right tool you won't have to remove the whole spoiler, especially if you roll down the window.
2. Drill a hole for the camera to fit in.
3. Install camera in to hole (I made a rubber gasket to put between camera and spoiler. Route wires through spoiler. Sorry, lost the picture.
4. Wires routed out from spoiler (Orange Arrow). Then route through the conduit (Green Arrow).
4a. Route the wires through conduit and then plug together with the other cable from the following steps. Tape together. This is where I capped and stowed the extra power wires (Green Arrow).
5.Route the other part of the wire up through the area behind the passenger side cargo mirror or speaker (w/JBL) and behind the tailgate gasket. Second pic shows transition from behind tailgate gasket to inside the rear mirror/speaker area.
6. Route the rest of the wire behind the luggage panel or subwoofer panel if JBL, under the door sills, and up to the radio head unit. I ran mine up above the inner glove box along where I had routed my wire harness for the UN-JBL conversion. The arrow points at the level where there are wires running forward.
Passenger Rear Door Sill. Orange Arrow is the Camera RCA wire. Green Arrow is the wire bundle I installed to convert this thing from JBL to Non-JBL.
7. Plug the rca connector into the radio (White Arrow).
8. Run another wire down under the steering column just left of the fuses. Connect this wire to Red wire w/yellow strip. I followed the wire that I had used for the parking brake wire. I soldered my connection, but do whatever you feel comfortable with. My solder job is better than it looks in the Pic. Purple arrow is the Reverse Light Wire. The Gray Arrow is the Parking Brake Wire (for dvd).
9. Connect the other end of this wire to the "Reverse Gear" wire from the head unit and also the red wire coming out of the Yellow rca connector from the camera. Blue arrow shows the three wires connected, wrap with connectors with tape. I used the male/female spade in case I have to remove the head unit.
10. Check head unit settings and test.
** I can see just behind the ball of the trailer hitch, so pretty good considering I didnt have to dig into the tailgate area of the truck.**
Last edited:


