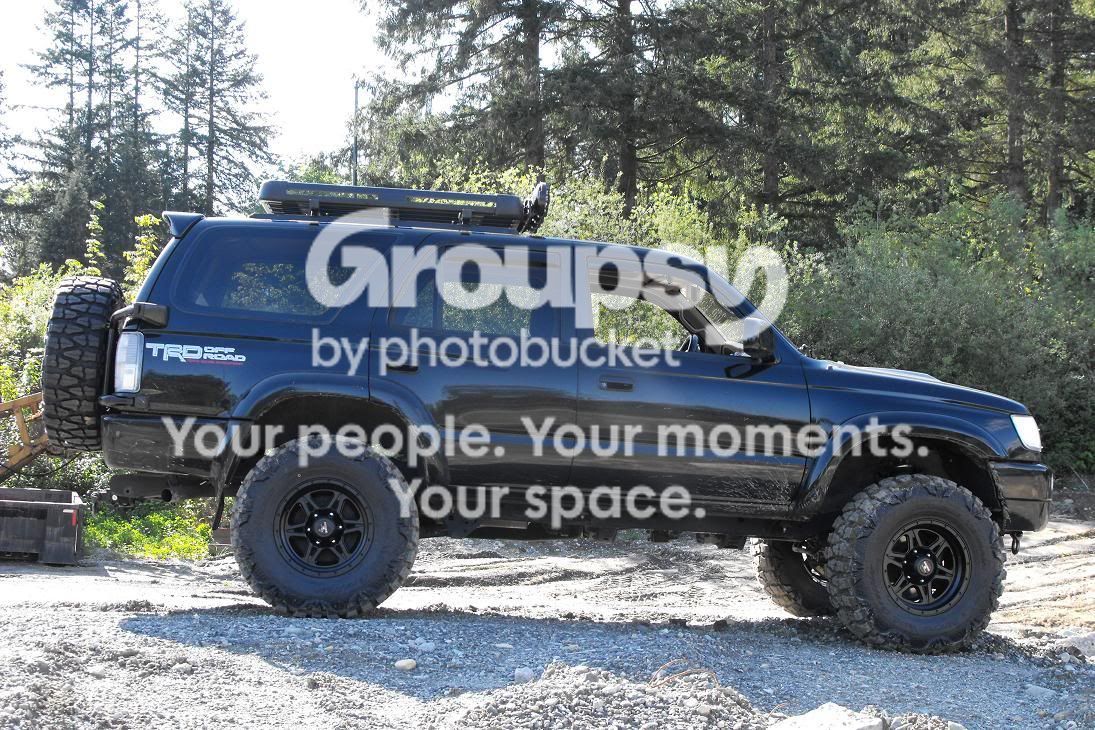
My Build Thread for "Imogene"

I've always been a big fan of those BruceTS bumpers. If I ever build one myself, it'll be that design too. I look forward to seeing what you come up with! :hungry:

Those metal shears are crazy aren't they? I think those things weigh like 20 tons. They're ridiculously heavy.
 
I've always been a big fan of those BruceTS bumpers. If I ever build one myself, it'll be that design too. I look forward to seeing what you come up with! :hungry:

Those metal shears are crazy aren't they? I think those things weigh like 20 tons. They're ridiculously heavy.

Hopefully I can pull it off the way I have it in my head. :D

The amazing thing about that shear was that after it was turned off and I had been outside loading up some steel in the runner, I came back in maybe 10-15 minutes later and the big flywheel on the side was still slowly spinning. I was amazed at how it was still moving after that time frame.:bowl:
 
Semper Fi man. I keep leaving your thread open on our ipad so my wife sees what you have done. I'm waiting for the day she compliments about the ARB and sport hood........ I'm not above making it sound like her idea!
 
Good luck with the bumper build! I'll be watching closely.

BTW, I'm currently designing a rear bumper for my truck with a tire carrier. It will have a better departure angle than my current bumper, and its styling is going to be sweet! (Teaser)
 
Good luck with the bumper build! I'll be watching closely.

BTW, I'm currently designing a rear bumper for my truck with a tire carrier. It will have a better departure angle than my current bumper, and its styling is going to be sweet! (Teaser)

Dang....I wish you had it finished so I could copy it :spy:
 
progress

Well, I spend several hours working on the bumper today. I must say that my Forney 130FI welder is performing great. :yo: The steel is 3/16 and I don't think I would want to try and weld anything thicker with it, even though the book says it can do 1/4" stuff. I don't have gas, so I have to use flux core :tape2:. Keep in mind that I am not a good welder, so my welds will not look great. That's what a grinder is for, right?:wink2:

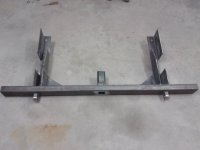
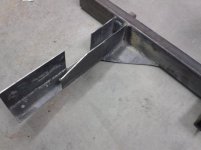
I managed to get the passenger side frame mount "mocked up" and tacked, but I won't do final welding for a while.

Getting it square.....
full_throttle-albums-rear+bumper+build-picture17176-making-frame-mount.jpg

full_throttle-albums-rear+bumper+build-picture17175-making-frame-mount.jpg


testing fitment.
full_throttle-albums-rear+bumper+build-picture17178-test-fitting-frame-mount.jpg


Due to the 1" body lift, I have angled the bracket up for more clearance.

I wanted to tackle mounting the d-ring mounts and the trailer hitch. I wanted the hitch recessed, and the d-ring mounts are designed to pass through the 2" bumper and be welded on the front and rear sides. We don't want those pulling out :mmph:

Starting on the d-ring mounts
full_throttle-albums-rear+bumper+build-picture17177-measuring-mount-goodies.jpg


full_throttle-albums-rear+bumper+build-picture17179-preparing-weld.jpg


One side done :p
full_throttle-albums-rear+bumper+build-picture17181-closer-view-weld-i-am-amateur-shows.jpg


Back side.(I hate the splatter, but that's what I get for not having a gas bottle) :pout:
full_throttle-albums-rear+bumper+build-picture17186-backside-all-welded-up-we-don-t-want-those-d-rings-pulling-loose.jpg


I recessed the trailer mount and made it so I can still put the pin in behind the bumper. Not really sure why I did it this way, vs. having the hitch stick out but oh well.

full_throttle-albums-rear+bumper+build-picture17182-hitch-tube-recessed.jpg

full_throttle-albums-rear+bumper+build-picture17183-testing-hitch.jpg

full_throttle-albums-rear+bumper+build-picture17184-another-angle-testing-hitch-fitment.jpg


Finally, finished for the day. Turned out just like I had planned. This was the easy part.:high5:
full_throttle-albums-rear+bumper+build-picture17185-overall-bumper-pic.jpg


Next up will be to get this attached to the truck and start on the corners.

 
wheels ordered

Well, I figured it was time to upgrade from the factory wheels, but not break the bank. While searching around on discounttire I found some nice looking wheels for not a lot of cash.

Level 8 Strike 6 wheeks. 16x8.5 with a 4.5" backspace.
levst6.mtb.ang.jpg~original


I thought I would search through our site here to see if anyone else is running them and what did I find but Blcktpgsr's running these wheels....that was all I needed to see.

Here is a pic from page 12 of his build thread(his truck has changed a lot since this pic, but it shows the wheels really well)
nitto16.jpg~original


I have 5 coming(spare). :high5:

I am slowly making progress on my rear bumper build. I will post up pics when I have more to show.

Peace out girl scouts :hippie:
 
Last edited:
These wheels are real nice and classy and you're gonna love them...I think I might even get another set before they get paced out...well hopefully not so soon.

Bumper build is coming along nicely too..sweet.
 
These wheels are real nice and classy and you're gonna love them...I think I might even get another set before they get paced out...well hopefully not so soon.

Bumper build is coming along nicely too..sweet.

Yeah, I knew I liked those wheels, I just couldn't remember where I had seen them. then POW! I saw e'm on your truck! That's where I had seen e'm:phone: I called my buds and made them look at your rig....AGAIN....so they could see how it will look on my black runner. ( your truck is like 4-runner porn at the office:naughty: )

I hope the bumper build works out...I am a bit nervous about the finishing welds that will be seen.:pray:
 
some changes

Well, my new wheels are on. Installation was $5 per wheel at Walmart. :becky:
Two things immediately come to mind after looking at this picture:

1) I REALLY need to get a bumper on this truck.

2) That two-tone paint has GOT to go! :puke:

The tires look great on the 8.5" rim...I am a bit concerned that they will rub the UCA at full compression of the suspension. ( A reason to go test it :cool: )
 

Attachments

  • new wheels.jpg
    new wheels.jpg
    136.6 KB · Views: 1,962
bumper update

I think I have the basics all welded up and finalized. Next steps will be to make the "wings" on the sides of the bumper.
I am trying to decide what gauge steel to use for this....12 or 14 I imagine.

I did score a big "find" over the weekend.....a free Plasma cutter!!:madgrin:
Person gave it away thinking it was bad...I think they just had their wiring messed up.
I wired up an outlet for it, fired it up and wham!! cuts like butta! :whoo:
 

Attachments

  • IMG_20130317_153011.jpg
    IMG_20130317_153011.jpg
    122.5 KB · Views: 1,940
  • IMG_20130317_153021.jpg
    IMG_20130317_153021.jpg
    66.3 KB · Views: 1,883
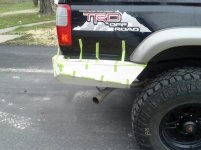
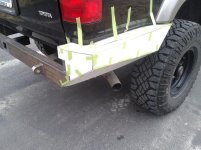
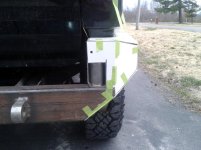
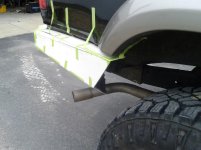
I was able to spent some time today working on the hinge for the tire swing and
working on the passenger side bumper "wing" for lack of a better word.
While I am basing this bumper off of a BruceTS bumper, I am also adding in some of Bandit Runner's design and Prospectator's design.
 
[No message]
 

Attachments

  • wing1.jpg
    wing1.jpg
    111.5 KB · Views: 1,830
  • wing2.jpg
    wing2.jpg
    122.6 KB · Views: 1,843
  • wing3.jpg
    wing3.jpg
    100.9 KB · Views: 1,832
  • wing4.jpg
    wing4.jpg
    104.3 KB · Views: 1,842
This took close to 2 hours to mock up. My plan is to lay it out flat and use it as a pattern on 11 gauge steel. I will then make the appropriate bends to limit the amount of visible welding I will have to do. It is hard to see because of the brightness of the material, but there is actually a few angles running down the side, it is not just "squared" off. I took inspiration from this thread and this thread. Props to all those who have done this in the past and posted up pics so I could see how you did it and have the courage to try it myself. :love:
 

Members online

Forum statistics

Threads
278,310
Messages
3,554,078
Members
248,016
Latest member
Advally Service

Trending content

Back
Top