
TigerTownAlum
New member
* My reason for doing this write up was to contribute what bit of knowledge I have acquired through my project. I love how t4r.org is such as wealth of knowledge and want to do what I can to contribute. Thanks! Hope this helps!
In early 1012, I started a thread talking about my problems with the JBL Synthesis system that was included in my 2005 Limited. It can be seen here: Problems with JBL 10 speaker system
After a big hold up, I was finally able to do my install and revamp the JBL System in the 4th Gen. In the meantime, I have posted in the "What did you do with your 4Runner today?" My sub project. This will build off it with a full revamp of the sound system. I also picked up a set of JL Audio C2650 Evolution Components for the front because I got them for a pretty good deal from T4R.org member hlpressley. They get real good reviews and it was a deal I couldn't pass up. The materials I ended up using:
- JL Audio C2650 Evolution Components (Fronts)
- Infinity Reference 6030cs Component speakers (Rear Components)
- Autotek Mean Machine M1400.4 4 channel Amplifier (Powering all components... under passenger seat)
- Alpine MRP-M450 Mono Subwoofer Amplifier
- Scosche e2 EWDB2 Power Distribution Block
- Tsunami DB8012 Ground Distribution Block
- Metra 70-8113 (using this and taking out Axxess TYTO-01)
- 100 ft. of Pyle 12 gauge speaker wire
- Generic Inline fuse holder
- 1 JL Audio 250 ANL Fuse
- 2 JL Audio 150 ANL Fuse
- 1/0 Gauge Power wire from battery --> Scosche e2 EWDB2
- 1/0 Gauge Ground wire from ground --> Tsunami DB8012
- 4 Gauge Power wire from Scosche e2 EWDB2 --> AMPS
- 4 Gauge Ground wire from Tsunami DB8012 --> AMPS
- 1 Set of Scosche SA69 6x9 speaker adapters for fronts
- Speaker Tweeter Adapters from car-speaker-adapters.com (These were good speaker adapters that came in use for the front tweeters. They took a little modification, but that was to be expected bc all tweeters aren't going to be the same size.)
First was to run the power wires from the battery, through the inline fuse under the hood, to the middle of the center console. The point was to have both of the distribution blocks (power and ground) concealed under the center console, then split to the respective seat. I put the Sub amp under the driver seat and the 4 Channel under the passenger seat.
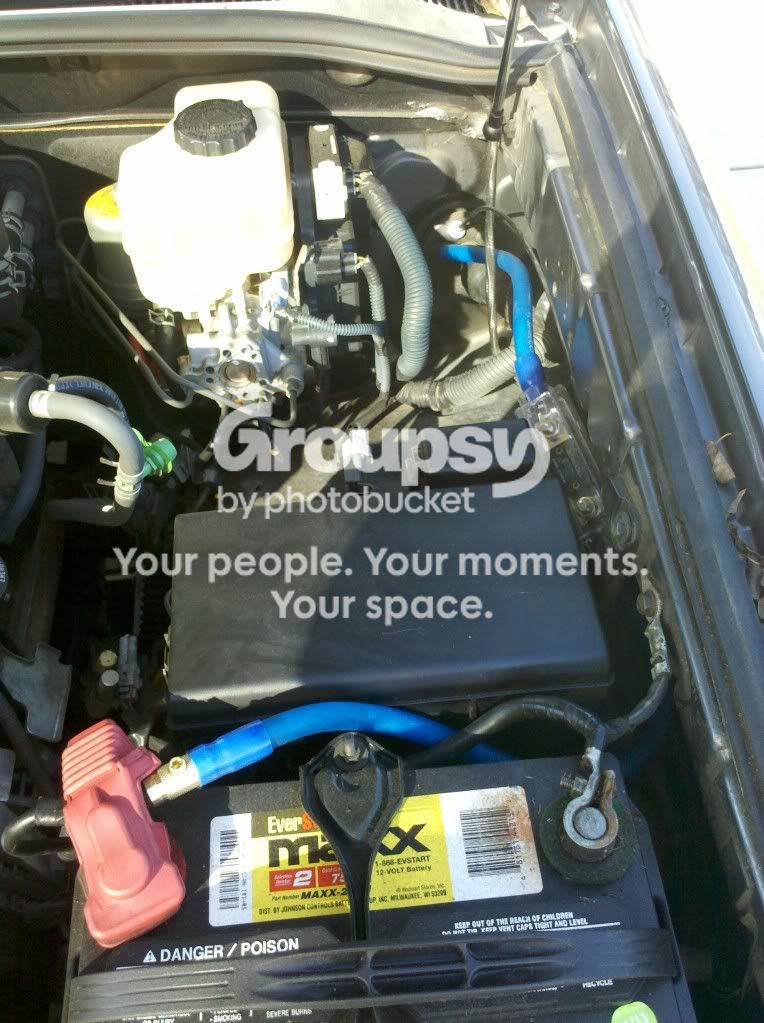
Zero Gauge wire I used to run from the battery, into the inline fuse, through the firewall boot, and to the the Power Distribution Block
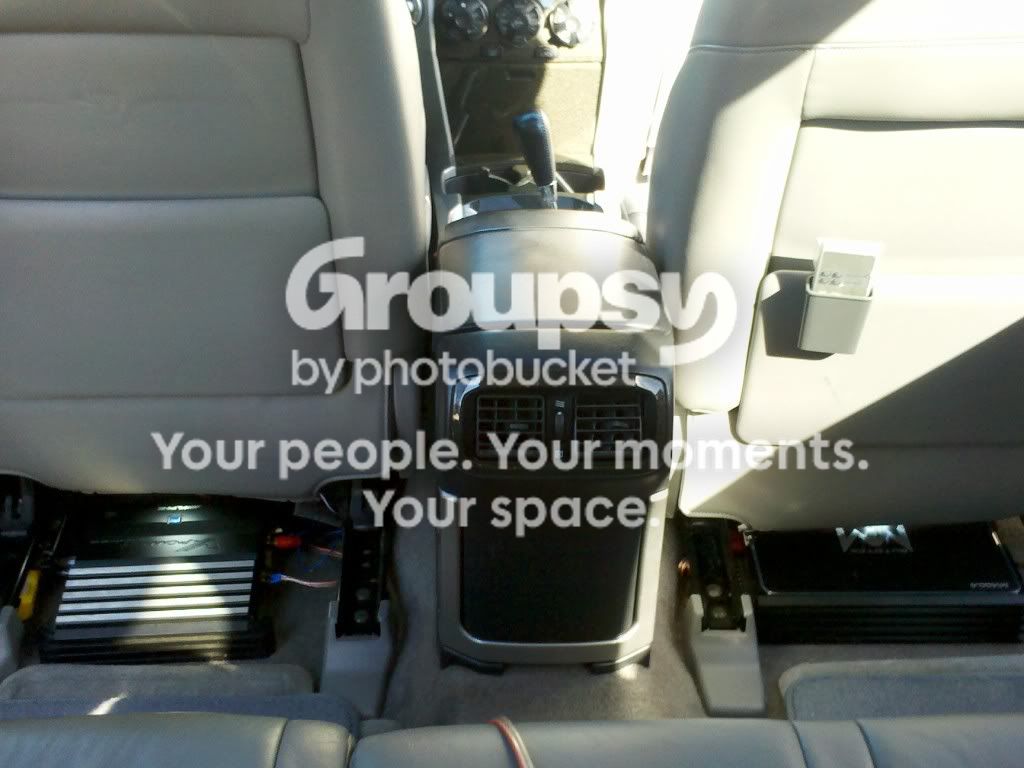
Pics of the amps under the seats. They are tight fits, but it works and the seats still move back and forth. 1st one is with the seats all the way up.
(SIDE NOTE: Also, I love my Toyota 4Runner Footwell Led Lighting Mod courtesy of JA's Footwell writeup.)
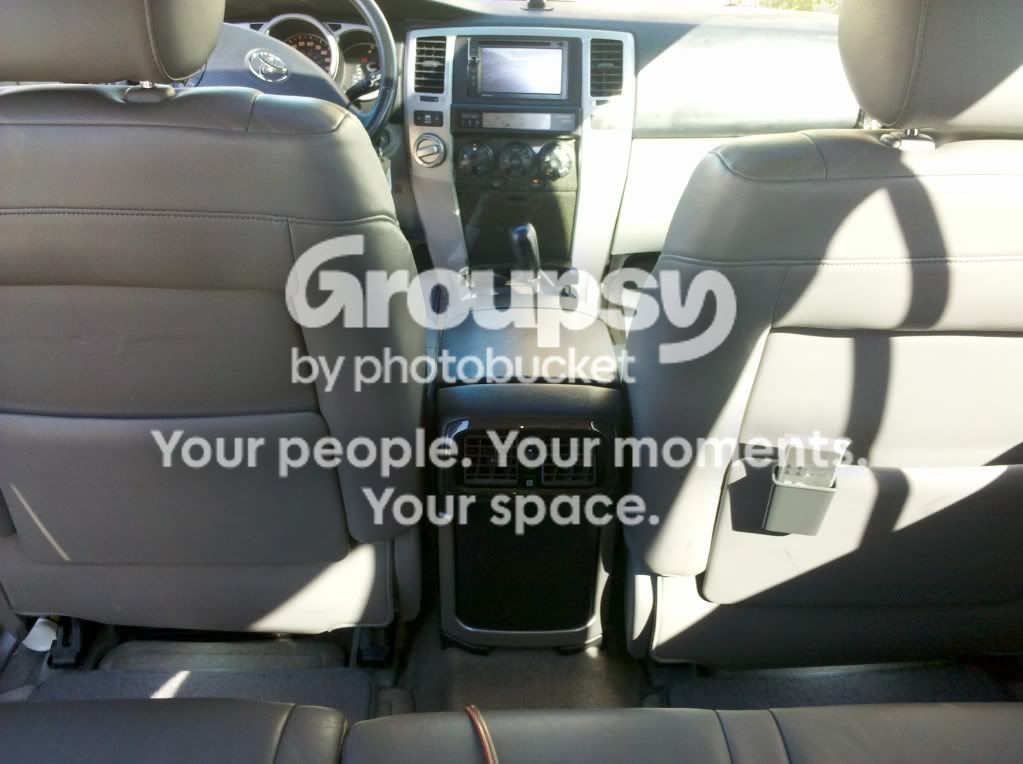
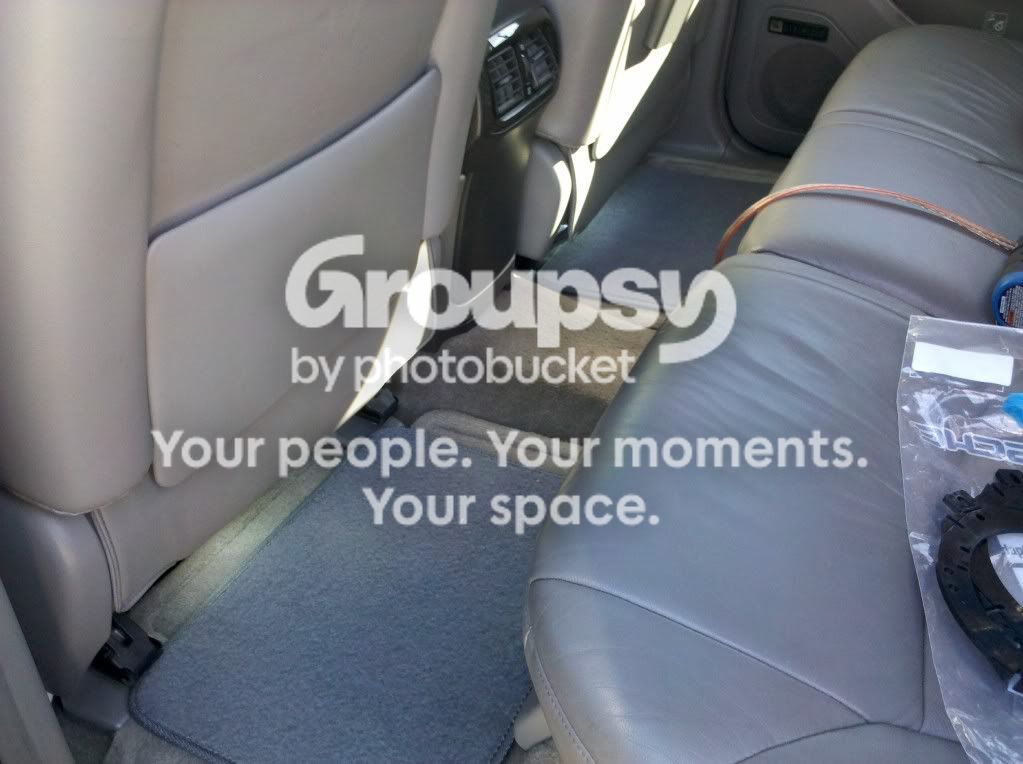
And now with the seats all the way back which is the way they stay for the most part. As you can see, they are concealed and neat. Running the wires to the amps was probably one of the most difficult parts of this install, but in the end… it was worth it.
- After running the power, remote, and ground lines to the amps, I decided to work on the doors.
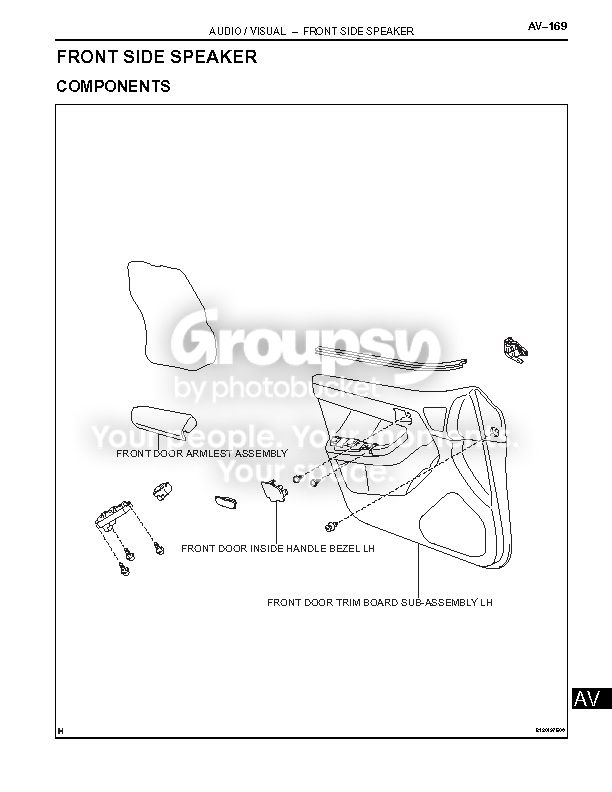
I used this handy diagram to disassemble the doors. The doors can seem real tricky, but you just need to be confident and give them a good tug to get the pop clips loose.
Next, to run the speaker wires. This was probably the hardest part of the project, but it was very worth it bc I used good quality 12 gauge wire. It's just something about tapping into the factory wiring that doesn't seem as good of quality as running dedicated lines. All you have to do is remove the 10mm bolts holding the door boot to the door and use a handy coat hanger to pull the speaker wire through.
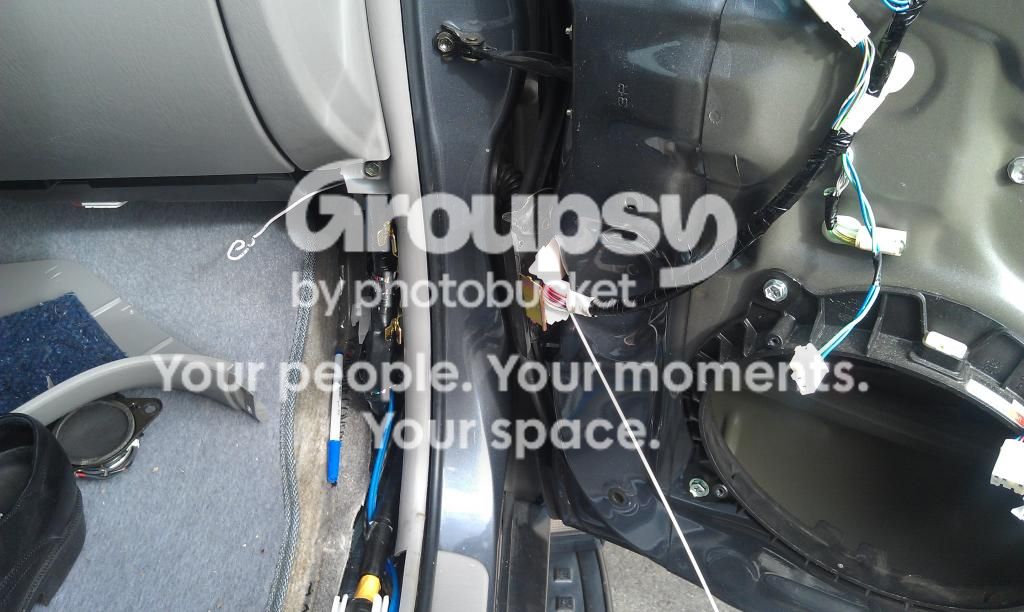
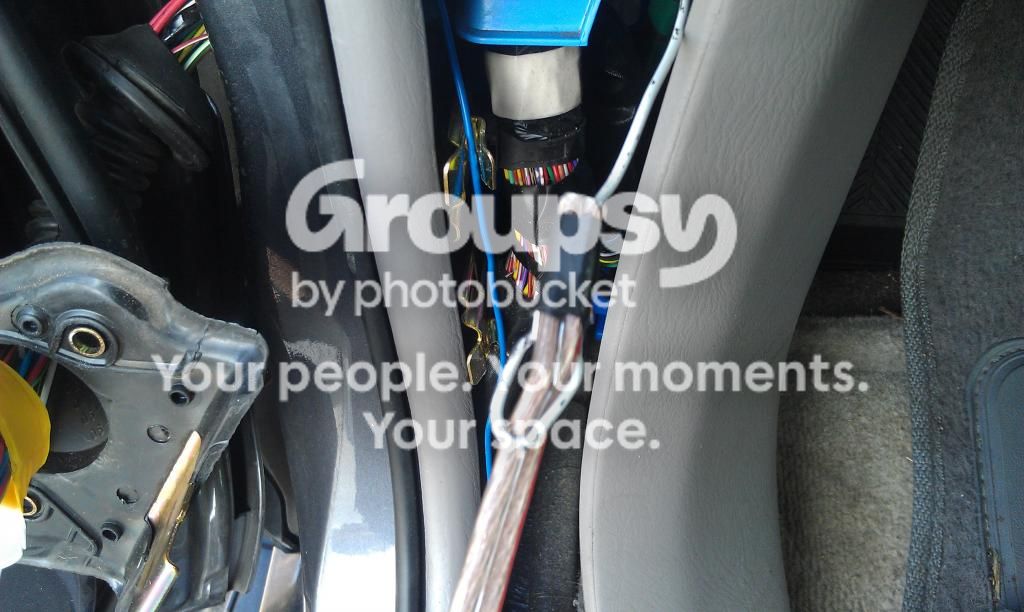
created a loop to snag the end of the wire and tapped it up tight so it wouldn't snag anything in the door boot.
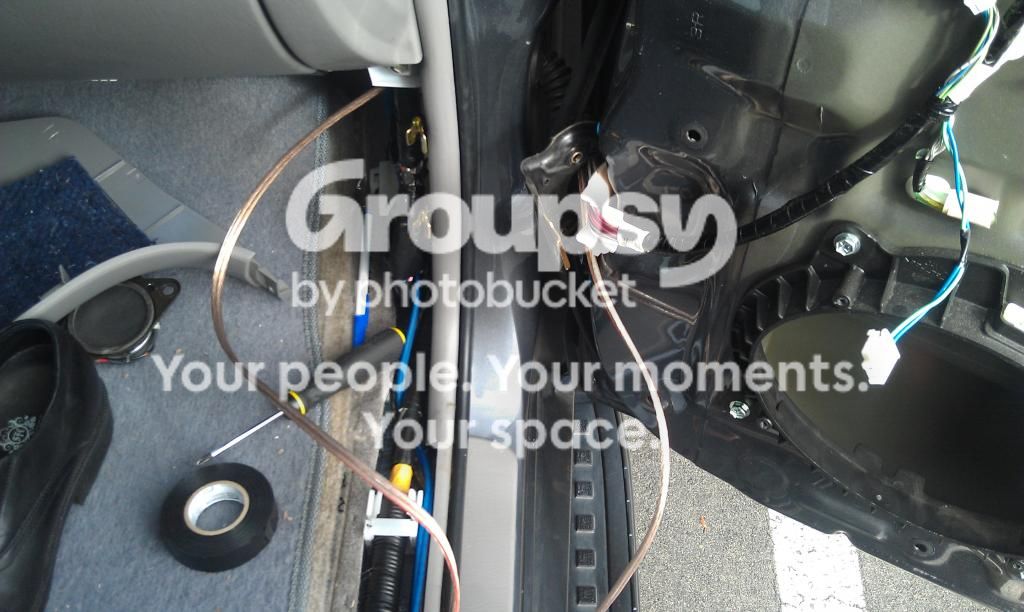
Wire pulled through. Repeat steps for all three remaining doors. FUN!
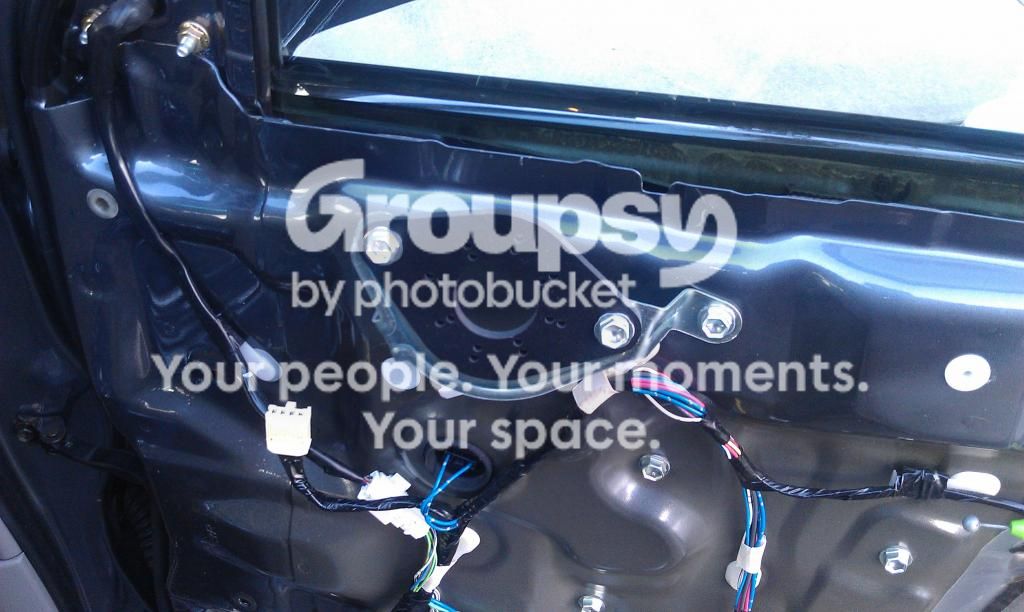
Quick Shot of the bracket installed.
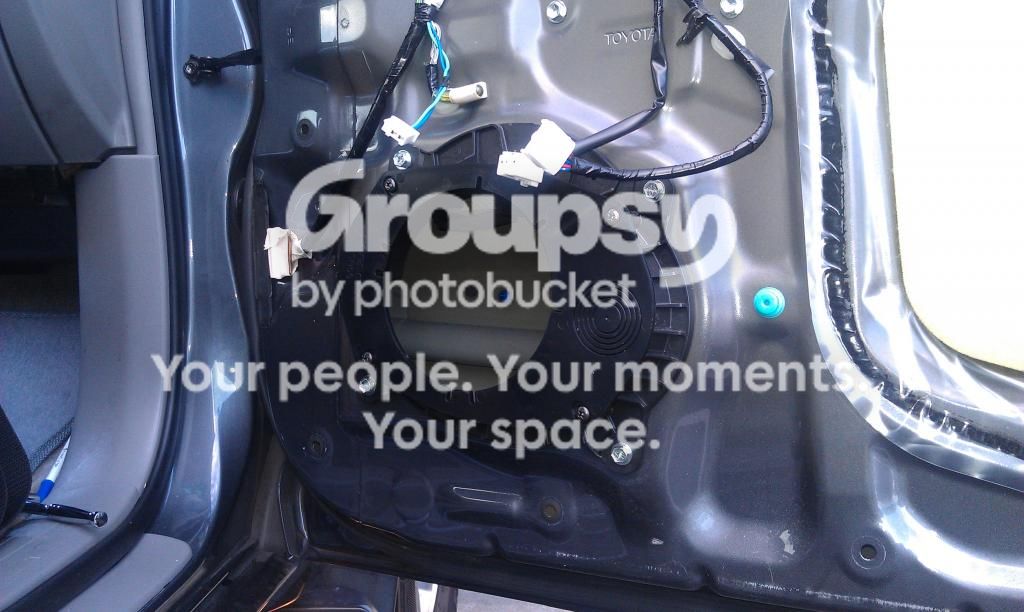
6x9 bracket I used. This bracket required some dremeling as well to make the JL Audio components fit. They were supposed to fit the speakers, but needed a little bit of fabrication.
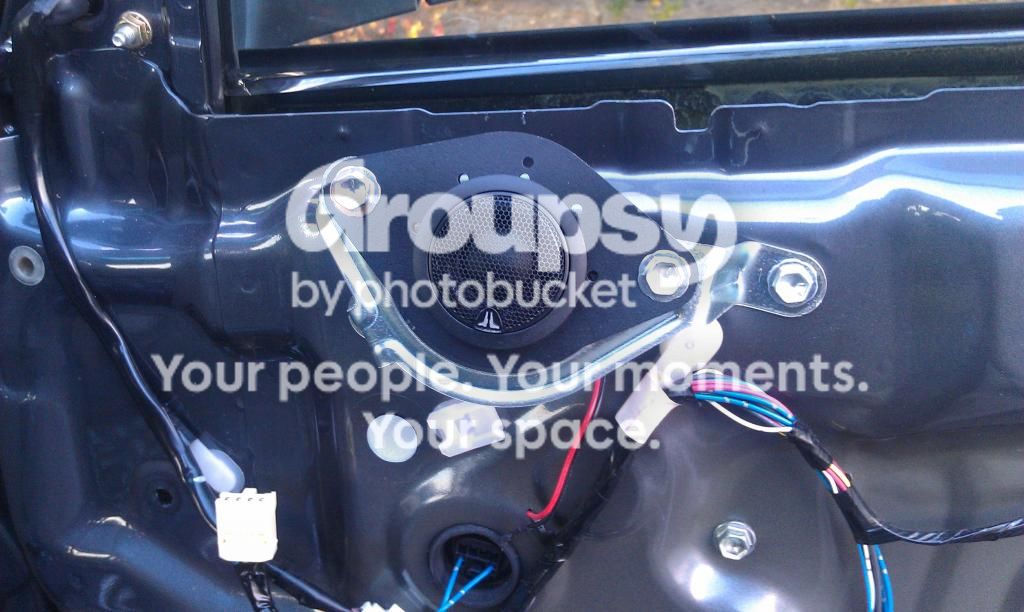
The Tweeter installed in the adapter. The adapter needed to trimmed so the tweeter would fit, but the plastic is really easy to dremel so it fits like a glove.
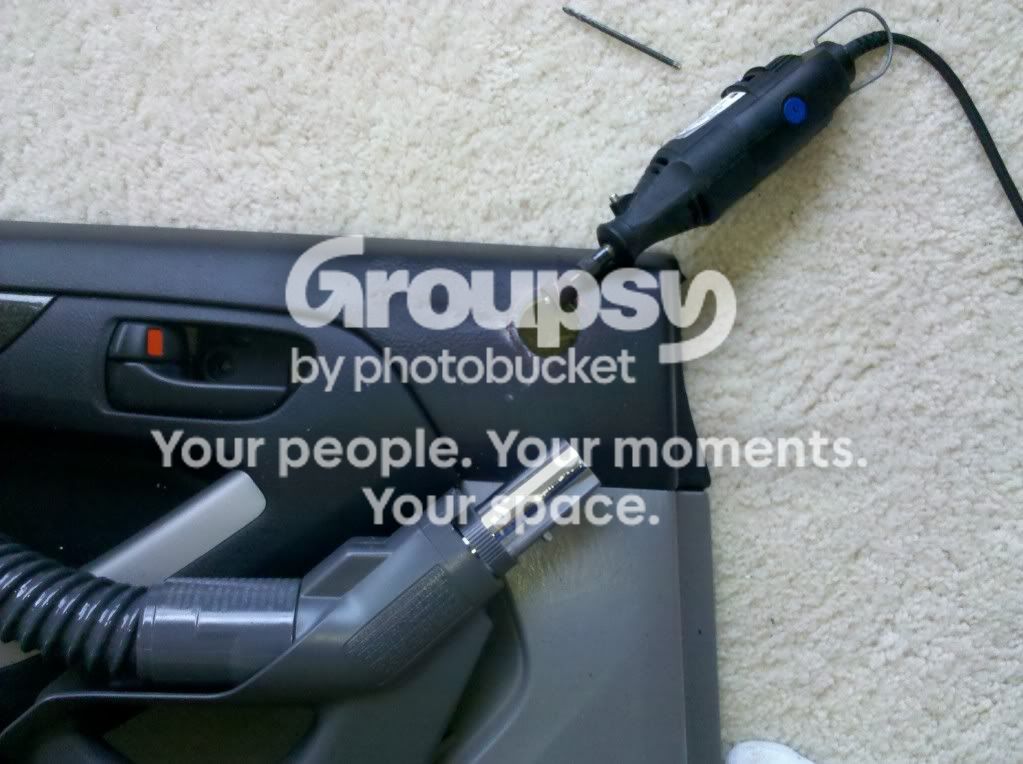
For the rear doors, It took some customizing. I had to cut a hole to fit the tweeter fom the rear set of Infinity components.
It can get messy which is why I had the vacuum there… keep my lady happy.
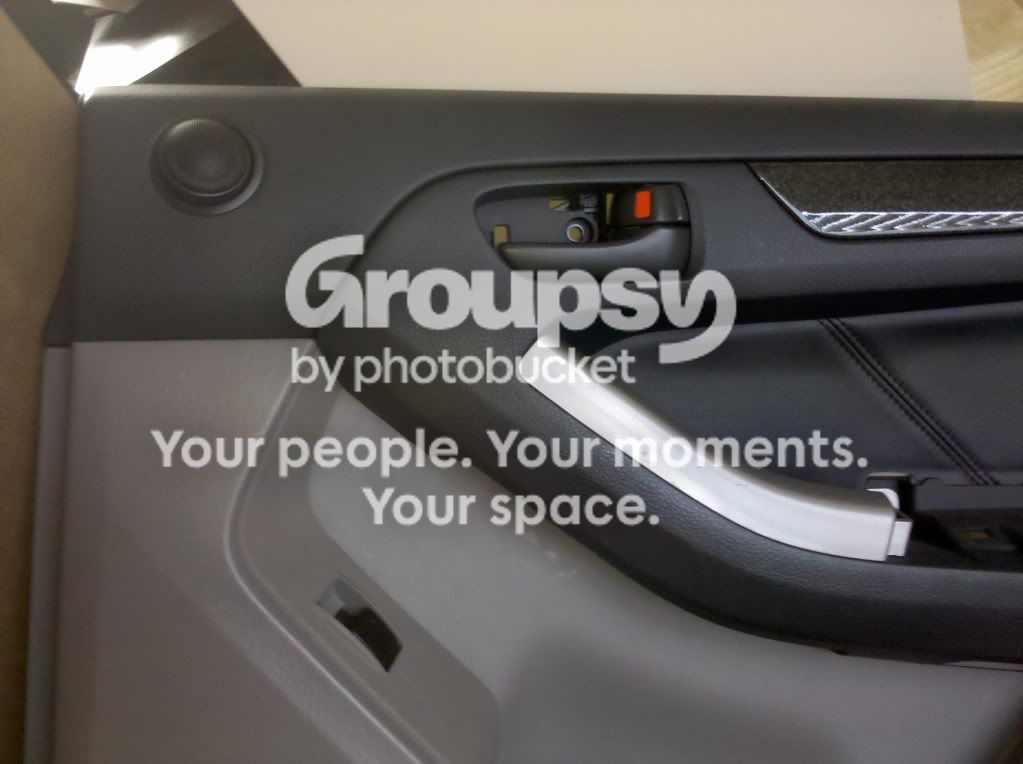
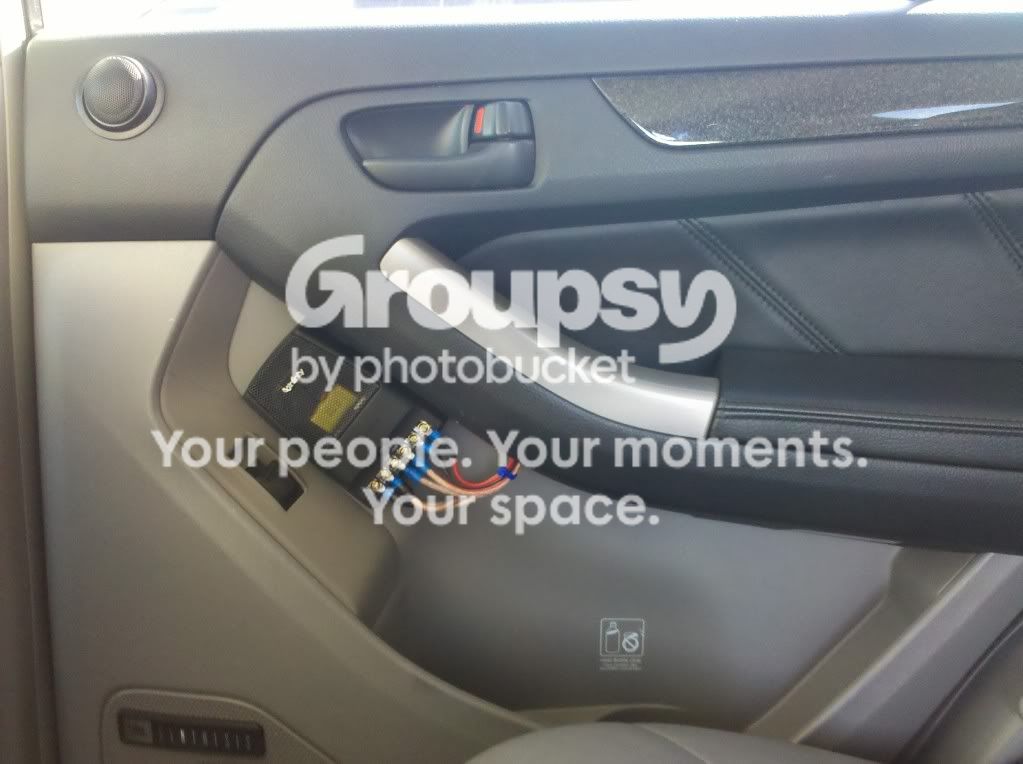
I really liked the way it turned out looking. Pretty solid. Plus, It freaking loud!
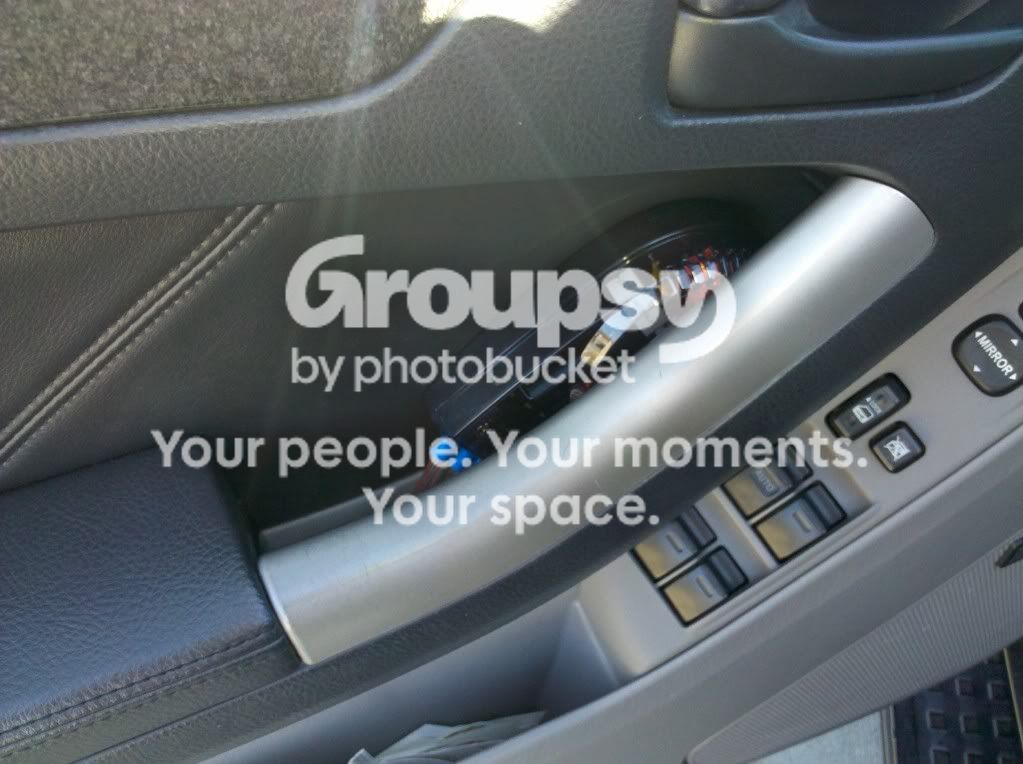
Front Crossovers... This is the only thing I am debating on cleaning up on the install. Right now, they are just wedged in the armrests, but it doesn't look terrible to me.

Badges included with front tweeters that I put on the front tweeter grills. Really glad with the way this turned out.
Now on to the Sub project that I actually completed a while back. I wanted to accomplish a similar result as Ark
I used the following link to dismantle the interior and get to the sub/storage area itself. How to Remove the Navigation ECU from a 2003 Toyota 4Runner
I then followed Ark Swamp Rider's instructions for installing the sub and amp, running wires and such. Replaced JBL Sub/Added Amp: Install Pics/Info
I ended up using a JL Audio 8w3 v3-4 so I ended up needing to use a spacer ring, but I am happy with the way it turned out.
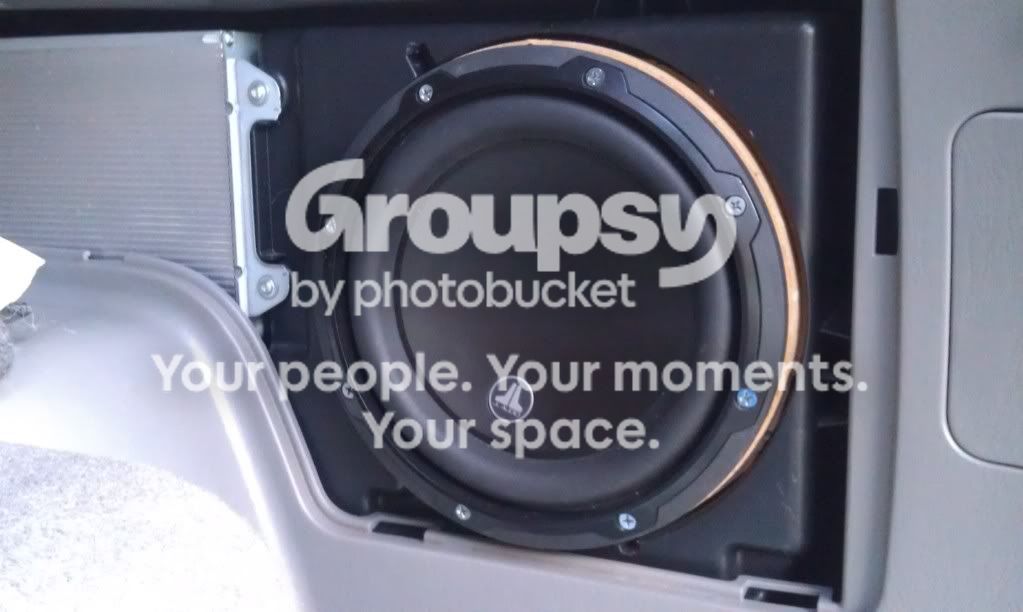
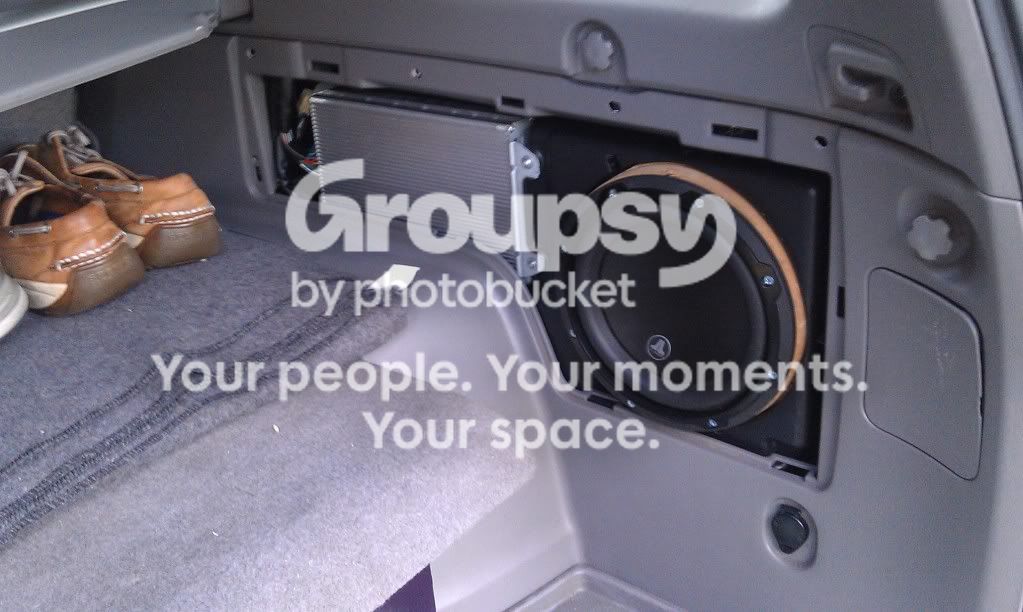
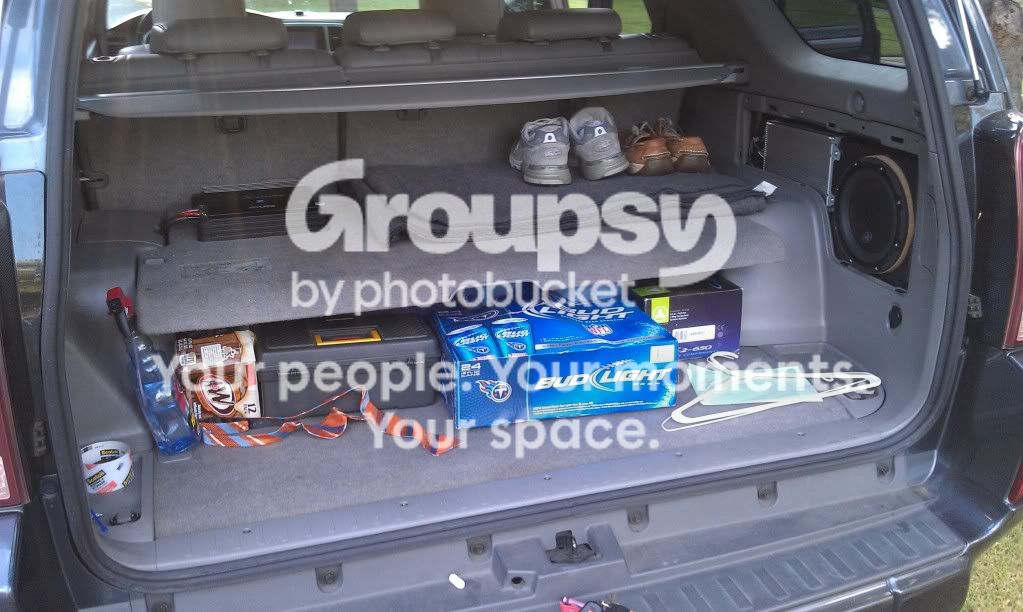
Good amount of cargo space which I am definitely happy about… (Especially the "important things")
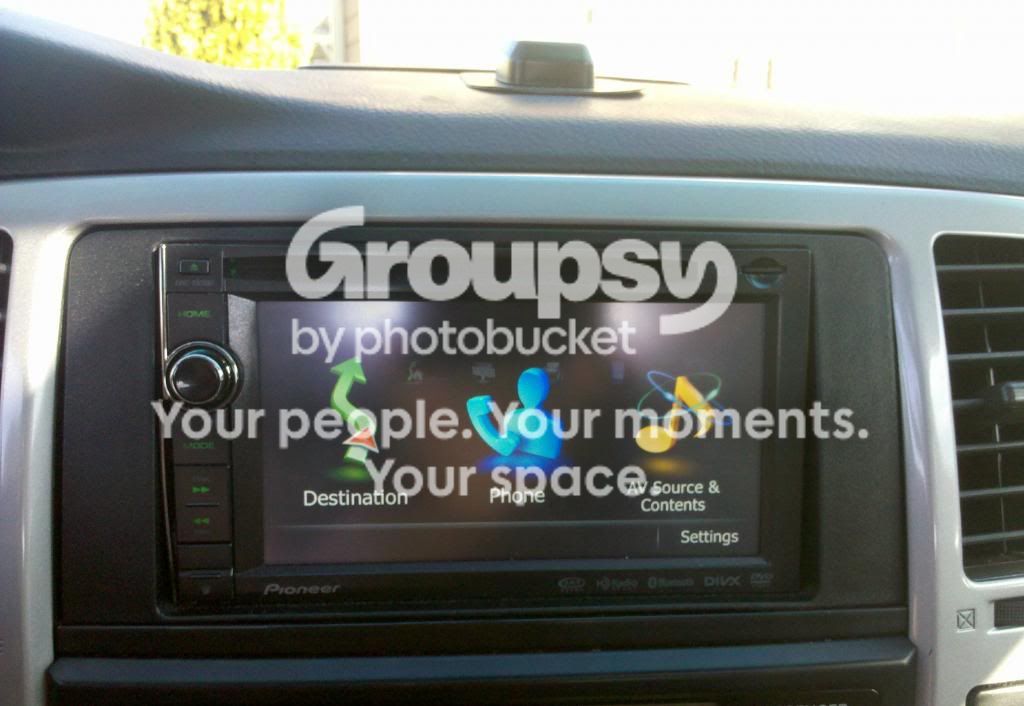
A picture of my Headunit. Pioneer Avic-X930BT.
I had the Avic installed with the factory amplifier using the Axxess TYTO-01 Adapter. I wasn't crazy about leaving this adapter wired to the power, constant, remote, etc. when I wasn't going to be using the factory amp for anything so I took it out as well. I used the Metra 70-8113 wire harness which I was able to get off ebay for about 7 bucks. The way I had this harness wired up was straight connecting the constant (yellow), 2 blue (Amp remote & Antenna remote), & ground (black). I didn't connect the illumination wire bc I wasn't sure where it should connect. Plus, I've read that it is not necessary and the unit will work just fine without it.
**** As you could probably imagine, I don't need the Axxess TYTO-01 because I am not using the factory amp. If anyone would be interested in purchasing this adapter, I would like to sell it.****
There are a few things I would be interested in improving on my install, but for the most part it looks great and sounds awesome!
- I was interested in finding a good place to mount to mount a 3.5 mm Aux Jack. Any ideas of locations that would be good?
- I am going to try to make a cargo box for the trunk. The idea came to me when I saw Dusty Driftwood's Custom Cargo Box & jbmccul's build thread. My cargo box will have some modifications and customizations that will make it a little different as well as an element that will tie into this project. I will be working on this in time to come, but in no way am able to devote much time to these projects so it will take a while I'm sure.
Let me know if there are any questions and I will do my best to share my experience and add to this thread to make it more informative. Hope this helps!
In early 1012, I started a thread talking about my problems with the JBL Synthesis system that was included in my 2005 Limited. It can be seen here: Problems with JBL 10 speaker system
After a big hold up, I was finally able to do my install and revamp the JBL System in the 4th Gen. In the meantime, I have posted in the "What did you do with your 4Runner today?" My sub project. This will build off it with a full revamp of the sound system. I also picked up a set of JL Audio C2650 Evolution Components for the front because I got them for a pretty good deal from T4R.org member hlpressley. They get real good reviews and it was a deal I couldn't pass up. The materials I ended up using:
- JL Audio C2650 Evolution Components (Fronts)
- Infinity Reference 6030cs Component speakers (Rear Components)
- Autotek Mean Machine M1400.4 4 channel Amplifier (Powering all components... under passenger seat)
- Alpine MRP-M450 Mono Subwoofer Amplifier
- Scosche e2 EWDB2 Power Distribution Block
- Tsunami DB8012 Ground Distribution Block
- Metra 70-8113 (using this and taking out Axxess TYTO-01)
- 100 ft. of Pyle 12 gauge speaker wire
- Generic Inline fuse holder
- 1 JL Audio 250 ANL Fuse
- 2 JL Audio 150 ANL Fuse
- 1/0 Gauge Power wire from battery --> Scosche e2 EWDB2
- 1/0 Gauge Ground wire from ground --> Tsunami DB8012
- 4 Gauge Power wire from Scosche e2 EWDB2 --> AMPS
- 4 Gauge Ground wire from Tsunami DB8012 --> AMPS
- 1 Set of Scosche SA69 6x9 speaker adapters for fronts
- Speaker Tweeter Adapters from car-speaker-adapters.com (These were good speaker adapters that came in use for the front tweeters. They took a little modification, but that was to be expected bc all tweeters aren't going to be the same size.)
First was to run the power wires from the battery, through the inline fuse under the hood, to the middle of the center console. The point was to have both of the distribution blocks (power and ground) concealed under the center console, then split to the respective seat. I put the Sub amp under the driver seat and the 4 Channel under the passenger seat.
Zero Gauge wire I used to run from the battery, into the inline fuse, through the firewall boot, and to the the Power Distribution Block
Pics of the amps under the seats. They are tight fits, but it works and the seats still move back and forth. 1st one is with the seats all the way up.
(SIDE NOTE: Also, I love my Toyota 4Runner Footwell Led Lighting Mod courtesy of JA's Footwell writeup.)
And now with the seats all the way back which is the way they stay for the most part. As you can see, they are concealed and neat. Running the wires to the amps was probably one of the most difficult parts of this install, but in the end… it was worth it.
- After running the power, remote, and ground lines to the amps, I decided to work on the doors.
I used this handy diagram to disassemble the doors. The doors can seem real tricky, but you just need to be confident and give them a good tug to get the pop clips loose.
Next, to run the speaker wires. This was probably the hardest part of the project, but it was very worth it bc I used good quality 12 gauge wire. It's just something about tapping into the factory wiring that doesn't seem as good of quality as running dedicated lines. All you have to do is remove the 10mm bolts holding the door boot to the door and use a handy coat hanger to pull the speaker wire through.
created a loop to snag the end of the wire and tapped it up tight so it wouldn't snag anything in the door boot.
Wire pulled through. Repeat steps for all three remaining doors. FUN!
Quick Shot of the bracket installed.
6x9 bracket I used. This bracket required some dremeling as well to make the JL Audio components fit. They were supposed to fit the speakers, but needed a little bit of fabrication.
The Tweeter installed in the adapter. The adapter needed to trimmed so the tweeter would fit, but the plastic is really easy to dremel so it fits like a glove.
For the rear doors, It took some customizing. I had to cut a hole to fit the tweeter fom the rear set of Infinity components.
It can get messy which is why I had the vacuum there… keep my lady happy.
I really liked the way it turned out looking. Pretty solid. Plus, It freaking loud!
Front Crossovers... This is the only thing I am debating on cleaning up on the install. Right now, they are just wedged in the armrests, but it doesn't look terrible to me.
Badges included with front tweeters that I put on the front tweeter grills. Really glad with the way this turned out.
Now on to the Sub project that I actually completed a while back. I wanted to accomplish a similar result as Ark
I used the following link to dismantle the interior and get to the sub/storage area itself. How to Remove the Navigation ECU from a 2003 Toyota 4Runner
I then followed Ark Swamp Rider's instructions for installing the sub and amp, running wires and such. Replaced JBL Sub/Added Amp: Install Pics/Info
I ended up using a JL Audio 8w3 v3-4 so I ended up needing to use a spacer ring, but I am happy with the way it turned out.
Good amount of cargo space which I am definitely happy about… (Especially the "important things")
A picture of my Headunit. Pioneer Avic-X930BT.
I had the Avic installed with the factory amplifier using the Axxess TYTO-01 Adapter. I wasn't crazy about leaving this adapter wired to the power, constant, remote, etc. when I wasn't going to be using the factory amp for anything so I took it out as well. I used the Metra 70-8113 wire harness which I was able to get off ebay for about 7 bucks. The way I had this harness wired up was straight connecting the constant (yellow), 2 blue (Amp remote & Antenna remote), & ground (black). I didn't connect the illumination wire bc I wasn't sure where it should connect. Plus, I've read that it is not necessary and the unit will work just fine without it.
**** As you could probably imagine, I don't need the Axxess TYTO-01 because I am not using the factory amp. If anyone would be interested in purchasing this adapter, I would like to sell it.****
There are a few things I would be interested in improving on my install, but for the most part it looks great and sounds awesome!
- I was interested in finding a good place to mount to mount a 3.5 mm Aux Jack. Any ideas of locations that would be good?
- I am going to try to make a cargo box for the trunk. The idea came to me when I saw Dusty Driftwood's Custom Cargo Box & jbmccul's build thread. My cargo box will have some modifications and customizations that will make it a little different as well as an element that will tie into this project. I will be working on this in time to come, but in no way am able to devote much time to these projects so it will take a while I'm sure.
Let me know if there are any questions and I will do my best to share my experience and add to this thread to make it more informative. Hope this helps!


 Great job!


