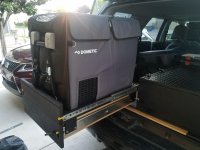
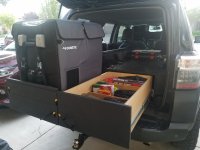
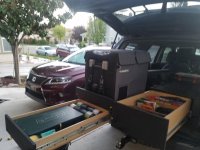
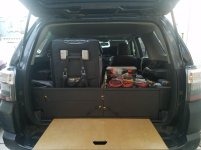
My "semi-professional" DIY drawers build

Magnetic4R

New member
So, I've been itching to upgrade my drawers that I've build a couple of years ago. It wasn't robust to my needs and being that I have a 3rd row, it didn't leave much room for anything else. So, first thing first, the 3rd row seat has to go. I think I may have use it's like once a year. I was looking into buying one but being this is a 3rd row delete, choices were limited. Trexboxx was an option but the price is $3k and their 3rd row is still in progress. After countless days of resesearch, I decided to see if I could build a higher quality version by myself. So, the result is inspired by a combination of other's builds I found on ih8mud, Goosegear plate system, and Trekboxx. Let me say, building this was not cheap but very rewarding. My last build was pretty straight forward, everything was put together with standard plywood and wood screws. I wanted this to be more of a production build with higher quality, robust parts: Baltic Birch Plywood, 80/20 aluminum extrusions, Accuride slides, machine screws, threaded inserts, pocket holes, etc.
previous drawers: http://www.toyota-4runner.org/5th-gen-t4rs/213224-3rd-row-drawer-system-part-1-a.html
Future plans: cage and sleeping platform for solo trips
 

Attachments
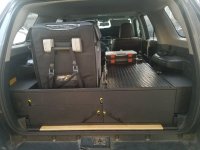
  • 20180420_194638.jpg
    20180420_194638.jpg
    134 KB · Views: 6,095
  • 20180420_194717.jpg
    20180420_194717.jpg
    129.3 KB · Views: 3,566
  • 20180420_194357.jpg
    20180420_194357.jpg
    127.4 KB · Views: 3,435
  • 20180420_194425.jpg
    20180420_194425.jpg
    127.5 KB · Views: 3,361
  • 20180420_193809.jpg
    20180420_193809.jpg
    126.8 KB · Views: 3,403
Last edited:
Register to hide this ad
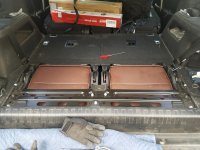
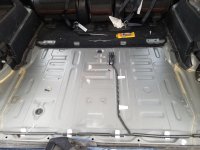
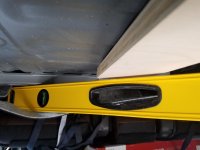
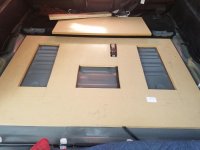
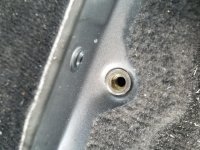
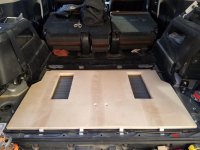
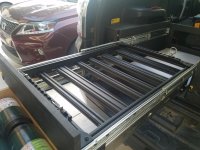
First thing first, 3rd row delete. Removal of the 3rd row was pretty straight forward. I found a "how to"video on YouTube. Those that have the 3rd will discover that you don't have to drill the sheet metal out to find all the pre existing factory holes. This made things a little easier. Still I had no clue how I was going to tackle this. All I know is, I longer wanted the 3rd row and needed the extra space. Here's the 3rd removed and the support for the platform plate system. Comprise of 2 pieces, I could have cut a few more opening to save on the weight but didn't think it was necessary. I did add a few rivets nuts to help secure the top platform.
 

Attachments

  • 20180316_131323.jpg
    20180316_131323.jpg
    136.2 KB · Views: 3,101
  • 20180316_135509.jpg
    20180316_135509.jpg
    130.4 KB · Views: 3,090
  • 20180316_140044.jpg
    20180316_140044.jpg
    116.9 KB · Views: 3,030
  • 20180317_100214.jpg
    20180317_100214.jpg
    123.6 KB · Views: 3,041
  • 20180318_092557.jpg
    20180318_092557.jpg
    134.7 KB · Views: 3,007
  • 20180317_180939.jpg
    20180317_180939.jpg
    129.4 KB · Views: 3,121
Last edited:
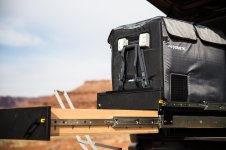
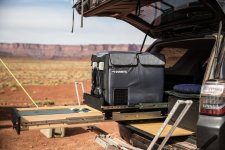
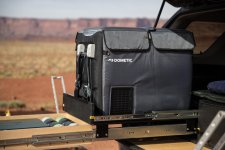
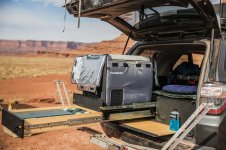
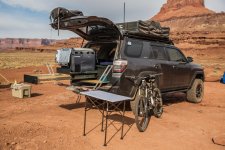
Worked out perfectly on my trip to Moab. Survived the 80+ white rim trail, still quite and solid
 

Attachments

  • 5Z6A4647.jpg
    5Z6A4647.jpg
    135.2 KB · Views: 2,477
  • 5Z6A4643.jpg
    5Z6A4643.jpg
    137.5 KB · Views: 2,656
  • 5Z6A4642.jpg
    5Z6A4642.jpg
    130.7 KB · Views: 2,450
  • 5Z6A4638.jpg
    5Z6A4638.jpg
    143 KB · Views: 3,047
  • 5Z6A4631.jpg
    5Z6A4631.jpg
    144.5 KB · Views: 2,447
Last edited:
Really nice......I built some similar, and I have really enjoyed them!....I don't have any slide our for the fridge like you do, and that's next on my list!....Its a lot of work!!!!!!!Congrats, awesome job!.................................................
 
Really nice......I built some similar, and I have really enjoyed them!....I don't have any slide our for the fridge like you do, and that's next on my list!....Its a lot of work!!!!!!!Congrats, awesome job!.................................................
thanks! Yes it is.

Man those look great! Are you using the aluminum for the frame?
the aluminum is for the fridge slides

Awesome!!! Would love to see a build thread on these.
thanks!

Very cool..would love to see the steps/parts uses as I am trying to build something similar.
thanks

Which model accuslide did you go with?
9308 lock in lock out

Sent from my iPhone using Tapatalk
 
What are those accessory slot rails beside the fridge called? you have some looped attachment points fitted in it.
 
What are those accessory slot rails beside the fridge called? you have some looped attachment points fitted in it.

Took me forever to find the actual name, even places selling them would just call them tie down rails, which did me no good. They're called S-Track or L-Track (I believe there is a difference but its negligible) or the more generic 'Flanged Airline-Style Tack'
 
Very nice. I've taken some thoughts and inspiration from your first build into my own design; been in the design stages since October and in s-l-o-w fab for a few months now myself. Curious to see some more of the build, good stuff.

EDIT: I hadn't realized on my phone that you removed the lower sill section out back. Looks like that netted you a significant and impressive amount of extra space. Nice!
 
Last edited:
If those are "semi professional" then my hand built drawers are full mediocre. Wow...amazing craftsmanship! Post up some more pictures, I would love to see the full design.
 
What are those accessory slot rails beside the fridge called? you have some looped attachment points fitted in it.
What the 2 below said, L track, gotten them off eBay
Took me forever to find the actual name, even places selling them would just call them tie down rails, which did me no good. They're called S-Track or L-Track (I believe there is a difference but its negligible) or the more generic 'Flanged Airline-Style Tack'

Bought mine here L-Track Tie Down - Airline Track Cargo Tie Down Rails & L-Track Straps

they come in different colors as well. buy more tie down hooks then you think you'll need. Home depot sells them in 12" lengths and the quick attach hooks as well. The "double stud with o ring" ones are super solid.

Awesome setup!
Thanks!
Looks great!!
Thabks!
Very nice. I've taken some thoughts and inspiration from your first build into my own design; been in the design stages since October and in s-l-o-w fab for a few months now myself. Curious to see some more of the build, good stuff.

EDIT: I hadn't realized on my phone that you removed the lower sill section out back. Looks like that netted you a significant and impressive amount of extra space. Nice!

Yeah, I had planned to take my time on this and didn't want to rush like my first drawers. But with my Moab trip in May, I need it done sooner. Took me about 5 weekends. I had 1 small piece that held me back over a week. Yes, I gain quite a bit of space from the 3rd delete and that was the while intention. I couldn't stand the limited space with the 3rd row. Heck, I can even sleep in the back if I had to since I gain an additional 4" vertical space.
 
Well done!

This looks fantastic so far!

I am researching for my next build: Half and Half - slide out table top and slimline drawer with a fridge bolted to the top (debating on the slide for the fridge still - I hate rattles).

Subscribed to see more pics. :thumb3:
 

Members online

No members online now.

Forum statistics

Threads
278,316
Messages
3,554,120
Members
248,016
Latest member
Advally Service

Trending content

Back
Top