shootmymime
New member
This is the go to place for information on inspecting and replacing your lower ball joints.
What are Lower Ball Joints (LBJ) and what do they do?
A ball joint is used for allowing free movement in two planes at the same time, including rotating in those planes. Combining two such joints with control arms enables motion in all three planes, allowing the front end of an automobile to be steered and a spring and shock (damper) suspension to make the ride comfortable.
In automobile suspension, the two ball joints are called the "upper ball joint" and "lower ball joint". Lower ball joints are typically larger and wear out faster as the entire front end weight rests solely upon them.

According to Toyota there is no recommended maintenance or miles that the LBJ should be replaced at. Only by checking the play is the best way to tell if they are worn. (for instructions on checking, scroll down)
NOTICE (lifted vehicles and vehicles that are subject to harsh suspension travel should have the LBJ inspected and or replaced more frequently.)
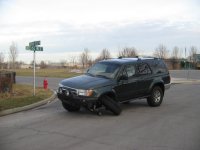
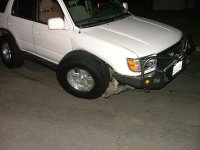
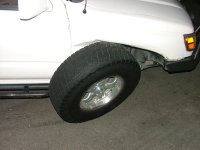
Failure of a LBJ can be catastrophic to the vehicle and or cause injury maybe even death.
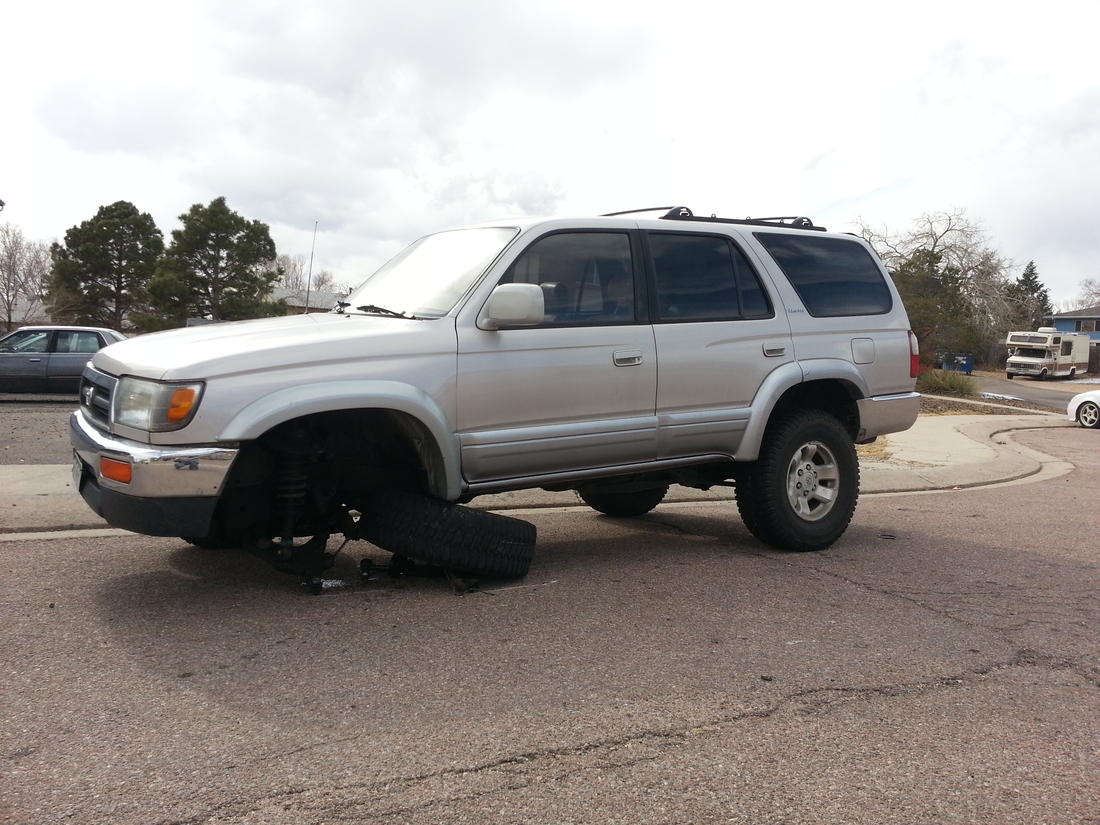
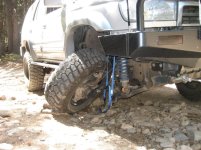
This is an example of another vehicle with extremely worn LBJ. There should be very little to no play in vertical movement.
Lower ball joint play - YouTube
So how can you check to see if your lower ball joints are loose or potentially ready to self destruct?

There are multiple ways by prying on the suspension system, but the easiest way that I have found is to follow these simple steps:
1. (checking driver side LBJ) Place a jack under the lower control arm (to mimic the wheel sitting on the pavement and weight of the vehicle) and raise the vehicle so the front left wheel (driver side) is 1/2-1" off the ground
2. place a large pry bar under the center of the wheel and pry on an up and down motion thus lifting the wheel up and down on its suspension travel slightly.
if there is any movement it quite possibly could be the lower ball joint. Having a second person there to visually see if the movement is indeed at the LBJ is an indication of a worn joint.

(Disclaimer: as an example on my 96 4Runner sr5 stock suspension with 280,000 miles, there was about 1/8" of up and down play at the LBJ when i replaced them.
Most vehicles that have seen off road time do not last this long)
So if you have come to the conclusion that it is time to replace the LBJ, How hard is it to do and what tools will you need to do it?
This is a very quick write up of a few pictures that I took along the way. the whole process only took about 2 hours with the tools i show.
Price for parts depends on who and where you buy them from. ranging from $80-150
1. A good tip of advice is to spray all the components you will be taking off (described later) with some sort of lubricating penatrating oil (wd40, PB blaster).
2. Prepare all the parts and tools you will need before you start to tackle this job if this is your only vehicle. The parts and tools I used were an impact wrench and sockets measuring 14mm, 17mm, 19mm, and a 22mm. A large hammer. The ball joint associated with the side your replacing. (Mog P/N #K90262 and K90263 for the other side. $65.11 and $65.17 respectivaly totaling to $130.28. This was even with a Repair Shop Discount.) Jack and jack stands. Dykes or wire cutting pliers. another tool you might need is a torch and a puller of some sort (can be rented from auto parts store), but i did not need them.
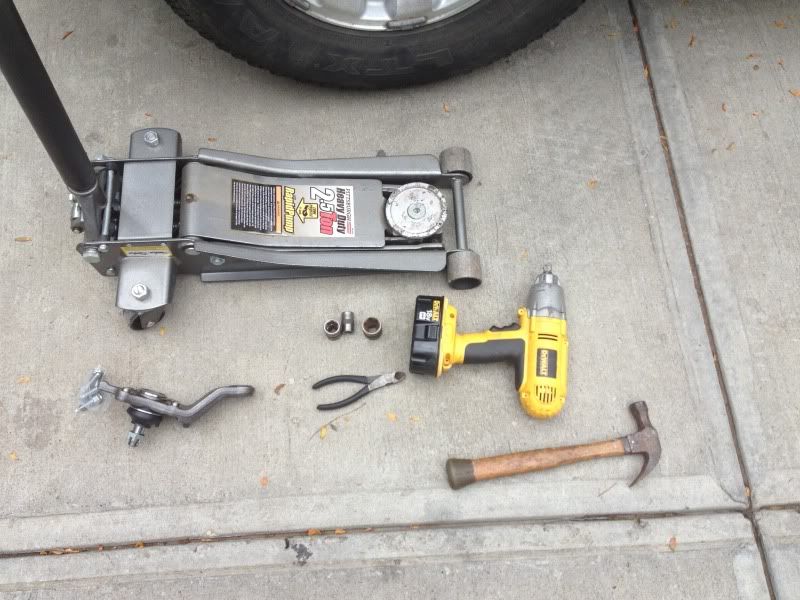
3. Start by lifting the vehicle and supporting it by jack stands.
4. Remove the center cap and lug nuts. (Tip,if you are using a breaker bar or tire iron, it helps to break the lug nuts loose before raising the vehicle so that the wheel does not rotate. )
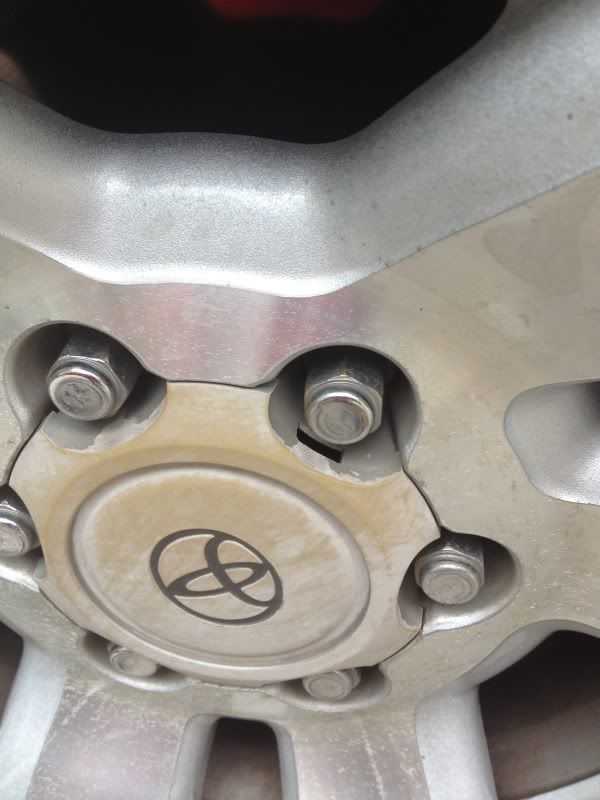
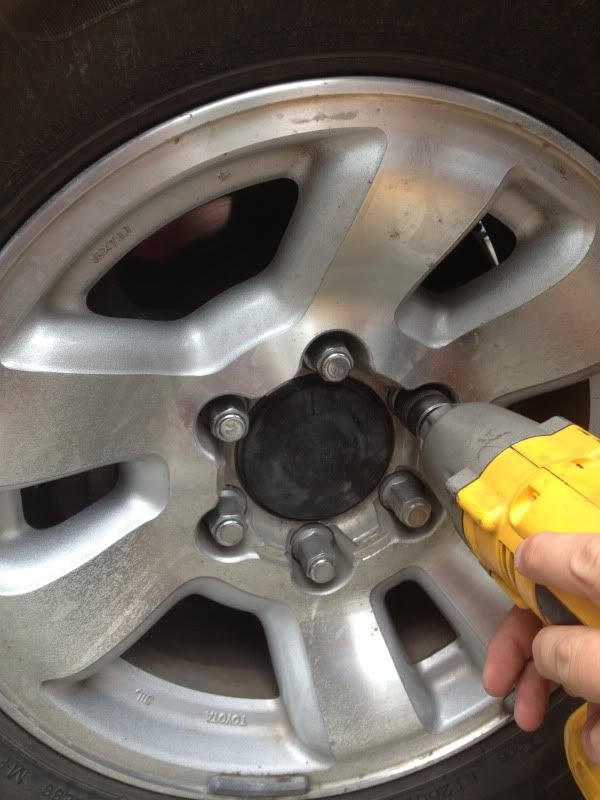
5. Remove the cotter pin on the tie rod end. reassembly torque spec is 67 ft-lbs (tip: the best way to not damage them is to grab the bent arm with the dykes and straighten it out, then go to the other side of the nut and grab onto the side to which it is to be pulled out and use the nut as leverage by pulling and re-grip the cotter pin shaft until it comes free.)
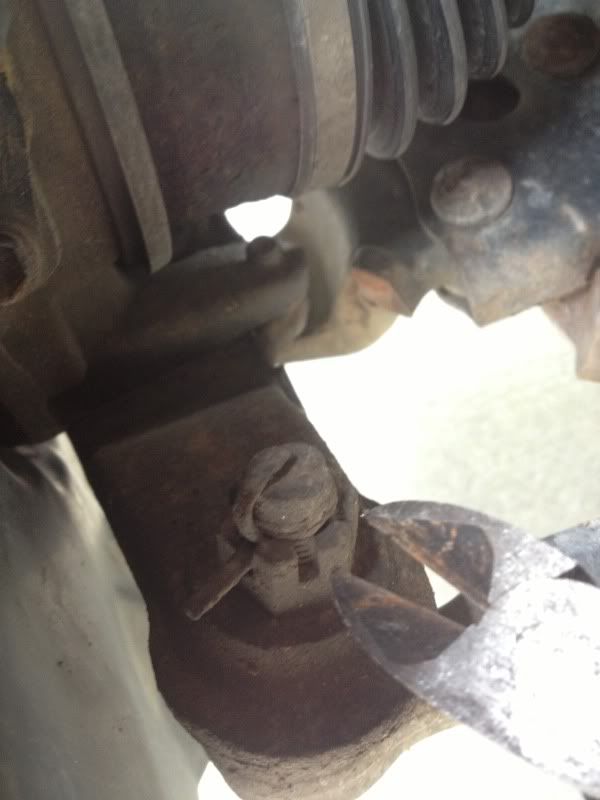
6. Remove the castle nut (Spray this with penetrating oil) and tie rod end from the steering knuckle. (tip: this bolt will most likely be frozen to the knuckle, so the hammer, torch and pickle fork are used to break this joint loose. be very careful not to bust the rubber boot on the tie rod end. The best way to beat the outer casing of the ball joint housing that surrounds the shaft jarring it loose. Although turning the castle nut upside down then screwing it back on so that the bolt threads are level with the castle nut and taking a hammer to it, is not a great idea but it worked for me) (warning, do not hit the top of the bolt with your hammer as this will mushroom the bolt of the tie rod end and prevent the castle nut from screwing back on.)
7.Remove the cotter pin from the lower ball joint bolt but do not take the bolt off yet.
8. Place the jack under the lower control arm and jack it up just to prevent the lower control arm from springing loose from the ball joint.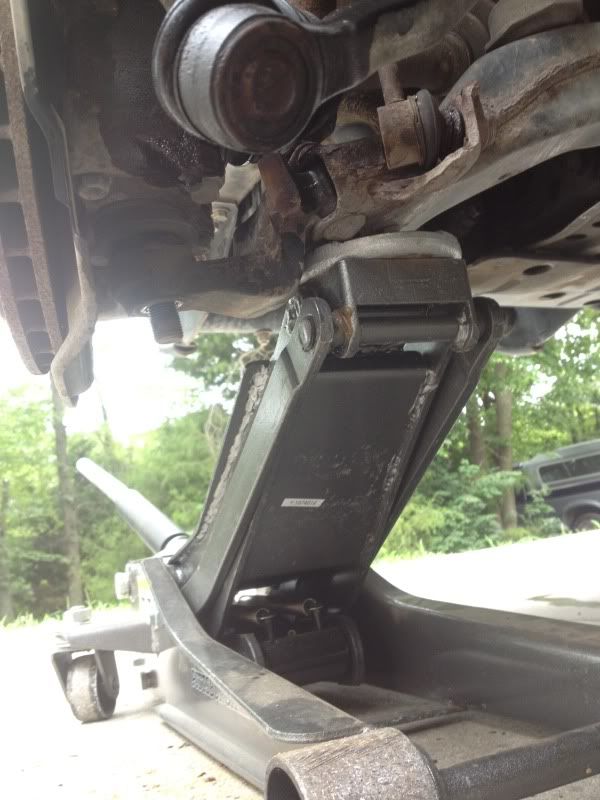
9. Remove the castle nut from the lower ball joint (Spray this with penetrating oil) then slowly lower jack from the lower control arm. reassembly torque spec 112 ft-lbs. (notice: if the compressed suspension has not popped the bolt out of the knuckle, it will in a bit after you hit it with a hammer. it will only fall and inch or 2 then be stopped by the shock.)
10. After the LBJ bolt is broken free, remove the 4 bolts securing the LBJ assembly to the knuckle itself. (Spray this with penetrating oil). reassembly torque spec is 59 ft-lbs with advice to use locktite (debate over red or blue).
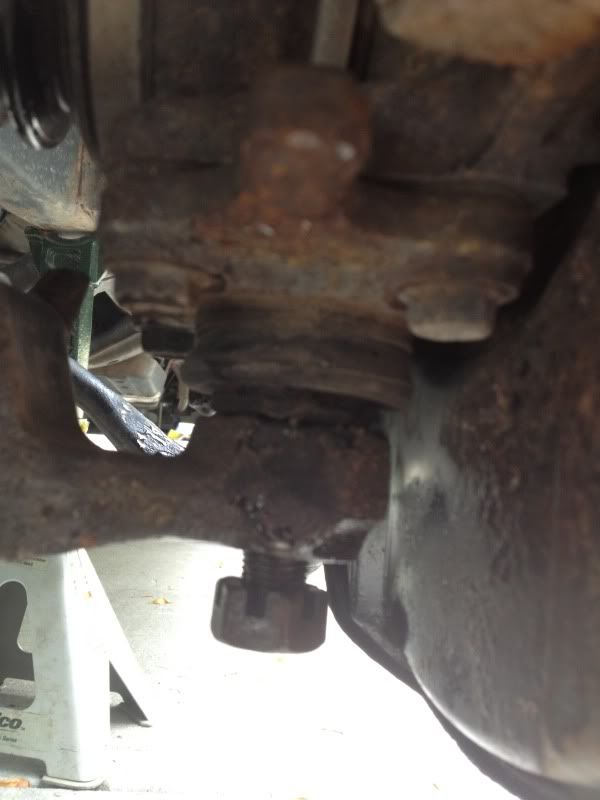
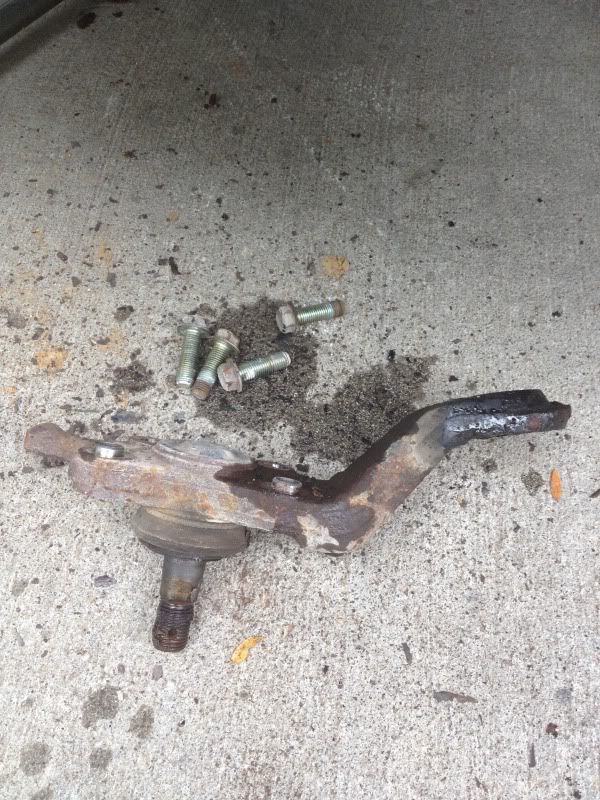
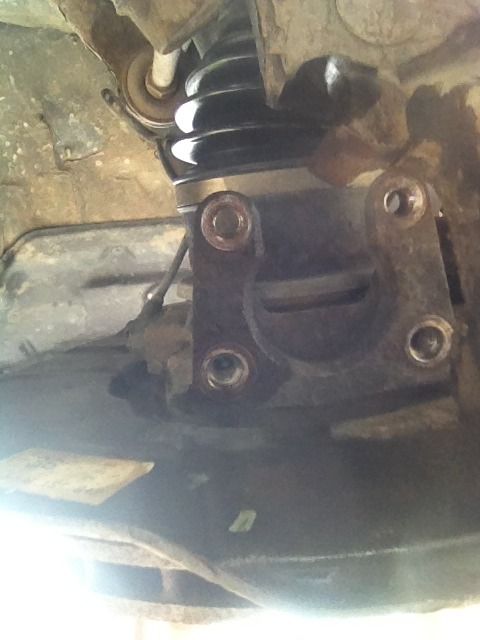
That is the dis assembly of the LBJ on a 1996-2002 4Runner. instillation is in the reverse order.
Other Optional Links
http://www.carproblemzoo.com/toyota/4runner/front-suspension-lower-ball-joint-problems.php
http://car-and-safety.com/toyota-suspension-front-control-arm-lower-ball-joint.htm
http://www.yotatech.com/f2/toyota-truck-4runner-tundra-balljoint-failures-244804/
http://www.toyota-4runner.org/3rd-gen-t4rs/126221-my-turn-ball-joint-failure.html
http://www.toyota-4runner.org/3rd-gen-t4rs/84794-ball-joint-failure-my-turn.html
http://www.toyota-4runner.org/3rd-gen-t4rs/88252-new-twist-lower-ball-joint-failure.html
http://www.toyota-4runner.org/3rd-gen-t4rs/67793-you-should-replace-your-ball-joints.html
http://www.toyota-4runner.org/3rd-gen-t4rs/122051-lower-ball-joint-failure-questions.html
http://www.toyota-4runner.org/3rd-gen-t4rs/103217-lower-ball-joint-removal-installation.html
http://www.toyota-4runner.org/3rd-gen-t4rs/92427-ball-joints.html
What are Lower Ball Joints (LBJ) and what do they do?
A ball joint is used for allowing free movement in two planes at the same time, including rotating in those planes. Combining two such joints with control arms enables motion in all three planes, allowing the front end of an automobile to be steered and a spring and shock (damper) suspension to make the ride comfortable.
In automobile suspension, the two ball joints are called the "upper ball joint" and "lower ball joint". Lower ball joints are typically larger and wear out faster as the entire front end weight rests solely upon them.
According to Toyota there is no recommended maintenance or miles that the LBJ should be replaced at. Only by checking the play is the best way to tell if they are worn. (for instructions on checking, scroll down)
NOTICE (lifted vehicles and vehicles that are subject to harsh suspension travel should have the LBJ inspected and or replaced more frequently.)
Failure of a LBJ can be catastrophic to the vehicle and or cause injury maybe even death.
This is an example of another vehicle with extremely worn LBJ. There should be very little to no play in vertical movement.
Lower ball joint play - YouTube
So how can you check to see if your lower ball joints are loose or potentially ready to self destruct?
There are multiple ways by prying on the suspension system, but the easiest way that I have found is to follow these simple steps:
1. (checking driver side LBJ) Place a jack under the lower control arm (to mimic the wheel sitting on the pavement and weight of the vehicle) and raise the vehicle so the front left wheel (driver side) is 1/2-1" off the ground
2. place a large pry bar under the center of the wheel and pry on an up and down motion thus lifting the wheel up and down on its suspension travel slightly.
if there is any movement it quite possibly could be the lower ball joint. Having a second person there to visually see if the movement is indeed at the LBJ is an indication of a worn joint.
(Disclaimer: as an example on my 96 4Runner sr5 stock suspension with 280,000 miles, there was about 1/8" of up and down play at the LBJ when i replaced them.
Most vehicles that have seen off road time do not last this long)
So if you have come to the conclusion that it is time to replace the LBJ, How hard is it to do and what tools will you need to do it?
This is a very quick write up of a few pictures that I took along the way. the whole process only took about 2 hours with the tools i show.
Price for parts depends on who and where you buy them from. ranging from $80-150
1. A good tip of advice is to spray all the components you will be taking off (described later) with some sort of lubricating penatrating oil (wd40, PB blaster).
2. Prepare all the parts and tools you will need before you start to tackle this job if this is your only vehicle. The parts and tools I used were an impact wrench and sockets measuring 14mm, 17mm, 19mm, and a 22mm. A large hammer. The ball joint associated with the side your replacing. (Mog P/N #K90262 and K90263 for the other side. $65.11 and $65.17 respectivaly totaling to $130.28. This was even with a Repair Shop Discount.) Jack and jack stands. Dykes or wire cutting pliers. another tool you might need is a torch and a puller of some sort (can be rented from auto parts store), but i did not need them.

3. Start by lifting the vehicle and supporting it by jack stands.
4. Remove the center cap and lug nuts. (Tip,if you are using a breaker bar or tire iron, it helps to break the lug nuts loose before raising the vehicle so that the wheel does not rotate. )


5. Remove the cotter pin on the tie rod end. reassembly torque spec is 67 ft-lbs (tip: the best way to not damage them is to grab the bent arm with the dykes and straighten it out, then go to the other side of the nut and grab onto the side to which it is to be pulled out and use the nut as leverage by pulling and re-grip the cotter pin shaft until it comes free.)

6. Remove the castle nut (Spray this with penetrating oil) and tie rod end from the steering knuckle. (tip: this bolt will most likely be frozen to the knuckle, so the hammer, torch and pickle fork are used to break this joint loose. be very careful not to bust the rubber boot on the tie rod end. The best way to beat the outer casing of the ball joint housing that surrounds the shaft jarring it loose. Although turning the castle nut upside down then screwing it back on so that the bolt threads are level with the castle nut and taking a hammer to it, is not a great idea but it worked for me) (warning, do not hit the top of the bolt with your hammer as this will mushroom the bolt of the tie rod end and prevent the castle nut from screwing back on.)
7.Remove the cotter pin from the lower ball joint bolt but do not take the bolt off yet.
8. Place the jack under the lower control arm and jack it up just to prevent the lower control arm from springing loose from the ball joint.

9. Remove the castle nut from the lower ball joint (Spray this with penetrating oil) then slowly lower jack from the lower control arm. reassembly torque spec 112 ft-lbs. (notice: if the compressed suspension has not popped the bolt out of the knuckle, it will in a bit after you hit it with a hammer. it will only fall and inch or 2 then be stopped by the shock.)
10. After the LBJ bolt is broken free, remove the 4 bolts securing the LBJ assembly to the knuckle itself. (Spray this with penetrating oil). reassembly torque spec is 59 ft-lbs with advice to use locktite (debate over red or blue).


That is the dis assembly of the LBJ on a 1996-2002 4Runner. instillation is in the reverse order.
Other Optional Links
http://www.carproblemzoo.com/toyota/4runner/front-suspension-lower-ball-joint-problems.php
http://car-and-safety.com/toyota-suspension-front-control-arm-lower-ball-joint.htm
http://www.yotatech.com/f2/toyota-truck-4runner-tundra-balljoint-failures-244804/
http://www.toyota-4runner.org/3rd-gen-t4rs/126221-my-turn-ball-joint-failure.html
http://www.toyota-4runner.org/3rd-gen-t4rs/84794-ball-joint-failure-my-turn.html
http://www.toyota-4runner.org/3rd-gen-t4rs/88252-new-twist-lower-ball-joint-failure.html
http://www.toyota-4runner.org/3rd-gen-t4rs/67793-you-should-replace-your-ball-joints.html
http://www.toyota-4runner.org/3rd-gen-t4rs/122051-lower-ball-joint-failure-questions.html
http://www.toyota-4runner.org/3rd-gen-t4rs/103217-lower-ball-joint-removal-installation.html
http://www.toyota-4runner.org/3rd-gen-t4rs/92427-ball-joints.html
Last edited: