Okki's Build Thread

Nice wheel's!

Suites your car spot on, I think it would look weird on a Pearl limited though :(.

Plus it's too "rugged" for the wifey..

LOL .. mine said "well.. at least the guys at the Summit won't point their fingers and laugh at it now." :trophy:

Although that said; I'm not sure how well it will go over once I start mentioning new suspension from Icon.

Okki
 
Gobi Roof Rack 1/2

REMOVAL OF THE LIMITED ROOF BARS
The factory roof bars are pretty quick and easy to remove. You start off by removing the plastic cover on both ends of the bar.
5989505146_5ac525f6b5_z.jpg

Make sure you use a rag or shop towel to protect the paint as you pop off the cover. Under the cover you will find a set of bolts that hold the roof bar in place.
5988944655_0693df5d0d_z.jpg


A 12mm socket wrench will remove the bolts.
5988945761_6f24fd7704_z.jpg


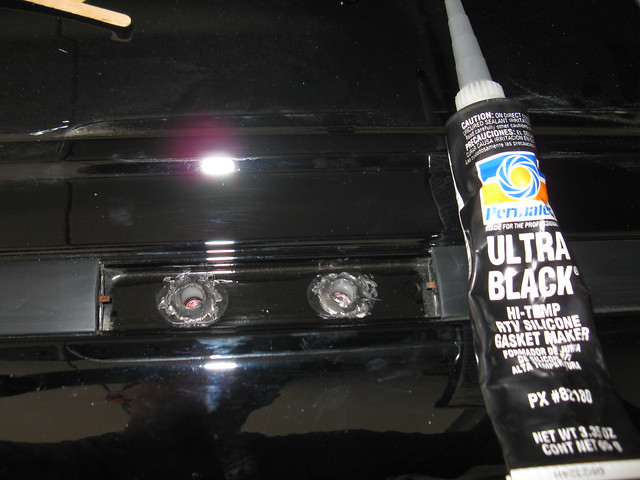
Remove the rubber seal and be careful not to drop the posts with the bolt threads into the body. You can see a sealing agent inside the threaded hole. Use some silicone on the new hardware to seal everything back up when you install the Gobi rack.
5988947087_2325d9c103_z.jpg
5989507666_d50159b176_z.jpg
 
Gobi Roof rack 2/2

INSTALLING THE GOBI RACK
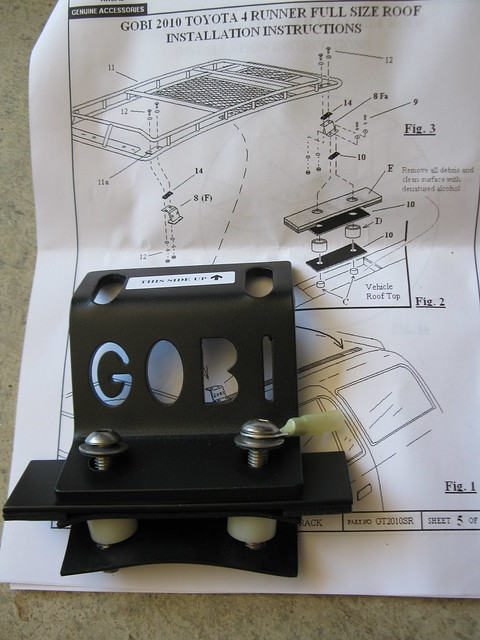
I preassembled all the pieces as much as possible so I knew I had all the required pieces when working on a corner. On the passenger rear I included a ground point for the roof lights. If you include that now, you will not have to undo the bolt and break your seal later.
5989508220_58ed4330ba_z.jpg


Next prep the corner you are working on. I used a liberal helping of silicone, but be sure NOT to block the drainage channel.
5989508742_fa8cd0603e_z.jpg


Repeat the above step for all factory mounting locations. Once completed grab a buddy and lift the rack in place. You can start bolting it down, but you will need some slack to align the front legs and you will want to make sure the rack sits straight on the truck.

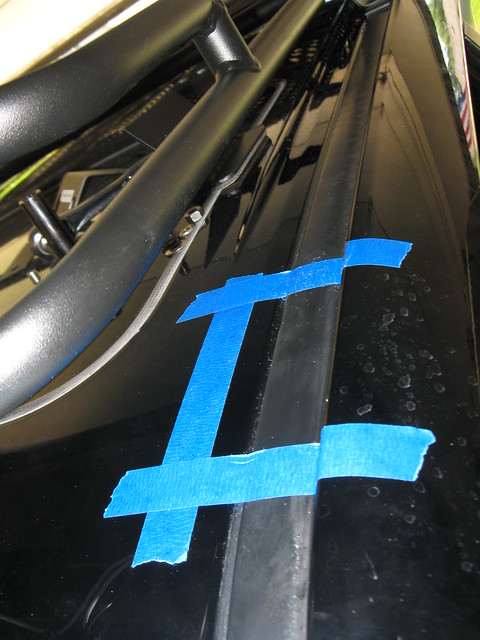
For the far front support legs, determine where the support leg will contact the rain gutter and thoroughly clean the rubber cover. This way the double sided tape will take good hold. The downward force of the rack will also aid in keeping it in place.
5989509312_5973b84503_z.jpg


At this point your roof rack is secured to the vehicle.

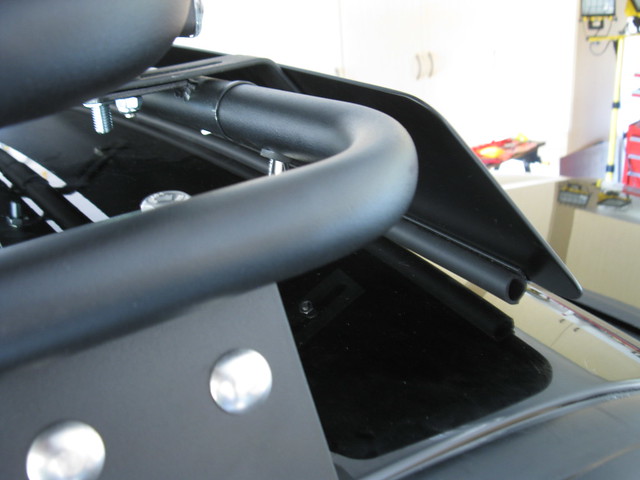
Before you install the fairing, affix some clear automotive protection film under where the bottom of the fairing touches the roof. This will prevent damage to the paint later on due to wind pressure and dirt that settles underneath the rubber weather strip (Tip courtesy of Antman).

You will be able to get the fairing to touch the roof for almost the entire length, but the edges will likely stick up a little.
5932171570_d172da64c8_z.jpg


If you are planning on installing some Rigid Industry lights, you may want to consider installing them under the fairing like Ducmonsta did on his vehicle. This reduces the overall height of the rack/light combination and eliminates the rubbing issue of the fairing. It also looks pretty darn awesome.
 
Last edited:
Yup... I'll be posting that (very delayed), write up soon.. If have to update the bracket to the non-rubbing version since I just received that.

Okki
 
Ummmm.....when I get my CB, HAM, Gobi Rack and VisionX lights, ARB compressor and locker can i send it all to you with my truck to do all the wiring? So clean.
 
Ummmm.....when I get my CB, HAM, Gobi Rack and VisionX lights, ARB compressor and locker can i send it all to you with my truck to do all the wiring? So clean.

Hahahaha.. thank you for the compliment, but I'd recommend you send it on a little further to Ducmonsta... he's a bit more professionally experienced and has a shop to do it.:cowboy:

I'm just a big believer in doing it right the first time.. and from a hobby perspective that means I take forever to get it done and usually have to redo things once or twice. the thread below is a great example of "the cost of learning" :)

http://www.toyota-4runner.org/5th-gen-t4rs/108076-cb-parts-list-questions.html#post977692

Okki
 
.
Any word on the ladder install write up?

Hahahaha yes.. All the parts are laying ready in my garage. Work just hasn't allowed me to change the bracket and do the write-up. I did install my rotopax mounts. And also have the parts for the rear diff. Breather relocation mod.

Sitting in an airport at the moment.

Okki
 
.

Hahahaha yes.. All the parts are laying ready in my garage. Work just hasn't allowed me to change the bracket and do the write-up. I did install my rotopax mounts. And also have the parts for the rear diff. Breather relocation mod.

Sitting in an airport at the moment.

Okki

Haha sounds good man. Safe travels!
 
Hahahaha.. thank you for the compliment, but I'd recommend you send it on a little further to Ducmonsta... he's a bit more professionally experienced and has a shop to do it.:cowboy:

I'm just a big believer in doing it right the first time.. and from a hobby perspective that means I take forever to get it done and usually have to redo things once or twice. the thread below is a great example of "the cost of learning" :)

http://www.toyota-4runner.org/5th-gen-t4rs/108076-cb-parts-list-questions.html#post977692

Okki

That's what I plan on doing, he's not too far from me.
 
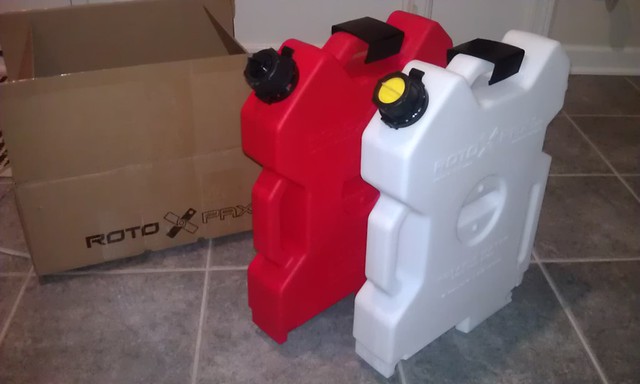
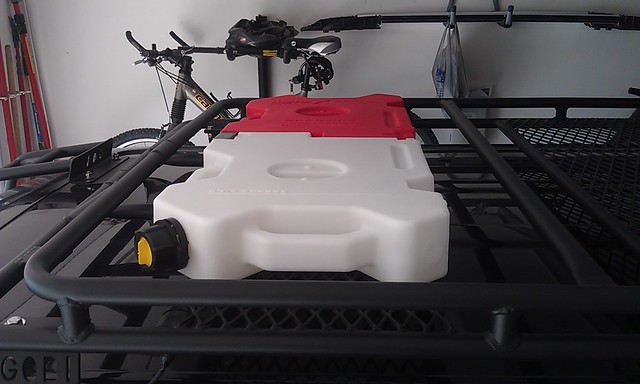
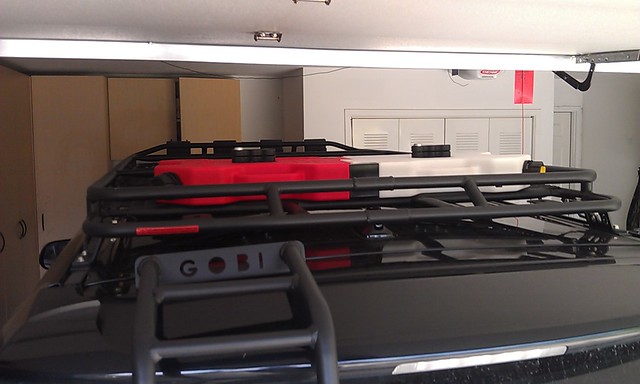
Rotopax 2 gallon fuel and water 1/3

Rotopax fuel and water storage
RX-2G-2W : 2 Gallon Gasoline and 2 Gallon Water Kit by Rotopax $99.95 www.rotopax.com
ROTRX-LOX-PM : LOX Pack Mount by Rotopax $79.98 (2 units) www.rotopax.com
RX-BP Backing Plate $9.90 (2 units) www.rotopax.com
Shipping $18.97
Discount $(26.98)
Total $181.82

What size pack and why?
I based the size of my Rotopax on the following logic: I don’t expect to have to carry enough fuel in them to carry me across the salt flats or survive the zombie apocalypse. I do expect to use the gasoline in my dual flue stove when camping and use the water during camping as well. Outside of the camping scenario the 2 gallons of fuel give me about 30 miles of travel in the vehicle. That should be enough to get to civilization or at least within cellphone signal range.

NOTE: This write up is specifically for installing the Rotopax on a Gobi Stealth rack. Your experience may be different if you mount them differently.

6920180794_5e60f0b694_z.jpg


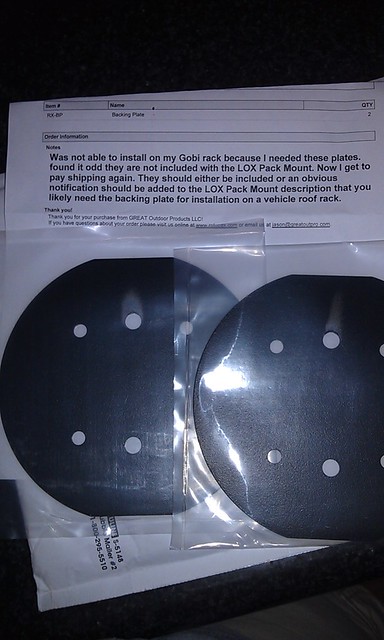
In order to mount the Rotopax to Gobi rack, you NEED to order the back plates. These do not come with the mounts and there is no hint on the Rotopax website that you need them, but you do. The diamond mesh on the rack is to big to use washers on the bolts.

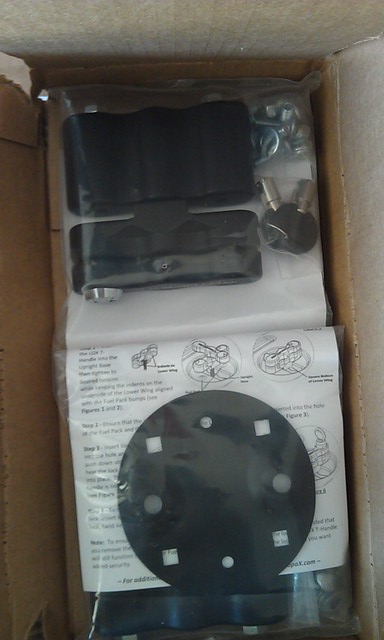
Your stuff will come in a couple boxes and I was pretty pleased with the packing and the items themselves.

6920181878_4143f6bd51_z.jpg


Putting the mounts together:
6971003542_9084c6bb23_z.jpg

I got the locking mounts and the key is universal, so you can keep one set at home for emergencies and one set to split between your key ring and the glove box.

7137179009_f91d20e057_z.jpg

As mentioned… you need the back plates.

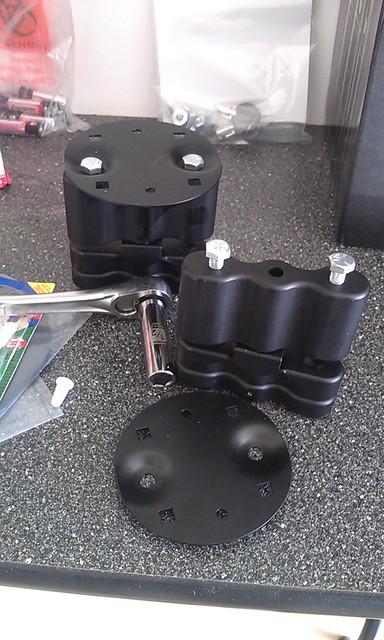
Start off by putting the top mount together by bolting on one of the (bimpled) plates. Make sure you have the dimple facing the mount so the bolt gets recessed in it. (you can remove the top part of that locks the pack by simply unscrewing it all the way.)
7003933554_33e39e11f4_z.jpg
 
Last edited:
Rotopax 2 gallon fuel and water 2/3

Find your mounting location:
The steps below place the mounts in the desired location on the rack.

7150006657_41c963d4db_z.jpg

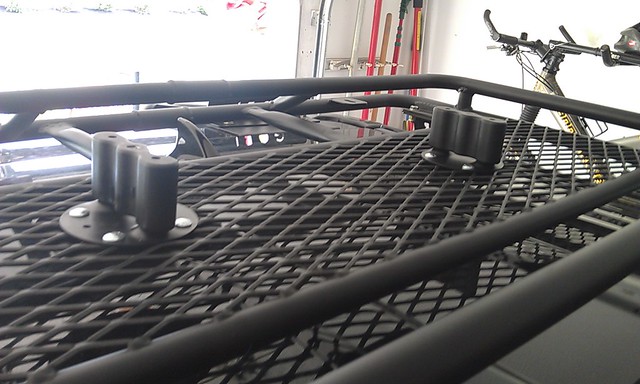
Place the packs (locked together) on top of the rack and find your spot. Lift and carefully place your mounts and let the bolts fall through the rack to (sorta) keep your mount in place. Once done on both sides, carefully lift the Rotopax off the mounts and be careful not to nudge them out of place.

7003937900_38654d4cf4_z.jpg


Dealing with the Q(*@$&Q# back plates:
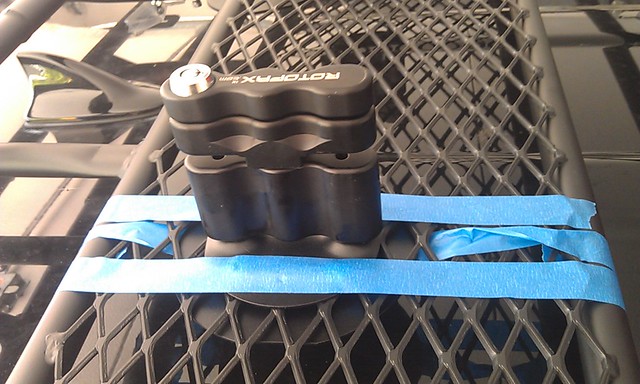
So far so good and running smooth. Since there is only about 2.5 inches worth of clearance between the roof and the rack, dealing with the backplates is frustrating at best. In a moment of cleaverness I used painters tape to quide the backplate into place and weaved the tape throuth the rack to lift it up against the bottom of the rack! This works like a charm. In the picture below you can see I have the top mount taped in place as well (including the bolts. You can take the bolts out at this point and line up the holes instead…. (wait for it….)

7150025599_ea492780a4_z.jpg
 
Last edited:
Rotopax 2 gallon fuel and water 3/3

Dealing with the Q(*@$&Q# bolts:
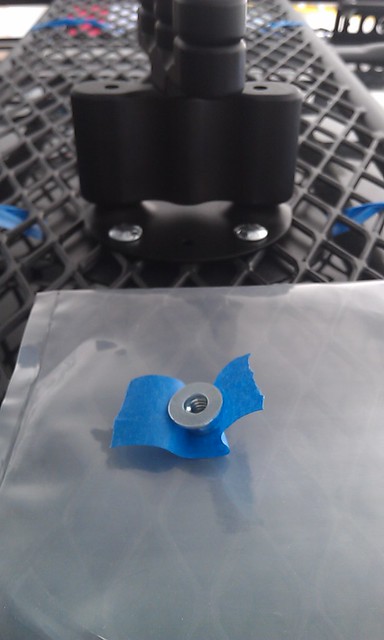
As mentioned before… VERY little space between the roof and the rack. It is a major pain trying to get a washer and nylon lock nut under the back plate and started. After some increasingly frustrating minutes… GENIUS…. More painters tape!

7150025953_1fcff00e52_z.jpg

Using the contraption above I was able to slide the nut + washer under one of the holes (the nut between two fingers to keep it from turning) and insert and turn the bolt with my other hand to have it catch the threads of the nut.

Next you’ll want to use a short ratcheting socket to fasten the nut….. but you can’t keep the socket on the nut because there isn’t enough room to properly hold the socket handle. I ended up using some foam core board (used for target shooting) to give me A) protection for the paint of the roof B) pushed up the socket driver enough to stay on the nut.

Do realize that you have to remove the foam core from under the socket driver in order to remove the socket driver from one nut and move on to the next one. Slide a shop towel under and you pull the foam core back to provide protection to the paint of the roof.

The final wiggle:
Before you tighten everything down, leave a little play and refit your Rotopax. With the plates on you will notice that you may need to wiggle the mounts around a little for the packs to fit. This will result in your packs not being entirely straight on the rack, but this is due to the size of the diamond mesh, the straightness of the mesh and the distance needed between mounts.

My driver side sits a little further back from the passenger side, but it’s not really noticible.
7150027447_fafb84a3cb_z.jpg


7003935634_ebf1fa35df_z.jpg

To secure the packs you screw the bottom “handle” down into the base until it settles snuggly on the two bumps on the pack (at a 90 degree to the base). You can then turn the key on the lock and push it down into the lower handle, preventing it from being unscrewed. Remember to read the instructions from Rotopax and to throw one of your two copies in the truck. I keep it in a ziplock bag in the glovebox, together with a key and this is also where I store the “handles” when I don’t have the packs on the roof.

The instructions as provided by Rotopax:
http://www.rotopax.com/images/PDF/mounting_instructions.pdf

UPDATE:
I filled up the fuel and water containers today and noticed that the fuel container only was able to accept 1.869 gallons of fuel. The water container is likely not a whole lot different (didn't measure that one). In other words, you may want to step up a size if you need the actual volume.

UPDATE 2:
7915000308_d63aa00f8d_z.jpg

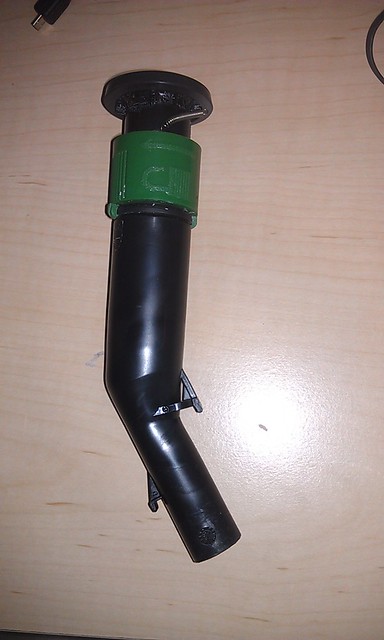
The "ECO" spout that you get with your US based fuel pack SUCKS! As you can see in the image above, the little spring already came out. I had to call in the help of LimaMike to provide some guidance on why I wasn't getting any fuel out of my pack. So even with his assistance I was not able to get fuel out of the thing.

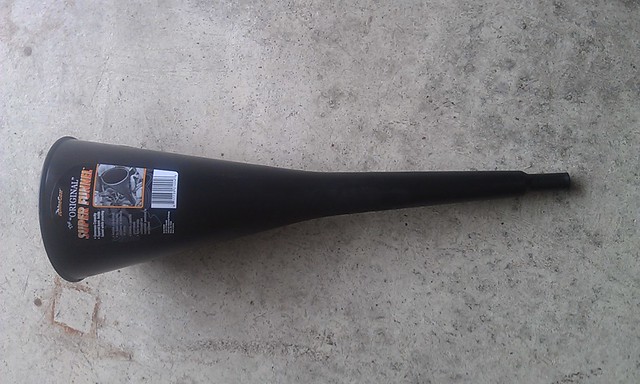
Solution number 1:
7914999222_432e200bae_z.jpg

Screw the spout; just get a bigger funnel. For $2.99 at Autozone, this isn't a bad deal, but large to pack and haul with you.

Solution 2:
SP-VENT-D-01.jpg

Spout kit includes: Yellow self-venting spout with rubber gasket, and stopper. *THIS SPOUT IS ONLY SUPPLIED WITH WATER PACKS AND INTERNATIONALLY SHIPPED FUEL PACKS.

SHIPPING INCLUDED IN PRICE....
Details
SKU RX-SP-VENT
Our price: $6.95 (you save 50%)

So the line highlighted in red is what caught my eye. I was wondering if the yellow spout is fuel rated; AND IT IS. so my suggestion, with your order, also order a spare yellow spout and screw the EPA.
http://www.rotopax.com/Self-Venting-Spout.html

 
Last edited:
Rear Differential Breather Relocation to Engine Bay 1/3

Rear Differential Breather Relocation to Engine Bay

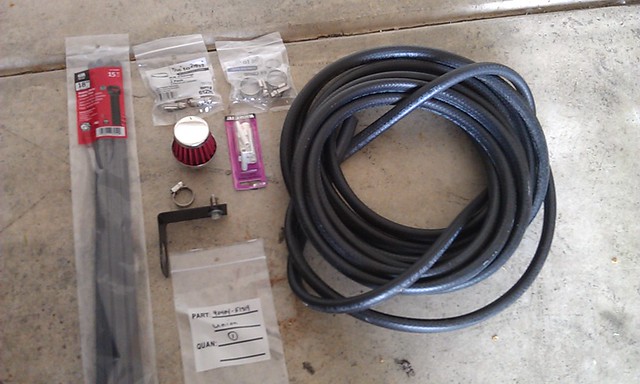
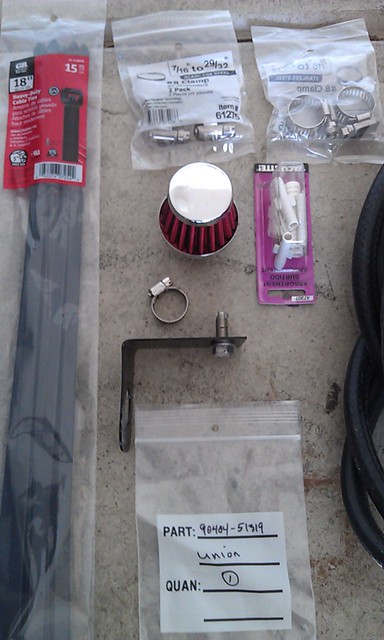
Item Description Quantity Unit Price Total Cost Vendor
90404-51319 Rear Diff Union 1 $ 7.50 $ 7.50 toyotatrdpart.com
27070 3/8 Fuel hose 14ft $ 1.49 $ 22.32 O’Reillys
3992 Breather Filter Red/Chrome 1 $ 9.99 $ 10.69 O’Reillys
3/8 Hose clamp 2 $ 1.07 $ 2.29 Lowes
47307 Vacume Connection kit 1 $ 3.99 $ 4.27 O’Reillys
Total $ 47.07

Per [MENTION=117301]T4Rdvm[/MENTION], the bolts that fit in the OEM threaded holes in the engine bay are: M8-1.25 bolts. The recommendation is M8-1.25x20 stainless.

So in preparation for my trip to the FJ Summit I completed the rear differential breather modification. This is basically moving the breather end-point to a higher point on the vehicle in order to prevent the inadvertent intake of water into the differential when fording or doing a river crossing.

With the exception of the bracket, I made that myself out of some stock aluminum I had gotten from Lowes, all the parts for this project can be had for under $50.
7192169566_072bb6e4f2_z.jpg


I ordered the rear differential union from toyotatrdpart.com. They offer great service and the best deal on this OEM Toyota part.

7192323344_1ea6b4899a_z.jpg
 
Last edited:
Rear Differential Breather Relocation to Engine Bay 2/3

INSTALLING THE BRACKET FOR THE FILTER:
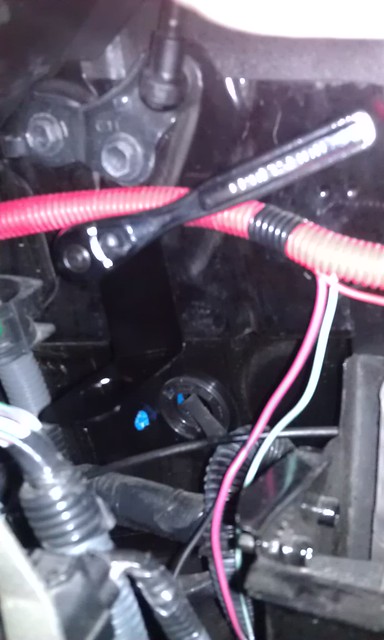
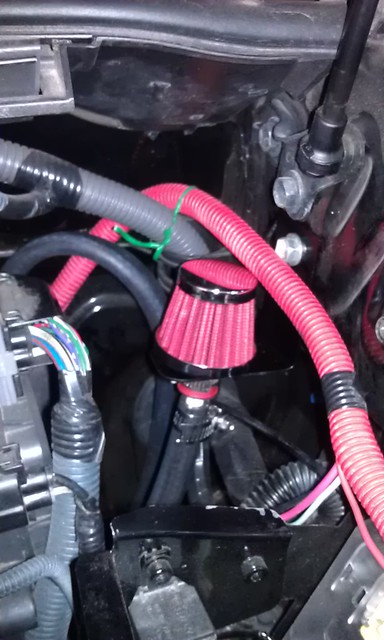
The bracket is a simple L-shape with a small hole to allow it to be bolted to one of the factory threaded holes in the driver side fender wall. I used the hole under the hood hinge.
7193069504_b477512e2c_z.jpg


RUNNING THE HOSE:
I ran the extension hose from the engine bay to the back of the vehicle. The major steps are as follows:
1 – Along the firewall to the back of the wheel well.
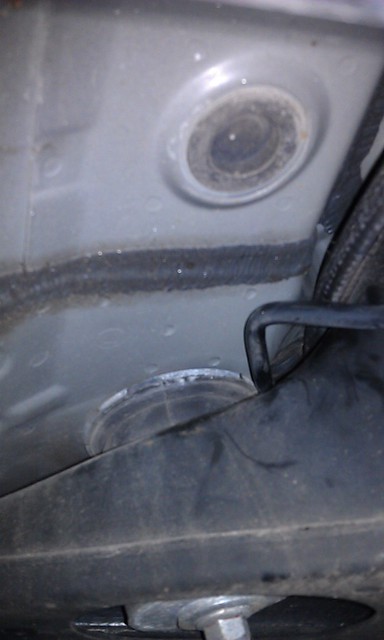
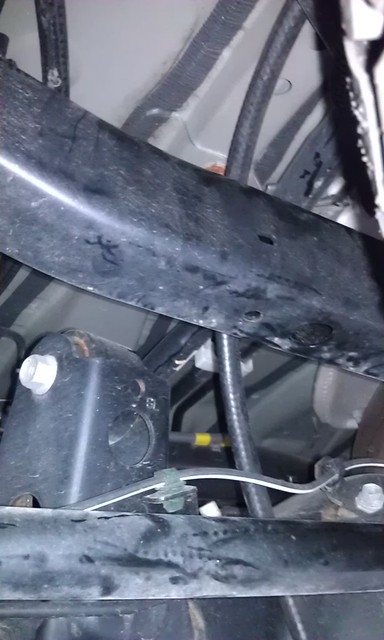
2 – From the back of the wheel well through the front driver side body mount to the frame rail.
3 – Along the frame to the start of the rear wheel well.
4 – Back between the gas tank and the wheel well to the center of the vehicle.
5 – Over the differential and along the center frame reinforcement (above the spare).
6 – Loop back and down to the rear differential.

Below you can see the hose being fed along the firewall down into the back corner of the wheel well.
7193096312_a337be79f6_z.jpg


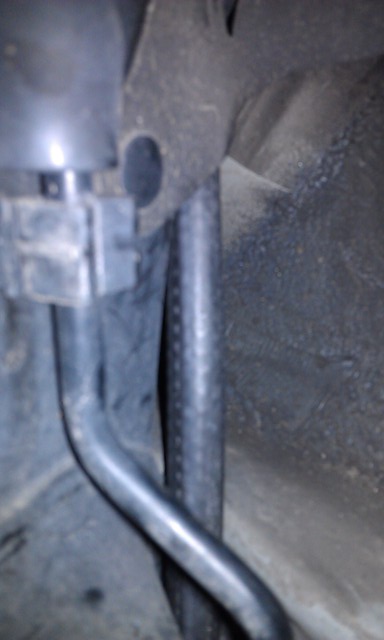
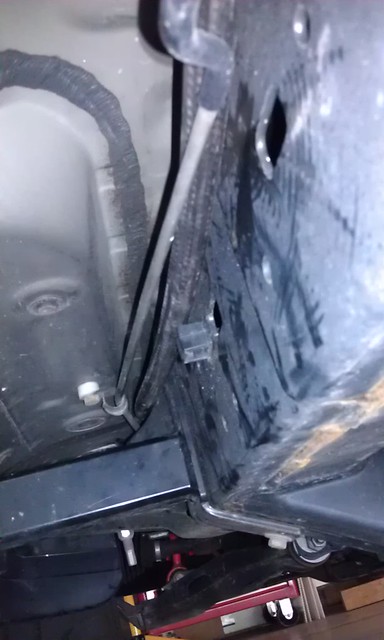
As the hose exits the engine bay it is exposed for a short section before it turns under the body mount and moves along the frame between the frame and the body.
7193095388_2f28a5236d_z.jpg


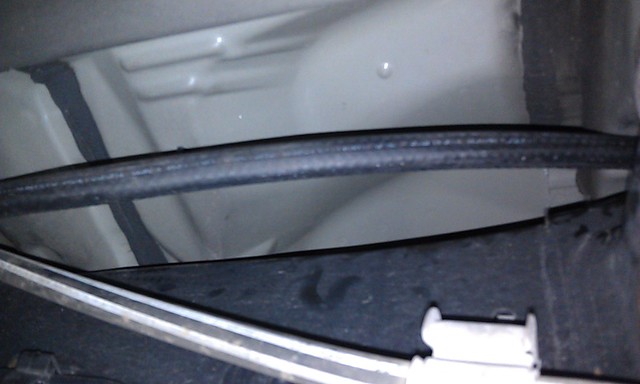
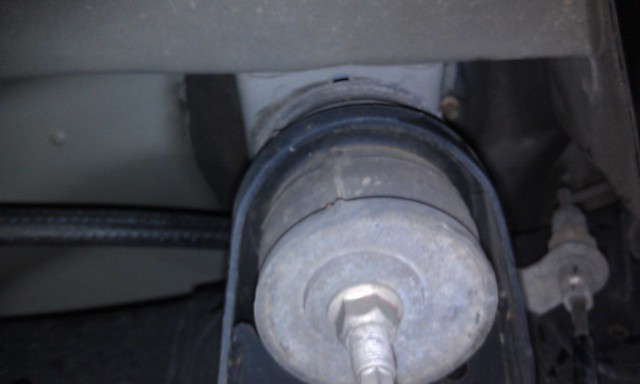
Below you can see the hose come from the wheel well/engine bay and through the body mount to the outside driver side frame rail.
7193087268_e2ed446e90_z.jpg


You basically just follow along the frame and use the large zip-ties and existing holes to secure the hose. Make sure you do not snug them down too tight; you do not want the hose to kink or be restricted.
 
Last edited:
Rear Differential Breather Relocation to Engine Bay 3/3

RUNNING THE HOSE (cont.):
You basically just follow along the frame and use the large zip-ties and existing holes to secure the hose. Make sure you do not snug them down too tight; you do not want the hose to kink or be restricted.
7193086228_98b17caebc_z.jpg


Right before the rear wheel well the hose is routed to the center of the vehicle.
7193082364_029eb3dd86_z.jpg


Before the rear body mount the hose is routed to the center of the vehicle. It will come out behind the rear suspension.
7193083092_c8171be991_z.jpg


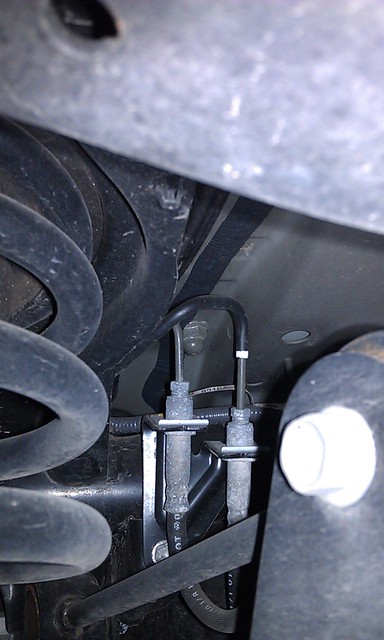
When you route the hose behind the suspension, make sure it cannot move and get between the coils of the spring.
7193081242_9a442a6428_z.jpg


I routed the hose over the rear sway bar and looped back. This way there is plenty of slack for suspension travel without having access hose dangling under the vehicle.
7193074324_1f6b429fca_z.jpg


When the loop is back behind the rear sway bar drop it down to connect to the rear differential union.
7193072276_5f47c0197b_z.jpg


Remove the OEM breather and replace it with the new rear diff union. In order to seal the threads a single pass of Teflon tape was used. Once the union is tightly in place, run the hose through a hose clamp and push the hose over the union. Tighten the hose clamp around the union and that completes the rear part of the breather relocation.
7193100094_17dc8d1223_z.jpg


CONNECTING THE FILTER:
Use a hose cutter to remove any excess hose ( with 14ft you shouldn’t have any). Use the correct size plastic union to connect the hose to the filter. Use a hose clamp on both the hose side and the filter side. Again make sure you have no tight bends or kinks in the hose.

Connect the filter to the other end of the plastic union and use a hose clamp to keep it in place on the bracket (clamp, bracket, filter). (The “loop” of hose that is visible in the picture was removed before finalizing the installation.)
7193097400_b56464511f_z.jpg


I eventually plan on combining all breathers into this single filter, but this takes care of the main trouble point on the 5th gen 4Runner.
 
Last edited:

Members online

Forum statistics

Threads
278,307
Messages
3,554,056
Members
248,016
Latest member
Advally Service

Trending content

Back
Top