Okki's Build Thread

Okki

New member
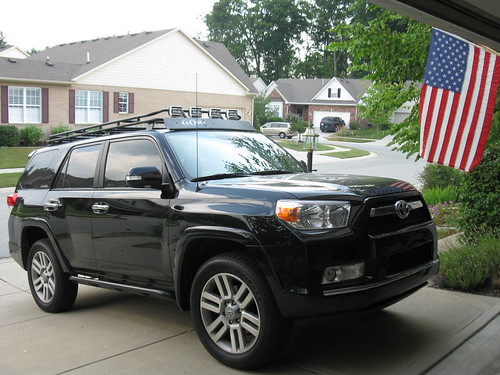
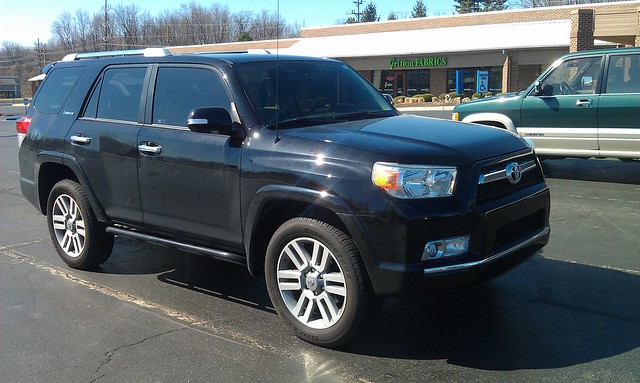
Since I have a number of mods done now, I thought I'd start a build thread.

MODS
- Shrockworks Rock Sliders
- Gobi Roof Rack & Ladder
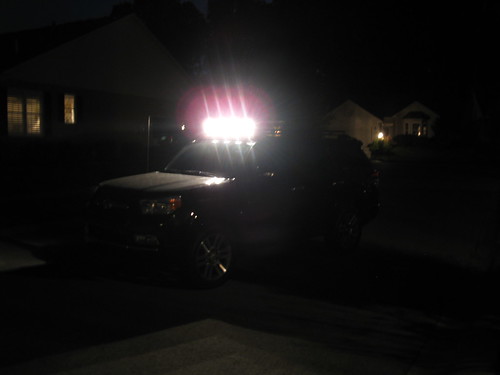
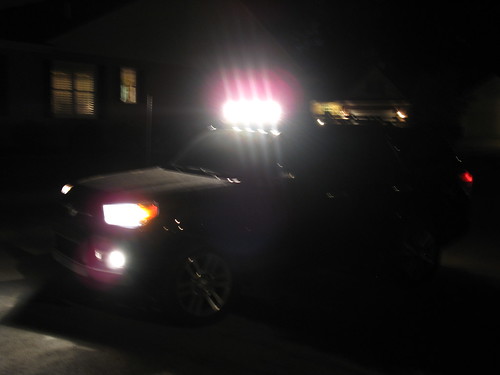
- Quad Hella Roof Lights
- Hella Horns
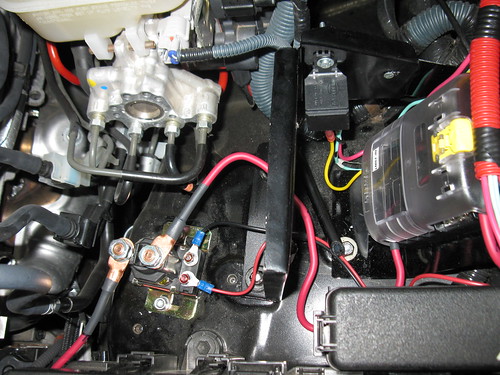
- Accessory Auxiliary Fuse Box
- Cobra ST 75 CB with 4ft Firestik Antenna
- TRD Rims and Cooper Tire Discoverer ATP LT265/70R17
- Rotopax 2 gallon Fuel and Water on Gobi Stealth Rack
- Rear Differential Breather Relocation to Engine Bay
- Cargo Area Mounted Fire Extinguisher
- Gobi Stealth rack Swiffer Mop Mod
- ARB Twin Compressor under hood
- Pressure Gauge and Air Chuck in Cargo Area
- Hi-Lift Extreme mounted on Gobi Roof Rack
- Molle Seat Back Panels
- Icon Stage 6 Suspension
- Fumoto Oild Drain Valve
- Shrockworks Full Skids
- Pelfreybilt Group 31M battery Cage
- Rear Attachment Adjustment (for Icon Billet Trailing Arms)
- Big 3 Upgrade (Alternator cables)
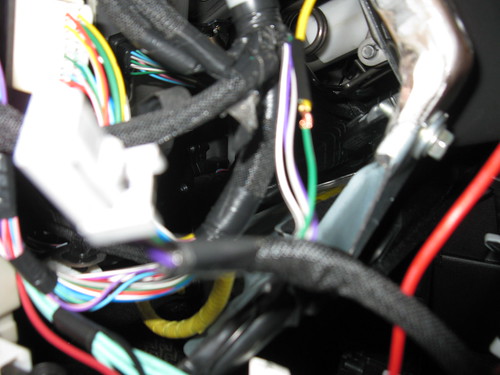
- Power along the A-Pillar to the roof
- Bash plate between Shrockworks skids and CBI Front Bumper
- Sliding Tray Removal, Dynamat Installation, Goose Gear Floor

MAINTENANCE
- Maintenance Manuals and Vendors
- Michelin Stealth Wiper Blades
- Replacing The Key Fob Battery
- Greasing Zerk Fittings
- Diehard Platinum 35D Battery
- Diehard Platinum Group 31M Battery in OEM Main Location
- LT versus P rated tire pressures
- Icon Vehicle Dynamics Billet Upper Trailing Arms Maintenance


OTHER/HOW TO
- Rotopax Base Camp Water Spigot
- Water Rotopax Disinfection
- Measuring Suspension Height and Overall Height
- Battery Group Identification and Dimensions
- Replacing the cables between the alternator, battery and fusebox. (unsuccessful mod)
- Medical Kit for your truck and outdoor adventures. (full thread)
- Adventure Tool Company (ATC) Shop Roll
- http://www.toyota-4runner.org/5th-gen-t4rs/213514-maps-maps-maps.html#post2250086
- http://www.toyota-4runner.org/5th-gen-t4rs/241553-road-trips-where-go-what-see.html#post2756255
- How Does an Alignment Work

Hope you find them useful. On that note, a massive shout out to Harper7, Antman, MeBeRunning, Philly2d, Limamike, Adio3x, Jangoforhire, Rigtec for helping me where I was clueless.

Okki
 
Last edited:
Register to hide this ad
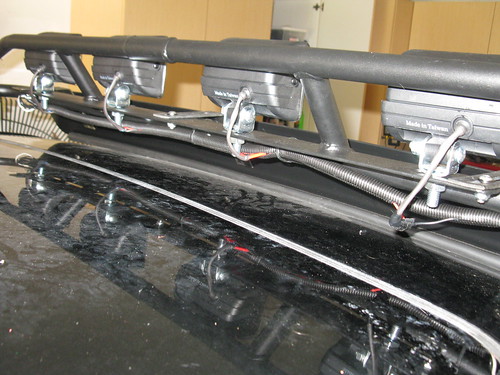
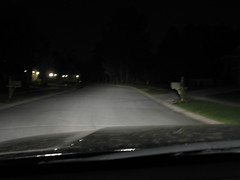
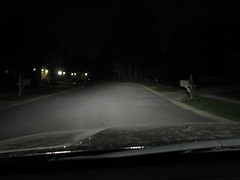
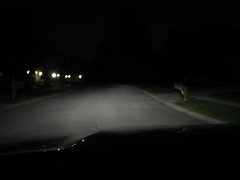
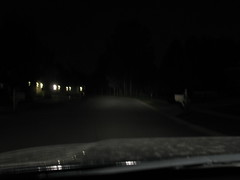
Quad hella roof lights

For this install I cannibalized the wiring harness that came with the lights. You do need to buy 40ft of 12 gauge (stranded; NOT solid core) to run power from the engine bay to the rear of the roof.

5931606389_fa3d2ff158_b.jpg

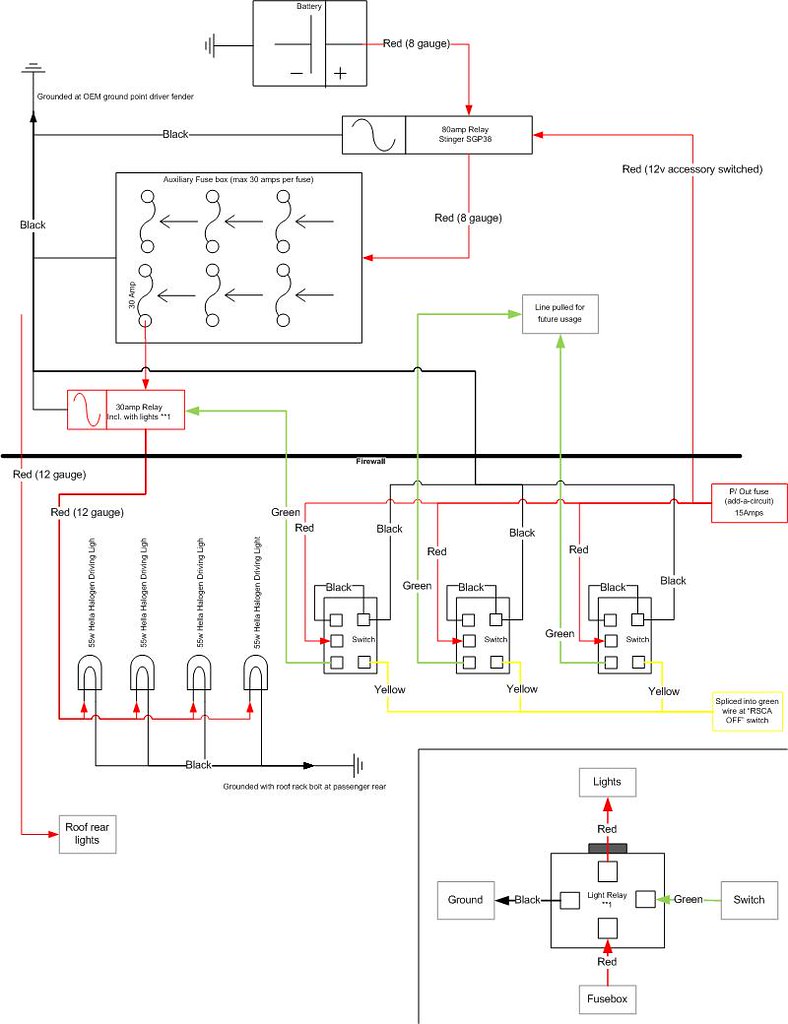
The electrical schema. I ordered 2 sets of HELLA 007133831 Micro FF Series 12V/55W Halogen Driving Lamp Kit
They were $55/each here: Amazon.com: HELLA 007133831 Micro FF Series 12V/55W Halogen Driving Lamp Kit: Automotive

For details on the switches and fusebox, please see my Auxiliary Fuse Box write up.

5968250355_afa39ba8af.jpg


FROM THE ENGINE BAY TO THE ROOF:
5968246119_843369ec68.jpg

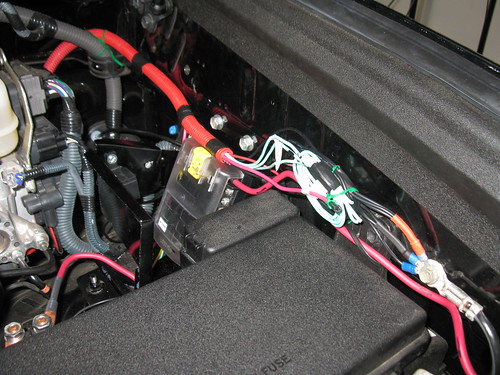
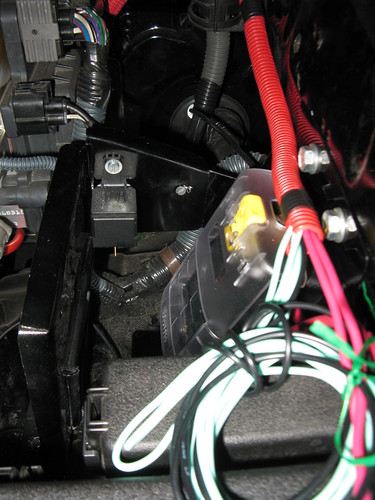
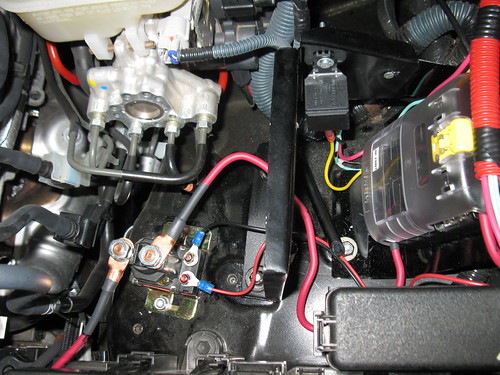
Fusebox (high voltage relay switched) and relay for lights. I fabricated the brackets for the fusebox and the relay from sheet aluminum. The Stinger SGP38 relay is mounted using factory threaded holes in the fender. My brackets also use factory holes.

5968245285_beb0fa3fe2.jpg

Grounded on factory grounding

5931616933_3fb2a552ab.jpg

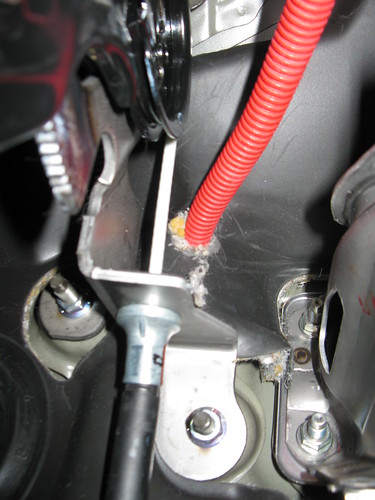
Routed via existing hole in firewall into the cab.

5932173518_a745b13696.jpg

Hole cut into rubber to allow wires through (left side driver foot-well)

6003514439_470d027103.jpg
6004062310_7f146a315f.jpg

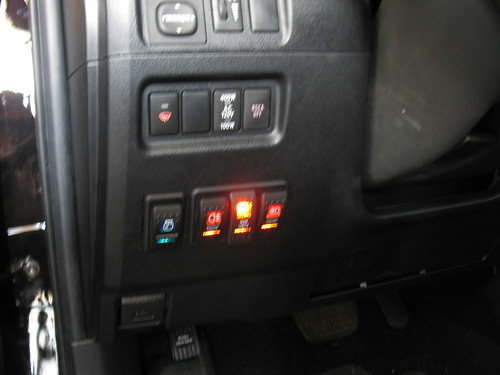
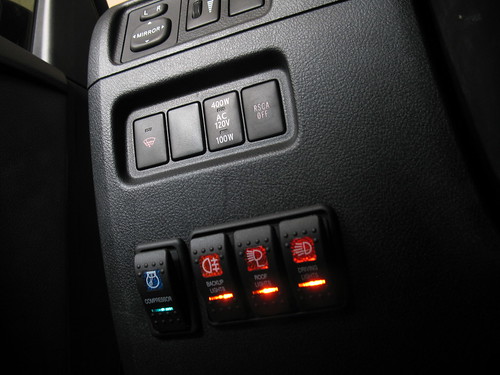
Trim a hole for your switches. What it looks like with switches installed.

5985791847_8f6943845f.jpg

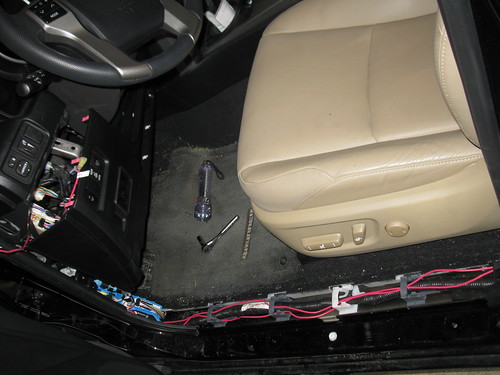
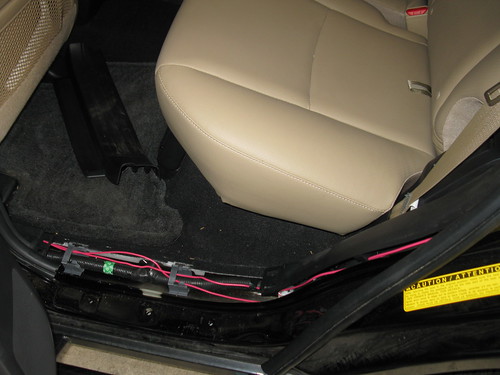
I used two 20ft wires to run from the engine bay to the rear roof. Pull the sill plates to hide the wire (driver side).

5986351224_3b1a08f9a8.jpg

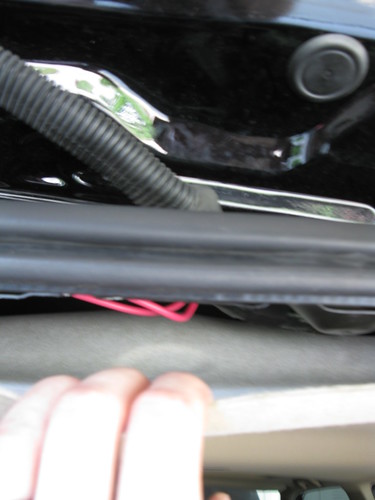
Pull sill plate for driver side passenger. Also pull the weather stripping to run the wires up into the cargo area.

5985790547_3cf2300e67.jpg

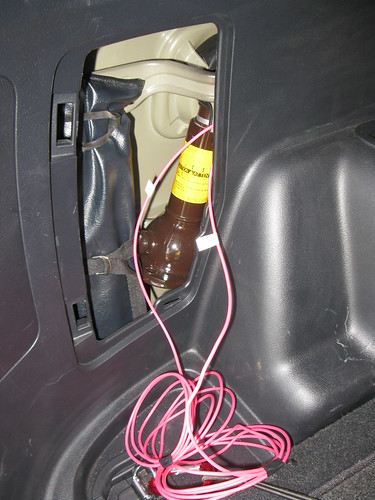
Fish the wires out of the jack cover.

5968790126_bf6ccef8ae.jpg

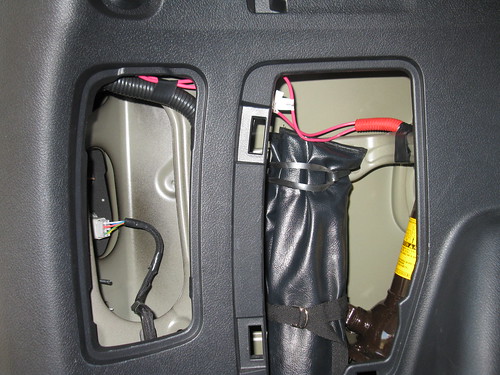
Run the wire up via the rear light access panel.

5968790630_0892840e07.jpg

Pull the rear trim loose (does not need to be removed). this is the annoying part to run the wires through.

5968234187_0be6e569bc.jpg

5968791592_3166a31d06.jpg

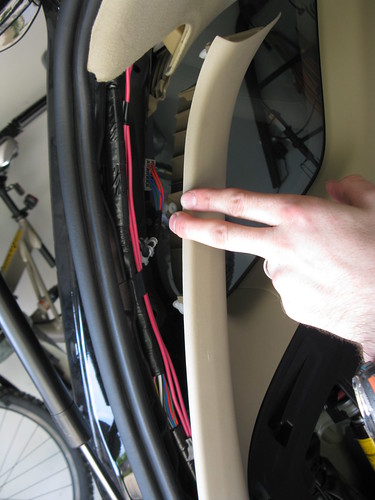
Use a trim removal tool to pull the plugs from the headliner and carefully pull it down a bit while you run the wires into the light gate connection.

5968236511_b5beced607.jpg

Trim a hole in the rubber and exit the wires. dont forget to wirewrap them. Run them under the rubber raingutter cover. You will have to trim a corner out.

5968235927_1d4164167a.jpg

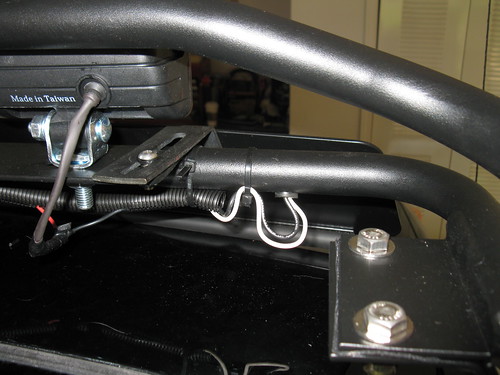
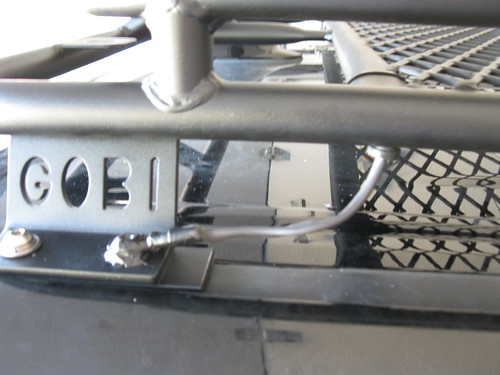
Run the wires under the rear mounting point for the rack and up to connect to the wires exiting from the rack (again.. wrap after connecting them). I used both white and black to run power to the lights. white powers 2 and black powers 2). both black and white are connected to a single powerline into the cab. the line for the rear lights is taped off for future usage.

5931618913_91dc8149fb.jpg

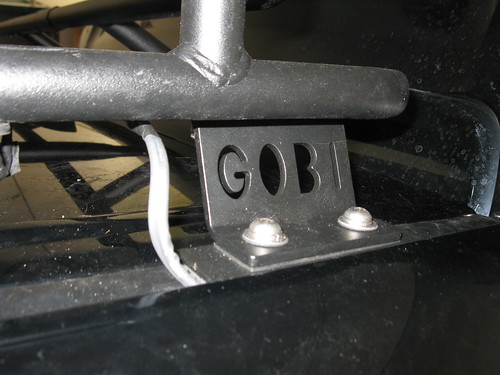
Wires cleaned up under the front of the rack.

5932175452_c5d44ddc36.jpg

The black and white wire on the passenger side of the rack are both use for grounding. each wire grounds 2 lights.

5931616273_5a5257d43c.jpg

Grounded via the rack bolts and covered with liquid electrical tape.

Click here to see the lights in action.
 
Last edited:
Shrockworks Rock Rails On Limited

TE Plastic Parts (courtesy of Harper7):
ToyotaPartSales.com

75805-35130 $161.94 ROCKER MOLDING RIGHT
75806-35100 $161.94 ROCKER MOLDING LEFT
53847-35140 $102.95 FLARE RIGHT
53848-35140 $102.95 FLARE LEFT
76604-35050 $30.92 MUD GUARD LEFT
76603-35050 $30.92 MUD GUARD RIGHT

Rock Rails $640
Replacement TE parts $680
Professional paint job $350
EDIT: Shrockworks appears to have a rocker panel replacement piece for SR5/LE owners that is cheaper than the TE conversion I used. Details can be found here: http://www.toyota-4runner.org/5th-gen-t4rs/84084-sr-5-body-kit-2.html#post956858
Looks like a great alternative at $269 a pair. They are not listed on the website so you'll have to call to order.


Fender Flare installation:
So I got the rocker panels and front fender flares back from the painters this week. Below is my adventure in installation.

Removing the LMTD fender flares:
You have to install the fender flares BEFORE you install the rocker panels. At the bottom there is a blue clip that makes a great starting point once all the screws have been removed from the inside fender wall. remove all the screws and use a trim pry tool like this one from Griots Garage. I highly recommend using a tool, although you can simply pull the flare off, but you run the risk of breaking off the receiving ends on the flare.

There is a thin strip of double sided tape that also connects the flare to the fender metal.

Installing the TE flare:
First check to see if any clips broke; most likely you will have broken a few. i ordered my replacement ones from ClipsAndFasteners.com - Automotive Retainers,Clips and Fasteners
Orange ones
blue Ones

I was not able to find the thin double sided tape anywhere, but if you double up on 3M mounting tape like the 3M™ Scotch-Mount™ Molding Tape, 03609 you should be fine. This should give you enough height to just clear the lip that connects up with the fender.

I first clipped in the bottom blue clip and the orange end clip. I then pushed and clipped the remaining one. I didn't, but you can use some masking tape to place markers on the fender so you know where the clips are.

I first thought that the rear of the rocker panel would line up with the trim on the rear doors; it doesn't. However, I don't dislike the look and the bottom of that trim piece has a rubber cover, so no dirt etc will get into it. I may replace it with TE trim at some point, but I've spent enough on this project so far.

34423d1287364929-rock-sliders-rock-rails-img_2881.jpg


34424d1287364939-rock-sliders-rock-rails-img_2882.jpg


34425d1287364950-rock-sliders-rock-rails-img_2883.jpg


34426d1287364966-rock-sliders-rock-rails-img_2885.jpg


Installing the TE rocker panel:
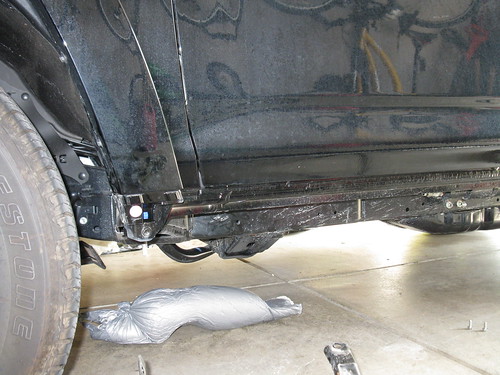
Keep in mind that when installing the TE rocker panel on a LMTD there is a rubber plug under the rear doors that needs to be removed so the drain that is part of the TE rocker can partially slide into the hole. Getting this to line up can be a minor pain, but if you can lay under the truck with a light source, it shouldn't be a big deal.

Installing the TE front mudguards:
For the mud guards you will be missing some clips. I ran down to Lowes and for just over $2 I got 4 clips to lock the mudguards in place. The screws keep them on the truck, but the clips keep them from being able to sway back and forth. I used a 5MM screw-in and a 7/16 nylon rivet. I wasn't sure which one would fit better, so I got some of each. The 7/16 rivet is the slightly snugger fitting option, so I would probably use those on both holes.
34428d1287364987-rock-sliders-rock-rails-img_2887.jpg


34429d1287365000-rock-sliders-rock-rails-img_2888.jpg


Shrockworks Rails Install:
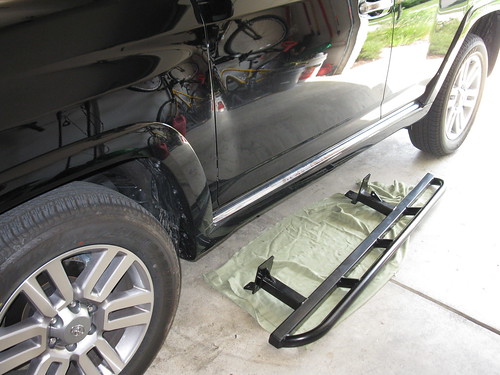
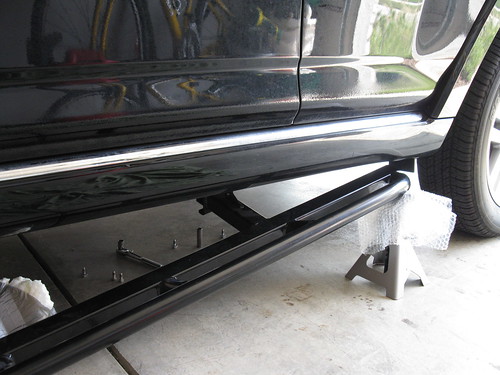
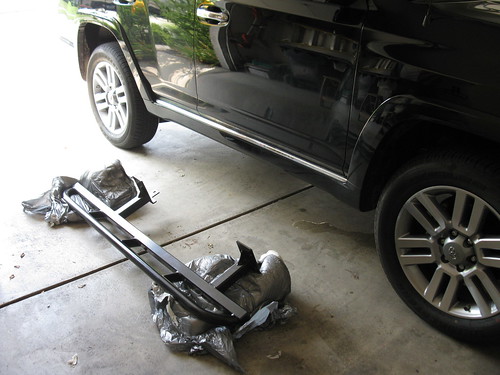
In order to install the Shrockworks Rock Rails on a Limited, you need to remove the OEM rocker panels.
5988835221_e7e4fe5ecf.jpg

The rails come straight off the frame and that about 3/4 above the bottom of the rocker panels.

As mentioned earlier, I order the Trail Edition front fender flares and rocker panels because it doesn't look all that good without the rocker panels.
5988830315_697f5267b1.jpg
.
Others (like BFLAN) have simply cut the OEM rocker panel so the rail fits below it.

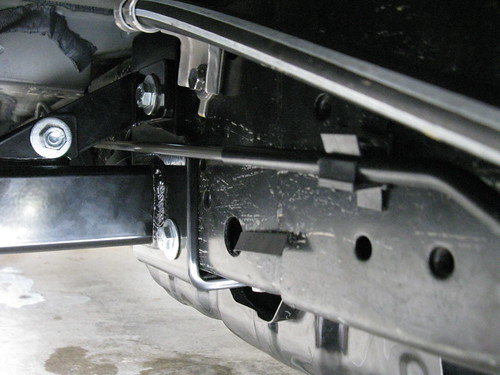
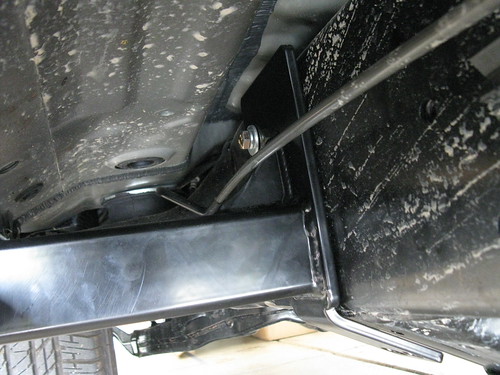
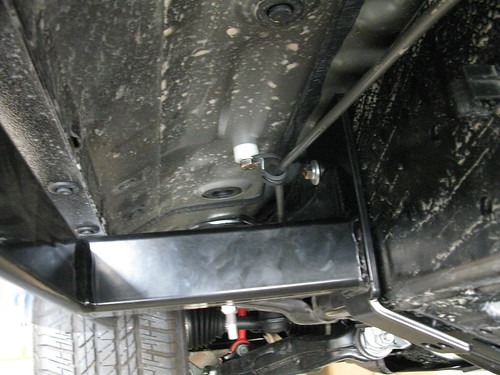
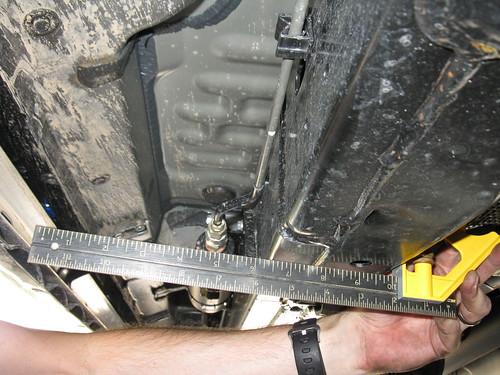
I installed the Shrockworks Rock Rails on my limited and ran into a few issues. I had to bend out the hard lines in the front and create a bracket out of a bolt, 2 nylon spacers and a hose-guide with rubber padding. pictures of the problem and the fix I put in place are lower on the page.

5988826691_3722b76451.jpg

Passenger side rock rail.

5988827537_656e1ef7eb.jpg

Driver side rock rail.

5989389870_2dc6ca9ea5.jpg

I used Jack Stands to keep the rail in place while I worked on the bolts. It would be easier to have 2 friends hold the rail, but this works as well.


I would request (if Jim hasn't updated the design already for the Limited) to have the Bolt On Gusset on all 4 corners; It means you don't have to mess with the hard lines on the Limited.
4898954151_c1d3f3790a.jpg

Bolt on gusset on rear of slider.

BEFORE FIX
4899547536_e3b2d374a0.jpg


FIX IN PLACE
4898957869_63c2e246c1.jpg

XREAR hard line pulled out of the way with hose clamp, nylon spacers and factory bolts.

34422d1287364919-rock-sliders-rock-rails-img_2880.jpg


34427d1287364977-rock-sliders-rock-rails-img_2886.jpg


It's a bit dirty, but you get the idea :)
5564742484_175f52ac85_z.jpg


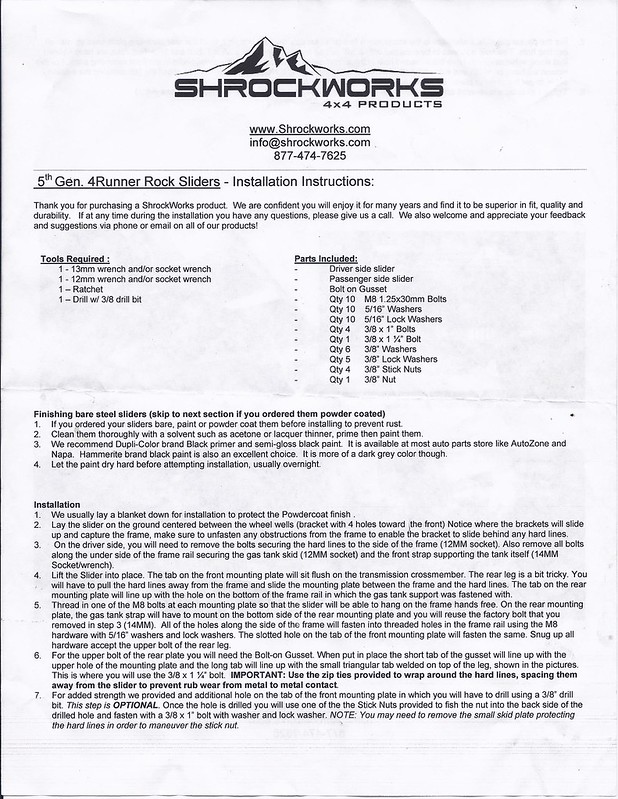
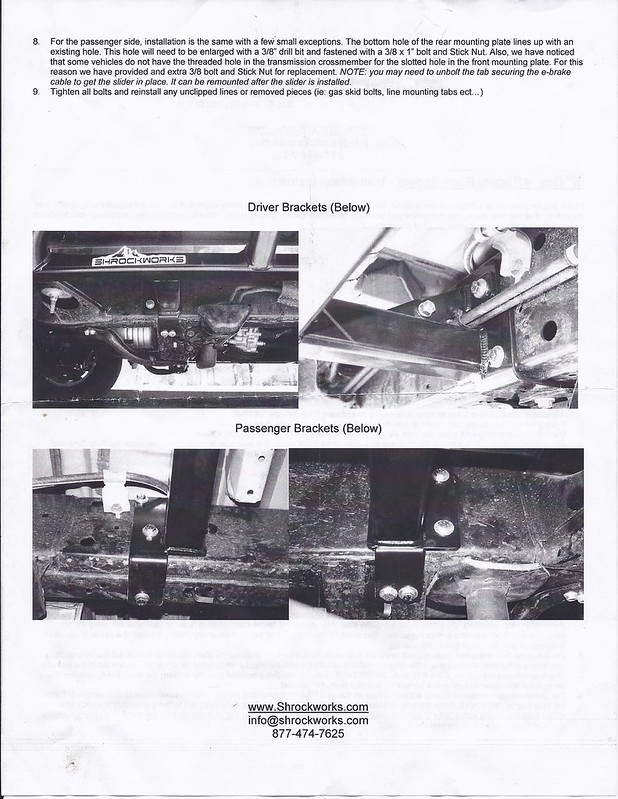
EDIT: added the Shrockworks installation instructions:
8998616177_7e86d53438_c.jpg

8998616723_3645ef3d0f_c.jpg
 
Last edited:
Did you order the TE parts from your local dealer? How long did it take? I'm planning on doing the TE exterior swap. By the way how much did they charge for shipping?
 
Did you order the TE parts from your local dealer? How long did it take? I'm planning on doing the TE exterior swap. By the way how much did they charge for shipping?

As indicated, I ordered them from ToyotaPartSales. That's actually a dealer in Texas, but was the best deal out there. My local dealer wanted to charge nearly double the parts cost and of course local would have added tax. The shipping charge was just shy of $90.-

TE Plastic Parts (courtesy of Harper7):
ToyotaPartSales.com

Rocker Moldings:
75805-35130 $161.94
75806-35100 $161.94

Fender Overmolding:
53847-35140 $102.95
53848-35140 $102.95

Harper7 has all the TE plastic parts listed since he changed all exterior plastic to TE on his limited. that does require fabrication of new bumper skin brackets because they are different between the TE and the Limited.

Okki
 
Hella Horn Installation

I ended up ordering some Hella Horns... 118db high and low tone. I did get a good reaction from a lady not yielding to me while I was on a roundabout, but I thought they would have been louder.

HELLA 003399803 Supertone 12V High Tone/Low Tone Twin Horn Kit
Price: $51.-
http://www.amazon.com/gp/product/B0030YWM0Y/ref=pd_lpo_k2_dp_sr_1?pf_rd_p=486539851&pf_rd_s=lpo-top-stripe-1&pf_rd_t=201&pf_rd_i=B000CRZXPI&pf_rd_m=ATVPDKIKX0DER&pf_rd_r=137XDW1PG2S5QVWJYBTN

Them not being "loud" may be incorrect in that they are directional horns and being in the cab behind them, you would hear significantly less than in front of them.

40630d1299809957-fiamm-replacement-horns-img_3003_small.jpg

The box and the parts therein.

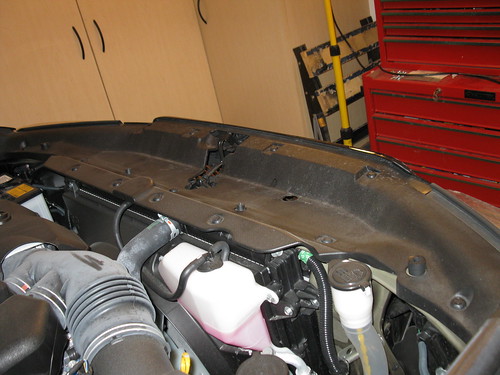
Start by removing the radiator cover by popping all the pins and lifting the cover up. There are 13 pins to be removed.
5989488672_3f8cfbf362.jpg


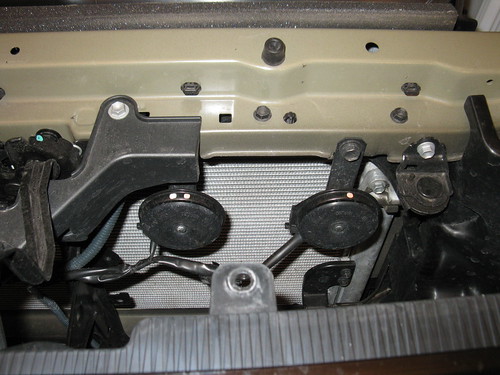
You'll also have to remove the center piece of plastic in order to remove and re-install the passenger side horn.
5988929677_0ce1491f86.jpg


5989491202_99afac88b0.jpg

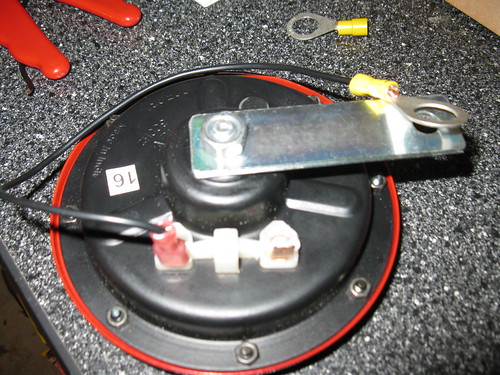
I added ground wires to both horns and grounded them via the bolt that bolts them to the frame.

40632d1299809981-fiamm-replacement-horns-img_3009_small.jpg

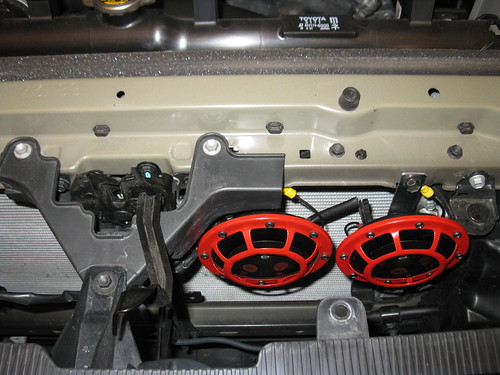
The OEM horns versus the Hella's. you can also see that the factory harness connects to the two Hella's. I did not use the relay that was provided in the kit (yet).

5988933867_d360f0ab28.jpg

with the plastic center piece back in place you just need to re-install the plastic radiator cover and you are ready to blow your own horn in a job well done :)
 
Last edited:
Auxiliary Fuse Box

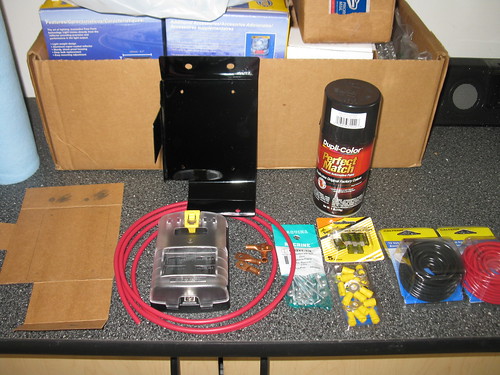
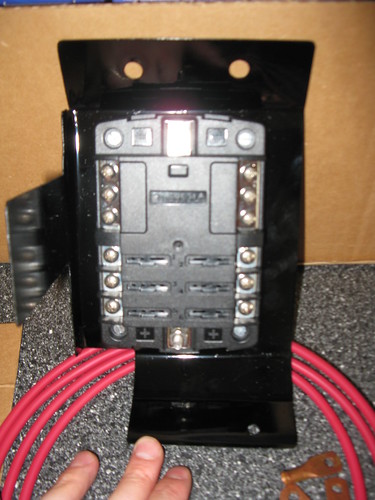
I mounted an auxiliary fuse box to power the roof lights that I have on my Gobi Stealth Rack, but also so that I would have everything in place for any additional lights I may want to mount and a compressor.

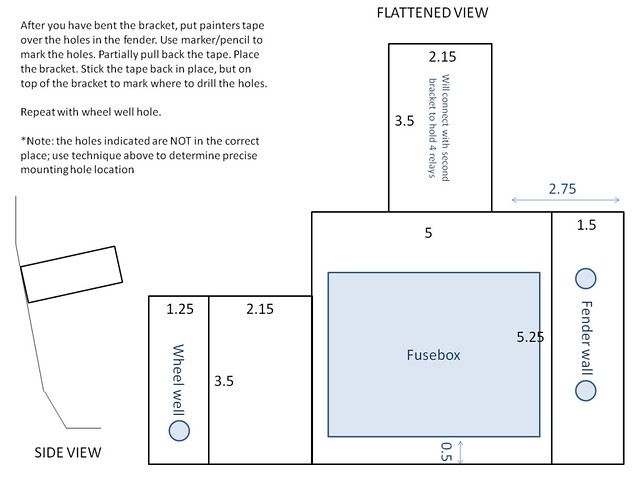
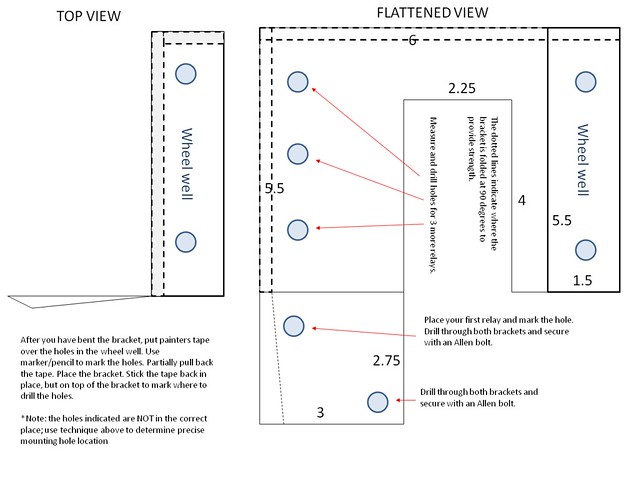
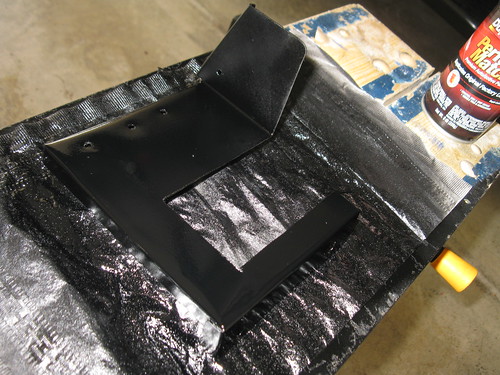
Lets start with the boring stuff. Below are the electrical schematics and the drawings for the brackets I fabricated.
6000271414_18cc93c459_b.jpg


Fuse Box Bracket:
6000271464_c2ef343eb7_z.jpg


Relay Bracket:
5999723725_eb3e30f989_z.jpg


I fabricated the brackets out of sheet aluminum that I picked up at Lowes. Per [MENTION=117301]T4Rdvm[/MENTION], the bolts that fit in the OEM threaded holes in the engine bay are: M8-1.25 bolts. The recommendation is M8-1.25x20 stainless.

I ordered all the surrounds and switches from Over The River And Throw The Woods (www.otrattw.com):
Product ID: V1D1J66B-AFCN5-17U
Product Name: V-Series Contura II sealed rocker switch, Driving Lights
Quantity: 1
Unit Price: $12.00
--------------------------
Product ID: V1D1J66B-AYC9A-CP1
Product Name: V-series Contura II sealed rocker switch, Compressor
Quantity: 1
Unit Price: $12.00
--------------------------
Product ID: V1D1J66B-AFCM4-RF1
Product Name: V-Series Contura II sealed rocker switch, Roof Lights
Quantity: 1
Unit Price: $12.30
--------------------------
Product ID: V1D1J66B-AFC77-18B
Product Name: V-Series Contura II sealed rocker switch, Backup Lights
Quantity: 1
Unit Price: $12.30
--------------------------
Product ID: VMS-01
Product Name: Snap-In Single Switch Holder
Quantity: 1
Unit Price: $1.75
--------------------------
Product ID: VM3-01
Product Name: Snap-In Three Position Switch Holder
Quantity: 1
Unit Price: $5.30
--------------------------
Product ID: 5025B
Product Name: Blue Seas ST Blade Fuse Block With Cover
Quantity: 1
Unit Price: $27.95
--------------------------

Please not that these switches DO NOT FIT IN THE OEM SLOTS! You need to enlarge the locations (taller) or cut a big hole and use the snap in panel like I did.

The fusebox is connected to the battery using 8 gauge stranded wire. On the battery side you can use 8 gauge copper lugs, but on the high-voltage relay side I had to use 6 gauge lugs because I needed a 3/8 hole. I cut a T-shape in the top of the lug so I could properly compress the lug around the wire.
5999724811_99b9e3acd8.jpg


Make sure you leave enough room on either side of the brackets so you have room for the terminals to come off the fuse box.
6000276714_ab4a547bfb.jpg


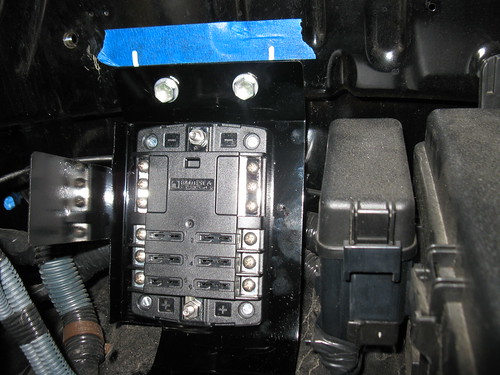
On the fender wall you can use existing threaded holes to secure the bracket. When you have the bracket bent in the right shape, place 2 pieces of painters tape on the fender wall, one covering each hole. mark the hole on the take with pencil. Pull back partially, place the bracket and stick the tape back. remove the bracket with the tape in place and drill the mounting holes accordingly.
5999730139_e162379d62.jpg


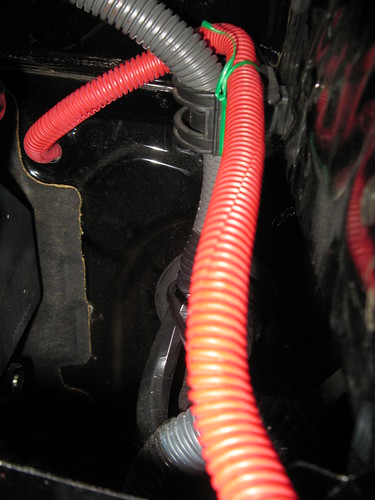
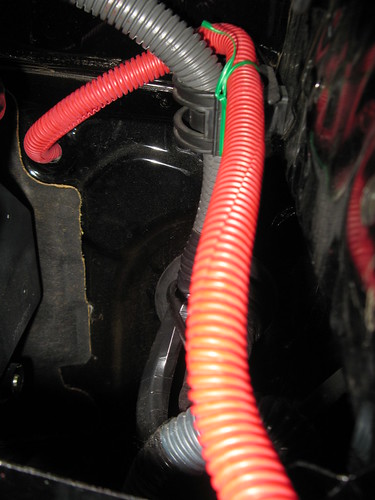
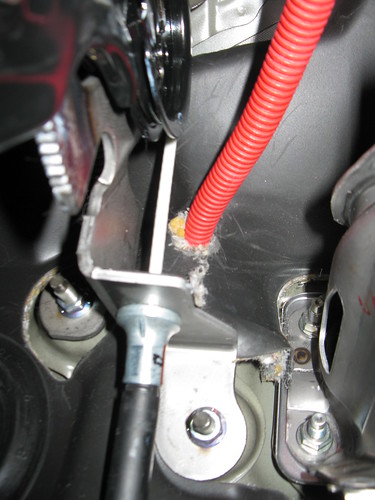
I used an existing hole in the firewall to run cable guide and wires.
6000280446_c8532fc9cd.jpg

I used a hobby knife to cut through the insulation and rubber backing that is inside the driver footwell. I started the cutting from the engine bay so you know the exact location to trim your hole.

This is the view inside the driver foot well;
5999733665_a0cfd7ab88.jpg


I have a total of 8 wires running through this passage.

A second bracket provides a mounting spot for an additional 3 relays (or other items) and reinforces the fusebox bracket.
5999735979_9e9fbe8152.jpg


In the final installation I used Allen bolts.
5999736715_fe3d04e26f.jpg


To the left of the bracket you can see the Stinger SGP38 High Voltage relay. It was mounted using two threaded holes that already existed in the wheel well. they are shallow holes, but provide enough threads to hold the relay securely in place.
6000287946_390ce48e95.jpg

As mentioned, I needed to modify 2 6 gauge copper lugs with 3/8 hole in order to connect to the terminals on the relay.

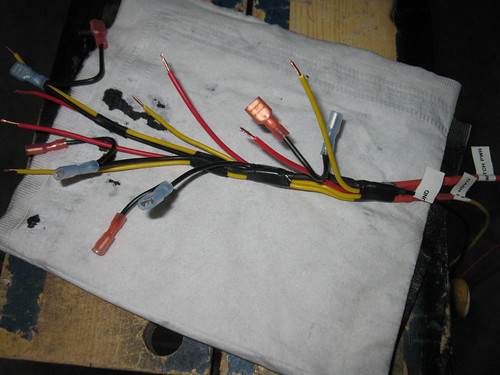
I fabricated a wiring harness from the harness that came with my Hella lights, but any 16 or 18 gauge wire will do.
6000285922_fd5c685e07.jpg

Black = ground
Yellow = Dashboard light; spliced into RSCA switch green wire
Red = 12 volt accessory switched; use add-a-circuit on P/Outlet mini fuse or splice into appropriate wire.
Green (not shown) = Switch to relay
5999745947_bb8a9bae67.jpg


Hook up the switches and you are good to go!
6004062310_7f146a315f.jpg
 
Last edited:
Can you use only the trail edition Rocker Panels or do you need the molding around the wheel wells too?

Hi Craig, You will have to replace the front fender molding because those dont' match up with the TE rockers. I did not replace the rear because while they dont match up with the TE rockers, they do not look out of place. There is actually a rubber piece under the rear fender molding that prevent dirt etc from getting under it; the front does not that have that.

It's a pricey addition to the rock rails and I probably would simply cut the OEM limited rockers if I were to do it again and possibly change the rockers to TE later. If you have a Limited and are getting the Shrockworks sliders, remember to have them put bolt on gussets on all 4 corners so you dont have to mess with the XREAS lines.

Okki
 
Thanks Okki! I think I will try to cut them before ordering all new stuff (would rather not spend the $$).

I think I will try your horn mod next though.
 
Thanks Okki, I was able to install the horns with help from your pictures.

Without them I would have been totally lost. I don't know anything about electrics or creating my own grounding cables like you did here lol!
 
Thanks Okki, I was able to install the horns with help from your pictures.

Without them I would have been totally lost. I don't know anything about electrics or creating my own grounding cables like you did here lol!

Whoohooooo (or Hoooonk Hooonk) :lookout: Glad to help... I'm no electrical genius either... Just ask Antman how many times I bugged him when I did my aux fusebox mod! LOL. But you don't learn anything unless you ask, so by all means keep asking and modding!
Okki
 
Whoohooooo (or Hoooonk Hooonk) :lookout: Glad to help... I'm no electrical genius either... Just ask Antman how many times I bugged him when I did my aux fusebox mod! LOL. But you don't learn anything unless you ask, so by all means keep asking and modding!

Okki

Are you back on track yet Okki? Let's see some more stuff!!:thumb3:
 
Are you back on track yet Okki? Let's see some more stuff!!:thumb3:

Nop.. still looking for new job. actively looking in Indianapolis (current location) and Colorado; Tucson, AZ; DFW, TX; Northern FL; GA and VA. The market just sucks :(

Anyone have a contact at:
Raytheon,
Triple Canopy,
Honeywell,
General Dynamics (or 4GS)

Looking for a Program Manager, Proj. Manager, Business Analysis Manager type of position.

Okki
 
Okki, check out USAjobs.gov - the VA in Indianapolis is hiring a project manager w/ IT experience - but not an IT project manager. You might be a fit.
 
Okki, check out USAjobs.gov - the VA in Indianapolis is hiring a project manager w/ IT experience - but not an IT project manager. You might be a fit.

Hi JHawk,
I didn't find the Project manager job at the VA, but did find 2 with DFAS and 1 with ICE.

Fingers crossed now; thanks for the heads-up... I appreciate it!

Okki
 

Members online

Forum statistics

Threads
278,306
Messages
3,554,046
Members
248,016
Latest member
Advally Service

Trending content

Back
Top