Part Numbers For Interior Light Mod....PLEASE

well I decided to go with the vleds. bought the warden some lights also so the final price jumped up to $153 shipped.

had to order a 578 for $10 and 2 extra 168/194 for $15. save some money on the shipping of one order instead of 2 separate later on.

3 x DE3175 @ $10 each (4Runner rear hatch/dome lights)
5 x 168/194 @ $15 pair (4Runner, 2x Vanity, 2x License, 4x Door Puddles, 2x Maps)

1 x 578 @ $10 (Tacoma dome light)
2 x 168/194 @ $15 pair (Tacoma, 2x Maps, 2x License)
 
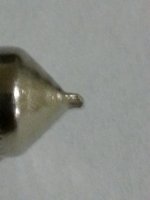
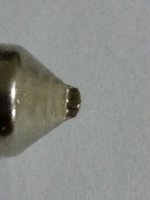
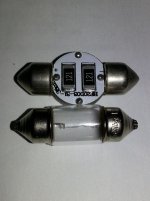
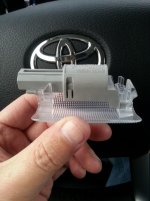
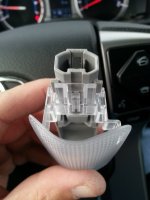
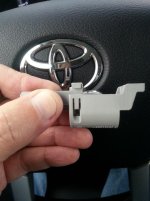
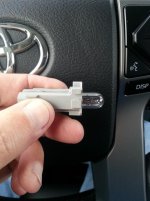
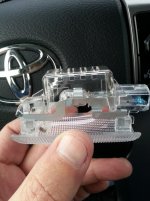
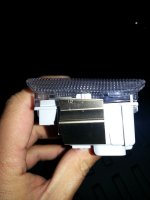
ok got the dome light in after some mod to one end. apparently the ends on the OEM buld has tapered/pinched ends and the ones from vled are rounded to a point which doesn't work for the dome on the DE3175.

you have to pinch one end to get it to sit correctly or you end up shorting out the circuit it seems.

now the big issue, how the heck do I get the rear door light covers to come off? any one with pics or instructions.
 
ok got the dome light in after some mod to one end. apparently the ends on the OEM buld has tapered/pinched ends and the ones from vled are rounded to a point which doesn't work for the dome on the DE3175.

you have to pinch one end to get it to sit correctly or you end up shorting out the circuit it seems.

now the big issue, how the heck do I get the rear door light covers to come off? any one with pics or instructions.

you don't pry the covers off, you actually pry the entire lamp out...check out this thread: http://www.toyota-4runner.org/5th-gen-t4rs/64819-led-replacements-rear-hatch-photos.html

Also, in case you meant the door door, and not the tailgate door, there's a thread for that too: http://www.toyota-4runner.org/5th-gen-t4rs/64823-led-replacements-door-lamps-pics.html

All courtesy of the old man [MENTION=51186]philsey[/MENTION] :)
 
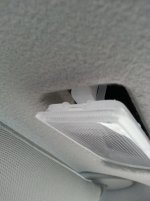
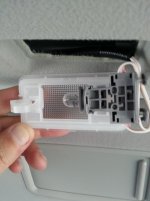
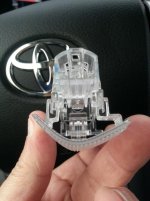
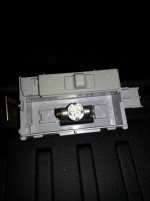
here are close up pics of the OEM dome light.

.
 

Attachments

  • DE 3175 End Pic 1 Cropped.jpg
    DE 3175 End Pic 1 Cropped.jpg
    100.5 KB · Views: 1,656
  • DE 3175 End Pic 2 Cropped.jpg
    DE 3175 End Pic 2 Cropped.jpg
    105.1 KB · Views: 1,655
  • VLED top OEM DE 3175 Cropped.jpg
    VLED top OEM DE 3175 Cropped.jpg
    45.8 KB · Views: 1,760
you don't pry the covers off, you actually pry the entire lamp out...check out this thread: http://www.toyota-4runner.org/5th-gen-t4rs/64819-led-replacements-rear-hatch-photos.html

Also, in case you meant the door door, and not the tailgate door, there's a thread for that too: http://www.toyota-4runner.org/5th-gen-t4rs/64823-led-replacements-door-lamps-pics.html

All courtesy of the old man @philsey :)

awesome. will try that in the morning since my search fu was totally lacking.

I will have to admit the vleds are just right in light output, not overly bright compared to the superbright pics I have seen.

also to add, it seems the vleds 3175 are about 1-2 mm longer which makes the install super tight. if you push it in and force it, you will hear a snap which in my case didn't cause any harm luckily. even though its in the socket now decently, it is cockeyed slightly pointing toward the rear passenger door and not horizontal like its suppose to be like the OEM bulb. looking from the rear driver side passenger door the light doesn't seem less than looking in from the rear passenger side.
 
Last edited:
awesome. will try that in the morning since my search fu was totally lacking.

I will have to admit the vleds are just right in light output, not overly bright compared to the superbright pics I have seen.

You will have much more room to work with in the tail gate dome lights, I had the same problem as you with the ends in the center dome light (the tip of the LED bulb not being sharp enough to squeeze in). The tail gate has way more width to bend the prongs wide enough and squeeze in the vled festoon bulb.

I agree, if you're on the fence about vled and superbright, I would just go vled because their customer service is superb and they have a very wide selection to help you match everything the way you like it. Prices are a little bit higher but worth it IMO.
 
[MENTION=1032]NoDak[/MENTION], just saw your edit...I had the same problem too with the dome light not sitting flat because the led bulb was a bit too long, what I ended up doing was taking a small needle nose pliers and bending the contacts in the dome light as wide as possible, it's going to take some time to get it right but eventually you can get it to sit flat enough so it points straight down.

Also if you heard a snap, you probably broke one of the solder joints holding the metal cone tips to the circuit board on the led bulb. If it still works then it's no big deal, but if it starts flickering you can just re-wet the broken solder joint with a solder iron and you will be good to go. I too broke the solder joint by accident, lol. Are we twins??? :tea:
 
yeah I was on the fence but decided to pay more for the better customer service, 5k output (superbrights didn't have all the bulbs I wanted in 5k), adjustable width, decent output (I didn't want retina burning output).

and those interested in vleds, they are backordered on the 168/194 bulbs. I have 7 pairs on backorder.

and talk about OCD on the packing.

3 different containers to ship 4 bulbs. padded pouch inside square cardboard box inside priority envelope.
 
@NoDak, just saw your edit...I had the same problem too with the dome light not sitting flat because the led bulb was a bit too long, what I ended up doing was taking a small needle nose pliers and bending the contacts in the dome light as wide as possible, it's going to take some time to get it right but eventually you can get it to sit flat enough so it points straight down.

Also if you heard a snap, you probably broke one of the solder joints holding the metal cone tips to the circuit board on the led bulb. If it still works then it's no big deal, but if it starts flickering you can just re-wet the broken solder joint with a solder iron and you will be good to go. I too broke the solder joint by accident, lol. Are we twins??? :tea:
I think the snap I heard was the actual dome light inside and not the led. I think the metal clip on the driver side is what made the noise. I think I pushed it past it retainer notch, but it doesn't seem to affect the operation atm.

I am ok with how it is sitting currently. I cant see and difference in output looking in from the passenger or driver side currently so I am leaving it for now.

I am going to try and tackle the rear hatch lights tomorrow and try it from inside like philsey did instead of overhead, that's if the temps don't drop to much, it actually got into the 20's tonite, but its suppose to drop again tomorrow and I don't want to try it wearing a heavy jacket.
 
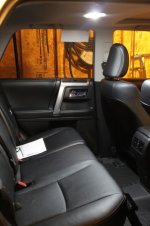
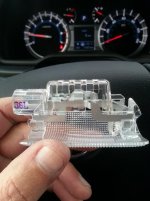
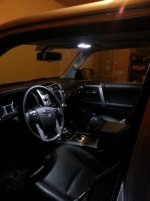
got a pic of the vleds dome light install, haven't tackled the rear lift gate lights as I haven't had time or warm enough to install them yet. no flash used in this pic.

.
 

Attachments

  • VLEDS Dome LED Light Cropped.JPG
    VLEDS Dome LED Light Cropped.JPG
    101.4 KB · Views: 1,867
big write up to add to this thread. mind you this is on a 2014 LE. thanks to @philsey for removal of the door puddle lights, reference his post link a few posts back in this thread as a baseline.

1st pic :

vanity light partially removed, pry from the left side to initially to pop out, then push the retainer clip to pop it out the rest of the way. be careful as the guts are pretty thick on the right side, so you have to wiggle it out.

2nd pic :

this is the housing popped out. this slides directly outward, but be careful of the retaining clips, they are small. replace with 168/194 bulb (i used vleds 4 led p/n : 194_4_HPF_W_5K - 5K WHITE 4 LED 2 WATT HP FLANK BULBS 194 168 158 | 1 PAIR)
.

3rd pic :

this is the housing on the 2nd row door puddle lights, they are a different housing than the 1st row door lights. this grey housing slides forward to remove it from the lens cover.

4th pic :

please note the small tab, push this to release the housing from the lens cover. its center of the picture and the only thing in focus.

5th pic :

housing removed from lens cover. inner housing is removed by pushing upward on the smaller protruding housing while being careful of the retainer clips on both side.

6th pic :

inner housing removed.

7th pic :

1st row door puddle lights removed.

8th pic :

please note the small tab, push this to release the housing from the lens cover. its center of the picture and the only thing in focus.

.
 

Attachments

  • 2014 LE Interior 1 - Vanity Light Cropped.jpg
    2014 LE Interior 1 - Vanity Light Cropped.jpg
    45.9 KB · Views: 1,813
  • 2014 LE Interior 2 - Vanity Light Housing Cropped.jpg
    2014 LE Interior 2 - Vanity Light Housing Cropped.jpg
    43.4 KB · Views: 1,739
  • 2014 LE Interior 3 - 2nd Row Puddle Light Housing Cropped.jpg
    2014 LE Interior 3 - 2nd Row Puddle Light Housing Cropped.jpg
    56.7 KB · Views: 1,749
  • 2014 LE Interior 4 - 2nd Row Puddle Light Housing Retaining Clip Cropped.jpg
    2014 LE Interior 4 - 2nd Row Puddle Light Housing Retaining Clip Cropped.jpg
    130.6 KB · Views: 1,828
  • 2014 LE Interior 5 - 2nd Row Puddle Light Housing Removed Cropped.jpg
    2014 LE Interior 5 - 2nd Row Puddle Light Housing Removed Cropped.jpg
    57.5 KB · Views: 1,755
  • 2014 LE Interior 6 - 2nd Row Puddle Light Inner Housing Cropped.jpg
    2014 LE Interior 6 - 2nd Row Puddle Light Inner Housing Cropped.jpg
    59.1 KB · Views: 1,686
  • 2014 LE Interior 7 - 1st Row Puddle Light Housing Cropped.jpg
    2014 LE Interior 7 - 1st Row Puddle Light Housing Cropped.jpg
    57.2 KB · Views: 3,120
  • 2014 LE Interior 8 - 1st Row Puddle Light Housing Retaining Clip Cropped.jpg
    2014 LE Interior 8 - 1st Row Puddle Light Housing Retaining Clip Cropped.jpg
    49.8 KB · Views: 1,774
Last edited:
9th pic :

this shows the 1st row puddle light housing cover popped so you can remove it to get to the bulb itself.

10th pic :

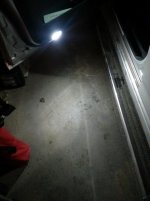
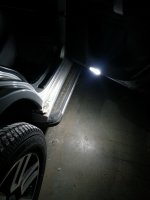
driver side door puddle light installed. pic is in the garage so you can get an idea of the light brightness.

11th pic :

rear passenger door puddle light

12th pic :

map lights installed

13th pic :

i did all this outside and this was the temperature. the installed pics where done inside the garage after i did all that outside :)

couldn't figure out how to remove the license plate frame quickly, so i will have to do a search of how later.

edit : forgot to add, the dome light removal of the actual lights is a serious PITA. i used needle nose pliers and gently removed them. the bulbs are pretty resilient to the plier if your super gentle. reference @philsey post of using electrical tape. i tried but man they dug in like a tick.

2nd edit : for the map lights, the one's i used actually don't project light directly downward. if you want more light you could use the following as they have direct projection. the flanks i used point into the reflector directly so you get more diffused lighting.

http://www.vleds.com/5k-white-4-led-2w-high-power-bulbs-194-168-158-1-pair.html

or

http://www.vleds.com/5k-white-high-power-led-bulbs-194-168-158-1-pair.html
.
 

Attachments

  • 2014 LE Interior 9 - 1st Row Puddle Light 1 Housing Popped Cropped.jpg
    2014 LE Interior 9 - 1st Row Puddle Light 1 Housing Popped Cropped.jpg
    66.5 KB · Views: 1,601
  • 2014 LE Installed 1st Row Puddle Lights Cropped.jpg
    2014 LE Installed 1st Row Puddle Lights Cropped.jpg
    42.9 KB · Views: 1,699
  • 2014 LE Installed 2nd Row Puddle Light Cropped.jpg
    2014 LE Installed 2nd Row Puddle Light Cropped.jpg
    132.7 KB · Views: 1,801
  • 2014 LE Installed Map Lights Cropped.jpg
    2014 LE Installed Map Lights Cropped.jpg
    40.6 KB · Views: 1,700
  • 2014 LE Installed Interior Light Mod Temp Cropped.jpg
    2014 LE Installed Interior Light Mod Temp Cropped.jpg
    124.9 KB · Views: 1,571
Last edited:
well since I reserved this spot for when it warmed up to actually finish out the part of the interior light mod, which is the rear lift gate/door lights.

as before please reference earlier post on getting the rear door light to pop out, trust me, its spot on and the driver side is a pita since you don't have the space due to body work.

pic 1 : the housing removed, this is the big retainer clip you have to push in, in order to even get this to pop out. 2 thin flatheads make this super easy work with no plastic bodywork marring.

remember there will be a test if you don't follow directions later on :)

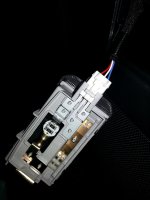
pic 2 : this is the housing still attached to the power cord, just push the retainer clip in and slide out

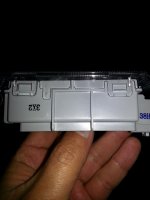
pic 3 : lens cover retaining clips, just pry with your fingernails nicely

pic 4 : since the DE3175 are not dual polarity, you have to make sure you install them, connect the housing to the power cord in pic 2 and slide the knob to the on position. if you don't get any output, swap the ends in the housing.

remember I said a test, if you don't do the above and put all that back in without testing, you will test your patience getting the housing out again.

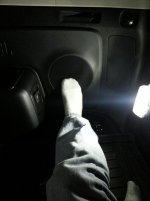
pic 5 : leds installed, feet basking in the output :)

btw these do faintly glow just like everyone else has said. but I think the amount of draw these have in this situation is going to be a mute point.

this concludes the simple interior mod for the 2014.
 

Attachments

  • 2014 LE Interior 10 - Rear Door Housing Removed Retainer Clip Cropped.jpg
    2014 LE Interior 10 - Rear Door Housing Removed Retainer Clip Cropped.jpg
    111.5 KB · Views: 1,391
  • 2014 LE Interior 11 - Rear Door Housing Removed Cropped.jpg
    2014 LE Interior 11 - Rear Door Housing Removed Cropped.jpg
    118.4 KB · Views: 1,372
  • 2014 LE Interior 12 - Rear Door Housing Lens Cover Retainer Clips Cropped.jpg
    2014 LE Interior 12 - Rear Door Housing Lens Cover Retainer Clips Cropped.jpg
    108.5 KB · Views: 1,448
  • 2014 LE Interior 13 - Rear Door Housing LED Installed Cropped.jpg
    2014 LE Interior 13 - Rear Door Housing LED Installed Cropped.jpg
    50.7 KB · Views: 1,368
  • 2014 LE Interior 14 - Rear Door Light Sample Cropped.jpg
    2014 LE Interior 14 - Rear Door Light Sample Cropped.jpg
    38.2 KB · Views: 1,381
Last edited:
Snarky comments are how we express our love for each other around here. Embrace the love :yo:

This thread reminded me that I never even installed mine and until you mentioned it actually forgot all about them :redbrick:

You probably haven't installed yours yet because you've failed to get a proper legal review on the modification to properly cover you in case the modification results in your truck jumping out into oncoming traffic and killing a medium sized white Christian family.
 
brightness is just right, except for the map lights. they seem to be a tad bit bright, but it could be due to being so close. I may swap them out for a more directional LED since the flanks are pointing directly into the reflector.

edit : reason I went with the flanks was that they had dual polarity. you couldn't put them in wrong :). well you could if you didn't want the light output going in the correction direction.
 
Last edited:
brightness is just right, except for the map lights. they seem to be a tad bit bright, but it could be due to being so close. I may swap them out for a more directional LED since the flanks are pointing directly into the reflector.

edit : reason I went with the flanks was that they had dual polarity. you couldn't put them in wrong :). well you could if you didn't want the light output going in the correction direction.

This is what I put into my map lights:

$T2eC16NHJIIE9qTYI2IFBQHG0nPnhQ~~60_1.JPG


VLED doesn't seem to carry this style anymore...but I remember they didn't call them the "high powered SMD", I forget what it's called though, lol. The higher powered ones are a bit too bright to be comfortable in the map light position.

Even those can be very mildly irritating if your passenger has them on while you're driving down a pitch black road. When there's other street lamps around outside, it's pretty bearable and does not appear to produce too much glare.

You might have aim issues if you used a directional one because the socket points straight down, while the reflector is trying to aim it outwards towards the seats...not sure but it may or may not look uneven? Worth a shot though, if you try it out please update, I wouldn't mind an even less glare option!
 

Members online

Forum statistics

Threads
278,310
Messages
3,554,079
Members
248,016
Latest member
Advally Service

Trending content

Back
Top