Pictures of my ham radio install

proimion

New member
Greetings 4R enthusiasts,
This forum has been very useful to me in learning and modding my new 4Runner. I'd like to return the favor with a bunch of pictures of my ham radio install.

I installed a Yaesu FT-7800R. I wanted an install that was completely removable and did not require drilling any holes in my new truck. That goal was mostly accomplished.

I'll break it down into several posts:

  1. Equipment and testing
  2. Antenna mount
  3. Antenna wiring
  4. Electrical
  5. Faceplate wiring
  6. Faceplate mounting
  7. Final connections

Standby, here we go...
 
Register to hide this ad
Part 1: equipment and testing

Part 1: equipment and testing

Before doing any of the install, I setup everything at home and tested it using the exact equipment for the truck, down to the electrical cabling.

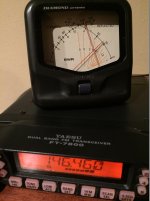
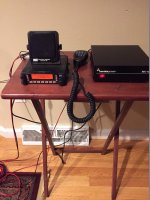
Here you see the FT-7800R connected to a DC converter for testing. Note the external speaker as well:

ham radio test (2).jpg

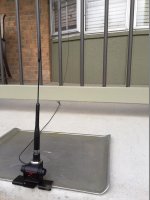
I setup the antenna and mount (more on those in the next post) outside. It is on the edge of a cookie sheet to simulate the ground plane I will get on the truck. The coax is going under the window screen into the house.

ham radio test (1).jpg

Next a quick SWR test. It is 1.7 which is not awesome but not bad either:

ham radio test (3).jpg

I used the setup like this for a few days and it performed very well.

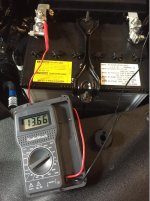
Finally, a check of the battery while the truck was running. Near perfect as this radio wants around 13.8V. The manual says above 15 could damage the radio. Just to be safe, I revved the engine up and the voltage did not go above 13.8.

The power for this is coming directly off the battery. This radio takes too much power to run from a 12V DC converter. In general you should never run any ham radio from the cabin power unless it is a handheld. And of course you should check the manual of your radio to be sure you are within its operating specs.

ham radio test (4).jpg

Next, I took the entire rig and actually wired it all up loose into the cabin and ran a system test with the truck running. I had the hood up and the wires running through the driver window! The antenna wire was just run through the back window and over the seats. Before I started the real work, I wanted to do this test, and everything worked just fine.
 

Attachments

  • ham radio test (2).jpg
    ham radio test (2).jpg
    131.6 KB · Views: 15,839
  • ham radio test (1).jpg
    ham radio test (1).jpg
    132 KB · Views: 14,642
  • ham radio test (3).jpg
    ham radio test (3).jpg
    127.4 KB · Views: 14,545
  • ham radio test (4).jpg
    ham radio test (4).jpg
    136 KB · Views: 14,456
Part 2: antenna mount

Part 2: antenna mount

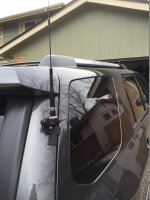
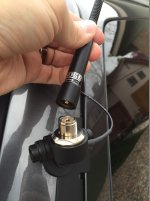
This is a Diamond K400S heavy duty trunk/hatchback mount with a UHF base (SO-239) and PL-259 connection. Diamond makes this same mount with an NMO or 3/4 x 24 thread base if you prefer. The antenna in this picture is a Comet SS460SB 146/446 MHz. It is only 18" tall. I have it mounted in this position so it does not strike the garage door or the parking garage sign at work. It can bend a bit if it does hit, but this is not something I want to do often. For around town, this size antenna does just fine.

ham radio antenna mount (1).jpg

The antenna disconnects easily. I have another antenna--a Comet SBB5. It is a 38" antenna 1/2 wave for VHF and 1/4 wave for UHF. Obviously this performs much better than the shorter antenna. So when we are out and about on an adventure, I can easily switch to the larger antenna. If you have no antenna on at all, there is a metal cap that screws on the post to keep water and debris out.

ham radio antenna mount (2).jpg

Next post, how I wired the antenna.
 

Attachments

  • ham radio antenna mount (1).jpg
    ham radio antenna mount (1).jpg
    129 KB · Views: 29,938
  • ham radio antenna mount (2).jpg
    ham radio antenna mount (2).jpg
    124.2 KB · Views: 19,254
Last edited:
Part 3: antenna wiring

Part 3 antenna wiring

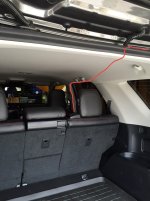
The transceiver itself will be under the passenger seat. Here is an overview of the wiring route from the mount into the truck, above the headliner, and down the pillar to the passenger seat. The cable that came with the Diamond K400S mount is 13.5 feet, juuuuust enough to reach.

I had to remove the various coat hooks and the handle above the door so I could loosen the headliner enough to push the cable up there. That handle was a real bear to re-install! Took about 30 minutes. Be sure to carefully note how the metal springs are positioned before you pull them off!

ham radio antenna wiring (6).jpg

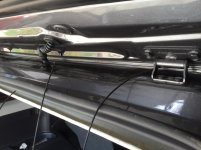
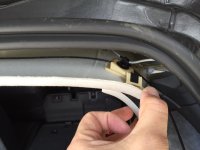
Here you see the coax from the mount to the tube that contains the washer fluid line for the back window:

ham radio antenna wiring (1).jpg

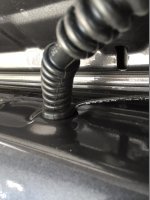
I cut a very tiny slit in the rubber cover and ran the wire through. Thankfully, the PL-259 connector is very small or it would not have worked. The rubber closed back over the wire nicely. I suppose if you were paranoid about moisture, you could put a dab of silicone caulk over it:

ham radio antenna wiring (2).jpg

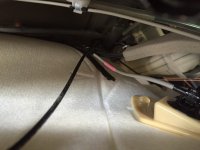
To loosen the headliner, I had to loosen the trim along the side window. I never had to remove the trim completely, just loosen it enough so I could rout the cable over the headliner. Here you see it is important to run the cable over this other wire:

ham radio antenna wiring (3).jpg

Note how I ran the cable as directly as possible and out of the way of the airbag:

ham radio antenna wiring (4).jpg

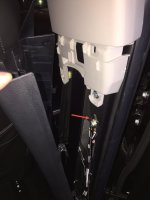
Then I loosened the pillar behind the passenger seat. to do this I also had to remove the floor door jamb trim as well. The cable ran down the pillar (see arrow):

ham radio antenna wiring (5).jpg

The cable came out under the pillar and then under the passenger seat. I had about 3" to spare! The pillar trim doesn't pinch or rub the cable--it has plenty of movement against the carpet. I'm not worried about the cable getting damaged at all.

All this was made much easier with the the right tools. I ordered some trim removal tools from Amazon and it was well worth it. No scratch marks anywhere!

Next up, electrical!
 

Attachments

  • ham radio antenna wiring (6).jpg
    ham radio antenna wiring (6).jpg
    130.5 KB · Views: 16,834
  • ham radio antenna wiring (1).jpg
    ham radio antenna wiring (1).jpg
    128.7 KB · Views: 16,765
  • ham radio antenna wiring (2).jpg
    ham radio antenna wiring (2).jpg
    127.6 KB · Views: 14,668
  • ham radio antenna wiring (3).jpg
    ham radio antenna wiring (3).jpg
    133.1 KB · Views: 14,543
  • ham radio antenna wiring (4).jpg
    ham radio antenna wiring (4).jpg
    132.8 KB · Views: 14,484
  • ham radio antenna wiring (5).jpg
    ham radio antenna wiring (5).jpg
    116.6 KB · Views: 14,371
Last edited:
Part 4: electrical

Part 4 electrical

Following established practice and the install guide that came with the radio, I'm getting power right from the battery. This means I had to route the cable in the engine room, through the firewall, and under the passenger seat. Here's how I did it.

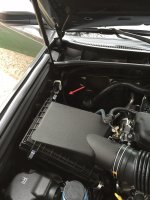
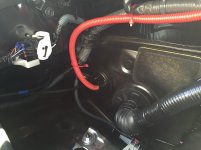
Toyota provides a handy port through the firewall where the rear window washer fluid and several other cables go (see arrow):

ham radio electrical (1).jpg

There was not enough room to run the wires through the same hole as the washer fluid line. So I very carefully cut a "+" shaped slit in the rubber and pushed the wires through. This was very difficult work. Good thing I have long arms! In retrospect, a really good idea would have been to take a small brass or copper tube and push that through the rubber. Then route the wires through that.

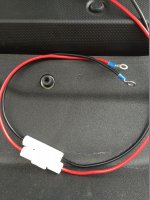
After running the wire through the firewall, I connected it to a 15amp fuse on each line and then a 1/4 inch ring connector:

ham radio electrical (2).jpg

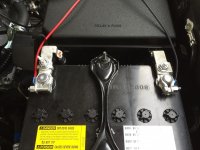
Here is the connection to the battery:

ham radio electrical (3).jpg

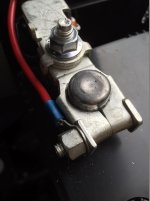
A up-close view:

ham radio electrical (4).jpg

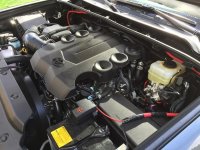
Then I shrouded the wire in fire-resistant loom and attached it to the existing wiring loom that runs along the back of the engine room. The electrical tape is where the fuses are, and they did not quite fit, so I taped them up real good:

ham radio electrical (5).jpg

Here is where the loom meets the firewall. Again, secured well with tape. If you were paranoid about moisture leak, I suppose you could seal this with silicone. But I had such a tight connection here, I can't imagine anything getting through this:

ham radio electrical (6).jpg

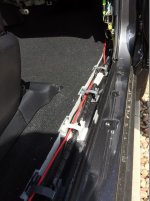
Finally, the wire came through the firewall and under the door trim to the passenger seat. Like with the antenna wire, the electrical wire does not rub or get pinched between the trim and the carpet!

ham radio electrical (7).jpg

Finally, I tested the voltage at the end, and after all that it dropped only 0.03 volts!

Keep in mind that getting power directly from the battery means the radio can work even if the truck is off. This could be good or if you forget to turn off the radio, you could drain your battery!
 

Attachments

  • ham radio electrical (1).jpg
    ham radio electrical (1).jpg
    135.8 KB · Views: 14,468
  • ham radio electrical (2).jpg
    ham radio electrical (2).jpg
    130 KB · Views: 14,140
  • ham radio electrical (3).jpg
    ham radio electrical (3).jpg
    135.1 KB · Views: 14,395
  • ham radio electrical (4).jpg
    ham radio electrical (4).jpg
    120.6 KB · Views: 14,278
  • ham radio electrical (5).jpg
    ham radio electrical (5).jpg
    136.7 KB · Views: 14,311
  • ham radio electrical (6).jpg
    ham radio electrical (6).jpg
    126.9 KB · Views: 14,326
  • ham radio electrical (7).jpg
    ham radio electrical (7).jpg
    135.7 KB · Views: 14,143
Last edited:
[MENTION=139232]proimion[/MENTION],
Looking good so far.
Interested to see what your SWR's drop off to once it is complete and you move away from other vehicles and buildings with all doors closed.
 
Last edited:
Part 5: faceplate wiring

Part 5: faceplate wiring

The Yaesu FT-7800R has a detachable faceplate that you can extend with RJ-12 6-wire straight-through cable. I could not find this cable anywhere local so I ordered it from Amazon. 7ft length--too much, but that is the shortest I could find.

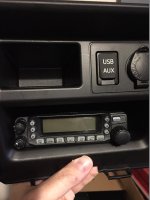
I decided to put the faceplate in the larger rectangular opening under the USB port. There are downsides to this, namely that if I put a cup in the forward cup holder, it will block the faceplate. But this is a tradeoff I am willing to make because I really couldn't fit the faceplate anywhere else, and I did not want to put the faceplate on some type of dash mount or arm that is used to hold up tablets/phone. I wanted as clean a look as I could get.

But this meant I would have to route the RJ-12 behind the dash and under the console below the shift levers and to the passenger seat. So here we go...
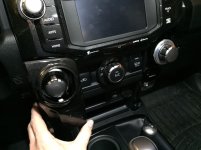
First, remove the side trim. You can just give a firm pull here to do this:

ham radio faceplate wiring (1).jpg

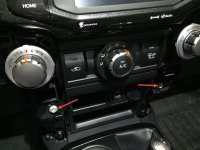
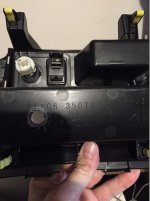
Then remove the 2 screws shown here and the USB unit should pull right out:

ham radio faceplate wiring (2).jpg

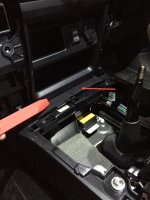
Ah, but alas! This little trim piece here gets in the way. So I had to unscrew the 4WD shifter knob and then take the console cover off in order to remove the trim piece.

ham radio faceplate wiring (3).jpg

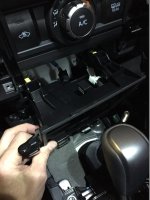
Then the USB unit comes out easily:

ham radio faceplate wiring (4).jpg

Here's how the faceplate will sit in the cubbyhole:

ham radio faceplate wiring (5).jpg

This means I had to drill a hole finally. 1/2 inch for the RJ-12 cable. The good news is that this hole is not visible if I decide to remove the radio later. It is off to the side and not centered because the RJ-12 connector on the faceplate is off to the side:

ham radio faceplate wiring (6).jpg

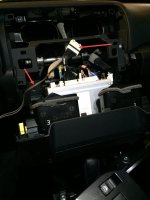
As long as I have the dash torn up, I might as well install the rear camera override dongle. I don't have a switch for it yet, so the switch wires just run over under the steering column and are tucked out the way for now (and out of the airbag path):

ham radio faceplate wiring (7).jpg

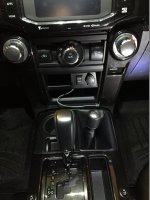
All cleaned up now with the RJ-12 running from the cubbyhole around the back and under the console below the shifter knobs and then out the side to the passenger seat:

ham radio faceplate wiring (9).jpg
 

Attachments

  • ham radio faceplate wiring (1).jpg
    ham radio faceplate wiring (1).jpg
    132.6 KB · Views: 15,021
  • ham radio faceplate wiring (2).jpg
    ham radio faceplate wiring (2).jpg
    132.5 KB · Views: 14,162
  • ham radio faceplate wiring (3).jpg
    ham radio faceplate wiring (3).jpg
    134.8 KB · Views: 14,322
  • ham radio faceplate wiring (4).jpg
    ham radio faceplate wiring (4).jpg
    129.7 KB · Views: 14,217
  • ham radio faceplate wiring (5).jpg
    ham radio faceplate wiring (5).jpg
    133.5 KB · Views: 14,427
  • ham radio faceplate wiring (6).jpg
    ham radio faceplate wiring (6).jpg
    128.6 KB · Views: 14,072
  • ham radio faceplate wiring (7).jpg
    ham radio faceplate wiring (7).jpg
    128.7 KB · Views: 14,214
  • ham radio faceplate wiring (9).jpg
    ham radio faceplate wiring (9).jpg
    132.5 KB · Views: 19,138
Part 6: faceplate mount

Part 6: faceplate mount

So here is where things get interesting. Again, I want something easy to remove later. So I have to "McGyver" things up a bit. Some of you may not like my reliance on velcro to do this, but it works!

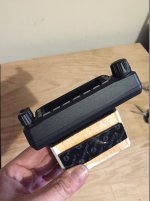
I took a piece of 2x4 and cut it to length. Then I attached the faceplate to it using heavy duty (10 lb) velcro. Another strip of velcro goes on the bottom:

ham radio faceplate mount (1).jpg

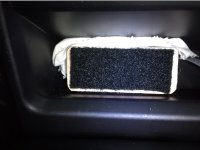
Then I placed the block in the cubby. I jammed in some cloth to put pressure down on the block and press in the velcro real good. It is very solid:

ham radio faceplate mount (2).jpg

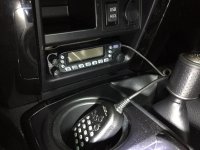
Here it is with the faceplate attached:

ham radio faceplate mount (3).jpg

I'll figure out where to hang the microphone later, but undoubtedly that will involve velcro too.

Again, the major disadvantage of this location is being blocked when I use the forward cupholder. But I don't anticipate this to be a problem since I won't be using the radio on every trip. So the cleaner look out of the way is what I chose. To adjust the volume, it is taking me a bit of practice to reach down there and find it, trying not to take my eyes off the road. The microphone has a lot of shortcuts on it so really the only time I need to reach for the faceplate is to turn it on and adjust the volume.
 

Attachments

  • ham radio faceplate mount (1).jpg
    ham radio faceplate mount (1).jpg
    128 KB · Views: 14,349
  • ham radio faceplate mount (2).jpg
    ham radio faceplate mount (2).jpg
    135.9 KB · Views: 13,938
  • ham radio faceplate mount (3).jpg
    ham radio faceplate mount (3).jpg
    133.7 KB · Views: 20,276
Part 7: final hookup

Finally, we come to the conclusion.

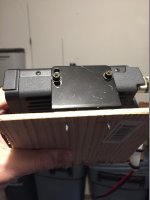
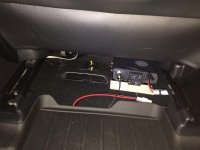
Again, since I want easily removable, I'm gonna go McGyver on this! I took a thin piece of plywood and mounted the radio on it. Yes, the screws protrude, but that is on purpose:

ham radio final hookup (1).jpg

Here is how it all finally fits under the passenger seat (in this picture the seat seat is all the way forward so you can see it clearly and you are looking at the passenger seat from behind). The protruding screws grab the carpet and keep it from sliding. Since there is a rise in the floor under the front of the seat, the radio cannot physically slide out into the passenger footwell--it won't fit. This keeps the radio from sliding out and hitting a passenger in the legs should I hit the brakes real hard. In a rollover crash, of course this would flop around, but then that would be the least of my worries.

ham radio final hookup (2).jpg

I am aware that the duct to the left of the radio is for heat. So before next winter hits, I will use some plastic tube to extend the duct a bit further out to the back so that hot air is not blowing near the radio.

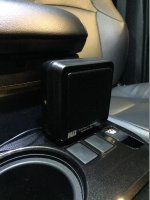
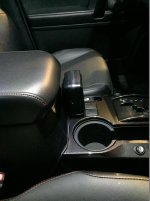
Now for the external speaker. Once again, due to my requirement to keep things removable, I am using velcro on the bottom and back of the speaker to mount it in front of the console box:

ham radio final hookup (4).jpg

Another angle:

ham radio final hookup (5).jpg

Sure, this gets in the way just a bit. But it isn't bothersome. The console box door opens easily and I can reach the rear window control just fine. If I had OEM heated seats, I'm sure this speaker location would make it much harder to adjust the heat, but I don't have OEM heated seats. You've probably noticed the aftermarket seat heater controls. I had Katzkin heated leather seats installed in my TE. I could not buy a TE Premium because I am tall and the moonroof takes too much headroom from me. So to get heated leather I had to go aftermarket.

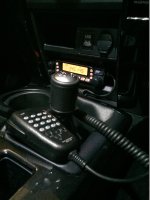
Finally, the radio is operational and it sounds great!

ham radio final hookup (3).jpg
 

Attachments

  • ham radio final hookup (1).jpg
    ham radio final hookup (1).jpg
    132.3 KB · Views: 13,992
  • ham radio final hookup (2).jpg
    ham radio final hookup (2).jpg
    136.6 KB · Views: 14,023
  • ham radio final hookup (3).jpg
    ham radio final hookup (3).jpg
    129.7 KB · Views: 14,152
  • ham radio final hookup (4).jpg
    ham radio final hookup (4).jpg
    135.7 KB · Views: 13,955
  • ham radio final hookup (5).jpg
    ham radio final hookup (5).jpg
    134.5 KB · Views: 14,002
Last edited:
[MENTION=139232]proimion[/MENTION],
I may be wrong, but I do not think the duct being pointed away from the back of your radio will cause you any grief during the winter.
 
Great write-up and very detailed thank you. I am going to bookmark this page for when it comes time to install my CB.

Would you pls be so kind and include a link to the trim removal tool set you bought off Amazon? I see a lot of kits on their site and wanted to know which one worked for you?
 
Good looking install.

Have you tried listening to the radio using the built in speaker instead of the external when its installed under the seat? I've got a Kenwood TM-D710G that I'll be installing under the driver's seat next weekend, but I'm not sure if I need an external speaker or not.
 
Did you check your swr after installation? What was it on 2m and 440?

Also, that antenna should have allen screws so you can adjust the swr.

Remember, every installation will change the swr, even in the same vehicles, side-by-side, and I always tell people to check swr immediately after their installation to make sure its 1.5 or below for optimized transmission. For me, I've done so many installs and antenna tuning over the years, I just broke down and got an MFJ 259B. While it doesn't tune for 440, I've found that if the dual band antenna gets tuned properly for 2m, 440 usually falls within 1.5:1 or so.
 
Good looking install.

Have you tried listening to the radio using the built in speaker instead of the external when its installed under the seat? I've got a Kenwood TM-D710G that I'll be installing under the driver's seat next weekend, but I'm not sure if I need an external speaker or not.

Well I hadn't tried it until you brought it up. I unplugged the external speaker and it sounds surprisingly good without it. I haven't tried it on the highway yet where the external noise would be loudest.

So for now I've taken the external off and put it in the glove box. Can reattach easily later if I need it. That's the magic of Velcro.
 
Also, that antenna should have allen screws so you can adjust the swr.

Yes, it has screws, but there is no margin to adjust. I think the screws are there just in case someone wants to disassemble it. Comet provides no user manual for this antenna, either with the product or on line.
 
For those who want more SWR information...
I took a couple readings with the truck outside away from buildings. The SWR is actually better than when I tested stand-alone.

With the short SS460SB, it is 1.3 on both 146 and 446.

With the longer SBB5, it is just under 1.2 on 146 and 1.2 on 446.

On the packaging for both antennas, Comet states the SWR is "less than 1.5". There's not much point in tuning this any further, I suppose.
 
Definitely not, 1.2:1 is almost perfect, and that extra headache of trying to drop it to a perfect 1.1:1 will gain absolutely nothing.

I've had a TON of Comet and Diamond antennas over the past 20-something years, and of the ones I had to adjust, it was extremely minute for the adjustments. We're talking sixteenths of an inch here! The last one (which I still have somewhere around here) was an SB-10NMO, and IIRC, the adjustment seemed like if I just touched the antenna then took another reading, it would change!

I'm really not very active any more, although I still have my base station ready to go if I ever need it, but I've changed over to just a standard ¼ wave 2 meter antenna and keep a ¼ wave 440 antenna in my truck if I ever need it. For my setup, the ¼ wave gets out extremely well, and if I'm going camping or mountaintopping, I take some super-high gain antennas with me. I've found that even with 50 watts, the Comet and Diamond antennas (at least the older models, maybe they've changed them in the past 10 or so years) would eventually burn up the ceramic caps over time, and the antenna would become "deaf" when this happens. With the ¼ wave whip, I can run my 200 watt amp without any problems, and they are super-easy to tune flat. Just my own experience though, I still like the designs that Comet/Diamond have!

Btw, I have that same SWR meter! Its been going strong for at least 15 years now! It takes a beating (literally!) and continues to work and read antennas perfectly!
 
Well I hadn't tried it until you brought it up. I unplugged the external speaker and it sounds surprisingly good without it. I haven't tried it on the highway yet where the external noise would be loudest.

So for now I've taken the external off and put it in the glove box. Can reattach easily later if I need it. That's the magic of Velcro.

Awesome. I was debating whether to order a speaker or not. I'll give it a shot without it then, and hopefully I'll be able to get by without one.
 

Members online

Forum statistics

Threads
278,317
Messages
3,554,128
Members
248,016
Latest member
Advally Service

Trending content

Back
Top