Project NoRunner: 2000 SR5 4x2 Resto

STI_MECE

New member
Well, i jumped in knee deep on this one....for 3300 bucks, i got a 221.500k miles 4x2 4runner SR5 with a crappy 3 inch lift and it had 315/75R16s

This thread will be about my experience unraveling this big crappy ball of proverbial yarn and seeing what it's inside.

Time to fix a truck I should have never bought. It will be my daily driver.

I hope you enjoying reading about the mistakes you should not make! All the work I have done could not have made doing the work myself any easier. This community is what made me decide to get one.

After all the work I put in after a short period of time, the truck has adopted a new name: NoRunner.

I was working on it more than I was driving it at first. Now with a new engine, I hope this name ends up being ironic.

When I first got her, only picture I got. She wasnt much of a looker:
v7kAgcGl.jpg


MAINTENANCE
@221,700 Miles
  • OEM Spark Plugs and OEM Wireset (Denso Dual Electrodes)
  • 5W-30 6 qt. Castrol Full Sythentic with Marvel Mystery Oil with OEM Filter and drain plug gasket
  • Airaid Intake Tube
  • PCV Valve
  • Lower Ball Joint's
  • Energy Suspension Body Mount Bushings
  • Replace L & R Steering Spindles
  • Bridestone KO'2 285/75R16 E Rated Tires (Worst Mistake Ever lol so Stiff)
@222,000 Miles
  • Fuel Vapor Hose - Charcoal Canister to Intake Maniold - Cracked - PN 2382762030
  • Fuel Vapor Hose - Intake Manifold to TB (the really short one) - Cracked - PN 90445-12284
  • Fuel Vapor Hose - Charcoal Canister to Air Intake - PN 90445-14172
  • Gear Selector Bushing - Wobbly Shifter - New bushing fixed this
  • Air Filter - PN 17801-07020
@222,500 Miles
  • Power Steering Fluid Swap - Toyota ATF
  • Upstream O2 Sensor - Denso
October 12th, 2019 @223,000Miles
  • Rebuild Rear Axles - Junkyard Find - 2002 Rear Axle (Dr Coffee Method)
  • Rebuild rear brakes w/ OEM Pads, Wheel Cylinders and Drums
  • Rear Diff Fluid - Lucas 75W-90
@223,500 Miles
  • Fuel Filter - Old - PN 2330062030
October 19th, 2019@223,700 Miles
  • TPS Sensor - Removed Aftermarket TPS with OEM
  • Oil Cap Rubber Gasket
@223,900 Miles
  • Valve Cover Gaskets
  • Valve Cover Grommets
  • New Half Moons
  • Rear Camshaft Plugs
  • FPIG

@224,000 Miles - Headgasket Failed - Replace w/ Used Engine​
  • Engine go boom (well it was going to "go boom")
  • Purchased donor engine with 144k from 1999 SR5
  • Swapped - Valve Cover Gaskets
  • Valve Cover Grommets
  • Swapped - Half Moons
  • Swapped - Rear Camshaft Plugs
  • FPIG
  • Camshaft Seals
  • Crankshaft Seal
  • Rear Main Seal
  • Reseal Oil Pan
  • Timing Belt
  • Hydraulic Belt Tensioner
  • No. 1 Pulley
  • No. 2 Pulley
  • Crankshaft Bolt - Torqued to 217 ft.lbs
  • L & R Engine Mounts
  • Swapped - Denso Coilpacks and Wireset
  • New Denso Sparkplugs
  • Swapped - PVC Valve
  • Swapped - TPS
  • Swapped Timing Cover
  • Upper Radiator Hose - PN 16571-62070
  • Lower Radiator Hose - PN 16572-62090
  • Hose, Oil Cooler - PN 15777-62020
  • Hose, Oil Cooler - PN 15778-62030
  • O-Ring, Oil Cooler - PN 90301-67004
  • Washer Seal, Oil Cooler - PN 90210-22001
  • Bolt w/ Washer, Oil Cooler - PN 90119-10825
  • Toyota Red Coolant - Pre-mixed - 2 Jugs
  • Denso Radiator - PN 221-0508
  • Brake Master Cylinder - PN 47201-3D350
  • Fuel Evap Canister - PN 77740-35392

@225,000 Miles
  • 4.10 3rd Member - PN 41110-35890


SIC MODS
Exterior
  • None :mmph:
  • Install OEM Skid Plates - Junkyard Find - $20.00
Interior
Suspension
  • Remove 2" Body Lift
  • Install Energy Suspension Body Mount Bushings
  • Install Toytech Eibach 3" Suspension Lift
  • SPC Upper Control Arms
  • Install Mstudt Front Sway Bar Links
Drivetrain
  • Extended Rear Differential Breather - Union: PN 90404-51319, Plug Breather: PN 90930-03136


PARTS ON DECK (Waiting to be intstalled)
ENGINE
  • NONE :D

Suspension
  • PCK -eimkeith- Quoted 250 to weld brackets on hunt for more competitive price
Exterior
  • Hub Caps - Need to be painted black, have to respray rims first


Parts left to replace
  • Old OEM MAF Sensor
  • Outter tie rods (Current are not OEM)
  • Rear LCA Bushings
  • Rear UCA Bushings
  • Panhard Bar bushings
  • Fender Flare Rubber Liners - Might paint flares black as well
  • GET AC :(


After i get to the bottom of that list, I may start doing some actual mods lol I may splurge and buy an ARP Bull bar for the front....

And how she looks now, the exact same lol except more reasonable tires and with a safe, and reliable suspension setup:
CStiWer.jpg


Helpful Links:
3rd Gen 4Runner Master Link List

3rd Gen FAQ, Tutorials, & Documentation Reference v2

Wheel Backspacing & Offset Defined

Return Of The Dead: A picture story of love, loss and renewal. (Replacing OEM fob) - Toyota 4Runner Forum - Largest 4Runner Forum

Rear axle differences between early and late 3rd gens?
 
Last edited:
Register to hide this ad
Remove the crappy lift. Get real coils and shocks. 265/75/16 is safest but you can push it to 285/75/16 if you really want to be the alpha male. 315's are not friendly to the front suspension. Tbh that thing looks like it is a deathtrap going down the road.
 
By looks of it, I see OME setup it quite popular. I think I may just open my wallet on it.

I figured the suspension was iffy...but meh I'll fix it.

I just ordered 315s lol so I guess I could get smaller tires instead then eventually lower it down. But if there no way to get 315s to work if I go lower with the right setup? Should I switch to 285s and then just try and lower it afterwards?

Or would that make things look odd?

I got an angle grinder lol
 
Last edited:
I would also like to keep the 315s of possible. I like the size of the tire. But i would like to remove as much lift as possible without having to do tubbing.

I would like to have at least 3 inch of lift. But obviously, I'd have to have a tire that can fit after I drop it. If there is no way to make a 315 work, then I guess the 285 is the widest I can go for a 3inch llift?

Edit: probably just going to call NTB today and tell them to order the 275s. I'll remove the body lift. But I'll keep the suspension lift on just to make it by for a few months. I'm only going 3-4 miles commutes on it for the next 1.5 years.

In November, my bday month, I'll go buy a proper 3inch suspension lift and new UCAs.

I guess the guess the question is, if I go to 275s, and I remove the body lift...will I still rub. It's probably about 1.5" if I eyeball it
 
Last edited:
Ah found a picture I took of this spacer. This is under drive side rear door, somewhere around there.

I am guessing now by looking at it. if i remove these spacers, I will rub on 275s....I guess that is probably more of a 2inch BL.

I wonder if I remove those spacers, if that will rub the 275's

edit: word vomit. But im going to go with 285/75r16. I will remove the body lift and see where I rub afterwards. Anything from where I am now is an improvement rubbing or not.
 

Attachments

  • IMG_20190803_102255_01.jpg
    IMG_20190803_102255_01.jpg
    125.8 KB · Views: 1,827
Last edited:
Well you weren't lying when you said it was a death trap lol

If I did enough searching on these body lifts, the picture I attached in the above post is scary because that gap shouldn't be there. The entire cab is basically held onto that bolt.

I pick the car back up from NTB Friday, they were able to slap the 285s on, and then I got a short voyage back home.

I want to remove the body lift and go back to stock...but that has it's own issues.

I want to remove the body lift the same time I install the OME complete assembly, and the SPC uppers, and will replace as many bushings and joints as I can.

Does anyone think it would be worth while to see if the PO possibly used the wrong length bolts between the 5 spots along the frame rail to see if I can close that bolt up with a smaller one?

I find it really odd that they weren't able to tighten that nut up some more....
 
Stock "99 highlander" springs, a 1" body lift, and folding over the pinch weld in the front fenderwells is all you need to accomodate 285's. Mine has been setup this way for years.
 
Stock "99 highlander" springs, a 1" body lift, and folding over the pinch weld in the front fenderwells is all you need to accomodate 285's. Mine has been setup this way for years.

Is there anything I can do spacer or rim wise I can do to avoid folding the pinch weld? I have slammed a couple of cars before and I've had to cut knotches out of the frame because the CV axle would hit the frame....I don't wanna mess with the frame unless it's last resort.


And just throwing this out there, I am going to be doing a 30k mile service. flushing all fluid's and changing spark plugs etc.


Fun fact for anyone replacing plugs always use ZINC anti sieze. Not graphite, or copper. Zinc. Just thought I would share that. First time I have worked on a motor with the 3 spark plug wires versus the common six. Pretty efficient I like it.

Better than the old ford/Mazda engines where the 4 cylinder engines ran off 8 spark plugs, 8 wires and 2 distributors lol
 
Is there anything I can do spacer or rim wise I can do to avoid folding the pinch weld? I have slammed a couple of cars before and I've had to cut knotches out of the frame because the CV axle would hit the frame....I don't wanna mess with the frame unless it's last resort.
It is a body pinch weld, no frame modifications...

If you bash it enough and re-mold the fender liner, you can't even tell you did anything there.

-Charlie
 
Screw the body lift and 315s. If you are looking for DD status then you will not achieve it with that stuff. Remove that body lift asap. I didn't even need to crawl under to see how sketch that looks. 265 all terrains. 285 if you really insist, but again you are looking for DD status. That thing has the stability of a bowling pin right now. Driven enough 4Runners like that to know how awful it really is to daily drive compared to stock.

Also, it it just me or does the rear wheel look way too far forward? 2WD control arms are shorter so I think that is the result when lifted. I would literally buy moog springs and shocks just to baseline it as a daily. There is so much sketch on this.
 
Last edited:
Screw the body lift and 315s. If you are looking for DD status then you will not achieve it with that stuff. Remove that body lift asap. I didn't even need to crawl under to see how sketch that looks. 265 all terrains. 285 if you really insist, but again you are looking for DD status. That thing has the stability of a bowling pin right now. Driven enough 4Runners like that to know how awful it really is to daily drive compared to stock.

Also, it it just me or does the rear wheel look way too far forward? 2WD control arms are shorter so I think that is the result when lifted. I would literally buy moog springs and shocks just to baseline it as a daily. There is so much sketch on this.

Yeah you are correct. But just be patient lol I am rebuilding a 302 engine. Today will be the last day before I fire it up!

But Yeah it's very lose this high up. I got it back home now with the 285/75R16s. It's going to stay in the stable for now. Going to swap alllll fluid's.

Then I'm going to get the suspension back in action 1 step at a time.

First thing is remove the spacers from ontop of the coils. But don't worry it will get back to a reliable status in time. It won't move much until I get this thing lower. But I am assuming I should not rub if I remove those spacers.

I would remove all the body lift and spacers at once if I could fit the 285s without rubbing but that's not the case from what I've researched. Maybe a few more weeks and I'll have a new kit on the way.

OME or toyotec. I'm definitely leaning toward a 3inch lift, and zero body lift.
 
It is a body pinch weld, no frame modifications...

If you bash it enough and re-mold the fender liner, you can't even tell you did anything there.

-Charlie

Fair point.... I'll probably end up going that direction just need more time to lay everything out.
 
You know what....I was thinking the same thing on the rear being to far forward....so.

By that, I would think this has a terrible suspension lift, plus coil spacers (which honestly seems like the worst item out of everything), then a body lift which is 2inches.

Sunday morning I'm going to actually be able to take a look at everything so I will report back.

Thanks again for advice. Even if it's just tell me to remove it all, I agree lol I just want to know what I'm taking off before hand.
 
I DD mine on 285's and a 3 inch, no body lift. Pinch weld massage and I have no rub under normal conditions. Read THIS and THIS. I think mine probably most closely fits the Bread and Butter build. I couldn't be happier with it. Enjoy.
 
Got some pictures to post later...good and bad. Mostly bad lol

But. Does anyone know the drive cycle to get the catalyst system and evaporator system ready? Those are the last two items before I can take it in for inspection.
 
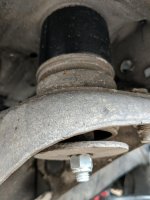
About to order the Toytech Boss System. What I dont know if i should do is go with the SPC Ultra Lights....PO did appear to grind the Stock UCA, and for lack of a better work that upper ball joint now is FUBAR'ed.

DD, no crazy trail work, just light offroad driving...part of me tells me to go for it. im 50/50.

advice anyone? or do i just knock out the stock BJ and replace it. those UCA's carry a pretty heft tag for tublar arms and a uniball joint lol must have some magical unicorn dust inside it or something

EDIT: I'm going to yolo this...going to add the SPC UCA's into the mix. going to do this right. Treat the truck right and it will take care of you.
 
Last edited:
I would not do uniball for a daily driver. SPC sells arms with a standard ball joint in them that are perfect for Mid travel set ups like you're doing. I would run those instead.
 
Last edited:

Members online

Forum statistics

Threads
278,310
Messages
3,554,080
Members
248,016
Latest member
Advally Service

Trending content

Back
Top