Puck 2015 TEP Build ARB Autohome Solar Kings

puckitpuck

New member
42388239_10156880129829171_51434264889131008_o.jpg

After owning this 4runner new since 2015 I finally spend this entire summer outfit with everything I wanted.

I did all of these mods in my garage and at Skid Row rental garage in San Jose.

I will just gonna throw in a lot of photo and some comments I have on these mods.

King shocks Suspension
ARB Front bumper
WARN winch
ARB Skid plate
ARB single drawer
ARB SAFARI snorkel
Dometic fridge & slider
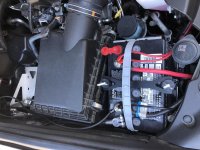
2nd battery, Shrockwork pump relocation kit. RAGO compressor mount.
REDARC battery charger
100W Solar panel
FrontRunner Slimline II roof rack
Autohome Columbus roof top tent size S
Rhinorack Batwing

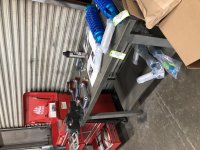
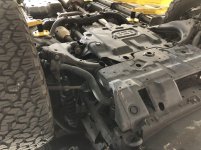
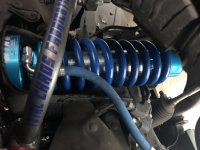
King shocks Suspension:LONG TRAVEL, 650LB
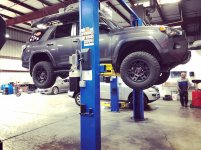
Took me about 6 hours to do. Lift help a lot, especially with the KDSS. KDSS is there to make it a lot harder to do the install. I am thinking to take the KDSS out at some point. The shocks came stock height and need to be adjust to 2.5" lift. I used spring compressor to make the adjustment. There is no way to adjust this shock when its installed because the reservoir hose is in the way when I tried to use the adjuster rod to make it turn. I had to make the height adjustment twice because I wasn't sure, but if I am to do it again I would put to max height 3" and let it settle. Another thing to consider is the additional weight from bumper and 2nd battery, they will weight down the spring.

The ride on this suspension is just perfect after some soft/hard adjustment. Off-road: soft, city street Soft/hard, highway hard. I feel the different in handling. The new shocks doesn't bounced everywhere like the stock.

Parts:
King Complete Kits (5GenK Stage 1A)
Toyota 4Runner w/KDSS Stage 1 Kit 2.5" Front Coil-Overs w/Res, w/Adjuster #25001-243A 2.5" Rear Shocks w/Res, w/Adjuster #25001-279A
Total Chaos Upper Control Arms (96504) 2005+ Toyota Tacoma / 03+ 4Runner / 07+ FJ Cruiser Bushing Inners
Rear spring: OME medium 3"
IMG_6501.jpg

IMG_6484.jpg

IMG_6477.jpg

IMG_6479.jpg

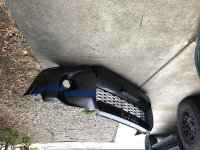
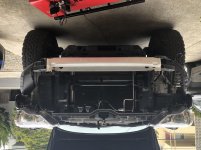
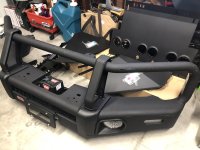
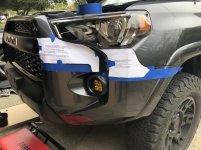
ARB Summit Bull Bar front bumper.
Got this bumper from 4wheels parts with no wait, next day pick up. It came in a little rough, some paint scrape but no dent, I am still waiting for the paint touch up for the integrit material to be available to fix it. Lot of nuts bolts and they all there in bags. Instruction is very detail. This bumper lower stone guard doesn't fit very well with stock skid plate, but fit with ARB. 2nd person is needed to help lift and align the bumper. WARN 8000lb WARN also went in. Did this mod in about 6 hours.
IMG_6959.jpg
IMG_6961.jpg
IMG_6962.jpg
IMG_6963.jpg
 

Attachments

  • IMG_6501.jpg
    IMG_6501.jpg
    124.2 KB · Views: 269
  • IMG_6484.jpg
    IMG_6484.jpg
    137.2 KB · Views: 254
  • IMG_6477.jpg
    IMG_6477.jpg
    137.4 KB · Views: 244
  • IMG_6479.jpg
    IMG_6479.jpg
    129.1 KB · Views: 242
  • IMG_6959.jpg
    IMG_6959.jpg
    127 KB · Views: 247
  • IMG_6961.jpg
    IMG_6961.jpg
    136.3 KB · Views: 258
  • IMG_6962.jpg
    IMG_6962.jpg
    132.3 KB · Views: 269
  • IMG_6963.jpg
    IMG_6963.jpg
    133.9 KB · Views: 248
Last edited:
Register to hide this ad
ARB Skidplate
This went in after the bumper. I’m glad I waited since this skidplate fit like a glove to ARB bumper. 2hrs install

27c619c159cb97ba5d97d22fe0d13eb8.jpg

6fb5d08422b9d10b8af5a2dd51abdb46.jpg


ARB safari snorkel
This mod is quite moderate easy, took me about 2 hours. It was the most satisfying moment cut into the 4Runner. I used lots of tape to mark the drilling and cutting.

470ad24faa72f11188089ed0ae81fc58.jpg

c88e2cf0480dbb6eb52ac531e5e3ffcc.jpg

3e0e2d4793003a33684742f9fabc8adb.jpg


Sent from my iPhone using Tapatalk
 
Last edited:
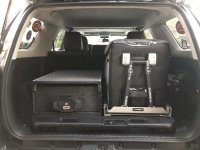
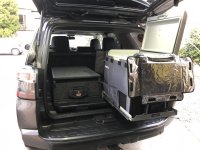
ARB Outback drawer & Dometic CFX65W

The ARB drawer and Dometic slider are secured onto the cargo slider using several big bolts and wide washers. Fridge slider and cargo tray slider pull put very far, it does bring out the fridge away from rear bumper line, very ease of using the fridge.

IMG_5906.jpg
IMG_5908.jpg

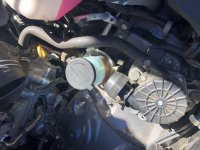
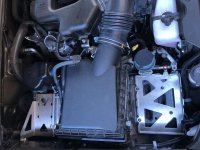
Relocate the washer fluid reservoir and pump to make room for 2nd battery.
Took me a while just looking at all the parts to do this mod. I tried to piece them together in my head before I pull apart what's already in the engine compartment. When I strarted, it went very quickly. Using a kit from Shockwork. The kit came with all the wiring and hose connectors with a very good instruction, big color A4 print.

IMG_8641.jpg
IMG_8646.jpg
 

Attachments

  • IMG_5906.jpg
    IMG_5906.jpg
    130.7 KB · Views: 257
  • IMG_5908.jpg
    IMG_5908.jpg
    132.5 KB · Views: 230
  • IMG_8646.jpg
    IMG_8646.jpg
    134.9 KB · Views: 212
  • IMG_8641.jpg
    IMG_8641.jpg
    131.9 KB · Views: 210
Last edited:
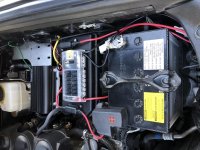
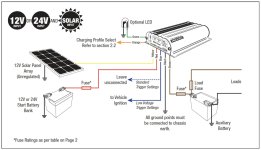
After I got all the surface area in the engine compartment prep and 2nd battery went in, I start to wire up the electrical.

REDARC controller is the center of this Solar panel & 2nd battery kit design. This charger will stage between Solar or car alternator to charge the 2nd battery. NO need to have 2 identical battery. I also picked the REDARC because all the wiring into the charger required only smaller wiring. I didn't want to run big size 1/0 wiring everywhere like other build I've seen. Smaller wiring is also cheap.
The BlueSea fuse tray panel is there for future expanding. I also found that running wiring between engine compartment and passenger cabin is a little hard, there aren't many location to pull the wire, and its super tight. SPOD or ARB LINX is something I am considering.
The two size 10 wires pulled along the door silt and to the back of the car. I got these cheap Amazon outlet set for cigarette charger, USBs, Voltmeter and local switch. I installed them in the little tray area.

44432432_10156946063664171_2942087563088756736_o.jpg

[/ATTACH]

44028277_10156932264944171_1225366822522454016_o.jpg


44089946_10156932264554171_3680224134387728384_o.jpg


44033075_10156932264274171_7408550403547070464_o.jpg


44067979_10156932264219171_7409018645176647680_o.jpg


44094716_10156932264379171_741462838786129920_o.jpg
 

Attachments

  • Screen Shot 2018-10-22 at 12.53.28 PM.jpg
    Screen Shot 2018-10-22 at 12.53.28 PM.jpg
    119.6 KB · Views: 274
  • IMG_9015.jpg
    IMG_9015.jpg
    137 KB · Views: 184
  • IMG_9016.jpg
    IMG_9016.jpg
    137.3 KB · Views: 176

Members online

No members online now.

Forum statistics

Threads
278,317
Messages
3,554,129
Members
248,016
Latest member
Advally Service

Trending content

Back
Top