Rahll's 98 SR5 4wd Build

Rahll

Member
Hello everyone!

I've read a thousand threads working on my rigs and thought I would make a build thread for my most recent one. I'm not breaking any new ground with my build but I'm excited for it.

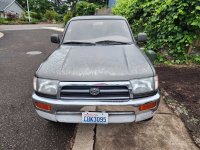
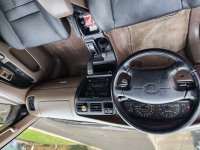
I picked my 98 SR5 4wd up early this last summer for 4600$ at 250k. It had brake wobble, stereo wasn't working, and paint issues. However it also had a good running motor, a clean frame, and just functioned as a highway driver.

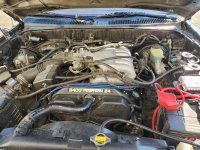
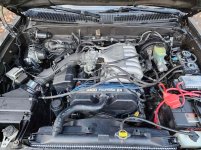
I've come what feels like a long way in the few months I've owned it, but here's where it started:
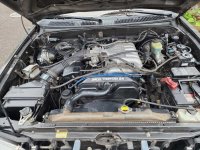
 

Attachments

  • Brand new engine bay.jpg
    Brand new engine bay.jpg
    112.2 KB · Views: 1,897
  • Brand new front.jpg
    Brand new front.jpg
    128.4 KB · Views: 1,912
  • Brand new interior.jpg
    Brand new interior.jpg
    75.9 KB · Views: 1,998
Register to hide this ad
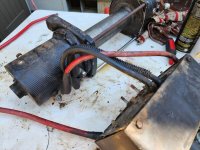
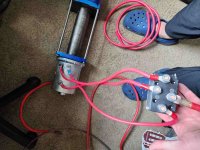
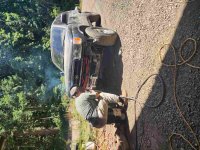
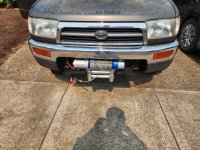
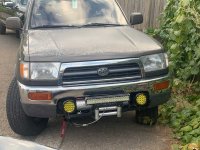
My first major project was to rebuild and mount an old Warn winch that come off of my grandpa's 1st gen 4runner. I had to use it for real for the first time last weekend after getting a little ambitious. I also torched the plastic bumper to return it to black pretty quickly after I got it. Yes I'm wearing crocs, and yes that wire in the picture where I'm holding the solenoid wasn't 2 ga, it is now. I made my own solenoid circuit for the winch using a 500a control box and a rocker switch for about 40$ instead of buying a new warn one for 4x the price.
 

Attachments

  • Winch Pre-Rebuild.jpg
    Winch Pre-Rebuild.jpg
    109.6 KB · Views: 1,862
  • Homemade winch controller feat crocs.jpg
    Homemade winch controller feat crocs.jpg
    116.4 KB · Views: 1,849
  • Winch Mount Welding.jpg
    Winch Mount Welding.jpg
    107.6 KB · Views: 1,880
  • Winch Mount with winch only.jpg
    Winch Mount with winch only.jpg
    102.3 KB · Views: 1,869
  • Winch mount with lights.jpg
    Winch mount with lights.jpg
    93.9 KB · Views: 1,849
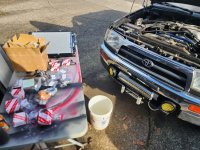
As far as maintenance goes, I have replaced:
- LBJS (OEM)
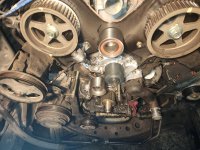
- Timing belt (Gates, alignment ticks ended up being necessary)
- Water pump (aisin)
- Radiator (OEM)
- Coolant
- Brake rotors pads and calipers

I have everything to do valve cover gaskets, so that is next on the agenda.
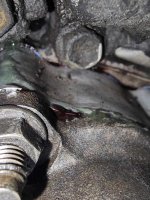
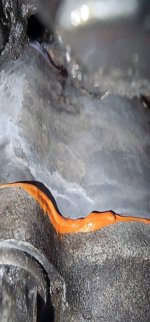
Had a little POS moment with the timing belt job leaking after it was done. Was just a poorly seated thermostat ring. Added some RTV for extra peace of mind. Hasn't leaked since.
 

Attachments

  • Timing belt pre-view.jpg
    Timing belt pre-view.jpg
    114.6 KB · Views: 1,858
  • Water Pump Idler view.jpg
    Water Pump Idler view.jpg
    117.1 KB · Views: 1,843
  • Leaking Thermostat.jpg
    Leaking Thermostat.jpg
    115.8 KB · Views: 1,813
  • Fixed thermostat.jpg
    Fixed thermostat.jpg
    121.5 KB · Views: 1,827
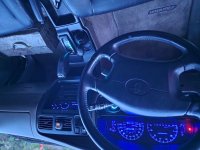
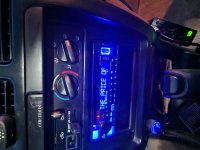
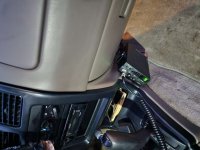
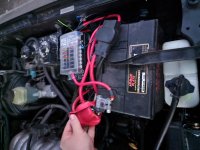
As far as gadgets go, I have a cobra CB with a firestik antenna, new kenwood stereo, replaced dash lights, fog lights and a light bar all wired up to a fuseblock. I've also done a heavy duty terminal conversion for my main harness leads.
 

Attachments

  • Blue interior Lights.jpg
    Blue interior Lights.jpg
    107.5 KB · Views: 1,847
  • Kenwood stereo.jpg
    Kenwood stereo.jpg
    122.8 KB · Views: 1,864
  • CB better.jpg
    CB better.jpg
    109.9 KB · Views: 1,809
  • Terminals and fuse.jpg
    Terminals and fuse.jpg
    114.3 KB · Views: 1,786
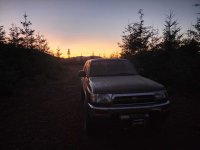
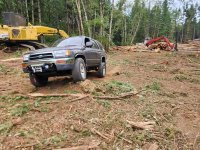
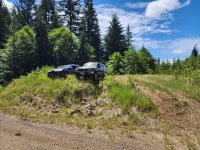
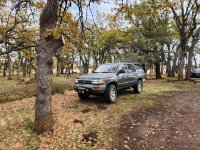
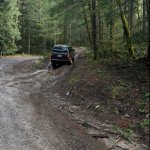
A couple pictures from adventures this summer
 

Attachments

  • Frog lake.jpg
    Frog lake.jpg
    92 KB · Views: 1,789
  • 4runner sunset tillamook.jpg
    4runner sunset tillamook.jpg
    114 KB · Views: 1,817
  • Stump resized.jpg
    Stump resized.jpg
    114.8 KB · Views: 1,797
  • Till small obs.jpg
    Till small obs.jpg
    129.5 KB · Views: 1,798
Next item on the agenda is installing my lift kit. I have everything ready to go. Here's my part list:
- Bilstein 5100 front and rear
- 1st gen Tundra TRD pro front coils
- OME 891 rear
- Moog 2nd gen rear sway links
- SS extended front and rear brake lines

Still need a panhard correction kit, diff drop parts, bump stops yada yada but this should be fine for the next couple months
My goal is to run 33's comfortably, not opposed to running a small body lift too to make it happen.
 
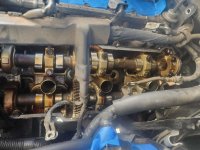
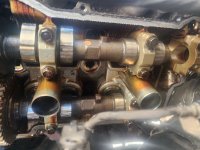
Finished up valve cover gaskets, sparkplugs, and PCV valve
Replaced normal stuff along the way
Pleasantly surprised with how things looked under the covers!
 

Attachments

  • valvetrain 2.jpg
    valvetrain 2.jpg
    117.9 KB · Views: 1,661
  • Valvetrain.jpg
    Valvetrain.jpg
    118 KB · Views: 1,653
Leaky valve cover gaskets done + some mud holes = pressure wash time
 

Attachments

  • 20231117_102752.jpg
    20231117_102752.jpg
    123.6 KB · Views: 1,642
  • 20231120_161359.jpg
    20231120_161359.jpg
    124.7 KB · Views: 1,622
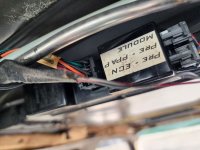
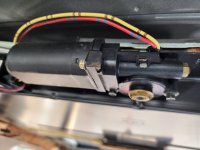
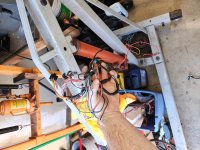
Decided to swap in a junkyard headliner over the break. Discovered that I have an aftermarket (I think) sunroof hidden under the old headliner, which also wasn't factory. Finished ripping out the old security system and taped up all the splice points. Anyone have any experience with aftermarket sunroof wiring? I'm assuming the two leads off the motor are just power and ground, so I'm not sure how to integrate that into factory sunroof controls, or if it even can. Open to wiring suggestions.
 

Attachments

  • Aftermarket relay mod.jpg
    Aftermarket relay mod.jpg
    94.5 KB · Views: 1,577
  • Sunroof Motor.jpg
    Sunroof Motor.jpg
    123.3 KB · Views: 1,639
  • Security cancer.jpg
    Security cancer.jpg
    123.5 KB · Views: 1,609
Decided to swap in a junkyard headliner over the break. Discovered that I have an aftermarket (I think) sunroof hidden under the old headliner, which also wasn't factory. Finished ripping out the old security system and taped up all the splice points. Anyone have any experience with aftermarket sunroof wiring? I'm assuming the two leads off the motor are just power and ground, so I'm not sure how to integrate that into factory sunroof controls, or if it even can. Open to wiring suggestions.

I would think that it takes a positive and negative from the battery and runs to that relay box, but I'm not sure what the controls would be. In theory it would be pretty easy to incorporate it into factory sunroof controls, given that you find the wiring diagram for it.

I looked up the text on the box you found and came up with this:
Cherry Sunroof SCU - C-49X8-4769-EXXX - Used-Sunroofs.com

Seems like your sunroof is a "Signature Auto Products / Inalfa / ASI / Model 750/840/845/925"

That box you found seems to be the "SCU" (sunroof control unit? not sure what it means), but that's a "CHERRY C-49X8-4769-EXXX"

If you're going to use OEM controls, go for the 99+ overhead upgrade while you're at it, imo it looks MUCH better than the 96-98s do. Otherwise, I've got a set of 98 sunroof controls sitting around I could sell to you.
 
Last edited:
I would think that it takes a positive and negative from the battery and runs to that relay box, but I'm not sure what the controls would be. In theory it would be pretty easy to incorporate it into factory sunroof controls, given that you find the wiring diagram for it.

I looked up the text on the box you found and came up with this:
Cherry Sunroof SCU - C-49X8-4769-EXXX - Used-Sunroofs.com

Seems like your sunroof is a "Signature Auto Products / Inalfa / ASI / Model 750/840/845/925"

That box you found seems to be the "SCU" (sunroof control unit? not sure what it means), but that's a "CHERRY C-49X8-4769-EXXX"

If you're going to use OEM controls, go for the 99+ overhead upgrade while you're at it, imo it looks MUCH better than the 96-98s do. Otherwise, I've got a set of 98 sunroof controls sitting around I could sell to you.

Did some more digging, came up with this manual which (I believe) would help you: https://www.signature-autoproducts.us/downloads/asiservicemanual.pdf

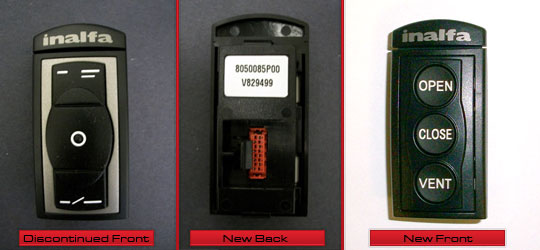
Besides that, the control switch could look something like this: (There are many different kinds of switches it seems, so this one might not be right, but they all seem to connect with the same ribbon cable.)

switch_pic.jpg


The controls connect with a ribbon cable, which could go into back to the SCU (I believe), which could allow you to splice and tap the OEM sunroof controls. I can't find anything about wiring the aftermarket switch though. If you can find the ribbon cable or the control switch then it'd be as easy as just poking around with a multimeter to figure out the wiring.
 
Wow, good work! Thanks for the hookup. That service pdf seems like it should be great starting place
 
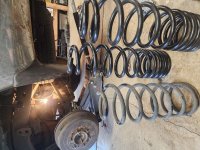
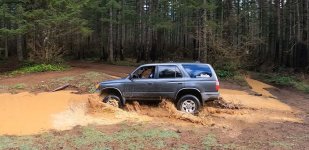
Lift is installed, along with brake lines, and extended sway links. Celebrated by taking this truck's maiden voyage up wheeling.

Casualties include muddy toolboxes, couple hours of carpet cleaning, and a
mud filled headlight

Final stance with Tundra TRD pro front coils (third perch), OME 891 rear springs, and bilstein 5100s all around was about a 2 inch increase from before in the front, and 5 inch increase in the rear (which I'm OK with due to previous squat). To final measurement of 37' ground to fender in the front, and 39 ground to fender in the rear, on 31 inch tires. The ride quality has actually increased significantly despite usual reports that lift suspension usually creates a stiffer ride.

I've got wheels and tires coming this weekend, and I'll show off the final stance then.

Overall I couldn't be happier with how this turned out for how much I spent on lift parts (300$) in combination from parts from previous builds lying around.
 

Attachments

  • Rear lift springs.jpg
    Rear lift springs.jpg
    107.2 KB · Views: 1,492
  • WheelTuck.jpg
    WheelTuck.jpg
    84.7 KB · Views: 1,472
  • 4runner-Splash.jpg
    4runner-Splash.jpg
    128.4 KB · Views: 1,450
final measurement of 37' ground to fender in the front, and 39 ground to fender in the rear, on 31 inch tires.
Try measuring from the hub center to fender lip - this takes tire size out of the equation... (tire flex, etc. make knowing lift height hard even if you know the tire size)

-Charlie
 
Try measuring from the hub center to fender lip - this takes tire size out of the equation... (tire flex, etc. make knowing lift height hard even if you know the tire size)

-Charlie

The measurements were taken with the same wheels on before and after so should be pretty accurate.. I helped hold the tape ;)
 
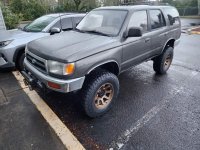
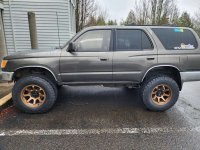
Wheels and tires are on. Stoked with how they look. Gonna need some work to keep them from rubbing but made it work since we had snow the last couple days.
 

Attachments

  • 3quarter.jpg
    3quarter.jpg
    117.4 KB · Views: 1,046
  • Side.jpg
    Side.jpg
    122 KB · Views: 1,056
The measurements were taken with the same wheels on before and after so should be pretty accurate.. I helped hold the tape ;)

Center of hub to fender measurement is helpful for other people because it takes tires out of the equation. Even if 2 people are running the exact same tire size but different brands the actual tire size will be different. My 265/70R17 bridgestone tires will measure differently than 265/70R17 bfg all terrains.
 
Center of hub to fender measurement is helpful for other people because it takes tires out of the equation. Even if 2 people are running the exact same tire size but different brands the actual tire size will be different. My 265/70R17 bridgestone tires will measure differently than 265/70R17 bfg all terrains.

You are adding scenarios that are not ours. We used the same exact wheel.. not a similar one. So the measurements are still accurate. You are arguing a point we all know.
 

Members online

Forum statistics

Threads
278,312
Messages
3,554,083
Members
248,016
Latest member
Advally Service

Trending content

Back
Top