Rear hatch rust

hankd

Member
hi all,

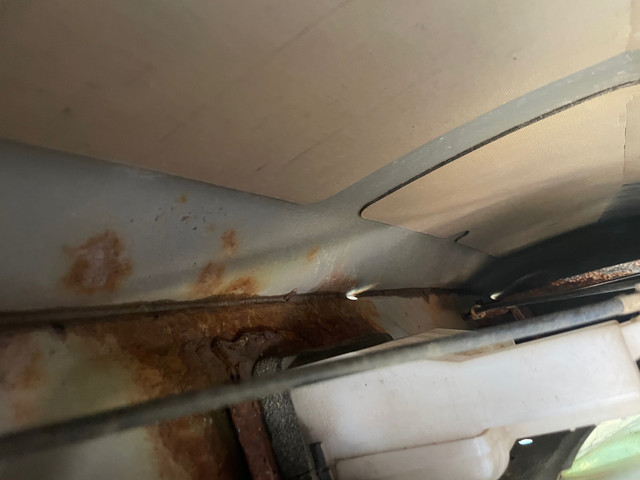
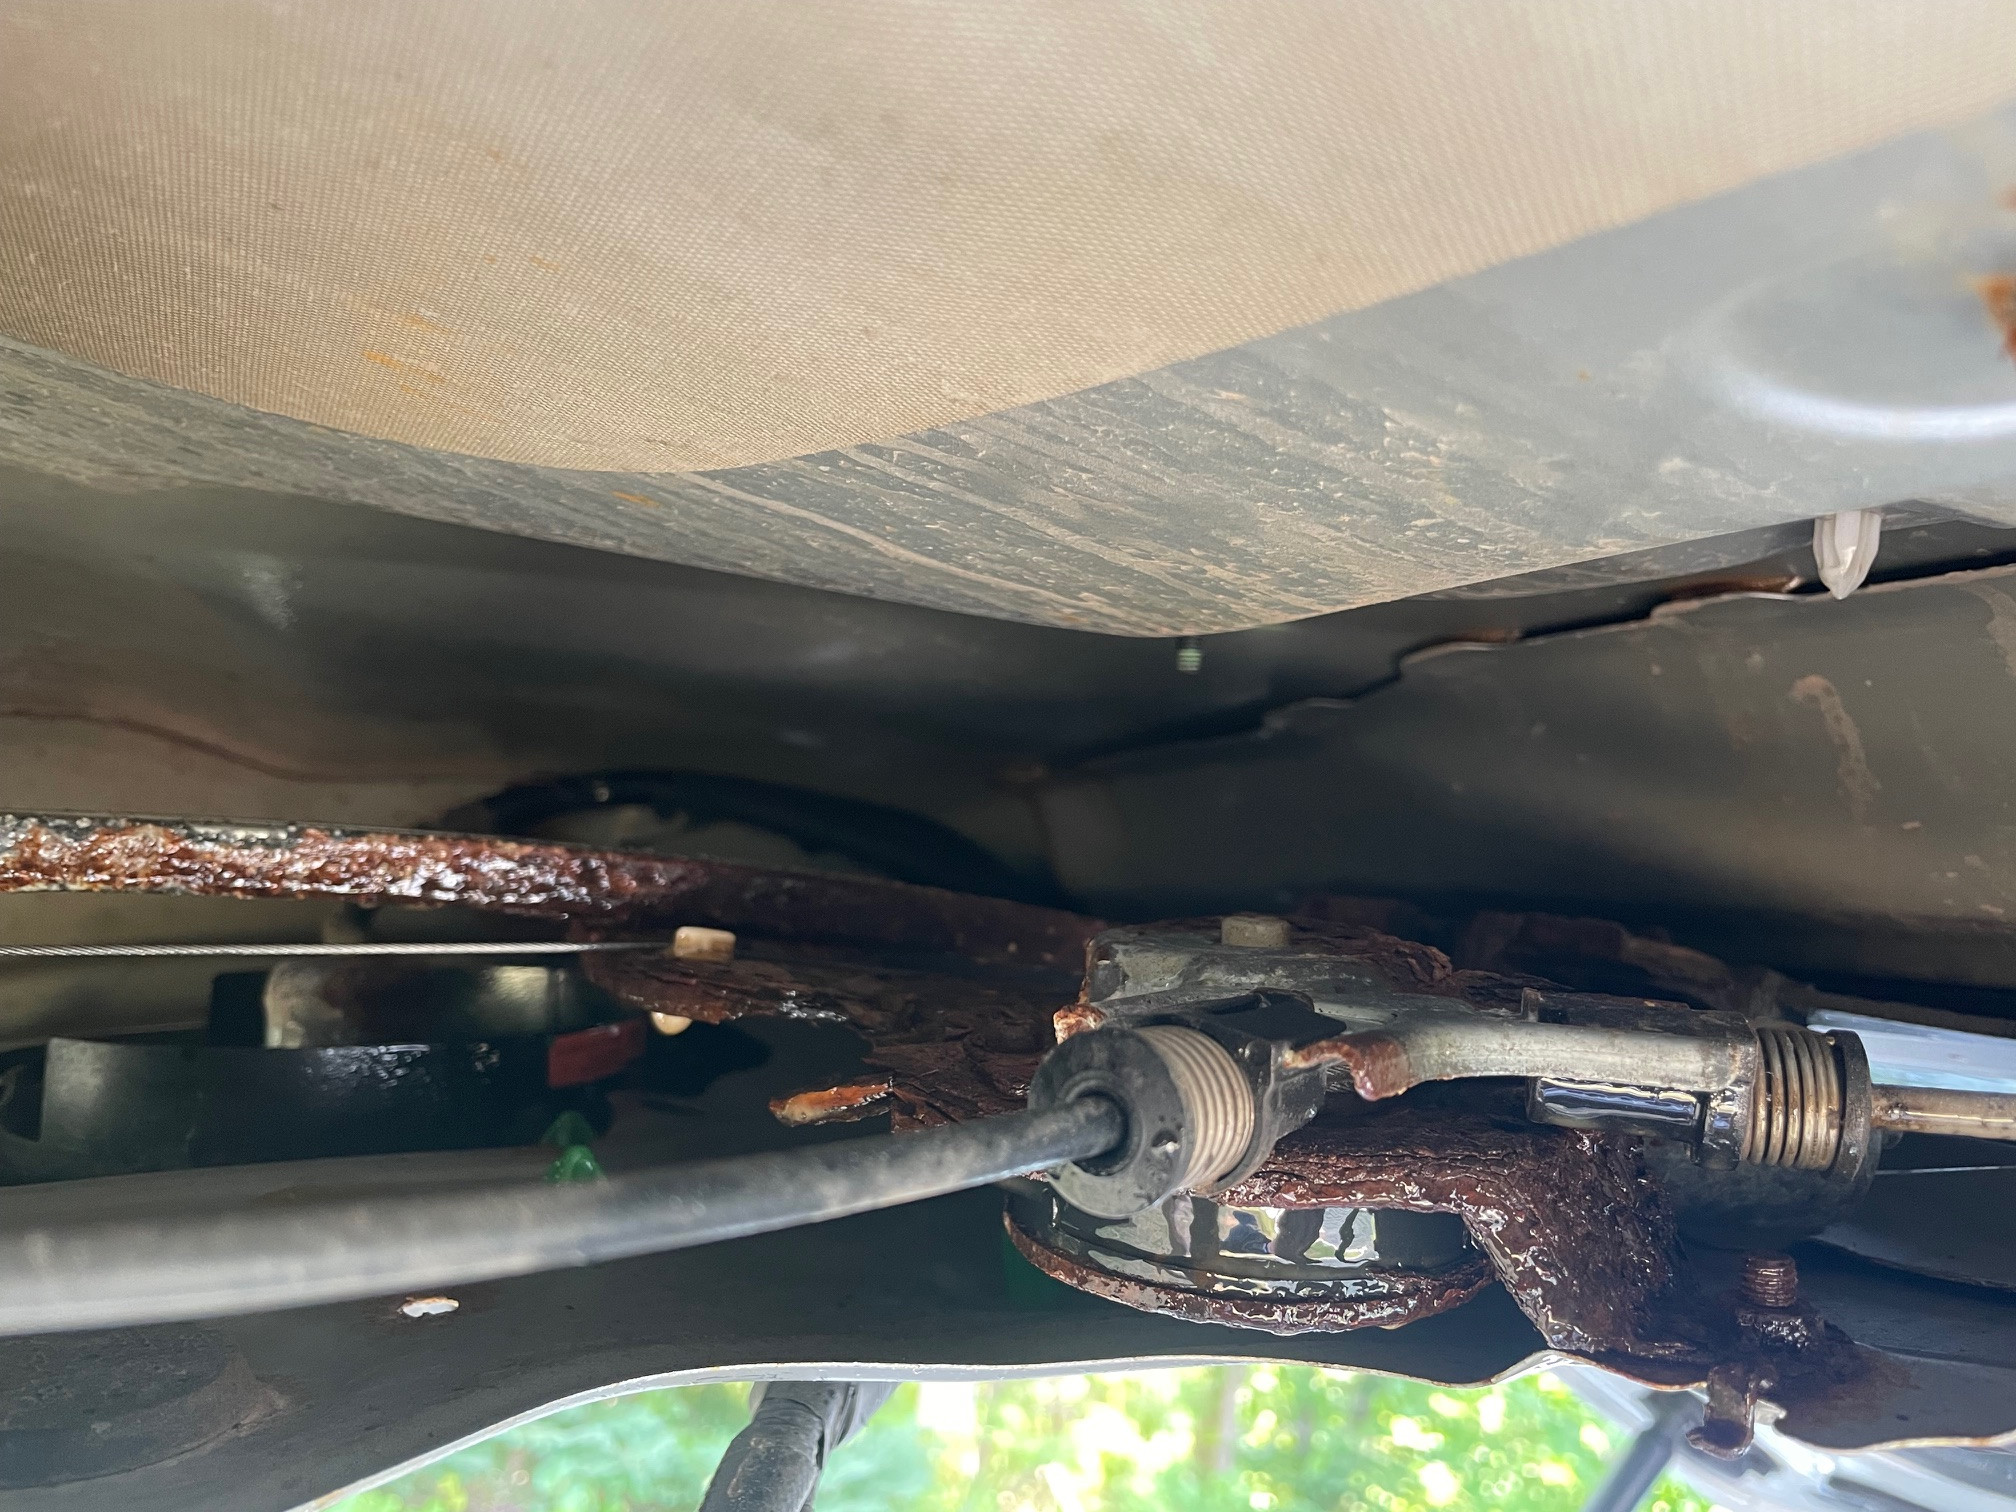
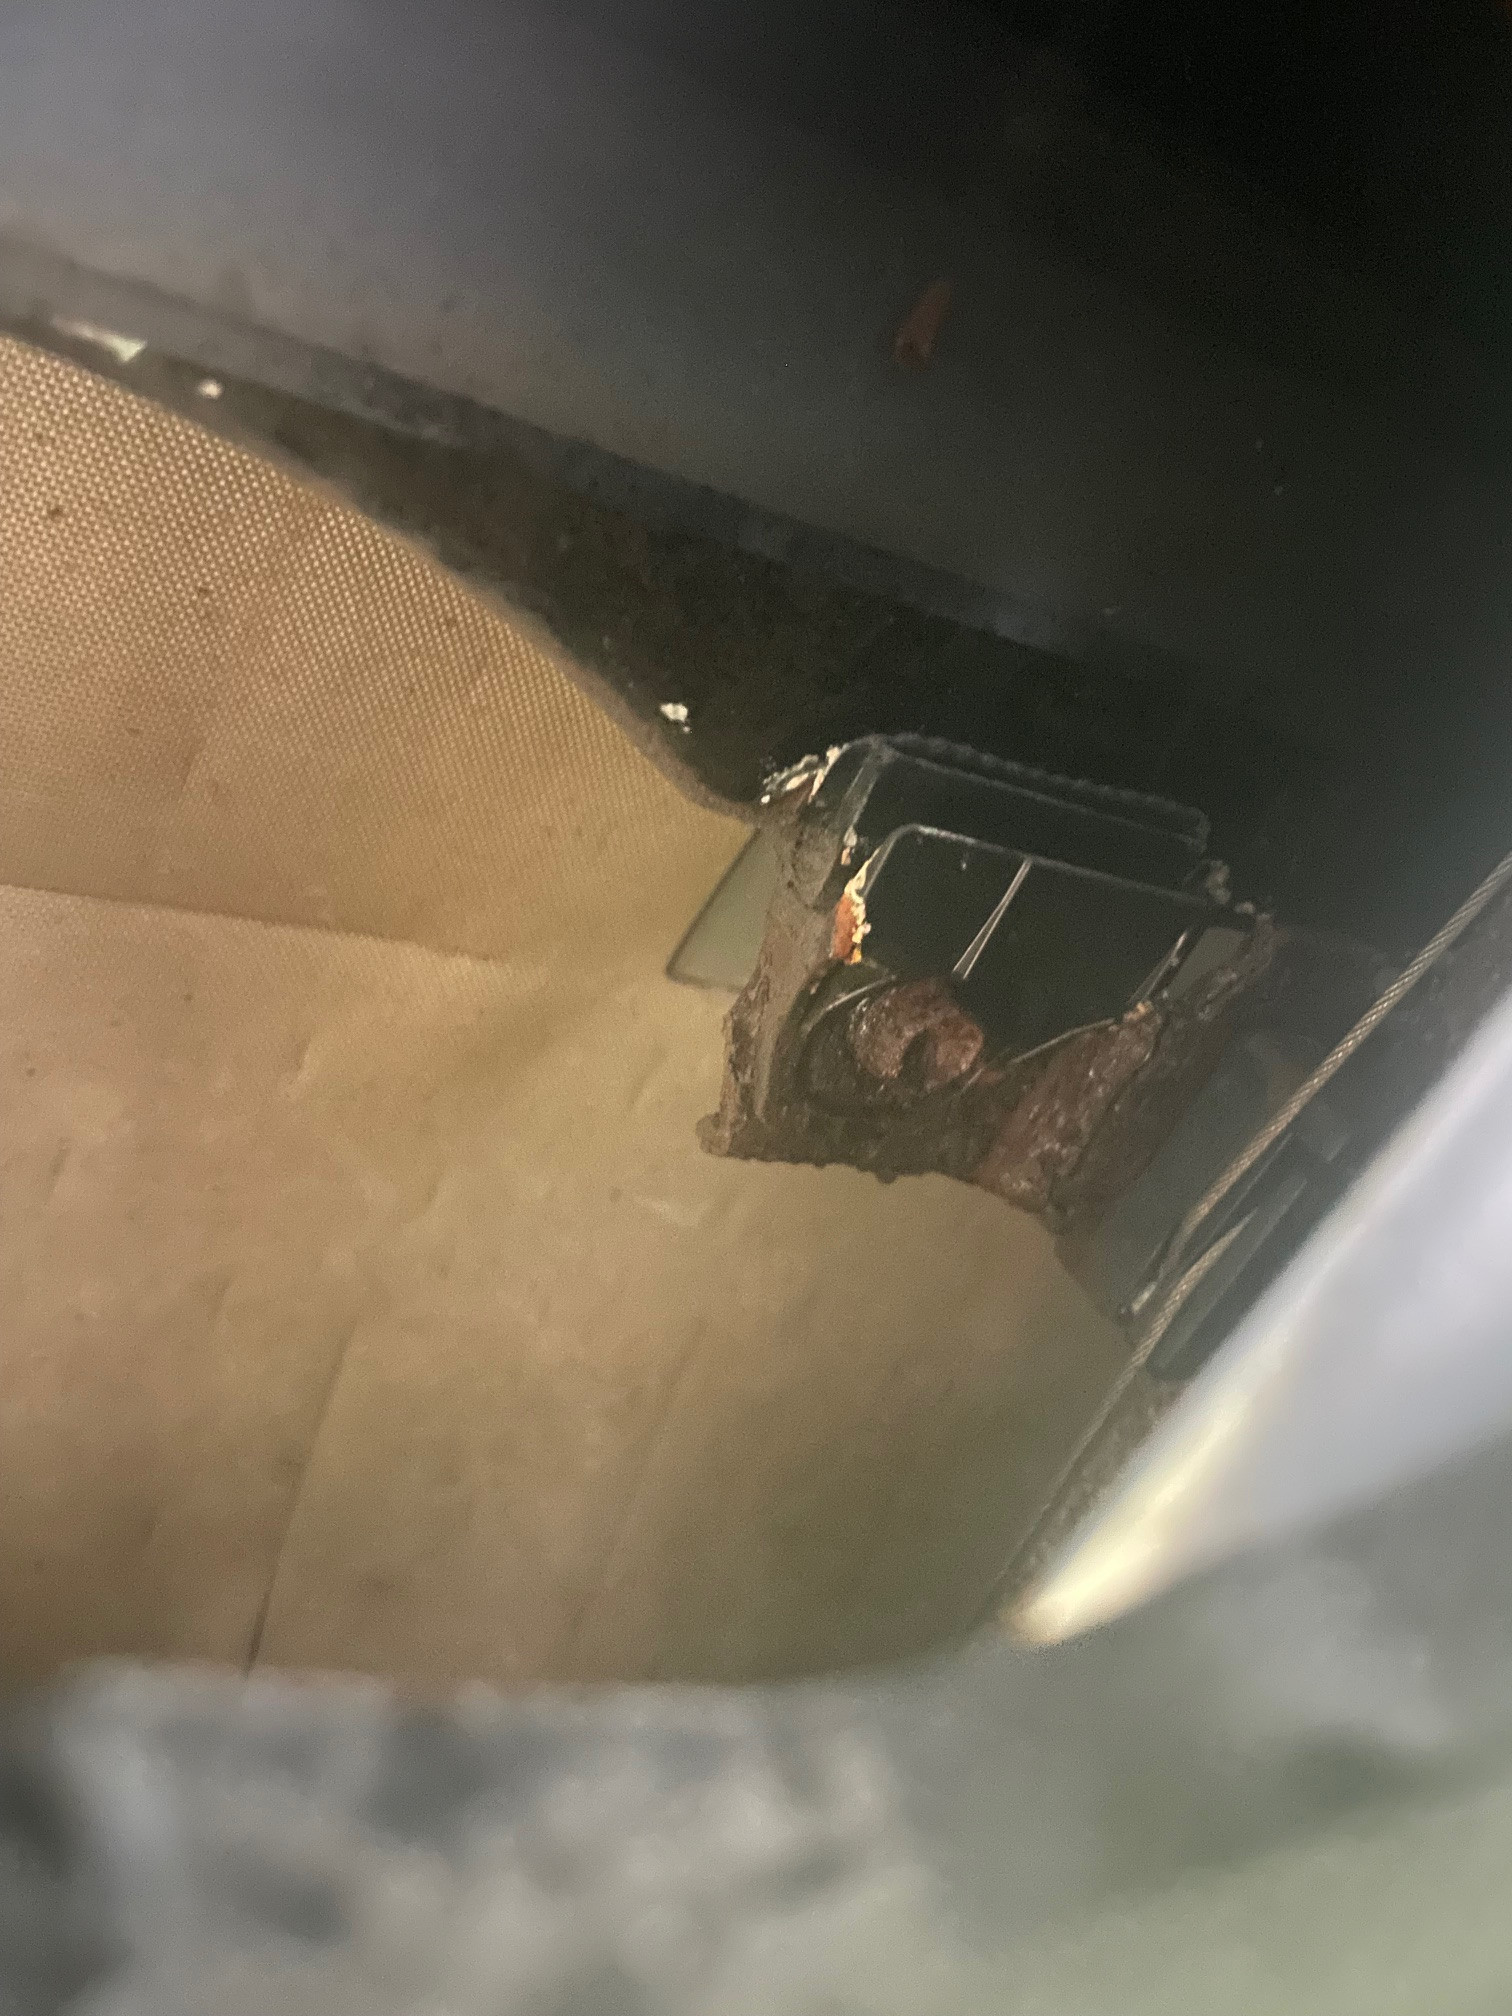
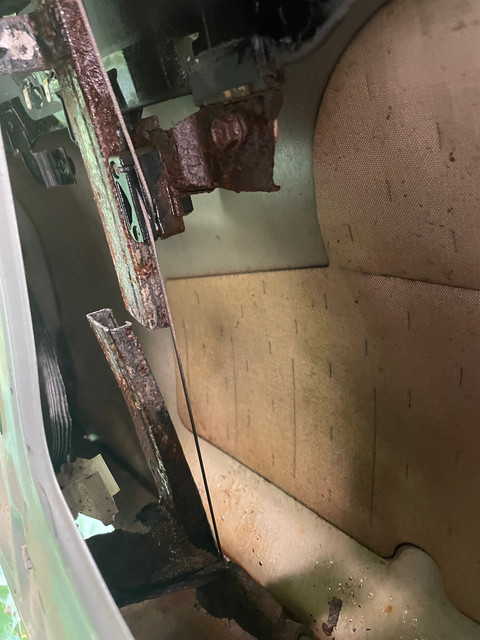
i bought a 2018 limited a few months back and i noticed some rattling in the rear hatch. turns out it was loose rust from a few rear window wire mounts. i took things apart a bit and noticed a lot of rust around the latch area especially on the inside of the hatch.

my plan for now was to remove the latch assembly, clean/brush up the area, apply some sort of rust protectant and monitor it. i don't want to get into removing the window mounts right now if i can avoid it, maybe for phase 2. the rust looks a little more isolated in that area although they're nasty for sure.

any ideas on how to address this? i wasn't sure if i should use por15 or fluid film or something else. hopefully not too late to get it under control.

many thanks


Rear door latch assembly exterior
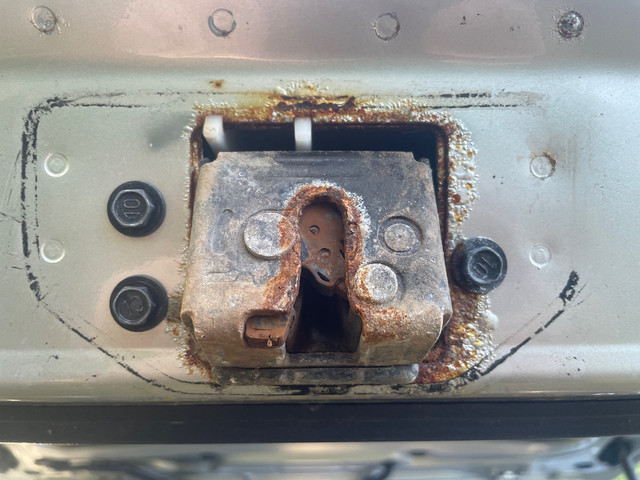
IMG-6488.jpg


Rear door latch assembly interior
IMG-6485.jpg


Wire mount for rear window:
IMG-6483.jpg
 
Register to hide this ad
that is a surprising amount of rust on a 2018... what spartacus said is the proper way to do things here. but if you don't want to put that much effort into it I would just hit it with fluid film and call it a day. I use that stuff on the pinch welds of my door, inside the hatch and inside the doors... that stuff really does not evaporate or run off. if you put a nice coat on there it will stop the rust is contacts (it should penetrate the rust and protect). what I've done in the past is take out the hand grips in the hatch and spray in there...

edit: this is why I still think the roll down window is overrated... likely the cause of that rust is water in the tailgate through the window seal
 
Last edited:
Grind the rust off or use rust neutralizer or reformer then paint it with marine paint.

Rust neutralize/reformer is phosphoric acid, sometimes called navel jelly; it dissolves the rust and you can wash it away with water. That still leaves the remaining metal unprotected.

What I use is a zinc rich primer. That used to be called cold galvanizing compound. Then top with the marine paint. I have never had metal re-rust after using zinc rich primer.
 
That latch is done and should be replaced. It will stick and then burn up the actuator which will then need replacing. I have replaced both on our 2014 and it’s easy to do. They say to prevent this you need to replace the seal at the bottom of the window.
 
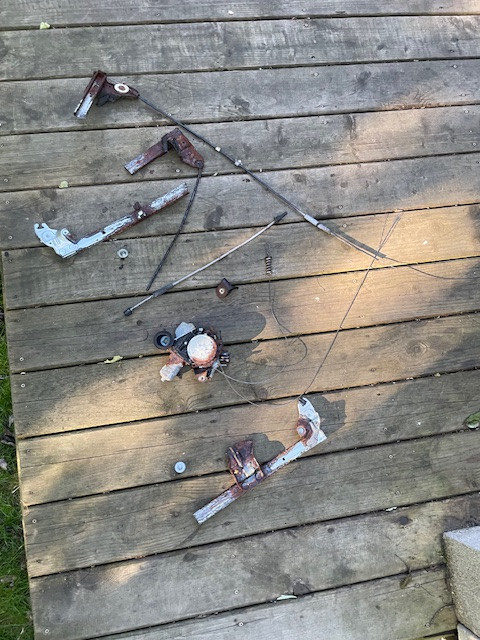
i got things apart a bit more today. the rust inside the hatch itself isn't that bad. but the rear window regulator is shot. mounts are rusted badly, as well as the area where the window motor mounts to the regulator.

i removed the latch actuator for the door, but it didn't look too bad and i was able to scrape most of the rust away. the original pic of this area looked a little worse than it is where it mounts up.

for now i just cleaned up what i could and sprayed por15 on everything.

i ordered a new regulator, install doesn't look too bad. hoping i can just clean up the motor and reuse it, as it seems to work fine.

you can see big holes in the regulator where chunks of rust are falling out of it.

 
What is the best way to prevent this from happening? Just change out the window seal on a regular (every couple of years?) basis?
 
What is the best way to prevent this from happening? Just change out the window seal on a regular (every couple of years?) basis?

IMO it's a flaw of the 4runner. the rear hatch gets water in there from the window. since it can roll down it's not water tight. that rear window causes more issues than benefits. unpopular opinion but you can't really drive with that window open or you get exhaust fumes sucked back into the cab. so really you can use it to load/unload stuff. people use it to load long items but just use cross bars. people let their dogs hang out back there with their heads out the window but to me that's just unsafe.

take the hand holds off once every year or so and spray some fluid film around in there to help prevent moisture from causing a problem.
 
Be careful changing out the regulator

i got things apart a bit more today. the rust inside the hatch itself isn't that bad. but the rear window regulator is shot. mounts are rusted badly, as well as the area where the window motor mounts to the regulator.

i removed the latch actuator for the door, but it didn't look too bad and i was able to scrape most of the rust away. the original pic of this area looked a little worse than it is where it mounts up.

for now i just cleaned up what i could and sprayed por15 on everything.

i ordered a new regulator, install doesn't look too bad. hoping i can just clean up the motor and reuse it, as it seems to work fine.

you can see big holes in the regulator where chunks of rust are falling out of it.


I just changed out my regulator. It was fairly simple with one complication. The 4 window attachment points that bolt to the regulator were rusted out. One of the brackets attached to the window (it appears that they are attached with an adhesive to the glass) broke. I called the dealer to order a new one. The dealer said that part is not sold separately. I would have to buy an entire new window! Terrible design. The part is a small piece of plastic attached to the window with an embedded nut to accept a 10mm bolt. You shouldn't have to replace an entire window because of a vulnerable plastic part.
 
thanks for the heads up on the brackets, hopefully i can work these out gently, who knows though. i picked up some generic replacement clips on amazon in case something goes south.

got pics of a few of the clips. probably need to get new fasteners too


well the regulator arrived yesterday, so i'm going to try and remove the current regulator. the bolts holding those clips are totally rusted. i have both sides of the bolt soaking in pb blaster and i'm able to get a 10mm socket to fit snug over them, but nothing's budging. so i'm going to leave it overnight. have a feeling i might need to drill them out, which i've never done before. i got some replacement clips if i break them off the window too. i'll post if i make any headway. going to read up a bit.

i'm going to need new 10mm bolts, can i get similar replacements at the local hardware store?
 
might be easier to try and just cut off the clips and put new ones on. i'll see what happens tomorrow when i have some light
 
well the regulator arrived yesterday, so i'm going to try and remove the current regulator. the bolts holding those clips are totally rusted. i have both sides of the bolt soaking in pb blaster and i'm able to get a 10mm socket to fit snug over them, but nothing's budging. so i'm going to leave it overnight. have a feeling i might need to drill them out, which i've never done before. i got some replacement clips if i break them off the window too. i'll post if i make any headway. going to read up a bit.

i'm going to need new 10mm bolts, can i get similar replacements at the local hardware store?

those bolts are probably rusted in place. drilling them out is going to be hard I think because of the location and the fact I think it's going to be hard to apply pressure and not break anything else. everything looks rusted there. what about heat?
 
i let things sit overnight but it wasn't any better. i broke one of the bolts off and rounded 2 of them. you're right i can't easily apply a lot of pressure. plus the regulator is about ready to disintegrate in a few places.

there is plastic parts all over so i don't know if i can use heat, so that's what has me thinking of cutting it out. unless i can just melt the clips right off the glass while it's all in place. never had to use heat for anything before.

i picked up some m6 bolts that didn't have a flange at home depot.

thanks for the info, i know this is a pretty basic job
 
ok made some headway. the bolt that attaches the defrost mechanism came loose on its own, so at least that went right.

from there, i had an idea to cut the track so that i could roll down the window and it would slide out of the tracks. this worked pretty well.

i'm now trying to figure out how to remove the rear window but i don't know if the spoiler needs to come off. the window still has the regulator clips attached to it, but it should be narrow enough to clear. i figure if i'm able to remove the window without damaging it, should be smooth sailing from there.

anyway, cutting the rails took about 20 minutes with a mini hacksaw. will post some more pics later


regulator remnants:

 
Last edited:
i think i have it mostly done now, had to fight every minute of it though. the window wasn't too bad to get out, but i wouldn't come out with the part of the regulator still attached so i had to hacksaw it off.

when the window came out, all of the plastic clips were intact, but on the other hand they all had bolts stuck in them. so i used the candle method to melt the clips off. i ended up discovering that if they caught on fire they would just completely burn up and come right off the glass, which was exactly what i wanted. so just mark where the center is so you know where to put the new clips.

i used these clips on amazon i found mentioned in another thread. Amazon.ca

the clips worked ok. i had some issues but better than a new window for sure. the m6 home depot bolts wouldn't thread into all of them so i put one of the bolts in backwards and one of them i had to use a different size bolt and nut. they may have come in pairs for opposite sides or something, i don't know.

the regulator itself was pretty easy, everything lined up with no problem. i followed a 4th gen tutorial and the mechanism is almost identical. i opted to put the motor on the regulator before installing it all into the vehicle, only thing i had to do there was unbolt the rear door lock actuator assembly so i could fit the regulator in.

i used jb weld fast setting to affix the new clips, and i put the window back in the truck as soon as i felt i could get away with it. this way i was able to nudge the clips around if they weren't perfectly placed. i'll let everything set overnight and check it in the morning.

there was some rust along the run channel routing and in a few other areas. this morning i gently rinsed the area and inside of the door with a garden hose. wherever there was no electrical. i let it dry all day then hit everything with fluid film.

will post an update tomorrow with pics, imgbb seems to be down
 
Last edited:

Members online

Forum statistics

Threads
278,308
Messages
3,554,057
Members
248,016
Latest member
Advally Service

Trending content

Back
Top