Rear Shock and Spring replacement with OME906/Rancho RS9000XL

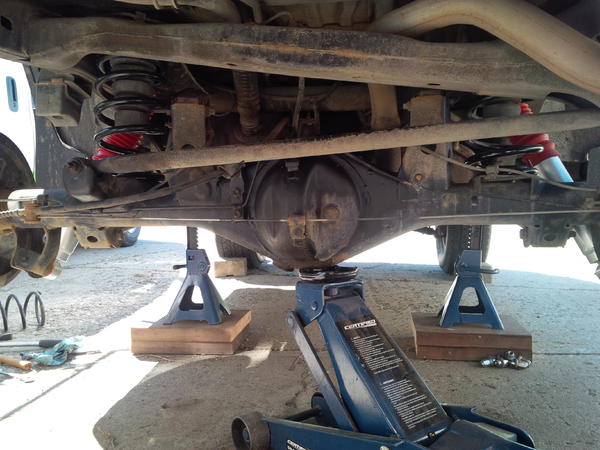
Well, it was long past time to replace my sagging rear springs. I found some lightly used 906's on Craigslist and decided on Rancho adjustable shocks. I do some weekend backroads, some highway driving and in the Summer, tow my sportboat, hence the adjustables. I was really tired of huge sag, when hitched up, and it was really uncomfortable bordering on unsafe. Here it is before the replacement:
poleclimber63-albums-my+new+toy-picture11062-a.jpg
 
Register to hide this ad
Step 1

- lots of blocks around the front wheels!
- jack stands under the rear frame
- drop the spare

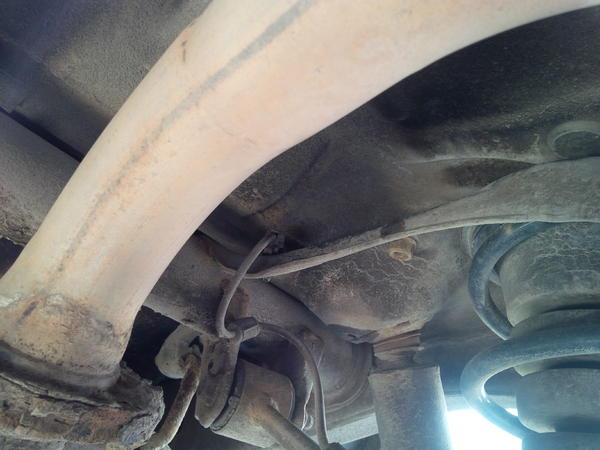
All the threads I've read, all agree getting the top nut off is a pain! There's reall not much room!
Starting off:
poleclimber63-albums-rear+springs-shocks+replacement-picture39841-painful-part-removing-top-nut.jpg
 
Last edited:
Step 2

- place a jack under the diff
- jack the diff up to take the pressure off pan hard bar
- remove the bolts on the diff to detach the brake line and e-brake cable from the diff
- remove the pan hard bolt

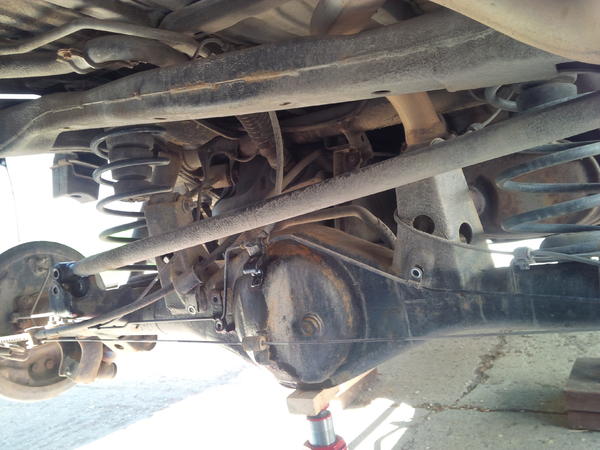
Pic:
poleclimber63-albums-rear+springs-shocks+replacement-picture39842-shocks-gone.jpg
 
Step 3

- remove the shock top nut

At this point, I struggled some with the top nuts. I bought Visegrip chain strap which made the difference. I was able to work the outer cover (strapped) and the top nut.. This skinny guy must be stronger than he thought! Both shock shafts snapped at the top nut!!

- lower the diff and push down on each drum and pop out the springs.
- place the bump stops in the new springs and place the new springs in place, ensuring the coil end is sitting in the diff seat tight.

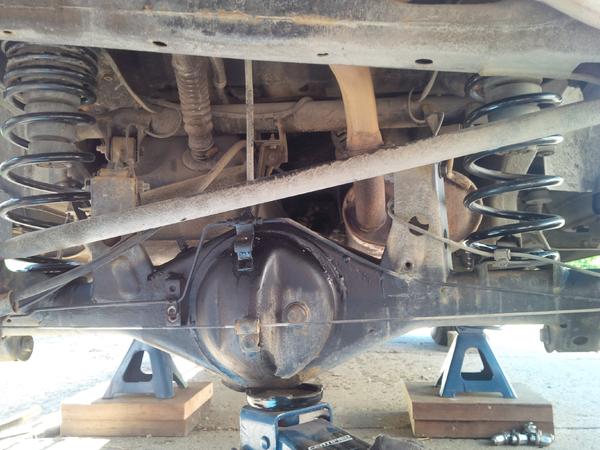
At this point, I wire brushed/ wire wheeled the rust off and applied Rustoleum.

poleclimber63-albums-rear+springs-shocks+replacement-picture39843-springs-rustoleum-touchup.jpg
 
Step 4

- wire brushed the shock seats and lower mounts and cleaned them.
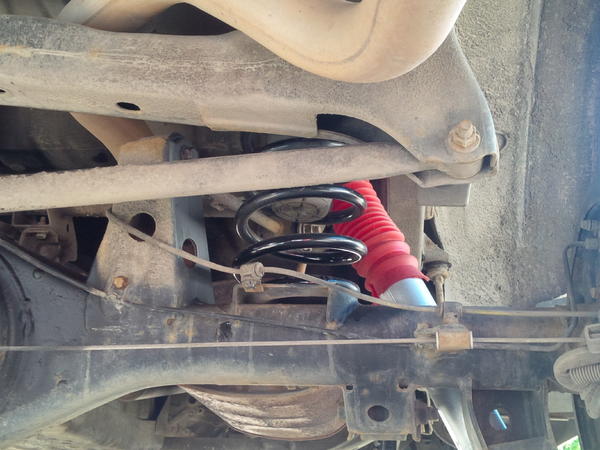
- jack up the diff and install the shocks. I lubed the bushings with silicone grease. Ensure you install the bushings/bushing washers in the right orientation.
- Torque the shock mounts-- lower 50 ft lbs, upper nut 14 ft lbs

poleclimber63-albums-rear+springs-shocks+replacement-picture39844-shocks.jpg


- jack up the diff to roughly align the pan hard bar and mount. I had to jack up the opposite drum to get the bolt installed. Torque to 50 ft lbs

poleclimber63-albums-rear+springs-shocks+replacement-picture39845-almost-done.jpg
 
Step 5

- replace the bolts mounting the brake lines and e-brake cable. Torque to 14 ft lbs.
- strap the boots and re-mount the tires!

poleclimber63-albums-rear+springs-shocks+replacement-picture39846-done.jpg
 
There's really no need to disconnect the brake line, ebrake cable or the panhard bar.

As far as I could see, I didn't want to risk damaging the brake line while man-handling the diff. With the diff dropped down, that centre brake line is quite tight!Try wire brushing the top of the diff with all the brake mounts attached. Removing the pan hard bar bolt provided lots of movement to remove and install the springs. It took 2 mins to remove those 4 bolts. It was worth it to me!
 
Raise one side of the diff with your floor jack and the opposite side drops, allowing even more room to install the spring than trying to get the entire rear axle to drop. This keeps the center section from dropping so far.

This is in reference to installing springs, not painting the rear axle.
 
What a difference!!

My Wife and youngest son took an un-serviced forestry service road up into the mountains yesterday afternoon to test the new rear suspension. This road is a favourite, to reach some really great fishing lakes... Anyways, we tried some washboard, potholes, mud and rocks. It really drove like an entirely different vehicle!! Before, the kids complained about feeling every bump, and on washboard, the rear would swing out. While towing, it was really uncomfortable... NOW however, yesterday, I got no complaints, even on the rough road. On washboard, it felt really grounded, even in turns. Even with the 2" lift, the vehicle feels and handles with more responsiveness and precision. Now for the front...
 
I had wondered why no one was using the Rancho 9000 adjustables. Do you have a remote adjuster or just the dial on the shocks?
 
Rancho

I had wondered why no one was using the Rancho 9000 adjustables. Do you have a remote adjuster or just the dial on the shocks?

I did a fair bit of reading. Considering the money for the remote system, and comments/problems with it, I decided not to go that route. Its true the Rancho's are fairly expensive $10-20 more than the Bilsteins, but I wanted to see how the adjustables will work for the wide variety of uses I experience. I have acquaintances that have these shocks on their Ford's and Dodge's and they love them. It's not a big deal to adjust them before I drive ie. towing the boat, going off-road etc. I have read cautionary experiences of the knobs freezing(rust) in high corrosion areas but I don't live in such an area. I will keep an eye on this, and next Spring I may remove the knob adjusters and follow the corrosion prevention steps I found on YouTube. I first heard of these shocks on 4Runners when I came across a thread from EconHonda, who installed them a few years ago. He matched the OME881/906's with the RS9000xl's. After 6 months he concluded the match on the front wasn't great but the rear match worked--- after 2 yrs he was satisfied with them, again, on the rear. He swapped the front struts with Taco 5100's. I will be installing RS9000XL's on the front with stock springs---- I'll review this setup, after I get them on. So far, I love the rear setup(OME906/RS9000XL).
 
Last edited:
update

I neglected to update my front suspension upgrade. Back in early July I replaced the front springs and shocks. I was able to find some OME/ARB 2880 springs on Kijiji. I also bought Rancho 9000xl's to match the rears. To replace these shocks, you really need some SERIOUS spring compressors. I had a pretty good set but due to the huge pressure, I ended up taking my new springs and shocks (and tops) to a suspension shop and they put them together.

Installing them was easy and relatively quick. I supported the front of the truck on jack stands, disconnected the stabs from the lower control arms, TRE's and removed the lower shock bolts. Removing the old combos required removing the top bolts, placing a pry bar against the lower arm and pulling the combo out. Putting the new combos back in was the reverse of removal except, aligning the lower shock mount was a bit of a fiddle but with a large screw driver, I got it done. I had to ensure the shop aligned the strut on the spring correctly, due to the orientation of the shock adjustment knob, but apart from that, it was pretty straight forward. One last note: I had replaced the stabilizer end links and OTRE's a few months before I did this job so removing them wasn't much of a problem. If you haven't, a sledge will make short work of the OTRE's. You may want to replace the end links, if you do, spend a little more money and get the ones that can be removed using a couple of wrenches--- the ones requiring an allen key are useless---- I removed mine using a cutoff grinder.

poleclimber63-albums-spring++shock+replacement-picture40862-fronts.jpg


after:

poleclimber63-albums-spring++shock+replacement-picture40859-after-all-new-springs-shocks.jpg
 
in conclusion...

I tried different settings on the Rancho's but was a little disappointed with the range. They were a little more expensive than the Bilsteins, therefore, if I was to do this again, I'd probably go that route. After Sept, I never bothered to change the settings, due, again to the limited adjustment range--- they're set to 5. There is however, nothing wrong with them. This is really just a financial observation.
 
Hey there,

I've been looking at the adjustable Ranchos for my rear, but I've only ever bought Bilsteins 5100 which are ride height adjustable for my 3" lift (bought it that way).

Do you know how you could tell which Rancho shock you needed for 3" lift in the rear?

On the 4WP website, with my search criteria, I get part number RS999187 but it says nothing about ride height.

Any help would be appreciated!
 

Members online

Forum statistics

Threads
278,316
Messages
3,554,120
Members
248,016
Latest member
Advally Service

Trending content

Back
Top