Rickashay's Projector Retrofit Thread

I have "finished" tinkering with the headlights so I went out and got some final output comparison shots to wrap this thread up. I'm hoping this thread educates others in the comparison of light output between a properly aimed set of HID projectors vs. a drop-in HID setup. Have a look:

Before (Low beams):
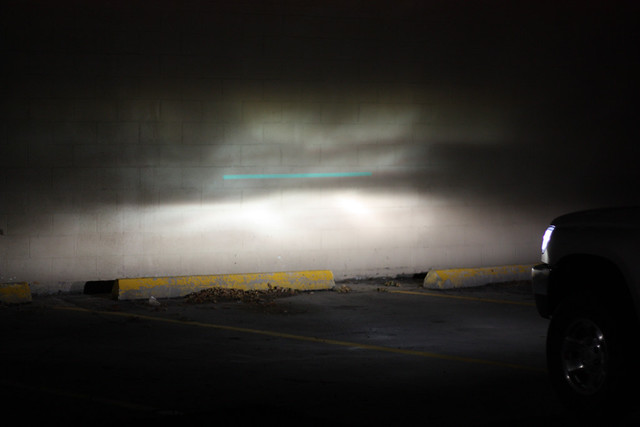
20111123-IMG_0701 by Headlight Hookup, on Flickr

After (Low beams):
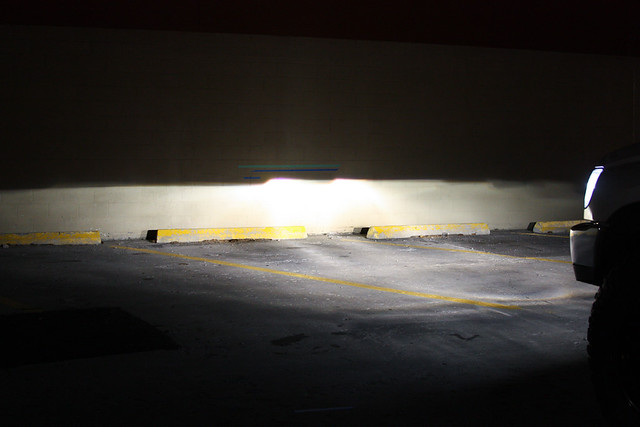
20120109-IMG_0960 by Headlight Hookup, on Flickr

Before (High beam):
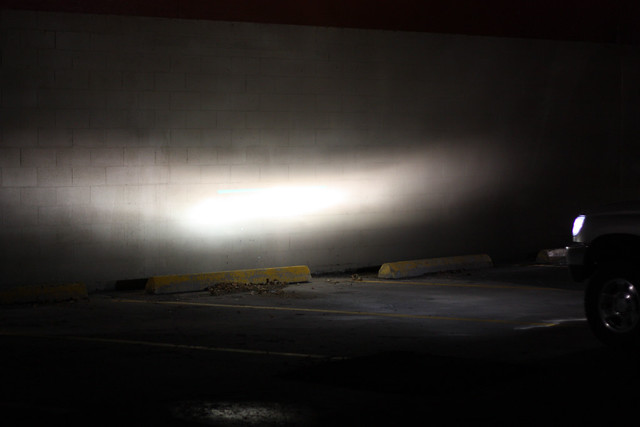
20111123-IMG_0704 by Headlight Hookup, on Flickr

After (High beam):
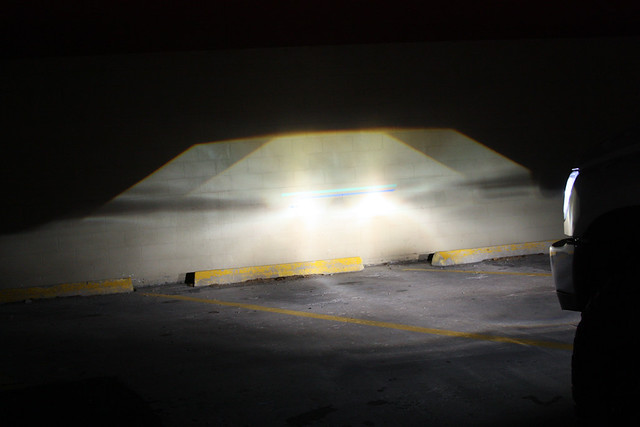
20120109-IMG_0979 by Headlight Hookup, on Flickr

mmmmm cutoff shots.... you can see why it's "cool" to tinker with the colour on the cutoff step, just looks BA!
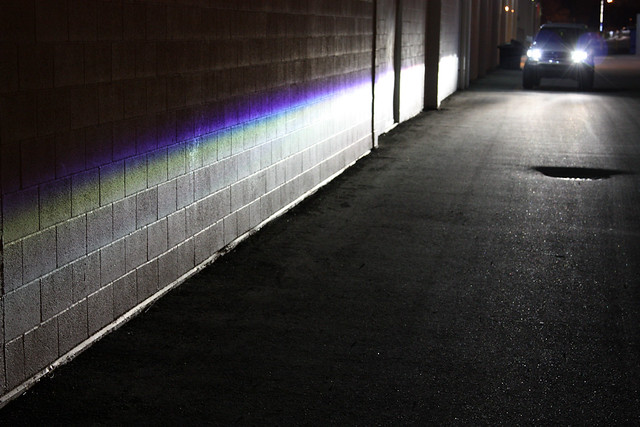
20120109-IMG_0966 by Headlight Hookup, on Flickr
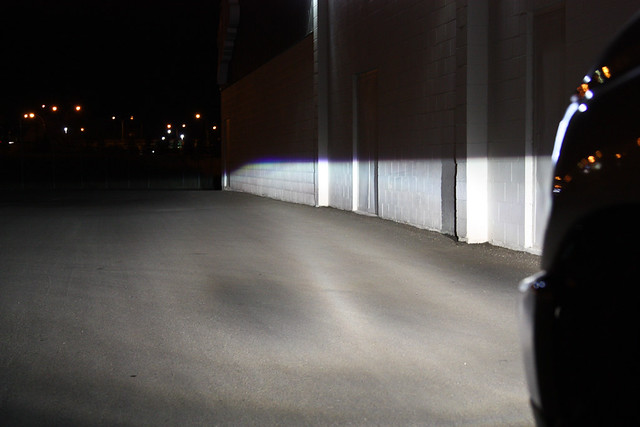

20120109-IMG_0964 by Headlight Hookup, on Flickr

It's sad that my addiction (my Toyota) has led to another addiction for which I am now always going to tinker with, headlights. It's funny that my headlights are starting to have their own "list" of mods and "to-dos"....this is bad news.
 
Wow indeed...I'm convinced, you do take this headlight business really seriously.
praise2.gif
 
How far away are you from the wall and whats the height of that piece of tape? I for got to take measurements for mine prior to doing my lift. Retrofit is currently in the works.

Thanks!
 
Wow indeed...I'm convinced, you do take this headlight business really seriously.
praise2.gif

lol thanks man!

How much would you charge to do mine? lol

I'm only a PM away.... haha

How far away are you from the wall and whats the height of that piece of tape? I for got to take measurements for mine prior to doing my lift. Retrofit is currently in the works.

Thanks!

You should not need this info at all white doing the retrofit. The distance and height of tape is used AFTERyour retrofit is complete and you are aiming your headlights properly to avoid blinding oncoming traffic. Pull your headlight out of your truck and set up a jig on a table or chair. Shoot the halogen beam pattern on a wall about 10-15 feet away and match the beam pattern with tape on the wall. The retrofit your lights and match the projectors output to that of the tape on the wall. Do this for both sides. And that's the real quick and dirty version of how to do a retrofit haha....
 
Those are tits. I really like what you've done here, and it looks like you covered all the angles.
+1, been watching this all along and just went back to re-read the whole thread again. I yanked a spare set of housings out of a junk runner over the weekend in prep for getting a retrofit project going.

Well done sir; my favorite retrofit to date!!!
 
Man if you weren't in Canada I would ship you might lights to get them adjusted lol. Your cut off is way better than mine.
 
^Thanks guys! Trust me, it took a few sets to get decently fast/good at doing retrofits. If your O.C.D. about the cutoff they do take some tweaking to get them aligned perfectly. Results are well worth it though! These thing are SO good on the highway.....

edit: Oh, and Mellow, just post up any questions you may have in this thread when you start your retrofit and I'll see if I can help!
 
WOW! Those look superb!! well done! very well done!

Now ill admit, i havent even started looking at lights, the cost of them, or a projector retrofit, but sometime in the future i would really love to try this.

With that being said, if you dont mind me asking, how much was the total of this project??
 
Make sure to add WeatherTech guards (or the like) to protect those beauties.

I had the ones you made for me installed for a couple weeks and couple already notice pitting on the brand new lenses. Plus, you saw the damage which mine sustained before I bought new ones - it would be a shame to have a big rock smash the glass right outta those.

Very nice cut off - which is your favourite bulb so far?
 
WOW! Those look superb!! well done! very well done!

Now ill admit, i havent even started looking at lights, the cost of them, or a projector retrofit, but sometime in the future i would really love to try this.

With that being said, if you dont mind me asking, how much was the total of this project??

I'm in these lights for around $375 in parts. But thats without the cost of labor to perform the retrofit or the cost of the headlights.

Make sure to add WeatherTech guards (or the like) to protect those beauties.

I had the ones you made for me installed for a couple weeks and couple already notice pitting on the brand new lenses. Plus, you saw the damage which mine sustained before I bought new ones - it would be a shame to have a big rock smash the glass right outta those.


Very nice cut off - which is your favourite bulb so far?

I'm liking my Philips bulbs. They are pretty much cream of the crop but I wish they came in 5000K temp. A little bluer might be nice? No complaints at all though from the Philips 85122+ bulbs.
 
Man this is so sweet... But being a noob, I have a bunch of questions.

1) Is it better, same or worse off to use aftermarket housing, ie TYC or Depo. I would hate to mess up my original headlights. Also... I would like a fresh clean outer lens.

2) It didnt seem like you had to dremel or cut a hole in your housing. Is that correct?

3) Is it possible to hook up the halos to the parking light so that they are only on when in Park and the light switch is off?

4) What did you use to seal the housing back together?


I really like your pick on the lighting, but I feel the PnP kit from TRS is a lot easier for a first timmer like myself (as well as least expensive)?

Thanks for your time and advice!
 
Man this is so sweet... But being a noob, I have a bunch of questions.

1) Is it better, same or worse off to use aftermarket housing, ie TYC or Depo. I would hate to mess up my original headlights. Also... I would like a fresh clean outer lens.

2) It didnt seem like you had to dremel or cut a hole in your housing. Is that correct?

3) Is it possible to hook up the halos to the parking light so that they are only on when in Park and the light switch is off?

4) What did you use to seal the housing back together?


I really like your pick on the lighting, but I feel the PnP kit from TRS is a lot easier for a first timmer like myself (as well as least expensive)?

Thanks for your time and advice!

1) It is better to use the OEM Kioto (sp?) housings if possible. It's not a complete deal break but they are better made and generally, have less play in the mounting mechanisms. The "play" (if any) on a non-OEM housing will cause your horizontal alignment of the projectors to be off. Buy some DEPO's and pull the brand new DEPO lenses off. Then retrofit your Kioto headlights and put the new DEPO lenses on the Kioto housings upon completion.

2) Yes, I did Dremel out the back of the housings. If at all, or how much, will depend on the projectors you choose. Which PnP kit from TRS are you looking at? I like the Morimoto Mini H1 v4.1 for an "easy" projector. If you contact TRS they can probably create a PnP kit with whatever projectors you choose.

3) Yes, That is how mine are wired. The only negative to this is that when you turn on the headlights (the projectors) the Halos stay on with them ad they are kind of washed out by the projectors light output. Just means the Halos will "wear" out faster.

4) For the lens: Rubber butyl (they sell it on the TRS page and it's the same stuff they use to seal your windshield to your car, or you can get it at NAPA)
For the housing (in the rear) I use clear silicone II. I have NEVER had a fogging issue using these items.

GL!

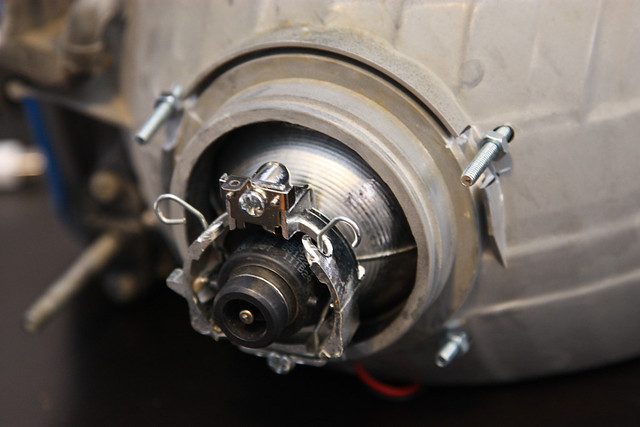
Edit: You can see in the pic below, where I cut the housing. I trimmed all the excess off the headlights that was inside the diameter of the circle ring on the back of the housings. Where the projector pokes through, it was trimmed all around. Also, I filled that gap between the back of the projector and the circle shape on the back of the housing, with Silicone II. (I completely filled that space with silicone, as I wanted to make sure it was 100% sealed)


20111214-IMG_0815 by Headlight Hookup, on Flickr
 
Last edited:
So basically, I can pick up some junkyard headlights, also buy depo headlights and replace the lenses?

I don't mind dremeling to make it smooth... but cutting out a larger circle... i dont think i have the technique or steady hands to do that.
 
So basically, I can pick up some junkyard headlights, also buy depo headlights and replace the lenses?

I don't mind dremeling to make it smooth... but cutting out a larger circle... i dont think i have the technique or steady hands to do that.

Sure, grab some from the junkyard but you DO NEED some 99+ clear glass lenses to go with the retrofit. The 96-98 headlight lenses will not work. Also you dont want lenses with chips and scratches as that will diminish light output.

Cutting is easy, just go slow and even use the Dremel sanding bit so you can do it little by little if you want. Look at the pic above, there is a large circle ridge already on the housing and you pretty much just cut along the inside of that edge. Also remember it doesnt need to be perfect as the projector will be covering up the hole from the front and you will never see it. Although cutting it cleanly, will make it easier to seal up afterwards.
 
Sorry, another question. If the halos do wear out... if you have to replace it you have to basically take everything apart again?

If that is so, maybe I can jerry rig a switch to turn the halos on and off?
 
update

Instead of starting a new thread, I thought I would just keep posting some of my other retrofits as I complete them.

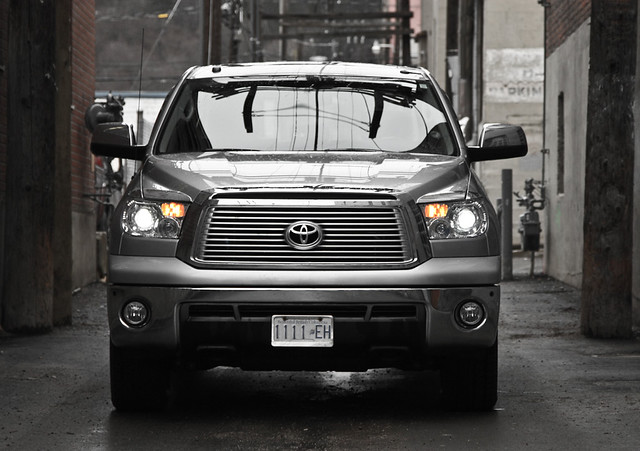
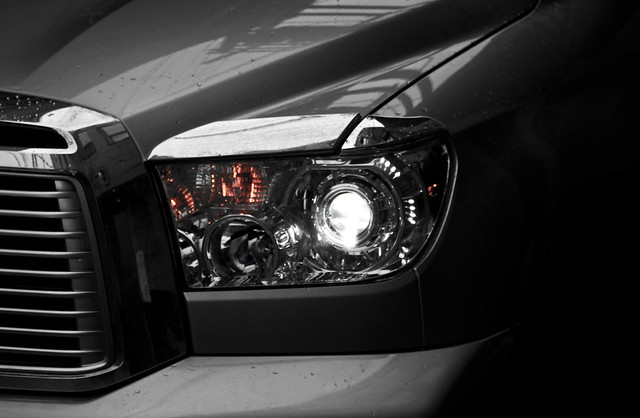
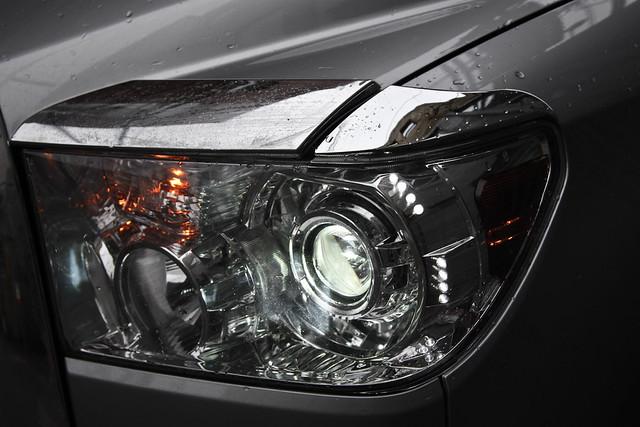
This weekend I headed back to BC for a few days to retrofit my Dad's 2010 Tundra Platinum. I think they turned out great! I wanted to keep them super clean and low profile, or OEM looking and to match the silver theme going on his truck. My Dad wanted something a little special to make them stand out and convinced me to do some custom LED driving lights.


20120221-IMG_1034 by Headlight Hookup, on Flickr

Retrofit specs:
FX-R projectors
Apollo Shrouds
Morimoto 3Five 5000K bulbs/ballasts
Custom LED DRL's
Tinted parking lamp lenses

A couple more:

20120221-IMG_1036 by Headlight Hookup, on Flickr


20120221-IMG_1037 by Headlight Hookup, on Flickr

Pretty cool too that these trucks have a small motor attached to the headlight adjustment screws so you can actually adjust the height of the headlight from a roller-switch inside the cab. I may even try to make this work with my 4Runner headlights.... When the truck gets loaded down you can adjust the headlights back towards the ground to avoid blinding people, or in our case, aim them farther down when we lift our trucks higher. lol
 
Last edited:
Wow, those look clean. Would projectors from a 98 Lexus ES300 be worth getting? There are some at the local pick-n-pull and thought about picking them up cheap.
 
^^Thanks guys!

Wow, those look clean. Would projectors from a 98 Lexus ES300 be worth getting? There are some at the local pick-n-pull and thought about picking them up cheap.

I am not too framiliar with those. I think they would have to be really cheap to be worth getting though, being from 98' there is definitely better projectors out there that will have better cutoff/colour/dispersion. You would probably have to tinker with those a lot to get them to perform as well as the stuff TRS sells. But, like I said, if the price was right and your bored......
 

Members online

Forum statistics

Threads
278,312
Messages
3,554,086
Members
248,016
Latest member
Advally Service

Trending content

Back
Top