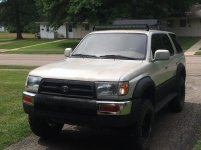
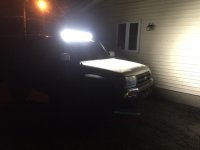
Roof Mount LED light bar install with PICS

amcnult1

New member
I bought a 40" light bar back in April and never got around to installing it, partly because Army schedule and partly for lack of information on 3rd gen light bar installs. After gathering what I could this is what I came up with and hope it helps anyone else out in the future.

Tools i used were
-phillips screw drivers
-channel locks
-wire snips
-socket wrench
-flat head screw drivers

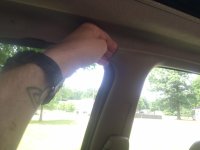
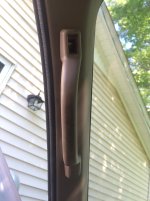
Step 1: Remove Ohh Crap handles from both sides. pop out caps with flat head screw driver and then unscrew the 2 phillips head screws
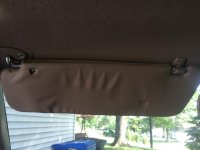
Step 2: remove the sun visors from both sides. Unscrew the 2 phillips screws on the door window side of sunvisor and the 1 phillips screw on the inside of the visor. Then unclip the inside visor clip from the roof after removing the screw.
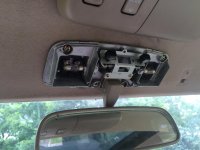
Step 3: Remove the Rearview mirror and sunroof control panel. Pop the rearview mirror plastic cover off from the windshield side of the plastic with a flat head screw driver. Then Remove all 4 phillips head screws. Lastly remove/unplug the dome light wire connector.
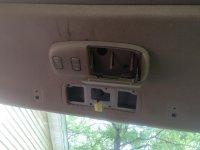
On the sunroof control switch open the garage door opener compartment and then unscrew the 1 phillips head screw. Unclip the plastic housing and unplug the wire connector.
 

Attachments

  • IMG_6419.jpg
    IMG_6419.jpg
    119.7 KB · Views: 6,694
  • IMG_6420 (1).jpg
    IMG_6420 (1).jpg
    128.4 KB · Views: 6,959
  • IMG_6320.jpg
    IMG_6320.jpg
    129.5 KB · Views: 6,855
  • IMG_6259.jpg
    IMG_6259.jpg
    119.7 KB · Views: 6,679
Register to hide this ad
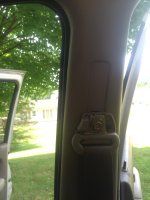
Step 4: Remove the trim pieces all the way back to the front seat belt trim pieces. after Steps 1-3 are complete the Trim pieces just pop out of the clips. use a flat head screw driver and start from one end and work back. (I started from above the seat belt and worked towards the dash.) To remove the front seat belt trim piece pop the plastic clip off the seat belt mount and unscrew the 12mm bolt.
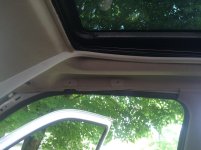
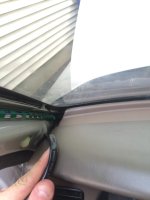
Step 5: Once all the trim is removed you can pull the headliner down and pull the trim off the sunroof opening. it just slides on and off
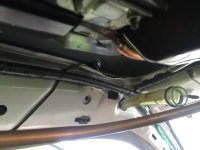
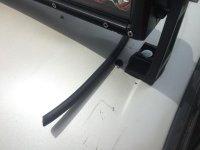
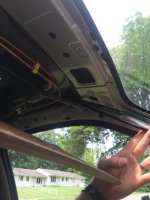
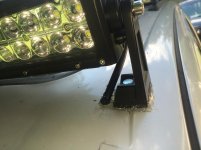
Step 6: is measure multiple times where you want you Light bar to go on your roof and drill once. The only places my mounts would fit lined up on the water grooves on the roof which made it tricky to make the mounts flat and also put the bolt coming inside behind 2 pieces of sheet metal and a pain in the butt to but the nut on. I had to take the Channel locks and bend the sheet metal down and then go to lowes and buy a nut that had a flanged head so that it would sit in the wrench without falling.
 

Attachments

  • IMG_6262.jpg
    IMG_6262.jpg
    118.9 KB · Views: 6,636
  • IMG_6263.jpg
    IMG_6263.jpg
    117.4 KB · Views: 6,691
  • IMG_6261.jpg
    IMG_6261.jpg
    124.7 KB · Views: 6,648
  • IMG_6316 (1).jpg
    IMG_6316 (1).jpg
    115.6 KB · Views: 6,848
  • IMG_6318.jpg
    IMG_6318.jpg
    132.3 KB · Views: 6,789
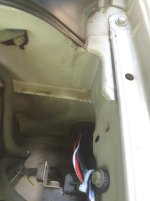
Step 6: Route the power cord where ever you plan. If you plan on running the power cord inside the T4R then drill a hole large enough to place wire but at a location that wont kink or cause the wire to rub or break. I ran mine through the roof and down the windshield pillar behind the trim piece.
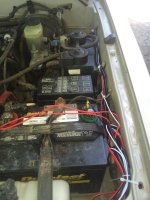
Step 7: Connecting the wires to the wiring harness you purchased for your light bar. I purchased a "Mictuning" led wiring harness from Amazon for $30 after shipping. (There are cheaper ones but this brand has a bunch of cool switch designs to choose from)
I am not going to pretend to understand electrical systems enough to describe how to wire them up. follow the wiring diagram it comes with and have a volt meter to see what has power and know that power has to eventually reach the light bar.
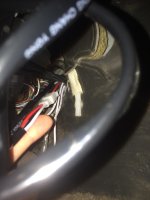
Step 7 Continued: I ran the wires from the battery in through the rubber weather seal underneath the brake master cylinder located on the fire wall. I cut a slit in the rubber seal and ran the wires through it. I ran the wire from the fire wall up through the dash to the windshield pillar. (I had to take some string and route it from the top of the dash down to the pedal and then tie it around the wiring harness to get it up through the dash)
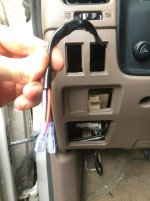
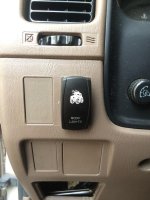
Step 8: Connect the switch to the dash board. Knock out the plastic panel for the place you want the switch to go. I had to use a razor blade to trim the switch mount just a slight bit to make my switch fit.
 

Attachments

  • IMG_6319.jpg
    IMG_6319.jpg
    123.8 KB · Views: 6,676
  • IMG_6415 (1).jpg
    IMG_6415 (1).jpg
    120 KB · Views: 6,631
  • IMG_6389.jpg
    IMG_6389.jpg
    103.6 KB · Views: 6,743
  • IMG_6390.jpg
    IMG_6390.jpg
    127.2 KB · Views: 7,937
  • IMG_6392.jpg
    IMG_6392.jpg
    132.6 KB · Views: 6,539
Step 9: Hide your wiring. Once you have tested everything and have secured your connections zip tie all your wires out of the way and secure them from sight and where they wont get pulled or rub on anything.
Step 10: put all your trim back on in the reverse order you removed it. Make sure you LockTite all your permanent screws and bolts and be sure to use something to weather proof the holes you drilled in the roof. I used clear silicone caulk.
Step 11: wait anxiously for night time if you don't have a garage to turn out the lights and then look at your awesome work!


I hope this was helpful and not just another post of the same thing. Like I said I looked for quite a while and never found a complete write up so this was my attempt!
 

Attachments

  • IMG_6414 (1).jpg
    IMG_6414 (1).jpg
    117.5 KB · Views: 6,725
  • IMG_6417.jpg
    IMG_6417.jpg
    132.3 KB · Views: 6,674
  • IMG_6418 (1).jpg
    IMG_6418 (1).jpg
    128 KB · Views: 6,875
  • IMG_6322.jpg
    IMG_6322.jpg
    133.3 KB · Views: 6,619
  • IMG_6394.jpg
    IMG_6394.jpg
    124.6 KB · Views: 6,537

Members online

Forum statistics

Threads
278,316
Messages
3,554,113
Members
248,016
Latest member
Advally Service

Trending content

Back
Top