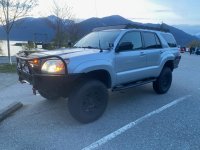
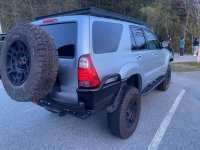
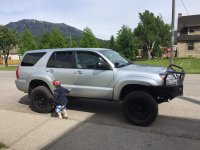
Sanmyaku build thread

Current mods

Front suspension

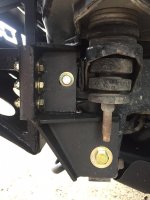
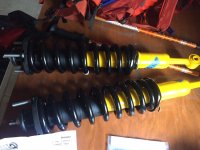
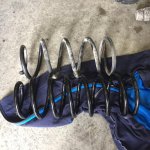
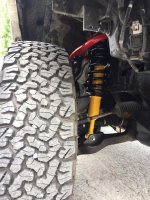
-Dobinsons C59-352R coils at 26mm ride height plus driver's side 1/2" spacer
-Dobinsons IMS shocks, with wheeler's 3/8" top out spacer
-JBA standard high castor UCA's
-front sway bar relocate

Rear suspension

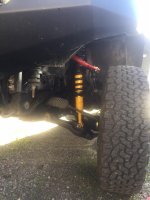
-Dobinson variable rate heavy coils C59-701VR
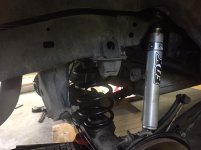
-Fox 2.0 performance series shocks for 2-3" of lift
-metaltech extended SS brake lines
-2nd gen 4runner sway bar end links

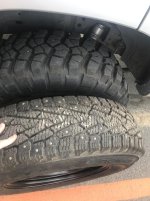
Summer tires/wheels

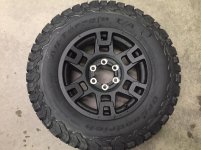
5th gen TRD 17x7 wheels, matte black
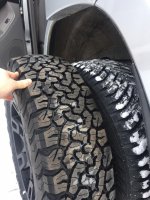
Falken Wildpeak AT3W in 255/80R17

Winter tires/wheels

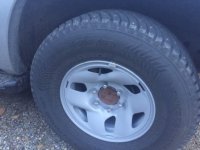
5th gen 4runner steel spare wheels 17x7
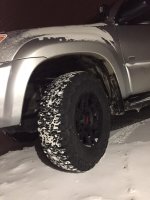
studded Nokian Hakkapeliitta LT2's in 235/80R17


Armor

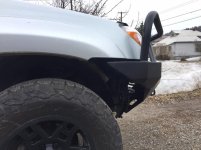
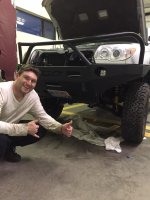
-Demello offroad front 3 hooped bumper
-4x4labs custom dual swingout rear bumper
-Demello offroad DOM rock sliders
-shrockworks engine/tranny/xfer case skid package
-Prinsu full length roof rack

Lighting

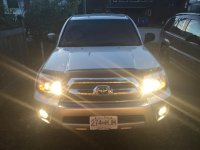
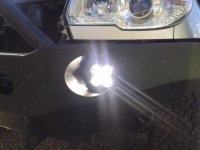
-Baja Designs squadron sport combo light in bumper
-KC LED slimlites
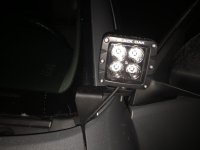
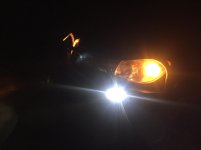
-Black Oak flood 40 watt pods on CBI ditch light mounts
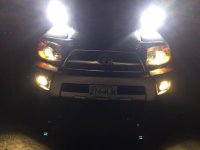
-HID low beams at 4300k
-upgraded wattage halogen bulbs in high beams
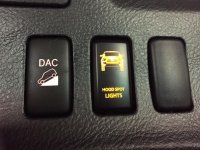
-AOB and CH4x4 toyota push switches

Miscellaneous Mods

-Warn M8000 front winch with synthetic line
-Fog light anytime mod
-TPMS delete
-Toyota block heater
-KATS battery heater blanket 80Watt
-Amazon 2 to 1 connector for battery blanket and block heater
-Fumoto drain valve with short nipple
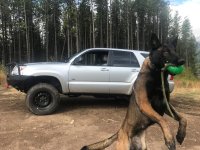
-Transk9 aluminum dog crate
-Amsoil in engine (5w30 in summer, 0W30 in winter)
-Amsoil 75w-90 in all gear cases
-Custom V-Bar snow chains for rear
-Diamond Back snow chains for front
-Recovery shackles and strap
-Keystone kinetic snatch strap and soft shackles
-Air down tool
-fire extinguisher with secure trunk mount

In the beginning

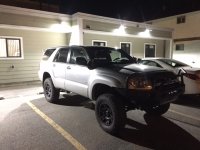
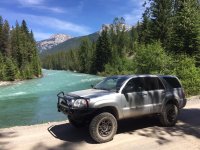
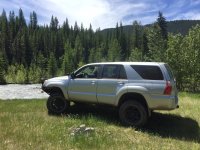
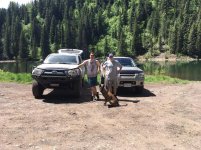
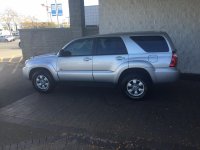
This is my build thread for a 2009 SR55 toyota 4runner. It had 49,000kms when I bought her in Vancouver, BC, September 2016. I had been looking for a 4runner for over 6months and was heart-set on only a 4runner or xterra. Glad I waited for this gem to appear. It was bought at the Hyandai dealership in Richmond. Who trades in a beautiful 4runner for a Hyundai?!? Anyways, their loss. Ended up paying $24,500 plus tax and fees. Because I live 1000kms away in Fernie, BC, I had a friend of mine go to test drive it and make sure everything worked. Thanks to him I found out about a few body blemishes that the dealership agreed to fix before I picked it up. I bought the vehicle a few weeks before I actually could find time to travel down to Vancouver as they weren't going to hold the vehicle for me. I packed my old cavalier, and dog with me and drove down to the Valley. I sold the cavalier the day before I went to pick up the 4runner. Only got $800 for the 04 cavalier, and man that thing was in great shape. Anyways, here's a pic of her the first moment we laid eyes on eachother.
 

Attachments
  • IMG_6194.jpg
    IMG_6194.jpg
    132.3 KB · Views: 2,615
  • all installed driver's side.jpg
    all installed driver's side.jpg
    136 KB · Views: 286
  • all installed passenger side.jpg
    all installed passenger side.jpg
    138.6 KB · Views: 255
Last edited:
Register to hide this ad
next step....

After I picked Sanmyaku up (her name is "mountain" in Japanese), I knew I would lift her very soon. The stance just seemed too "grocery getter" to me and I knew I'd need more ground clearance to feel comfortable off-road. This would have to wait though, and I started out with some simple mods...

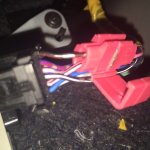
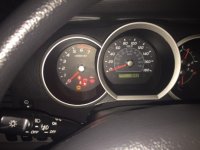
Within a couple weeks of owning her and started off with a TPMS delete, so that annoying TPMS light would go off with my winter set of wheels and tires.

wiring for tpms.jpg wiring for tpms proof it worked.jpg

The next mod to come was the "fog light anytime mod," so I could run all my lights at the same time. I also installed PIAA extreme vision bulbs.

I also purchased some hakkapeliitta 8 SUV tires with tire chains. This may be overkill for many of you, but in Fernie, BC, real winter tires are mandatory and definitely helped keep my family and I safe over the winter. Highly recommend Nokian tires!!

IMG_6738.jpg
wheels right before i took them off.jpg
 

Attachments

  • wiring for tpms.jpg
    wiring for tpms.jpg
    47 KB · Views: 2,364
  • wiring for tpms proof it worked.jpg
    wiring for tpms proof it worked.jpg
    37 KB · Views: 2,350
  • wheels right before i took them off.jpg
    wheels right before i took them off.jpg
    34.3 KB · Views: 2,262
  • IMG_6738.jpg
    IMG_6738.jpg
    73.4 KB · Views: 2,342
Last edited:
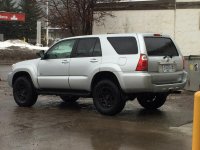
some black oak LED's and CBI pod mounts were next...

IMG_7002.jpg

I decided another inexpensive, yet practical mod, would be some ditch light mounts by CBI and black oak 40 watt LED pods. I received the lights and tested to make sure they worked. Was super impressed by their brightness, as I'm sure my neighbours were not! The brackets came within a week later, and I began working to install them. They were super easy to install and only took about an hour, besides wiring, and plugging in new bulbs, I guess this was my first real mod. The routing of wiring took a good 5 hours though for the lights, and I ended up wiring them to an aftermarket switch that mimicked toyota switches and looked cool. The switch letters light up anytime the other switch lights are on, and the picture lights up when you depress the switch to turn on the lights. Turned out great.

IMG_7006.jpg
IMG_6962.jpg

I also had toyota do a transmission drain and fill, transfer case drain and fill, and front and rear differential drain and fill, as I'm sure the previous owner never engaged 4WD.
 

Attachments

  • IMG_6962.jpg
    IMG_6962.jpg
    138.3 KB · Views: 2,435
  • IMG_7006.jpg
    IMG_7006.jpg
    55.8 KB · Views: 2,328
  • IMG_7002.jpg
    IMG_7002.jpg
    49.4 KB · Views: 2,301
Last edited:
daystar lift

The next mod to come would be a lift. I did a lot of research and thought I would be quite happy with the daystar 2.5 front/1.5 rear. I ordered the lift myself for about 160 CAD online and agreed to pay a shop 3 hours labour to install it.

I gotta say, looking back in hindsight this was a complete waste of time and money and I was not satisfied with the gained lift. It still had quite a raked look to it, and I knew in my gut I would be saving up for a better lift in the near future. I also was disappointed in myself for not doing the work on my own. Anyways it did allow me to buy bigger tires and I liked that it at least sat higher.

FullSizeRender.jpg

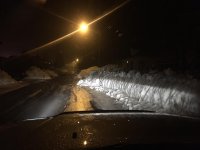
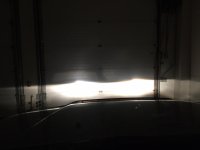
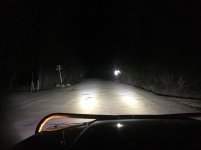
Snow has been falling in Fernie quite hard, and I really gotta say, the hakkapeliitta's are amazing tires. The projectors on these 4runners are very nice as well... check out these pics of the beam pattern

IMG_7759.jpg
new lights LOWS.jpg
 

Attachments

  • FullSizeRender.jpg
    FullSizeRender.jpg
    105.3 KB · Views: 2,416
  • IMG_7759.jpg
    IMG_7759.jpg
    71.7 KB · Views: 2,367
  • new lights LOWS.jpg
    new lights LOWS.jpg
    36.2 KB · Views: 2,365
Last edited:
wheels and tires

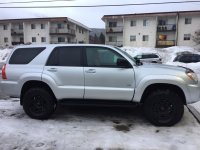
After the daystar lift, I quickly sourced out what I wanted for wheels and tires. I had originally thought of getting the 265/75R16 BFG KO2's but started seeing more posts of people running 255/75R17's and 235/85R16. I quickly grew to love the tall/skinny look. I also quickly decided on the TRD pro wheels because I wanted a wheel that was hub-centric, and only 7" wide for my skinny tires. All the aftermarket wheels I liked were 8" and wider like the pro-comps and mickey thompson. Very happy with the TRD's. I bought 1 tire in a 235/80R17 to test fit on the 4runner. I liked it however I thought it might be too skinny and after more research thought the 255/85R17 at 32.1" and 10" wide was perfect and a little better than 9.3" wide and 31.8" tall. Very happy with the combo. Attached are some pics of both the 235/80R17 and 255/75R17's that I settled with. I ended up still keeping the 235 tire/wheel combo and use it as my spare as I sits higher up under the vehicle and allows more ground clearance while being more or less the same diameter.
 

Attachments

  • IMG_7409.jpg
    IMG_7409.jpg
    136.4 KB · Views: 2,538
  • IMG_7424.jpg
    IMG_7424.jpg
    130.5 KB · Views: 2,564
  • IMG_7651.jpg
    IMG_7651.jpg
    131.6 KB · Views: 2,523
  • IMG_7831.jpg
    IMG_7831.jpg
    133.8 KB · Views: 2,503
  • IMG_7766.jpg
    IMG_7766.jpg
    129.8 KB · Views: 2,505
demello bumper time!!

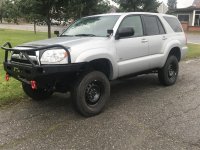
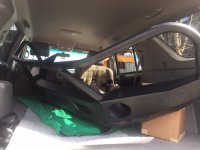
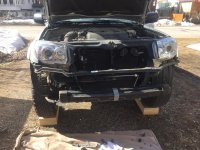
Tax season came, and I knew I would be getting a really sweet tax return, so I decided to treat myself with a steel bumper. It was between 2 companies; Demello and CBI. CBI was pretty firm on their price and Demello was running a GB for XX% off plus free shipping. I couldn't pass that up, and ordered a 3 hoop design. I really want to say how awesome Tiffany and Jason were to deal with and how quick it was made, and sent out. I think the turnaround was about 2-2.5 weeks. I received in bare metal as I know a really good powdercoater in Ft. Macleod who would do the job for me for 300 CAD. I went across the border to Montana to pick it up.....man it was heavy and big. I don't know why I wasn't expecting that but it fit in the back with the seats down. Lucky me, didn't get charged CAD tax at the border. In fact, to date I haven't been charged any duty or taxes on anything and most of the time it's over 200 CAD (which is the maximum personal tax exemption). I dropped it off at the powdercoater's later that week and picked it up a couple weeks later to install. Install was pretty easy. Didn't need to do any extra modding or re-locating of any AC lines, etc, as it said in the instructions. The bumper, however, doesn't fit quite perfect and seems to be off-center as you can see from some of the photos. I'm sure if I hadn't said that no one would have noticed. But it bothered me slightly. I ended up trimming the plastic grill corner to allow more room for body flex. Jason confirmed I was sent the right one and we choked it up to the vehicle frame being slightly off.

Another shitty thing, was when I torqued one of the side frame bolts, it broke off, which was a 2 hr ordeal to drill it out. Luckily I didn't need to tap and die the frame, but man was I sweating. I went through 3 drill bits and easy-outs to get it out. I think the torque setting is too high and told Jason perhaps this is the case. He was so awesome and sent me new hardware free of charge to replace that one and the others that were torqued too much.

In the last photo it was the smaller side bolt that I'm talking about. Anyways solid bumper and I've gotten so many compliments on it and many metal fab guys have said how good the welds and design are. Wouldn't hesitate to recommend them to anyone.
 

Attachments

  • IMG_7939.JPG
    IMG_7939.JPG
    83.2 KB · Views: 2,364
  • IMG_7941.jpg
    IMG_7941.jpg
    138.5 KB · Views: 2,368
  • IMG_7942.jpg
    IMG_7942.jpg
    59.6 KB · Views: 2,352
  • IMG_7943.JPG
    IMG_7943.JPG
    136.7 KB · Views: 2,370
  • IMG_7949.JPG
    IMG_7949.JPG
    98.3 KB · Views: 2,368
  • IMG_7950.JPG
    IMG_7950.JPG
    87.1 KB · Views: 2,349
  • IMG_7968.jpg
    IMG_7968.jpg
    136.1 KB · Views: 2,434
  • IMG_7982.jpg
    IMG_7982.jpg
    130.6 KB · Views: 2,420
baja lights

After about 2 months with the bumper, and missing my fog lights, I decided I'd hunt for a pair of lights to put in the bumper. After all my research I knew I wanted baja designs lights. I really wanted their squadron pro lights but couldn't justify the extra 200 for 40 watt pods instead of 20. Therefore I ordered the 20 watt squadron sports. Bailey at BD is amazing and gives a forum discount of 10%. Service was fantastic. Also inquired about a way to wire them directly to the OEM fog light harness. I assured me the adaptor that they make for the newer 4runners would work. I received the items in good condtion and packaged really well about a week later. Again, I drove across the border to Montana to pick them up (an hour drive away), and didn't pay duty or taxes!! YESSSS! Immediately checked that the lights and wiring adapter worked and it did...however, it worked in reverse. what I mean by that is normally the bulb would plug into the plug and snap in place. With these the polarity is reversed so it works but doesn't "snap" in place. That's fine with me and I just pushed it in as tight as it goes, and taped the plug to the adapter. It's never come apart and works beautifully. This adapter made the install a 10 minute job. Thanks Bailey!!
 

Attachments

  • IMG_8373.jpg
    IMG_8373.jpg
    131.6 KB · Views: 2,433
  • IMG_8377.jpg
    IMG_8377.jpg
    131.6 KB · Views: 2,406
  • IMG_8384.jpg
    IMG_8384.jpg
    90.8 KB · Views: 2,406
Last edited:
lift!!! done right this time

So......this was really exciting!!!!

I told myself if I lost 10 lbs I'd buy a lift kit for my vehicle.

It took about 1.5 months but I did it....in fact I'm an overachiever....I lost 11 lbs from 220lbs down to 209.

I had debated long and hard about all the lift options, and wrote down so many comparison charts with pros/cons/price etc. and narrowed it down to 3 options for the front

1) toytec boss or ultimate
2) eibach 620 lb springs with eibach pro truck sport shocks
3) OME 885's

I ended up going with the OME 885's with a 3/8" top out spacer and the softer nitrocharger 90021 shocks. I bought it from Wheelers offroad and had them install it on new strut mounts with hardware for an extra 100 dollars. I also got new shock bolts to replace my original hardware. I like to do this whenever possible because parts do wear out and I like the thought of all new hardware. I believe that if you have all the parts out, put the vehicle back together better than it was when you took it apart.

I also learned from my previous mistake that I wanted to do it right the SECOND time. I knew I would need new UCA's and after debating between SPC's, JBA's, and Camburgs, I opted for the JBA's. They had a rocky start with some design flaws, but all their new UCA's had rave reviews, especially on tacomaworld, and I really liked that the Castor was built into them (not adjustable) and that the balljoint was a very commonly sourced chevy 3/4 ton balljoin with tons of articulation and very easy to replace without removing the UCA. Spoke to the owner Marlin over the phone and he was very helpful. Shipped that same day. Only weird thing was there was a jesus DVD in the box when I received it. UGHHHHH I'm a devout atheist and don't like religion at all. But whatever, he's a solid guy with good intentions and makes a great product.

For the rear, I went with toytec superflex 2" coils with Fox performance series extended travel shocks. They say these shocks are for 2-3" of lift. I got the toytec coils from wheelers again, but found a wicked deal on the shocks at 4wheelparts and wheeler's couldn't come close to the price.

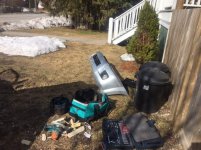
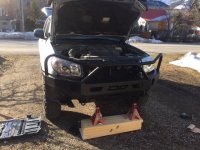
The day before I was ready to install the lift I thought I'd get a head start, so I took off my front and rear sway bar and skid plates. Man it felt weird driving around without sway bars. I kinda liked it but I wouldn't have wanted to have to do an emergency maneuver at high speeds. Luckily I was just driving around town at like 30 kms an hour.

I also knew this time I would do the install myself. This was MY build! I like to think I am a fairly intelligent guy and can figure stuff out. I did need to buy some miscellaneous tools that I was missing. I had all the bolts and nuts I knew needed to be removed soaking in PB blaster for about 2 weeks prior to the install so everything was pretty easy to remove.

I followed a few videos on youtube and used toytec's writeup as a reference. The most helpful videos were by "lowrangeoffroad" They have a youtube account and 3 very helpful videos for the 4th gen. One was an OME install, the other was an icon 5th stage I believe. Anyways here are some photos.

PS It really helped that my unit chief let me use the install bay at the ambulance station as it was raining that week and I don't have a garage.
 

Attachments

  • IMG_8372.jpg
    IMG_8372.jpg
    128.4 KB · Views: 2,413
  • IMG_8488.jpg
    IMG_8488.jpg
    134 KB · Views: 2,331
  • IMG_8499.jpg
    IMG_8499.jpg
    124.7 KB · Views: 2,445
  • IMG_8515.jpg
    IMG_8515.jpg
    129.2 KB · Views: 2,454
  • IMG_8526 (1).JPG
    IMG_8526 (1).JPG
    104.8 KB · Views: 2,340
  • IMG_8581.jpg
    IMG_8581.jpg
    136.8 KB · Views: 2,407
  • IMG_8584.jpg
    IMG_8584.jpg
    139.4 KB · Views: 2,311
  • IMG_8573.jpg
    IMG_8573.jpg
    126.6 KB · Views: 2,409
alignment and driving experience with lift...

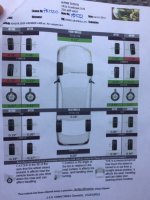
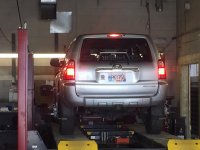
After letting the springs and shocks settle on the vehicle for 3-4 days and light driving around town and over little curbs I took the vehicle in to get an alignment at toyota.

I was very specific about what I wanted and asked to talk to the tech who would be working on my vehicle.

I told him I wanted maximum castor, with the camber and toe at 0 or within spec. He told me I might not be able to get all within spec. I ASSURED him I would, and said I put new UCA's in specifically so everything could be back in spec. I also told him I had the cam bolts loosened earlier to install my lift and had everything soaked in PB for over 2 weeks.

He told me he wouldn't recommend castor that is too high and explained why he wouldn't recommend going above spec. He said something about shopping carts and how the front wheels wobble and said I could up end with that. I said fine, just get the maximum castor you can get within spec. We agreed to shoot for between 3 and 3.5.

Off to work he went. He got everything where I wanted and he thanked me for soaking the cam bolts in blaster. He said normally they see them seized so I was pretty lucky.

I ended up leaving the front sway bar off but installed the rear for safety reasons. I have driven it now about 3 weeks and I feel very confident with the ride and kind of like the front sway bar off. The vehicle tracks strait and has no pull to either side. I'm loving it. Ended up going with a friend on a little forest road loop to try the suspension out. It drives really nice. At time I feel like I should have gone with heavier springs or stiffer valved shocks, but it's so comfortable and I drive on road about 90 percent of the time so I made the right choice. I am expecially loving the rear. The fox shocks are the longest shocks I found for this application and I have yet to feel them top or bottom out.

PS I took before and after measurements from stock to daystar, and then from daystar to OME/toytec lift. I will summarize the results, but for anyone interested I have all the fine details (for those OCD like me)...:

gained the 2.5 front and 1.8 rear from daystar, then gained an additional 2.4" front and 1.7" rear from the OME/toytec lift.

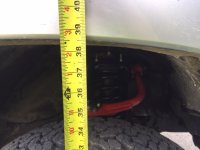
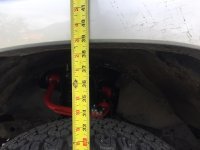
In summary, going from saggy stock springs, I gained 4.8" front and 3.5" rear from this lift. I now sit at:

DF --38 3/8" edit...after 8 months installed the height measures: ** 38"
PF --38 1/2" 38 3/8"

DR --39 7/16" 38 5/8"
PR --39 1/2" 39"

I'm so stoked it's level.. I'll remeasure in about 2 weeks and see how much it settles, but for now it's perfect to me. Just on an aside I did have wheelers put in an OME trim packer in the DF coilver (5mm). No trim packer used on the rear.
 

Attachments

  • FullSizeRender (1).jpg
    FullSizeRender (1).jpg
    108 KB · Views: 2,317
  • IMG_8588.jpg
    IMG_8588.jpg
    121 KB · Views: 2,363
  • IMG_8624.jpg
    IMG_8624.jpg
    138.1 KB · Views: 2,286
  • IMG_8617.jpg
    IMG_8617.jpg
    138.3 KB · Views: 2,274
  • IMG_8673.jpg
    IMG_8673.jpg
    135.9 KB · Views: 2,308
  • IMG_8541.JPG
    IMG_8541.JPG
    81.4 KB · Views: 2,271
  • IMG_8540.jpg
    IMG_8540.jpg
    132.8 KB · Views: 2,382
  • IMG_8407.jpg
    IMG_8407.jpg
    130.1 KB · Views: 2,366
Last edited:
update: June 18th 2017

I thought I'd update my build thread with the latest. I have been driving around for about 2-3 weeks on the new lift and I'm loving it so far. Drives great, super smooth on road, pretty good off-road. No complaints yet. Some things have crossed my mind lately....namely wanting to upgrade to

255/80R17 BFG KM2 mud-terrains

I am able to score a good deal on them with free install/balancing and pretty sure I could get a good chunk back from my KO2's which are pretty much brand new. Here are my concerns:

1) it will be possible from all my research to install these with no rubbing whatsoever, because of my lift/high castor, and front bumper, but in the rear the mudflaps would definitely have to go. This is illegal in BC, and I don't want to do anything that will cost me money in tickets, or even worse a vehicle inspection, which they can give if they see deficiencies in your vehicle.

2) I don't know how well I'll like the mud-terrains for on-road performance. I quite like the KO2's and they perform beautifully in all conditions. Well, all conditions minus maybe the ice, but I'll always run dedicated winters where I live.


Lastly, I rechecked my lift height and there's some interesting changes I'm not super happy with:

DF ---38 5/8
PF ---39 3/8

DR ---38 11/16
PR ---39 3/8

basically my front passenger side has gotten higher....this would seem impossible. Except for the fact that I now have a full gas tank, and my driver's rear has lowered 3/4" but the passenger rear only 1/8". I'm going to take some measurements when my gas tank is empty and see if that changes anything.

Also just installed the fumoto oil drain valve and did an oil change. Going to run it for a couple hundred kilometers then drain the oil again and put amsoil in and an amsoil filter. This is my way of doing an oil flush.
 
Last edited:
Updates

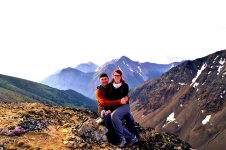
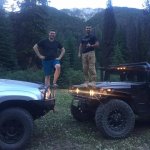
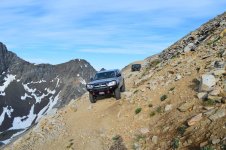
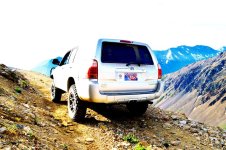
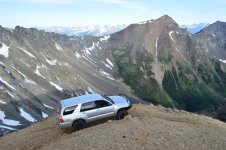
A lot has happened in the last few months. In July I traveled with my girlfriend from Fernie to Vancouver to do a bit of an off-road trip with my buddy. The trail is called Molybdenite ridge and we did it over 2 days. We spent a wonderful night near the summit. In Vancouver, I ended up selling my 255/75R17 KO2's for the larger diameter 255/80R17 KM2's. I got a killer deal on them for 1000.00 CAD installed, and sold the KO2's for $750.00 so I didn't lose out on too much. I had never had a mud terrain tire before and man they are loud. Definitely compared to the KO2, not sure how loud they are compared to other MT's. They fit with zero rubbing. No rubbing on full lock forwards, or reverse, and they stuff nicely. Very pleased with the fit. They also performed very well off-road. They 4runner did incredible and we were all very impressed with how it performed. Never got held up once on anything and there were some pretty knarly moments.
 
some photos from the trip. The trail is near Lilloet, British Columbia
 

Attachments

  • molybdenite ridge photo of us.jpg
    molybdenite ridge photo of us.jpg
    139.2 KB · Views: 790
  • molyb with ronnie and vehicles.jpg
    molyb with ronnie and vehicles.jpg
    64.7 KB · Views: 780
  • molyb front coming down.jpg
    molyb front coming down.jpg
    141.5 KB · Views: 1,263
  • molyb 4runner rear.jpg
    molyb 4runner rear.jpg
    127.6 KB · Views: 859
  • molyb at summit.jpg
    molyb at summit.jpg
    139.1 KB · Views: 846
maintenance updates

After coming back from the trip, I decided to do a bunch of maintenance, to keep my vehicle in tip top shape.

Oil change with pennzoil platinum ulta, then 500 kms later drained and filled with Amsoil signature series synthetic. I ran this for 5000kms then sent off to blackstone labs for an oil analysis, and drained and refilled with Amsoil. Short oil change intervals I know, but I don't mind spending the extra 50 CAD on the oil and do it myself, and it's my money, so stuff it!

View attachment 09 4RUNNER-170814.pdf

Rear diff/front diff/and xfer case oil drain and fills. I did the rear diff a few months prior, but wanted to see how the quality was, so drained and filled again. The front diff, and xfer case had been done by toyota a year prior, but I wanted to put amsoil severe gear 75-90 in all the gear cases so decided to do it again. I ended up stripping the front diff drain plug so took to toyota to get the drain plug out. I bought all new drain/fill plugs and crush washers for everything and a new rear diff breather.

In September as part of my "get ready for winter" list I had toyota do a coolant flush on the rig. I also installed the block heater from toyota, and also installed a battery blanket heater. I bought a 2 to 1 electrical connector and neatly routed the wires to the Demello bumper.

Changed out the air filter. Old one wasn't too dirty but I got 3 for 20 dollars from a neighbour who ordered the wrong one, so why not?

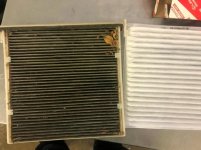
I also took the time to change my cabin air filter. I had a charcoal filter in there from last year and decided to just go with the normal particulate filter this time. Don't do like me. the regular filter is super cheap, thin, and crappy compared to the charcoal one. I just ordered 2 charcoal ones and will swap this out when they come in.

IMG_0489.jpg

I also upgraded my winter tires from Hakkapeliitta 8's in a 265/70R16 size to the Hakkapeliitta LT2's in 235/80R17 size with 5th gen toyota 4runner spare tire steel wheels. Sold my old setup for 900 CAD and bought the new setup for 1350 CAD all in. Loving the pizza cutters. Excited to see how they perform in the winter.

IMG_0454.jpg
IMG_0484.jpg
IMG_0428.jpg

PS attached the blackstone labs oil analysis for your viewing pleasure. Good report and nice to read the 4runner's engine is doing super well and perfectly healthy (not that I would expect anything less).
 

Attachments

  • 09 4RUNNER-170814.pdf
    09 4RUNNER-170814.pdf
    19.4 KB · Views: 295
  • IMG_0428.jpg
    IMG_0428.jpg
    132.8 KB · Views: 740
  • IMG_0454.jpg
    IMG_0454.jpg
    139 KB · Views: 761
  • IMG_0484.jpg
    IMG_0484.jpg
    139.7 KB · Views: 717
  • IMG_0489.jpg
    IMG_0489.jpg
    80.4 KB · Views: 708
Last edited:
Members online

Forum statistics

Threads
278,307
Messages
3,554,055
Members
248,016
Latest member
Advally Service

Trending content

Back
Top