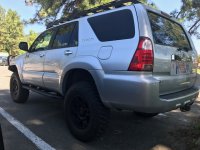
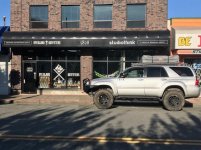
Sanmyaku build thread

Hey man, if you should find yourself in Calgary and in need of somewhere to work on your rig, let me know. If I'm in town, you're more than welcome to utilize my garage.

I met one of the Krave guys at the World of Wheels a couple weeks ago. Seems like a solid guy. Couple nice Tacos at the show.
 
Mpg

Hey man, if you should find yourself in Calgary and in need of somewhere to work on your rig, let me know. If I'm in town, you're more than welcome to utilize my garage.

I met one of the Krave guys at the World of Wheels a couple weeks ago. Seems like a solid guy. Couple nice Tacos at the show.


Thanks Rob,

Appreciate the offer, but I'm moving to the Fraser Valley in 10 days and don't think I'll be in the Calgary area anytime in the foreseeable future. Likewise though, if you're ever in Chilliwack, shoot me a message and we can meet up and talk Toyotas.

Didn't mention it earlier, but I did an oil change and a second blackstone labs oil analysis, to see how the 0W30 Amsoil was treating the 4runner with long idling periods and -25 degree (celcius) weather. Turns out she's doing great.

Attached is the PDF for the report if anyone cares to view.

View attachment Blackstone oil analysis 2018.pdf

I drained and filled with 5W30 as the temp's have warmed up nicely to about -5 to +5.

I also did some calculations to determind my MPG......it's not great!

I average between 14.72-14.86 MPG (15.83-15.98 L/100kms)
Correcting for my tire size (31.8/30.6) =1.04
Thus my corrected MPG is 15.30-15.45MPG not so hot!!

Then again I do have about 600 lbs of added weight with front bumper, skid package, sliders, roof rack, and cargo.
 

Attachments

maintenance May 2018 ODO: 82,936 kms

I love this vehicle and want it to literally last forever. Because of that I'm OCD, and very particular about my maintenance.

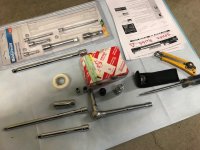
I just spent 14 hours doing a huge list of preventative maintenance to my vehicle. I did it all myself (except for the alignment), because I wanted to make sure it was done right, and I wanted to become more familiar with my rig.

-engine oil change, Amsoil signature series synthetic 5w-30, with OEM filter
-engine air filter
-cabin air filter (charcoal premium filter)
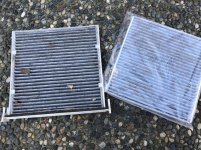
cabin filter.jpg

-front diff change, Amsoil severe gear synthetic 75w-90
-rear diff change, Amsoil severe gear synthetic 75w-90
-transfer case oil change, Amsoil severe gear synthetic 75w-90
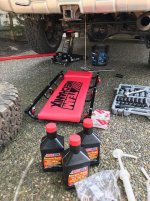
rear diff change.jpg

-grease driveline, and all greaseable points, Lucas synthetic red and tacky
-new UCA ball joints (JBA replaced under warranty because of rust issues)
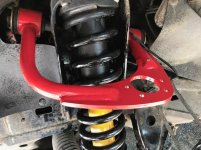
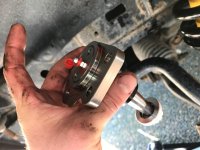
UCA ball joint.jpg

ball joints.jpg

-new inner TRE's (outer TRE's replaced a few months ago)
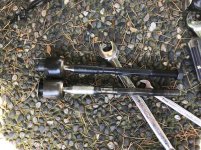
inner TRE's.jpg

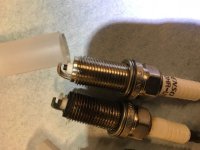
-new OEM denso spark plugs

spark plug set up.jpg

spark plug comparison.jpg

-alignment at Toyota after the new TRE's installed.

Everything went very smoothly, and I detailed the vehicle, including a shampoo of the cargo area.

I also organized my tool bags, SAR bag (kinda like a bug-out bag), medical kit, and labeled them all.

I got the alignment at Valley Toyota in Chilliwack. These guys are seriously good.

Caster:
L: 4.0*
R: 4.2*

Camber:
L: 0.0*
R: -0.1*

Toe:
L: 0.05*
R: 0.05*
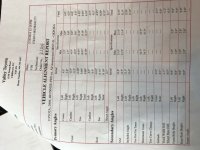
alignment numbers.jpg

Also They polished my drivers side headlight which was starting to fade and yellow ever so slightly and bugged the heck out of me. Thanks guys!!!


To come soon*:*:*:*:*:*:*:*:*:*:*:*:*:*:*:*:*:*:*:*:*:*:*:*:*:*:*:*:*:*

Ordered:
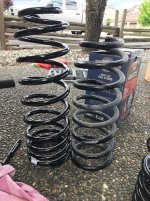
*Dobinson's V59-677 springs
*MT extended rear brake lines
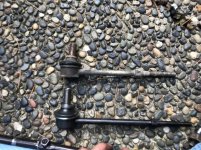
*2nd gen 4runner rear extended length sway bar end links

I am a bit nervous about installing these as I don't have that much weight in the rear of my 4runner, but just wasn't happy with the toytec superflex, with the weight that I do have. Down the road I am planning on a rear swingout bumper, and feel that the v59-677 will hold that weight very well.

Also a bit nervous because I don't have an adjustable panhard bar; From the research I've done, people say it doesn't really matter that much, and that the axle won't be out too much. Any thoughts from anyone??

 

Attachments

  • UCA ball joint.jpg
    UCA ball joint.jpg
    86.7 KB · Views: 513
  • rear diff change.jpg
    rear diff change.jpg
    107.7 KB · Views: 504
  • spark plug set up.jpg
    spark plug set up.jpg
    102.5 KB · Views: 501
  • cabin filter.jpg
    cabin filter.jpg
    83.6 KB · Views: 501
  • ball joints.jpg
    ball joints.jpg
    86.9 KB · Views: 510
  • inner TRE's.jpg
    inner TRE's.jpg
    97.3 KB · Views: 517
  • spark plug comparison.jpg
    spark plug comparison.jpg
    81.9 KB · Views: 519
  • alignment numbers.jpg
    alignment numbers.jpg
    90.5 KB · Views: 516
Last edited:
Dobinson V59-677 coils install!!!

Well, yesterday was a fun day. I was dreading doing this job because I've never worked with brake lines before, nor spring compressors, and I didn't know how tricky it would be installing these long travel springs. I also didn't know how well they'd work with my existing fox shocks.

It took about 5 hours, but I got the job done:

-MT extended brake lines
-2nd gen 4runner sway bar end links
-Dobinson dual rate V59-677 coils


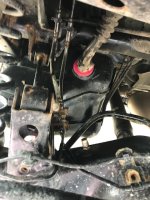
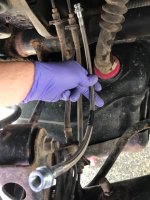
Started off removing the spare tire from under the vehicle and jacking up the vehicle from the frame. I then got a bunch of paper towels ready and removed the old rubber brake lines and replaced them with the SS metaltech extended lines. This job took about an hour to do because I had to watch a 16 minute youtube video of a guy doing it on an FJ. Once I knew what I was doing it was just a matter of using PB blaster to clean the OEM lines. There was a fair bit of road grime caked on and the nuts took a bit to loosen up.

old brake lines.jpg

SS brake lines.jpg

I then removed my sway bar end links, shocks from the upper mounts, and lowered the axle until I could pop out the superflex coils. These came out pretty easily.

To install the dobinson coils I had to rent some spring compressors. I was paranoid about doing it right, as I have seen people get injured compressing coils incorrectly. There's a lot of stored energy in those things!!!

IMG_2895.jpg

I also used the OEM jack between the axle and bump stop mounts to lower the axle even more to allow the coils to slide in easily. This worked very well.

I reinstalled the longer 2nd gen 4runner end links, then raised the axle to get the shocks reinstalled in the upper mounts, and torqued everything down.

end links compare.jpg

Lastly, I bled the brake lines, with the key in the ignition and my mom pumping the brakes, then holding them as I purged the bleeder valves. I did this to all 4 corners and made sure the fluid reservoir was full and topped off.

Cleaned up and called it a day!! Rides amazing and works very well with the fox shocks.

cultus shot.jpg

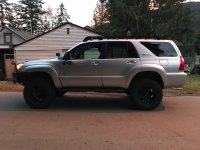
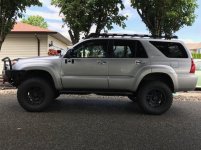
New height:

Front (to fender):
D: 39.125"
P: 39.25"

Rear (to fender):
D 40"
P 40.25"


My approximate gains using these coils over the superflex are the following in the rear with about 100 lbs of cargo plus my armour:

D (+0.875")
P (+1.375")


driveway shot.jpg
 

Attachments

  • old brake lines.jpg
    old brake lines.jpg
    100.9 KB · Views: 487
  • SS brake lines.jpg
    SS brake lines.jpg
    105.5 KB · Views: 484
  • end links compare.jpg
    end links compare.jpg
    84.8 KB · Views: 472
  • IMG_2895.jpg
    IMG_2895.jpg
    87 KB · Views: 491
  • driveway shot.jpg
    driveway shot.jpg
    93.2 KB · Views: 485
  • cultus shot.jpg
    cultus shot.jpg
    88.2 KB · Views: 504
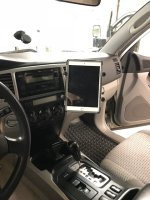
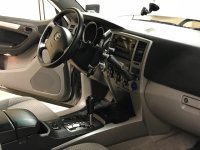
IPAD mount and Charging ports

Seems like I've been doing a lot of work to the 4runner recently! I have slowly been accumulating the products for this project. What I needed was:

-IPAD mini 3 with cellular
-Pelican voyager case for IPAD mini 3
-RAM mount universal X-Grip 2 for tablets up to 8"
-RAM mount double long socket for 1" ball (6")
-Ram mount diamond base for 1" (B) balls
-CHGeek Dual USB Charger with voltimeter (amazon for $16.00)

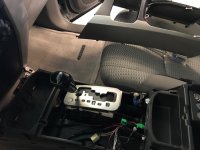
I started by taking off some panels that were in the way, and some that I thought I needed to take off, but really didn't LOL

taking off panels.jpg

I then took off the climate control cluster, and replaced a bulb that was burnt out behind there at the same time.


I then pre-drilled some very small pilot holes after making with a fine-point sharpie where I wanted the RAM mount.

I then drilled increasingly larger holes, until the were slightly smaller than the screws I was using.

I just used some regular screws and threaded them in by hand, mounting the RAM 1" ball base just below the hazard light switch.

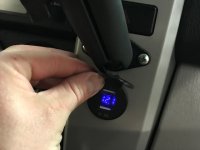
I then tested the voltimeter and charging ports directly to the battery to ensure they worked, before doing the full install (Do this, because if you go to all the work to mount it, and it doesn't work, you're SOL).

volitmeter.jpg

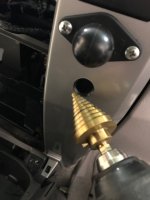
I then used a step bit drill to drill 1 1/8" hole for the accessory. I then mounted it in, and secured it from behind with the screw backing plate, and connected the pos and neg wires.

step bit.jpg

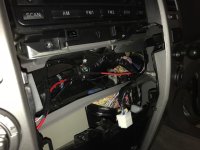
I used a grounding point on the steering column for the negative, and ran the positive to my main battery terminal. I made sure to leave the in-line fuse in an easily accessible location in the engine bay.

wiring.jpg

At some point when I'm bored, I want to clean up my wiring even more, and add shrink tubing to the connections to make them better. It might be worth while for me to invest in a fuse block for all my accessories....hmmmmmm

Finished product!!

IMG_2938.jpg

finished shot (passenger side).jpg

Side note: I bought some 10 or 12" charging cables to use to charge the ipad, as I didn't want long cords hanging everywhere.

Also, I was slightly worried that the voltimeter being constantly on, with the LED light, might drain the battery, but everyone I've spoken too, said it's super minimal, and I should never get a dead battery from that. If I did park the car for extended periods, I would just pull the fuse, which is easily accessible from under the hood.
 

Attachments

  • step bit.jpg
    step bit.jpg
    55.3 KB · Views: 478
  • wiring.jpg
    wiring.jpg
    75.9 KB · Views: 491
  • volitmeter.jpg
    volitmeter.jpg
    51.1 KB · Views: 471
  • taking off panels.jpg
    taking off panels.jpg
    77.9 KB · Views: 485
  • IMG_2938.jpg
    IMG_2938.jpg
    87 KB · Views: 474
  • finished shot (passenger side).jpg
    finished shot (passenger side).jpg
    81.2 KB · Views: 439
Nice and clean tablet install. Love having mine there as well... Any chance your going to be out in the Kootenays this summer? We should link up and go for a run.
Addison
 
Nice and clean tablet install. Love having mine there as well... Any chance your going to be out in the Kootenays this summer? We should link up and go for a run.
Addison

Sorry [MENTION=63060]rickashay[/MENTION] I don't know how I didn't see this until now, as I've logged in fairly regularly. Anyways, I didn't make it out to the Koots this summer. Instead, we went to the overland rally, and did a week trip through Washington and Oregon. We have moved to Cultus Lake now, and if you're ever in the area, please shoot me a message. Next summer, we may decide to do a trip to the Koots to visit old friends. If we do, I'll send you a message.
 
Your info says Chilliwack, where I am, but all your photos look like you're out of town.

I am indeed in Chilliwack (Cultus Lake more specifically). We moved back to Chilliwack in March of this year after being away for 3 years. We should organize a trip soon. I'm assuming you're part of bctoyota4wd?
 
some updates...

Well, it's been awhile since I've posted to this forum. Lots of things to update you all on.

In mid-July my girlfriend, I, and our son, went to the BC overland rally. We had a blast and it was the first time Emily has really been to an event, or off-road meet like this. It was cool to see that she was into it! Even though she isn't as crazy about it as I am, she enjoyed going to the presentations and checking out the venders. There were a lot of cool people that we met, and she even won a $200 flashlight/survival combo prize.

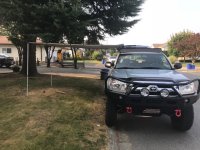
Here is my vehicle all cleaned up and ready to get on the road....

washed and ready to go.jpg

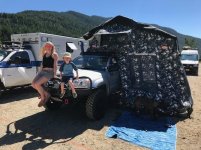
We decided to rent a RTT for the rally. I had always wanted a RTT but they're very expensive and the drawbacks of a RTT have kept me from pulling the trigger. We decided to rent one to see if it might be something worth buying down the road.

rtt rental.jpg

I can honestly say that I'm not sold on the RTT thing. Here's why:

-decreased fuel economy being large up top the vehicle and weighing 130lbs
-1500-3000 CAD $$$
-takes a fair bit of time to set up (maybe 5 minutes, but my ground tent takes 3 so you can't argue it's quicker that's for sure
-annex takes a very long time (8-10 minutes for me to set up) and is very heavy and eats up room inside the car.

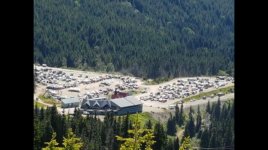
We got to the rally quite late around 2200hrs so we set up in the dark in the temporary area, then found an actual spot the next morning. The location, although it was beautiful was not ideal... It was in a rocky, dusty parking lot, with no shade, and no river or lake nearby to jump into. Here's a view of the rally from the air (not my photo, I just found it on google)

overhead view.jpg

set up rtt.jpg

It was a very fun event, but next year we want to go to the one in Plain, Washington near Leavensworth. It looks like it's a much better location, with more venders, and in a nicer area. We can't wait!!!

rally parking lot.jpg
 

Attachments

  • washed and ready to go.jpg
    washed and ready to go.jpg
    132.5 KB · Views: 565
  • set up rtt.jpg
    set up rtt.jpg
    91 KB · Views: 508
  • rtt rental.jpg
    rtt rental.jpg
    89.5 KB · Views: 508
  • rally parking lot.jpg
    rally parking lot.jpg
    124 KB · Views: 513
  • overhead view.jpg
    overhead view.jpg
    36.5 KB · Views: 482
camping trips in August

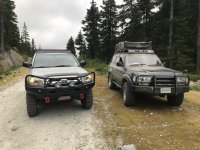
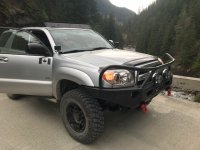
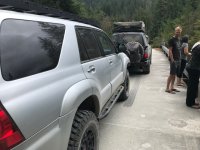
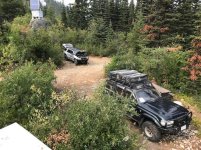
We decided to do an overnight trip from Harrison Lake to Boston Bar. I believe it's about 120-130 kms through mostly easy forest service roads. The trip takes you close to some hot springs which we stopped at, called Clear Creek. We then went over a very high mountain pass, which had some deep wash outs and some technical terrain.

side by side.jpg

front view of vehicle.jpg

side view with landcruiser.jpg

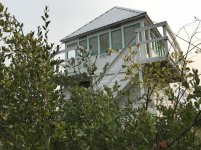
The road then descends into the Nahatlatch valley where there is some amazing camping.

This is the fire lookout tower. We couldn't really see anything as the smoke from all the wildfires was very thick.

nahatlatch tower.jpg

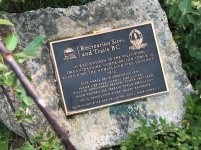
4wdabc.jpg

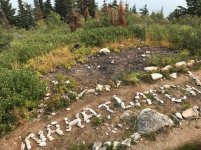
nahatlatch.jpg


It was a very steep climb for a good 15 minutes, so I opened my hood to let the vehicle cool down, while we ate, and hung out. I had her in 4lo for the climb to help the tranny, and for the descent to save the brakes
after steep climb.jpg

All in all, an amazing trip with some friends that we met at the overland rally.


Hope to do another trip soon with these guys!!
 

Attachments

  • side by side.jpg
    side by side.jpg
    127.8 KB · Views: 545
  • side view with landcruiser.jpg
    side view with landcruiser.jpg
    96.7 KB · Views: 531
  • front view of vehicle.jpg
    front view of vehicle.jpg
    91.3 KB · Views: 550
  • nahatlatch tower.jpg
    nahatlatch tower.jpg
    78.1 KB · Views: 471
  • 4wdabc.jpg
    4wdabc.jpg
    90.7 KB · Views: 472
  • after steep climb.jpg
    after steep climb.jpg
    98.1 KB · Views: 484
  • nahatlatch.jpg
    nahatlatch.jpg
    96.2 KB · Views: 472
Dobinson awning install

After the scorching heat at the Overland rally, and a torential downpour while camping at Manning Park, I convinced the girlfriend that we needed an awning. To me this will be far more beneficial than a RTT.

Before we had an awning, we had to rig up protection with a tarp, which wasn't always possible if you weren't around trees.

manning tarp.jpg

I ordered the awning directly through Mike at Dobinsons. His customer service was second to none when I ordered my suspension so when I found out he sold awnings (and at very reasonable rates I may add) it was an obvious decision to get it from them.

It came 3 days later from Florida to Washington!! I couldn't believe it! He literally shipped it the same day I paid for it.

Thanks for the great customer service [MENTION=148378]Dobinsons Mike[/MENTION] !


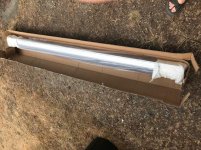
Packaged nicely

in box.jpg

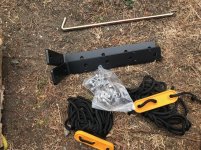
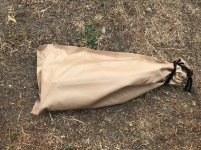
Came with pegs, lines, and a nice case (same material as awning fabric)

contents.jpg

pegs and guy lines in bag.jpg

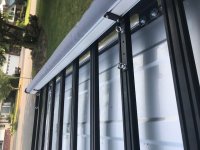
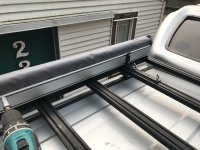
Install was very easy (as expected) and took me about 15 minutes alone. The hardware that came with it, however, is slightly small for the prinsu rack, so I used the tie down hardware kit that you can buy from prinsu or frontrunner and used that to secure the L bracket. I am slightly worried that someone could steal the awning in all of 2 minutes by twisting the eyelets off, but I guess I'll take that chance.

installed brackets.jpg

We were recently camping in Merritt, BC, and the winds were about 50-60 kms an hour and the awning held up. We obviously were using the pegs. Also after that incident, we decided to buy 2 additional pegs from Canadian tire, and some more line to brace the awning out to the sides as well. Many people at the campground that day, had their tents blown away or wrecked. A large around of water did pool on top the awning, but we didn't really have it sloping enough. If the awning poles had have been more angled I don't think we would have had that problem. On a plus note, it goes to show just how waterproof and solid this awning is.

install on prinsu rack.jpg

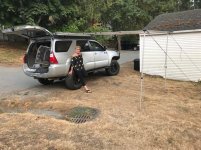
We set it up immediately and here's how it looked.

deployed with em.jpg

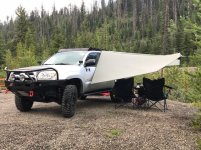
I really appreciate how long the awning is (10' as opposed to 8'). It provides additional protection from the elements.

deployed.jpg

I want to add, that we have used this now about 7-10 days, and it has held up great. When it gets wet we deploy it the next sunny day to let everything dry out.
 

Attachments

  • in box.jpg
    in box.jpg
    80.4 KB · Views: 494
  • pegs and guy lines in bag.jpg
    pegs and guy lines in bag.jpg
    97 KB · Views: 478
  • contents.jpg
    contents.jpg
    129.9 KB · Views: 484
  • installed brackets.jpg
    installed brackets.jpg
    86.9 KB · Views: 494
  • deployed with em.jpg
    deployed with em.jpg
    71.9 KB · Views: 478
  • deployed.jpg
    deployed.jpg
    117.1 KB · Views: 516
  • manning tarp.jpg
    manning tarp.jpg
    81.8 KB · Views: 478
  • install on prinsu rack.jpg
    install on prinsu rack.jpg
    91.4 KB · Views: 520
Last edited:
August roadtrip

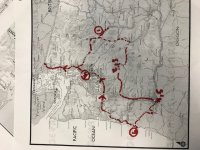
Our annual roadtrip this year was to Washington and Oregon. We had 8 days to explore a small portion of these states.

map of route.jpg

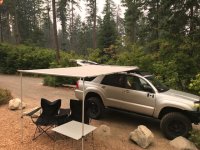
August 18th- Wanatchee state park. Beautiful area near Leavensworth. Can't wait to go back.

awning at wanatchee.jpg

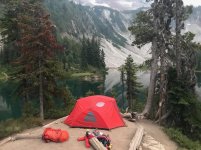
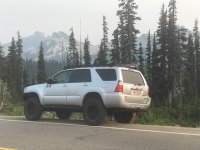
August 19th- Leavensworth to Mt. Rainier. Camped at Snow Lake

View attachment 311604

camping at lake.jpg

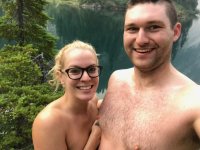
August 20th- woke up for an early morning swim in Snow Lake. Explored Mt. Rainier a bit more, including doing 2 more small hikes. Camping at a Cougar Rock campground

skinny dip.jpg

vehicle.jpg

August 21st- Mt. Rainier to Portland. Beautiful drive. Arrived in Portland early afternoon, first stop we went to the strippers for a brew, then explored some of the iconic Portland sites (Voodoo dounuts, bookstore etc...). Spent the night at an airBNB


August 22nd- Hood river, some waterfalls, town of Hood river, and more Portland in the evening. 2nd night at airBNB

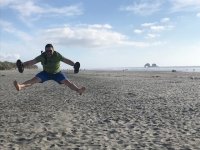
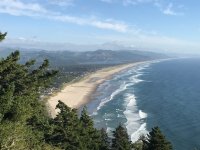
August 23rd- Left Portland, drove to a cool tree obstacle course, then drove through some beautiful state parks, trough Tillamook, to Cannon Beach. Camped on Cannon beach for the night.

beach jup`.jpg

cannon beach area.jpg

August 24th- Explored the town of Cannon beach. Drove north to Seattle. Stopped to check out the cool sites along the way. Arrived in Seattle at our BNB, then went to check out the city.

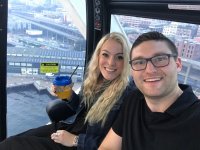
I had planned us a secret VIP Ferris wheel ride overlooking the city. I had some kinder surprises in my backpack, that I had secretly opened before our trip. I carefully removed the wrapper, then removed the toy, and replaced it with a ring. I then resealed the chocolate with melted white chocolate, and re-wrapped it in the tin foil. I marked one with a small dot....this one I gave to my now Fiance. I pretended that I had just bought them but made sure to give her the marked one. It was quite a magical moment.

edit* I realize you guys from the USA have different kinder egg surprises that aren't wrapped like ours, due to your laws. I guess someone sued Kinder surprise because a child swallowed the toy inside the chocolate so yours are wrapped separately. This trick wouldn't have worked.

seattle wheel.jpg

August 25th- breakfast in Seattle, 3 hours in REI, then north back to Canada.
 

Attachments

  • vehicle.jpg
    vehicle.jpg
    97.6 KB · Views: 480
  • awning at wanatchee.jpg
    awning at wanatchee.jpg
    132.6 KB · Views: 490
  • camping at lake.jpg
    camping at lake.jpg
    88.5 KB · Views: 471
  • beach jup`.jpg
    beach jup`.jpg
    109.3 KB · Views: 469
  • seattle wheel.jpg
    seattle wheel.jpg
    97.4 KB · Views: 629
  • skinny dip.jpg
    skinny dip.jpg
    124.9 KB · Views: 490
  • cannon beach area.jpg
    cannon beach area.jpg
    100.9 KB · Views: 478
  • map of route.jpg
    map of route.jpg
    119.7 KB · Views: 501
Last edited:
I had planned us a secret VIP Ferris wheel ride overlooking the city. I had some kinder surprises in my back, that I had secretly opened, removed the toy, and replaced it with a ring. I then resealed the chocolate with melted white chocolate, and re-wrapped it in the tin foil. I marked one with a small dot....this one I gave to my now Fiance. It was quite a magical moment.

View attachment 311602

August 25th- breakfast in Seattle, 3 hours in REI, then north back to Canada.

Congrats man, that's a really cool way to convince her to stay with you!! Chicks love chocolate, and rings.
 
Maintenance

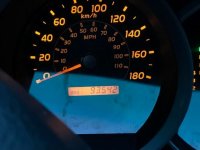
Decided to do a bit of routine maintenance. Still under 95,000kms on the odometer. I did an oil change, re and re air filter, greased driveline and UCA’s, and took the 4runner to Toyota to get the transmission flushed. There seems to be some discussion on whether to flush the transmission in these units. I don’t believe in “lifetime oil” so I decided to get it done. Drives beautifully and I personally am glad I did it for peace of mind. I’m OCD about maintenance and want my runner in tip top shape. I am also the guy that changes oil every 5,000kms even though I’m using synthetic.

kms on vehicle resized.jpg

View attachment 311650

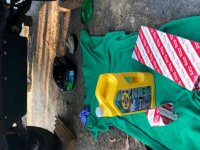
Oil change with pennzoil ultra platinum and OEM filter

oil and filter resized.jpg

OEM air filter. Compare old to new after only 2 months. Perhaps the forest fire smoke and a couple dusty trips contributed more than normal to its condition.


Took it in to Toyota to get a full transmission flush. Cost $232.00, but I couldn't do this job myself as I don't have the proper tools.


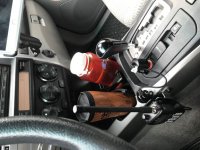
Installed a portable VHF radio mount from “stinkyfab racing”. They make it to fit a Beofang radio but it fits my icom ICV85 perfectly also. Also bought a DC 12v charger for my radio. It's good to be prepared if traveling where typical cell coverage ends.

radio large resized.jpg
 

Attachments

  • kms on vehicle resized.jpg
    kms on vehicle resized.jpg
    28.3 KB · Views: 464
  • radio large resized.jpg
    radio large resized.jpg
    52.8 KB · Views: 483
  • oil and filter resized.jpg
    oil and filter resized.jpg
    59.2 KB · Views: 471
Last edited:
maintenance November 16th 2018

Today I decided to do a bit of maintenance and winter prep....

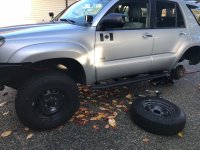
1) swapped over my tires/wheels to my winter set. (Toyota steelies and nokian hakkapeliitta LT2 in 235/80R17).

summer's.jpg

winter tires.jpg

2) did a cursory inspection of the front as I have noticed a loudish clang when reversing at an angle, all seems tight except my passenger CV axle. There is about a 1/2" play when grabbing the axle and shaking it. The boot on the axle tore about 1.5 years ago, so I knew it was only a matter of time before dirt and grime starting to degrade the joints. I have ordered a reman'd OEM axle without OEM boots from CVJ axles. Will install in the coming weeks.

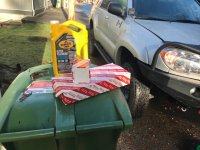
3) oil change with pennzoil ultra platinum synthetic 5W-30. Oil changes are so easy with the fumoto valve. Awesome purchase.

oil change.jpg

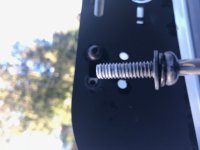
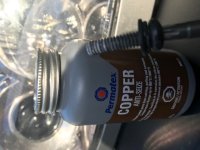
4) Bought some copper anti-seize to use on my prinsu rack screws. The screws are stainless and the rack rails are aluminum. I could see the corrosion already starting to form, so decided instead of eventually breaking the screws in the rails, I'd address this early.....I suggest other prinsu rack owners do this as well!

corrosion.jpg

anti-seize.jpg

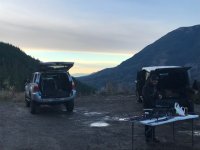
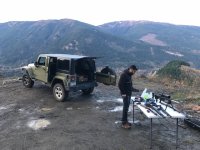
Just before swapping over the tires my friends and I went to the mountains for a little target practice. Everytime I bring my guns out I feel so "American." Shooting is a fun sport, and I see why so many Americans enjoy this hobby.

Good times with buds.jpg

shooting.jpg

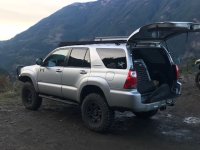
obligatory 4runner shot.jpg
 

Attachments

  • anti-seize.jpg
    anti-seize.jpg
    71.5 KB · Views: 450
  • corrosion.jpg
    corrosion.jpg
    75.2 KB · Views: 459
  • Good times with buds.jpg
    Good times with buds.jpg
    69.1 KB · Views: 433
  • obligatory 4runner shot.jpg
    obligatory 4runner shot.jpg
    86.2 KB · Views: 467
  • oil change.jpg
    oil change.jpg
    107 KB · Views: 468
  • shooting.jpg
    shooting.jpg
    110.3 KB · Views: 431
  • summer's.jpg
    summer's.jpg
    111.3 KB · Views: 457
  • winter tires.jpg
    winter tires.jpg
    108 KB · Views: 443
This is one of the best builds I have seen. I really want to do this, if you don't mind, what will be your total investment$$$ Gives me an idea what to look forward too....
 

Members online

Forum statistics

Threads
278,310
Messages
3,554,080
Members
248,016
Latest member
Advally Service

Trending content

Back
Top