raidernation
New member
I did a quick forum search and couldn't find anything like this, so hopefully this hasn't been covered already and will give some folks another mounting option.
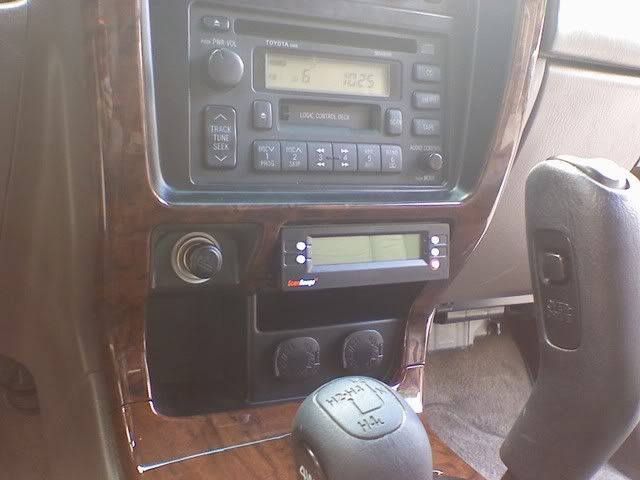
I was tired of the typical 'on top of the steering column mount' in my 99 limited. It covered my highbeam and O/D indicator so I decided to do an overhead mount.
I referenced this Tacomaworld write up for the install and adapted it.
Simple Scangauge II Mounting Mod - Tacoma World Forums
Difficulty of the install was fairly easy.
Items needed:
2 tape measures from the Dollar store
1 ethernet CAT5 female/female connector
1 ethernet CAT5 cable 5ft
I disassembled the following items to run the cable:
Grab handle
A-pillar trim
Overhead cosole/mirror pieces
Visors
Under dash cover
Once the above were removed I was easily able to run the ethernet cable from under the dash, up through the A-pillar area, into the headliner, and over to where I mounted the Scangauge. I used the ethernet connector under the dash to extend the existing Scangauge cable. I only needed an extra foot or so of cable but all I had laying around was a 5 ft cable so I coiled it up under the dash with zip ties.
I used the cheap dollar store tape measures for their metal mounts on the back of them. These are used to 'slide clip' the scangauge to the headliner. The scangauge housing separates into 2 pieces. The back part of the housing is empty once separated. Once you have the unit apart, you can see that the back 1/2 inch of the whole scangauge housing is fairly empty and all the vitals of the unit are up near the screen. I drilled 2 holes in the back of the scanguage housing on top, and mounted the belt type clip to the unit using (2) M3 bolts. Washers, lock washers and nuts on the inside of the scangauge. In the write up I referenced, they used simple screws to attach the clips. I decided to go with small bolts instead for piece of mind that it would not strip out the plastic housing on the scangauge.
Once the clips were mounted and the wiring ran, I just test fit the unit to find the best place that out of the way of the overhead console and rear view mirror assembly.
The only problem I had with this install was the grab handle bolts which need to be removed before the A-pillar trim will pop off. Toyota used some type of blue loctite on them and I ended up stripping the upper one in the removal (phillips head bolt). I drilled off the head off of the bolt and removed the grab handle and trim piece which left a small stub of the bolt sticking out of the a-pillar. Then I used some vice grips to unscrew the bolt. I replaced both of the Toyota bolts with socket head M6 bolts I had lying around that fit the original nuts welded to the A-pillar.


I was tired of the typical 'on top of the steering column mount' in my 99 limited. It covered my highbeam and O/D indicator so I decided to do an overhead mount.
I referenced this Tacomaworld write up for the install and adapted it.
Simple Scangauge II Mounting Mod - Tacoma World Forums
Difficulty of the install was fairly easy.
Items needed:
2 tape measures from the Dollar store
1 ethernet CAT5 female/female connector
1 ethernet CAT5 cable 5ft
I disassembled the following items to run the cable:
Grab handle
A-pillar trim
Overhead cosole/mirror pieces
Visors
Under dash cover
Once the above were removed I was easily able to run the ethernet cable from under the dash, up through the A-pillar area, into the headliner, and over to where I mounted the Scangauge. I used the ethernet connector under the dash to extend the existing Scangauge cable. I only needed an extra foot or so of cable but all I had laying around was a 5 ft cable so I coiled it up under the dash with zip ties.
I used the cheap dollar store tape measures for their metal mounts on the back of them. These are used to 'slide clip' the scangauge to the headliner. The scangauge housing separates into 2 pieces. The back part of the housing is empty once separated. Once you have the unit apart, you can see that the back 1/2 inch of the whole scangauge housing is fairly empty and all the vitals of the unit are up near the screen. I drilled 2 holes in the back of the scanguage housing on top, and mounted the belt type clip to the unit using (2) M3 bolts. Washers, lock washers and nuts on the inside of the scangauge. In the write up I referenced, they used simple screws to attach the clips. I decided to go with small bolts instead for piece of mind that it would not strip out the plastic housing on the scangauge.
Once the clips were mounted and the wiring ran, I just test fit the unit to find the best place that out of the way of the overhead console and rear view mirror assembly.
The only problem I had with this install was the grab handle bolts which need to be removed before the A-pillar trim will pop off. Toyota used some type of blue loctite on them and I ended up stripping the upper one in the removal (phillips head bolt). I drilled off the head off of the bolt and removed the grab handle and trim piece which left a small stub of the bolt sticking out of the a-pillar. Then I used some vice grips to unscrew the bolt. I replaced both of the Toyota bolts with socket head M6 bolts I had lying around that fit the original nuts welded to the A-pillar.