Shawn719 plagiarism slow build

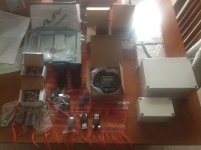
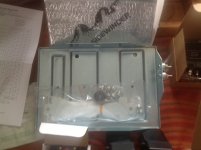
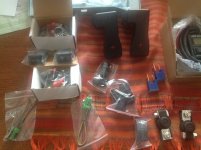
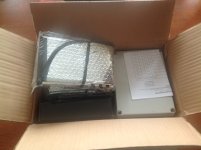
ARB Aux tray, Sidewinder, and goodies arrived!

So, I ordered from ARB (Austrailia) about two weeks ago and the package arrived today. Derek Bester was great to deal with - no problems.
I am really psyched to get the wiring projects going. I have a lot to do - from lights, switches, wiring, aux battery, relocating air compressor...I have enough to keep me busy for a while - just how I like it.

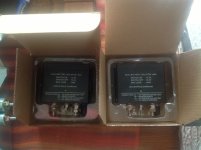
I did make one "error" in that I ordered an extra ARB Sidewinder Dual Battery Isolator (Dbi-140R).
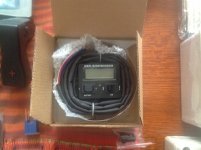
DB-140 Controller
I can hold as a backup or put up for sale - any interest out there?

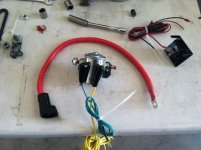
I ordered a bunch a little goodies to go with aux battery tray and Sidewinder setup. See pics below
 

Attachments

  • IMG_0140.JPG
    IMG_0140.JPG
    92.7 KB · Views: 2,681
  • IMG_0141.JPG
    IMG_0141.JPG
    96.1 KB · Views: 2,661
  • IMG_0142.JPG
    IMG_0142.JPG
    92.9 KB · Views: 2,666
  • IMG_0143.JPG
    IMG_0143.JPG
    105.3 KB · Views: 2,679
  • IMG_0144.JPG
    IMG_0144.JPG
    92.8 KB · Views: 2,660
  • IMG_0145.JPG
    IMG_0145.JPG
    117.9 KB · Views: 2,649
Tamper Proof hardware

So - part of my upgrade is including lighting.
Antman's lights were great :nod: but seeing pics of his new setup got me spending money...thanks a lot Antman! I did pay-it-forward by passing lights on to another member :decision:
Anyhow, the led lighting cost has me worried about how easily removed the lights are. So, I went out and picked up security hardware. I have had a few trial and errors and have extra stuff coming (not needed - but one of might need a few security screw/bolts, so hit me up if you do).
Here is what I came up with-
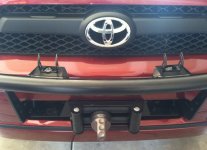
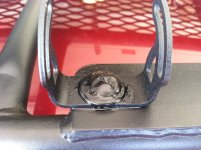
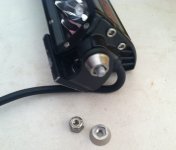
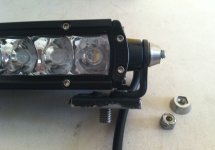
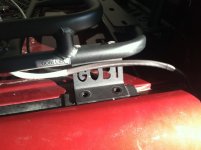
The first three pics are of the Dually mount. I added a one way bolt and TufNut (of course, I sprayed down with Plasticoat:rockon:)
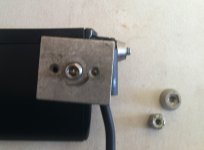
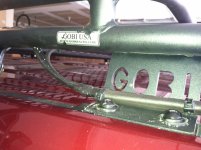
The next three are of a Rigid with a security nut that replaces the nylon. I plan on using a 3/8 Tufnut on the bottom of the base to attach to Gobi.
(Thanks to Antman and phillyd2 for helping me complete this security phase as I was short two bases).
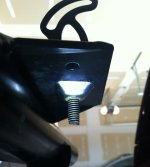
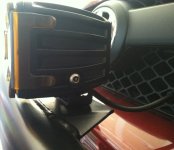
Last pic is of the Dually with a securtiy bolt showing.
Like I said I will have some extra security nuts/bolts shortly - so if you are in need, or want to try out just let me know.
Thanks
S
 

Attachments

  • IMG_1645.JPG
    IMG_1645.JPG
    108.2 KB · Views: 2,532
  • IMG_1646.JPG
    IMG_1646.JPG
    129.2 KB · Views: 2,534
  • IMG_1643.JPG
    IMG_1643.JPG
    59.8 KB · Views: 2,552
  • IMG_1651.JPG
    IMG_1651.JPG
    77.9 KB · Views: 2,509
  • IMG_1653.JPG
    IMG_1653.JPG
    79.4 KB · Views: 2,560
  • IMG_1654.JPG
    IMG_1654.JPG
    74.7 KB · Views: 2,519
  • IMG_1657.JPG
    IMG_1657.JPG
    86.2 KB · Views: 2,547
Baja Buster with Hi-Lift Extreme

Well, I have been taking my time wiring lights, switches, and everything in between. My project has been coming along...
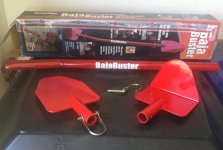
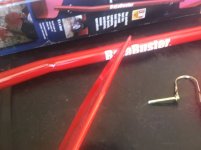
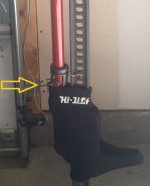
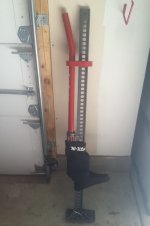
Taking a break from wiring I went out and bought a Hi-Lift Extreme jack to replace the OEM jack. I like the Hi-Lift and it will serve me well - (well, hopefully not that well - Id prefer to not have to use). I ran across a "Baja Buster" while doing research on Hi-Lifts to purchase. The Baja Buster was cheap enough (39.00) to take a chance on.
I will probably grind the edge of the spade in order to give more of a cutting edge if I ever have to dig. Other than that the tool feels pretty sturdy.
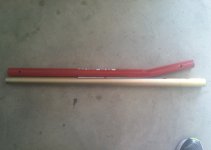
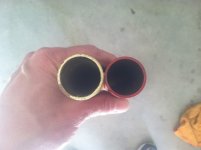
Comparing the Baja to the stock Hi-Lift handle it is obvious the Hi-Lift handle is larger but after testing the Baja handle I could not tell a difference between the two.
I replaced the cotter pin that was holding Hi-Lift handle to jack and use the lynchpin that came with the Baja handle - feels more secure...well, it looks more secure with the lynchpin compared to the cotter pin.
I will see how I like the handle - kind of "gadgety", but serves a purpose. I have the Gobi shovel/axe mount but usually would not travel locally with them hanging off the side of the ride. SO, in that case the Baja Buster could come in handy in a pinch.
 

Attachments

  • IMG_1705.JPG
    IMG_1705.JPG
    96.1 KB · Views: 2,418
  • IMG_1706.JPG
    IMG_1706.JPG
    88.1 KB · Views: 2,443
  • IMG_1708.JPG
    IMG_1708.JPG
    71.7 KB · Views: 2,417
  • IMG_1707.JPG
    IMG_1707.JPG
    73.3 KB · Views: 2,427
  • IMG_1712.JPG
    IMG_1712.JPG
    112.1 KB · Views: 2,434
  • IMG_1711.JPG
    IMG_1711.JPG
    67 KB · Views: 2,429
I am thinking I may need to do the linchpin mod to the handle of my Hi-Lift Extreme. Thanks for the idea Shawn!

Okki
 
Hi Lift Base mount

Projects, projects, projects. The warmer weather is keeping me occupied and motivated to work on the ride. I have all the components for my aux battery install (minus battery), but have been taking that project day by day - no rush as it comes along.
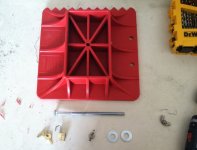
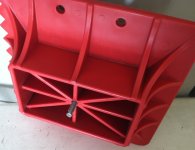
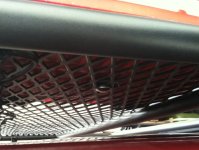
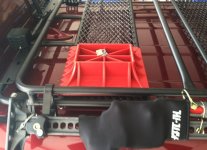
I purchased a Hi Lift base with my jack and kept in the back of the ride, but today I decided to do something different. I mounted on top of the Gobi.
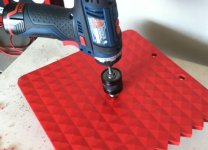
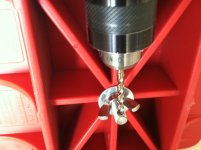
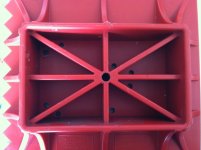
I hollowed out the center hole to match 3/8 carriage bolt. I also drilled a few random holes to allow for drainage.
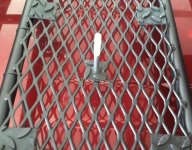
I slid bolt in and screwed wing-nut on. I used wing-nut placement to gauge hole for lock. I drilled hole big enough to fit a simple suitcase type lock thru.
I dremeled the excess bolt past lock.
I ran bolt thru grate and cut some excess rubber matting to hold it in place.
No, the lock wont keep a determined thief away, but it works for the "honest" thief (the opportunist).
 

Attachments

  • IMG_1728.JPG
    IMG_1728.JPG
    96.2 KB · Views: 2,332
  • IMG_1730.JPG
    IMG_1730.JPG
    95.5 KB · Views: 2,358
  • IMG_1732.JPG
    IMG_1732.JPG
    88.7 KB · Views: 2,366
  • IMG_1733.JPG
    IMG_1733.JPG
    91.2 KB · Views: 2,333
  • IMG_1735.JPG
    IMG_1735.JPG
    96.5 KB · Views: 2,324
  • IMG_1736.jpg
    IMG_1736.jpg
    60.9 KB · Views: 2,346
  • IMG_1736a.JPG
    IMG_1736a.JPG
    112 KB · Views: 2,315
  • IMG_1738.JPG
    IMG_1738.JPG
    116.4 KB · Views: 2,308
Did you seriously drill a hole through the side of a bolt with a power drill free hand??? That's pretty amazing, I can barely drill a hole straight through a flat board :)

Nice job on the locking mount, looks real clean!
 
Progress pics

Here are some updates on the ride. I am slowly making progress and improvements.

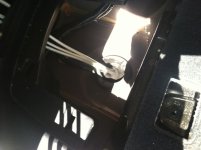
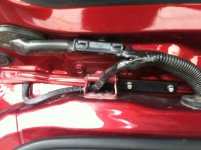
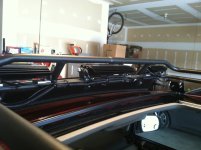
A pic of wringing I ran to Gobi from under the hood. I went underneath vehicle. Much easier, faster, and using the high end cable was a breeze. (Not to mention- the creeper I picked up at Harbor Freight for $20 was on point!)
1.JPG

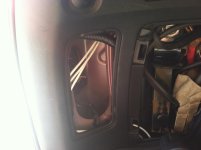
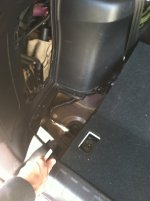
I pulled wiring up thru access panel in rear by jack storage.
2.jpg

I filled hole with liquid tape - awesome stuff (next to PlastiDip) - thanks for the idea Antman!
3.JPG

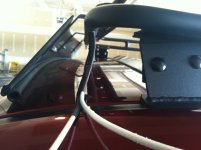
Ran wire up corner to roof
4.jpg

Easily ran thru tubing and filled gap with Goop plus a good coat of Plastidip.
5.JPG

I ran three lines, two to the front and one to rear light. The high end wiring is triple coated (polymer, fiber glass, and then nylon) - used existing wire to pull cables to front of Gobi.
6.JPG
7.JPG

Coming out the front was a little tough, but in the end all was well.
8.JPG
 

Attachments

  • 1.JPG
    1.JPG
    97.5 KB · Views: 2,291
  • 2.jpg
    2.jpg
    132.4 KB · Views: 2,299
  • 3.JPG
    3.JPG
    87.9 KB · Views: 2,296
  • 4.jpg
    4.jpg
    135.9 KB · Views: 2,308
  • 5.JPG
    5.JPG
    104.9 KB · Views: 2,304
  • 6.JPG
    6.JPG
    101.5 KB · Views: 2,298
  • 7.JPG
    7.JPG
    81.4 KB · Views: 2,293
  • 8.JPG
    8.JPG
    92.8 KB · Views: 2,298
Progress pics 2

Ongoing work

Cleaned up entry. Shrink tube, Goop, and a couple coats of PlastiDip.
a.JPG

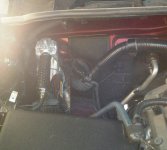
Wiring up front. One of the wires runs two outside 6" fogs, and one runs center 10" spot.
aa.JPG

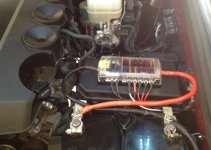
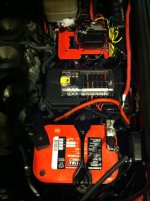
Fuse box. Powered by main battery. I will run a new power once aux battery is installed.
b.JPG

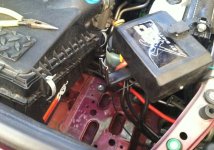
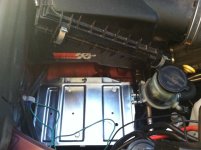
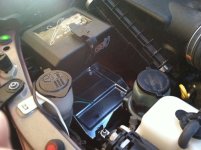
Moved air compressor to make room for Sidewinder aux battery tray. Debating on where to move winch control.
c.JPG

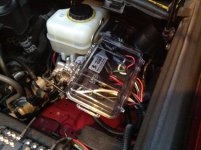
Sidewinder installed
d.JPG

Winch control mounted back in place. May look to place a 1200 Odyssey in that spot, but if I go for a larger battery box will need to be relocated.
e.JPG

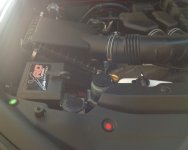
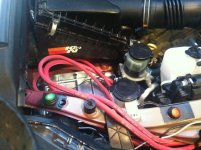
Green switch operates underhood strip lighting, and red operates air compressor (via relay)
f.JPG

Air compressor new home (thanks for the idea Antman)
g.JPG
 

Attachments

  • a.JPG
    a.JPG
    122.1 KB · Views: 2,294
  • aa.JPG
    aa.JPG
    107.8 KB · Views: 2,288
  • b.JPG
    b.JPG
    113.4 KB · Views: 2,443
  • c.JPG
    c.JPG
    136.2 KB · Views: 2,675
  • d.JPG
    d.JPG
    120.5 KB · Views: 2,337
  • e.JPG
    e.JPG
    122.5 KB · Views: 2,346
  • f.JPG
    f.JPG
    77.9 KB · Views: 2,304
  • g.JPG
    g.JPG
    94.9 KB · Views: 2,304
Progress pics 3

and more

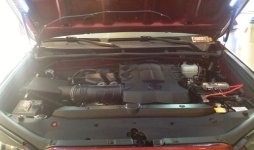
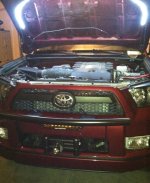
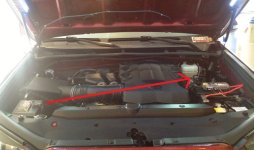
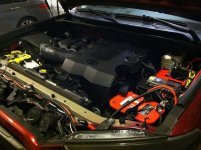
Overview of under the hood
h.JPG

Light on (strip lighting is one of my favorite mods I plagiarized - serves a great purpose!)
i.JPG

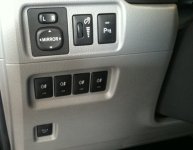
Change some switches around. The fog light switches from ABR work and fit perfect. They are green, but the color change adds to the mix.
No, the switches are not labeled per light, but I know which one does what, so its all good.
j.JPG

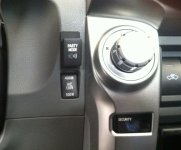
Move "Party Mode" out and Invert in. Ill probably swap Inverter over to the rear parking alarm location. Hard to see lighting when inverter is on. The party mode switch is in need of repair. I am going to look towards OTRATTW for an alternate switch. I don't like how this one sits so far out.
k.JPG


And the "work" goes on - happily.
 

Attachments

  • h.JPG
    h.JPG
    89.2 KB · Views: 2,552
  • i.JPG
    i.JPG
    130.7 KB · Views: 2,536
  • j.JPG
    j.JPG
    100.9 KB · Views: 4,232
  • k.JPG
    k.JPG
    96.6 KB · Views: 4,710
ABR Type-1 switch

Those ARB switches are nice. Can you attach a link from where you bought the switches?

They come from ABR. They are the "Type-1 switch" :first:
Switches and Buttons

Problem is you would need to get on a group buy to get these from ABR. We just had a group come back
http://www.toyota-4runner.org/5th-gen-t4rs/136494-abr-sidewinder-dual-batt-tray-group-buy.html

Since this last buy went smooth I will probably do another for members who are interested. :phone:
Need at least 12 people looking to buy in order to make shipping reasonable enough. (As with last buy, I am not buying. I just do leg work. Why? For good karma, for T4R.org community, and Derek B is a good guy to deal with.)
:gossip: No, no I AM NOT profiting, ha ha
 
ABR Type-1 switch diagram and Relay

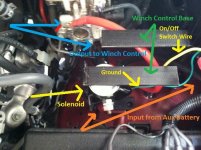
I had a few questions about the Type-1 switch wiring and relay use. I had never wired a relay before taking on these projects, but it was much easier than I first thought.

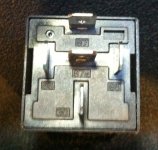
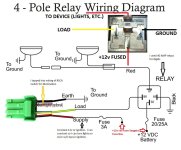
Relays all run the same pattern underneath and are numbered (as shown in diagram and pic of relay. Just hook up as directed and away you go.

Here are my novice directions. I copied diagram from ABR and edited. I hope they make sense.

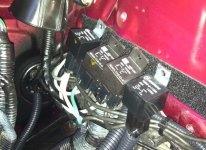
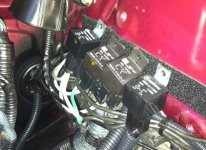
A pic of the relays running in the ride. These run the Rigid rear light on rack, fog light front, floods on rack, and spot on rack. I have them attached via Velcro. I am thinking of enclosing all these in a weatherproof housing.
IMG_1744.jpg

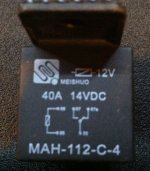
Close up of top of relay I am using (picked up on Ebay)
IMG_1745.JPG

Underside of relay
IMG_1746.JPG

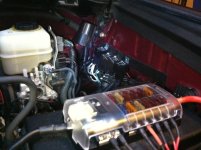
Shot of Seagate fuse panel and relays
IMG_1748.JPG

Diagram with drawing and pic of underside of relay
4-PoleRelayDiagram1ab.jpg
 

Attachments

  • IMG_1744.jpg
    IMG_1744.jpg
    59 KB · Views: 2,250
  • IMG_1745.JPG
    IMG_1745.JPG
    110.8 KB · Views: 2,259
  • IMG_1746.JPG
    IMG_1746.JPG
    125 KB · Views: 2,247
  • IMG_1748.JPG
    IMG_1748.JPG
    123.2 KB · Views: 2,270
  • 4-PoleRelayDiagram1ab.jpg
    4-PoleRelayDiagram1ab.jpg
    110.4 KB · Views: 3,159
Pelican case for relays

I didn't like how the relays looked sitting out I the open, so I gave it some thought. I had a couple Pelican cases stored away and figured one of them would fill the need.
Here is what I did.

Relays before
1.jpg

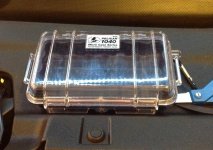
Pelican case
2.jpg

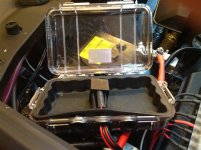
I drill three holes with a step bit and inserted rubber grommets.
3.JPG
4.JPG

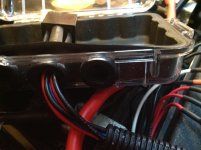
All the relays inserted
5.JPG

Top secured
6.JPG

Relays after (case velcroed in place)
7.JPG
 

Attachments

  • 1.jpg
    1.jpg
    59 KB · Views: 2,267
  • 2.jpg
    2.jpg
    49.1 KB · Views: 2,200
  • 3.JPG
    3.JPG
    135.9 KB · Views: 2,212
  • 4.JPG
    4.JPG
    116 KB · Views: 2,250
  • 5.JPG
    5.JPG
    133.7 KB · Views: 2,220
  • 6.JPG
    6.JPG
    130.8 KB · Views: 2,230
  • 7.JPG
    7.JPG
    135.3 KB · Views: 2,212
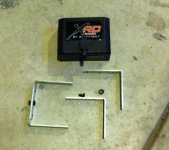
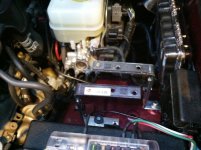
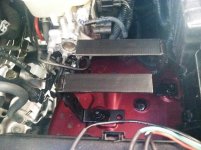
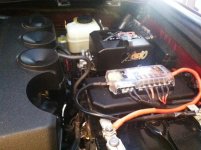
Aux Battery prep

So, I finally made the move and moved winch control to other side of engine bay to make room for my Optima Yellow Top. Man, the work continues - day by day. Still a lot to do.

Move from here to here
1.JPG

Picked up some brackets at Lowes
2.JPG

Gratuitous action shot
3.JPG

Test fit after cut and assembly
4.JPG

Painted and velcro'd. I bolted to existing threaded holes (thanks Toyota) and I plugged other holes with silicone and caps - (in an attempt to limit the amount of crud coming form wheel well).
5.jpg

In place and almost ready to go
6.jpg

Aux battery space and wiring ready for next phase. Two 2 gauge and One 00 gauge. The 00 was a bit tough to work with and I am second guessing my choice - Ill see how it goes when I wire this end.
7.jpg
 

Attachments

  • 1.JPG
    1.JPG
    85.8 KB · Views: 2,164
  • 2.JPG
    2.JPG
    109.2 KB · Views: 2,170
  • 3.JPG
    3.JPG
    73.7 KB · Views: 2,157
  • 4.JPG
    4.JPG
    132.3 KB · Views: 2,167
  • 5.jpg
    5.jpg
    53.3 KB · Views: 2,168
  • 6.jpg
    6.jpg
    49.2 KB · Views: 2,214
  • 7.jpg
    7.jpg
    53.2 KB · Views: 2,170
Last edited:
Aux battery

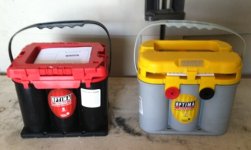
I ordered two new Optima for my setup
IMG_1772.JPG

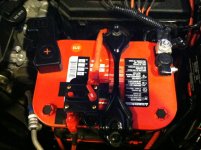
I replaced factory battery with a group 35 Optima,
Optima Batteries 8020-164 35 RedTop Starting Battery
Optima Batteries 8020-164 35 RedTop Starting Battery : Amazon.com : Automotive
IMG_1778.JPG

and the aux battery with a Group 34 Optima,
Optima 8014-045-FFP YellowTop Group 34/78 Deep Cycle Battery
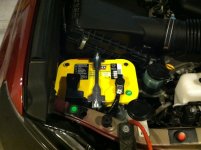
The yellow top sits nice in tray with room to spare.
Optima 8014-045-FFP YellowTop Group 34/78 Deep Cycle Battery : Amazon.com : Automotive
IMG_1777.JPG

I am working the myriad of wiring for batteries, Sidewinder aux battery setup and monitor, winch, and winch power interrupt.
IMG_1775.JPG

I've heard of possible problems with winches and fire...so, I decided to install a Bulldog Power Interrupt Kit
IMG_1773.JPG

I attached interrupt kit under where I mounted the winch control box
IMG_1776.jpg

Getting there...
IMG_1779.jpg
 

Attachments

  • IMG_1772.JPG
    IMG_1772.JPG
    48.2 KB · Views: 3,054
  • IMG_1773.JPG
    IMG_1773.JPG
    68.9 KB · Views: 2,894
  • IMG_1775.JPG
    IMG_1775.JPG
    80.9 KB · Views: 2,831
  • IMG_1776.jpg
    IMG_1776.jpg
    60.2 KB · Views: 2,810
  • IMG_1777.JPG
    IMG_1777.JPG
    117 KB · Views: 3,072
  • IMG_1778.JPG
    IMG_1778.JPG
    120.7 KB · Views: 3,017
  • IMG_1779.jpg
    IMG_1779.jpg
    136.3 KB · Views: 2,782
Progress

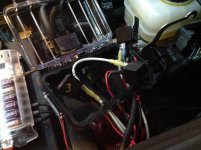
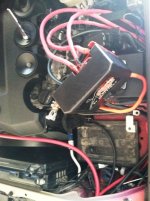
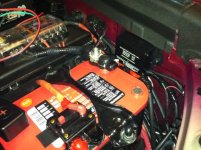
Spent sometime today wiring and modding. I hooked up Sidewinder aux battery control and breaker to protect main battery.
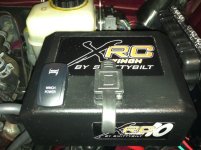
I gave some thought to where I wanted to place my OTRATTW Winch switch inside the T4R. I came to the conclusion, as I did with the air compressor switch, that I will be under the hood when using. So, I found the perfect spot.

Breaker in place. Wire from Sidewinder to breaker to main battery.
1.JPG

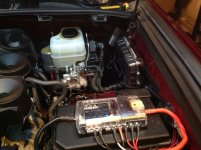
Shot of Sidewinder. Input from Aux batt, output to breaker, then to main batt. Not functioning yet - still have to find a location in cab for monitor. (Thinking inside center console)
2.jpg

Shot of OTRATTW switch mounted in XRC control box
3.JPG
 

Attachments

  • 1.JPG
    1.JPG
    135.5 KB · Views: 2,668
  • 2.jpg
    2.jpg
    57 KB · Views: 2,680
  • 3.JPG
    3.JPG
    124 KB · Views: 2,637
Switches look super clean man.

and more

Overview of under the hood
View attachment 84854

Light on (strip lighting is one of my favorite mods I plagiarized - serves a great purpose!)
View attachment 84855

Change some switches around. The fog light switches from ABR work and fit perfect. They are green, but the color change adds to the mix.
No, the switches are not labeled per light, but I know which one does what, so its all good.
View attachment 84856

Move "Party Mode" out and Invert in. Ill probably swap Inverter over to the rear parking alarm location. Hard to see lighting when inverter is on. The party mode switch is in need of repair. I am going to look towards OTRATTW for an alternate switch. I don't like how this one sits so far out.
View attachment 84857


And the "work" goes on - happily.
 

Members online

Forum statistics

Threads
278,316
Messages
3,554,120
Members
248,016
Latest member
Advally Service

Trending content

Back
Top