jmferg
New member
Shrockworks bolt-on slider install.
A couple install notes.
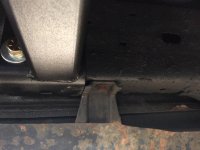
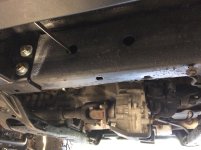
The drivers side has clearance issue around the gas tank skid mounting tab as well as the the plastic fuel line cover.
The plastic cover will be notched and re-installed.
Do the drivers side first. The passenger has all the room to adjust where you mount so this way they match. The driver's side is about 3/8" farther forward because I didn't do this.
8 total holes have to be drilled to install. There are NO existing holes in the frame to utilize contrary to other write-ups.
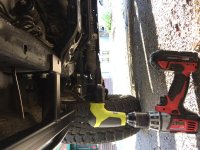
You need a right angle drill to drill the upper holes.
See the picture of the setup I used with a ryobi right angle attachment.
My frame has been undercoated and fluid filmed which made it difficult to mark the holes.
1. I spray painted the general location of the mounting holes with silver paint to make the marks stand out.
2. Raise the slider into the general location with a floor jack. There is a driver and passenger side as indicated on the frame plate of each
3. Measure and step back to make sure it is located where you want it. Clamp the L-shaped frame plates snug against the frame rails and mark mounting holes.
4. Center punch holes and start with a small pilot drill bit. Use a step drill bit to drill the holes out to 9/16". The bolts are 1/2" but the extra 1/16" will help to line things up accounting for any error.
5. Paint the drilled surface to prevent rusting.
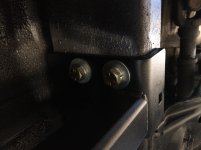
6. Raise slider back up with floor jack and install bolts and stick nuts. There wasn't a torque spec on the instructions but I went to 85 ft/lb without much issue. Use a pair of vise grips to hold the stick nut end.
I ordered the 2 tube support, angled up with their textured powdercoat. The powdercoat job and the welds look excellent.
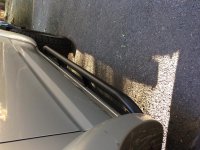
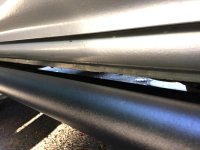
There is roughly 3/8" clearance between the main tube and the pinch weld.
The directions show installing 1 bolt through the side of the frame and 1 through the bottom. My plates don't match the picture as the bottom hole is square and oversized. I installed all 8 bolts through the side and will be reaching out to shrockworks for an answer.
this is probably the tightest tucked factory built slider I've seen for a 3rd gen.
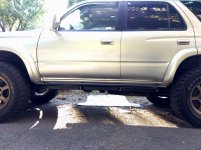
The standard length allows coverage from flare to flare.
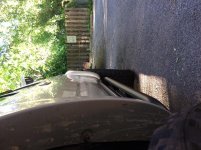
Overall I am happy and tested with the obligatory jack stand lift and it supported weight and the truck with no deflection. (+10 Overland poser points).
A couple install notes.
The drivers side has clearance issue around the gas tank skid mounting tab as well as the the plastic fuel line cover.
The plastic cover will be notched and re-installed.
Do the drivers side first. The passenger has all the room to adjust where you mount so this way they match. The driver's side is about 3/8" farther forward because I didn't do this.
8 total holes have to be drilled to install. There are NO existing holes in the frame to utilize contrary to other write-ups.
You need a right angle drill to drill the upper holes.
See the picture of the setup I used with a ryobi right angle attachment.
My frame has been undercoated and fluid filmed which made it difficult to mark the holes.
1. I spray painted the general location of the mounting holes with silver paint to make the marks stand out.
2. Raise the slider into the general location with a floor jack. There is a driver and passenger side as indicated on the frame plate of each
3. Measure and step back to make sure it is located where you want it. Clamp the L-shaped frame plates snug against the frame rails and mark mounting holes.
4. Center punch holes and start with a small pilot drill bit. Use a step drill bit to drill the holes out to 9/16". The bolts are 1/2" but the extra 1/16" will help to line things up accounting for any error.
5. Paint the drilled surface to prevent rusting.
6. Raise slider back up with floor jack and install bolts and stick nuts. There wasn't a torque spec on the instructions but I went to 85 ft/lb without much issue. Use a pair of vise grips to hold the stick nut end.
I ordered the 2 tube support, angled up with their textured powdercoat. The powdercoat job and the welds look excellent.
There is roughly 3/8" clearance between the main tube and the pinch weld.
The directions show installing 1 bolt through the side of the frame and 1 through the bottom. My plates don't match the picture as the bottom hole is square and oversized. I installed all 8 bolts through the side and will be reaching out to shrockworks for an answer.
this is probably the tightest tucked factory built slider I've seen for a 3rd gen.
The standard length allows coverage from flare to flare.
Overall I am happy and tested with the obligatory jack stand lift and it supported weight and the truck with no deflection. (+10 Overland poser points).