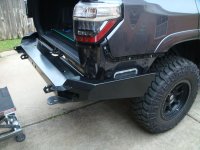
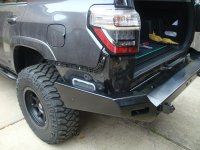
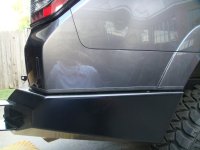
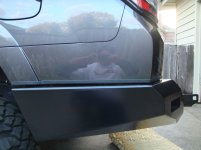
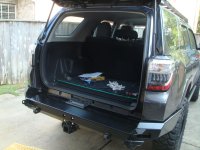
shrockworks rear bumper

I'll have mine installed.

Sorry, but I don't have the stones to go sawing into my new vehicle... :fear::shrug:
 
Does Shrockworks ship these rear bumpers with all pieces on one pallet? I'm thinking of ordering and getting shipped to the US border. Do you think all the pieces would fit in the back of the 5th gen?
 
Does Shrockworks ship these rear bumpers with all pieces on one pallet? I'm thinking of ordering and getting shipped to the US border. Do you think all the pieces would fit in the back of the 5th gen?

they probably do ship in one pallet. i'm local to these guys, i went to their shop to pick it up in a trailer. it'll be a tight squeeze in the runner but it should be ok.
 
Does Shrockworks ship these rear bumpers with all pieces on one pallet? I'm thinking of ordering and getting shipped to the US border. Do you think all the pieces would fit in the back of the 5th gen?

I picked up mine on my runner, it was a very tight fit but managed to get everything in there. I had one end against the second row windows, so make sure you take alot of padding material.
 
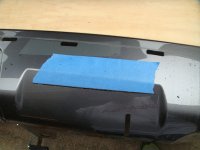
Use blue painters tape and follow directions. You will want a gap. If you don't have one when the frame and body flex while wheeling it can separate bumper cover from body which is no bueno.. To be honest I used a Drexel part of the time But for long flat sections of bumper what worked best for me was a long blade set of tin snips... Just flew through and made straight line cuts...
 
Would a RotoZip with a small diameter laminate or drywall bity work better than a Dremel or Jig Saw?

I'd recommend a Dremmel tool such as that shown above. RotoZips are interesting tools, but I don't find them as precise as I'd like.
 
No problem, I'm in Spring Branch area, (I-10 and the beltway).
I work right off of blalock and hempstead. i'm surprised i've never seen your rig around.
Happy to help out as well. I'm north of Willowbrook in Klein area

all right guys, let's try for next saturday. i'm going to be installing my prinsu roofrack that i got on the TacomaWorld GB this weekend. If yall want to help on that too would be great, :bounce: but let me know if next saturday is ok for the bumper.

 
I work right off of blalock and hempstead. i'm surprised i've never seen your rig around.


all right guys, let's try for next saturday. i'm going to be installing my prinsu roofrack that i got on the TacomaWorld GB this weekend. If yall want to help on that too would be great, :bounce: but let me know if next saturday is ok for the bumper.

next Saturday is fine for me.
 
starting install

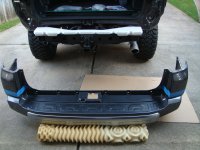
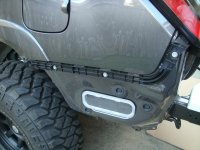
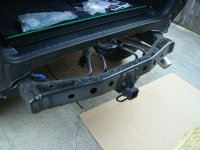
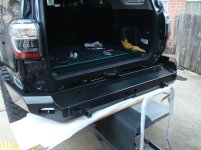
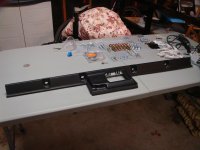
Finally got around to installing my bumper. Took off work early today to get a head start on my install. I took the factory plastic bumper off. wanted to do a dry fitment before i start to hack into my plastic cover. i will reinstall the bumper back to do the final cut. but it just started to pour here so i had to call it a day. I will start backup tomorrow and hopefully the weather cooperates.

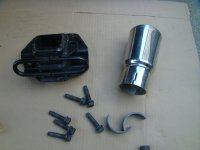
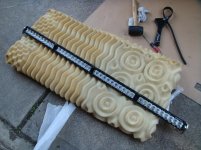
Is anybody in here running rear icons with the remote reservoir? it looks like that it might be in the way but dont know for sure, I will do a fitment tomorrow and see how it goes, also i think you have to remove the chrome exhaust tip, that looks like it'll be in the way as well. I will keep this thread updated as i go. Oh yeah and my light bar came in today as well. DSC02240.jpg

DSC02244.jpg

DSC02249.jpg

DSC02257.jpg

DSC02262.jpg

more pics of the final install to come tomorrow keep tuned. and if you see something i'm doing wrong please let me know.:usa2::usa2:
 

Attachments

  • DSC02240.jpg
    DSC02240.jpg
    135.6 KB · Views: 3,188
  • DSC02244.jpg
    DSC02244.jpg
    133.5 KB · Views: 1,493
  • DSC02249.jpg
    DSC02249.jpg
    133.6 KB · Views: 1,485
  • DSC02257.jpg
    DSC02257.jpg
    128.1 KB · Views: 1,413
  • DSC02262.jpg
    DSC02262.jpg
    136.1 KB · Views: 1,449
Install update

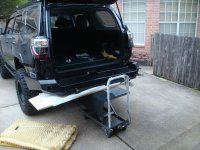
I used a hydraulic lift table to "lift and guide" the heavy beast into place. This table is great, you can go up and down, in and out making the job much easier.

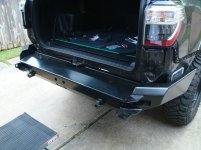
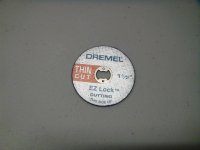
After trying different cutting tools, I went back to my dremel tool. As others have mentioned, the regular cutting disc was just melting the plastic instead of cutting it. Went to Home Depot and got a thin cutting disc. I did a test cut before I started cutting the real part of the bumper. This disc does a very nice job of cutting, (see pics) Just keep a slow and steady speed and don't cut away too much at a time. I took my time and repositioned my hands often on the inside edge. It came out pretty good.
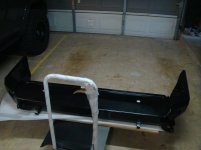
I have about 1/4 inch gap, i might go back and install another washer if there is any clunking issues.

Since my factory bumper is trash now. I tried the idea of cutting part of the shell to cover the big gap in the cargo area, after you bolt everything back in place it looks better than having the gap there. (IMHO)

I'll finish up tomorrow with the accessories and tire carrier, check back later for more install pics.

DSC02265.jpg

DSC02272.jpg

DSC02273.jpg

DSC02278.jpg

DSC02279.jpg

DSC02280.jpg

DSC02293.jpg

DSC02313.jpg
 

Attachments

  • DSC02265.jpg
    DSC02265.jpg
    136.3 KB · Views: 1,284
  • DSC02272.jpg
    DSC02272.jpg
    131.6 KB · Views: 1,259
  • DSC02273.jpg
    DSC02273.jpg
    136.8 KB · Views: 1,620
  • DSC02278.jpg
    DSC02278.jpg
    134.2 KB · Views: 1,359
  • DSC02279.jpg
    DSC02279.jpg
    132.9 KB · Views: 1,340
  • DSC02280.jpg
    DSC02280.jpg
    135.5 KB · Views: 1,354
  • DSC02293.jpg
    DSC02293.jpg
    139.4 KB · Views: 1,239
  • DSC02313.jpg
    DSC02313.jpg
    148.6 KB · Views: 1,230
more pics

DSC02304.jpg

DSC02305.jpg

DSC02303.jpg

DSC02315.jpg
 

Attachments

  • DSC02304.jpg
    DSC02304.jpg
    137.4 KB · Views: 1,279
  • DSC02305.jpg
    DSC02305.jpg
    133.7 KB · Views: 1,309
  • DSC02303.jpg
    DSC02303.jpg
    135.3 KB · Views: 1,270
  • DSC02315.jpg
    DSC02315.jpg
    132.8 KB · Views: 1,236

Members online

Forum statistics

Threads
278,313
Messages
3,554,090
Members
248,016
Latest member
Advally Service

Trending content

Back
Top