Sniv's Custom Long Travel Build

Hey what are your plans for the rear set up?
Im running a 2.0 X 4" bump stops and icon 2.5's (bolt in) in the rear and I finally had the opportunity to run my camburg front lt kit this past weekend.

The rear couldnt keep up with the front at all even bumped, so im really interested to see what you do with yours and how it works out.

My rear is all sorts of jacked right now. I have some ambitious ideas to pull some big travel numbers but that won't happen until next summer at a minimum. I'm surprised your 2.5 Icons can't keep up, how much have you tuned the valving in on the rear? The fact the rear is a ***** to pull big travel numbers certainly doesn't help, I have yet to have my rear suspension ever come close to matching the front even pre-LT which is why I'm gonna tear out every piece of the rear suspension when I upgrade it.
 
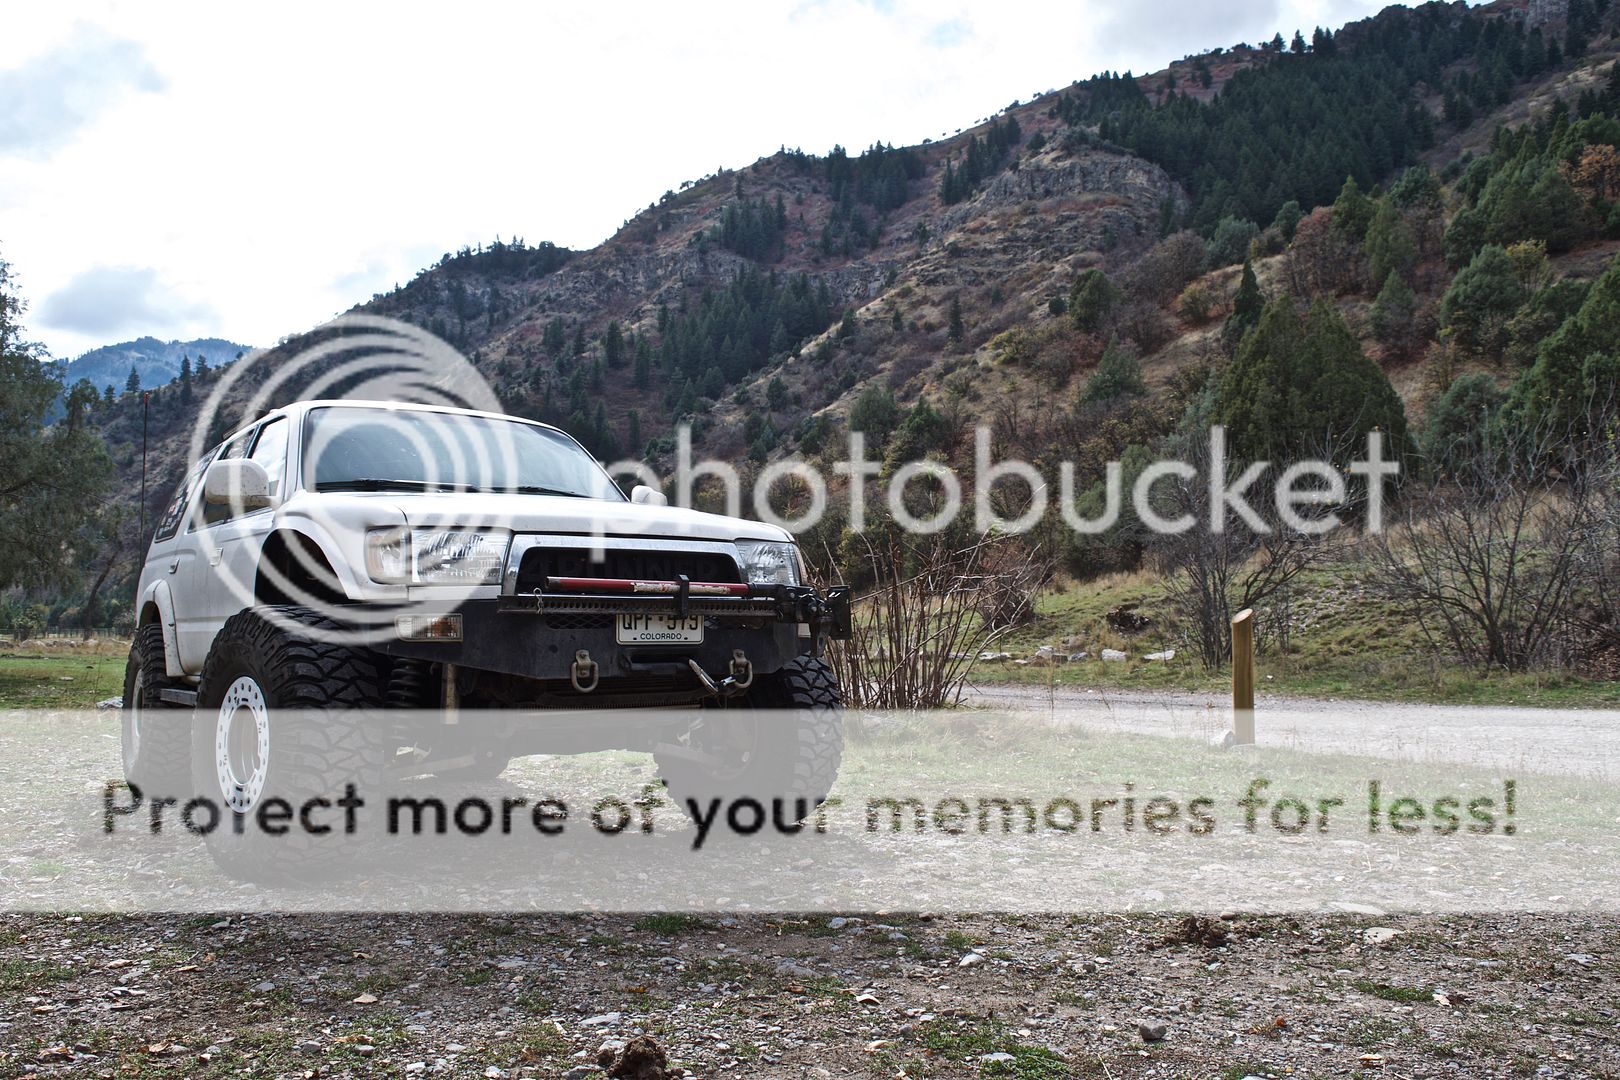
My girlfriend moved in a few weeks ago, so I haven't had much time to go wheeling lately. A few days ago we cruised up Providence canyon to kill some time before going to the movies. My rear bumper was getting wrecked whenever my tires would stuff much, which was another big factor in not wheeling much. Only decent picture I got up Providence:

DSC_0395_zpsidcqfxrx.jpg~original


So yesterday I finally got around to trimming the rear bumper (again) which made a huge difference. I still rub on on the body if one tire stuffs a lot, so I'll probably just trim the body now and either relocate my flares higher or just remove them entirely.

Once the bumper was clearanced my girlfriend and I decided to try and offroad from the valley where we live to Bear lake, which is about 40 miles on the highway north-east of us. That time I got stuck in the mountains with two flat tires and spent the night, at one point there was a forest service sign that said "laketown" so I figured it was realistic to be able to get most if not all the way to the lake. We started out on a trail called Left Hand Canyon, with a vague idea of where to go.
DSC_0413_zps4kamehph.jpg~original


There's a decent rock garden, though I wasn't worried since as I said I've done it a few times and the last time I went through it I was on 31s and only scraped my skids twice. After that it's mostly fire trail and essentially dirt roads. We aired down to 10psi, mainly for the comfort aspect and my figuring is with the CO2 and beadlock setup as well as having staun air downs my buddy got me for my birthday, there's no reason not to air down for added traction (not that that was needed) and a smoother ride.

DSC_0415_zpst5uh68ho.jpg~original


It's probably 5-6 miles until the rock garden. This obviously isn't the first time rock crawling with the LT, but it's the first time doing some mild crawling with the 35s and extra wide front end setup which creates some interesting changing in driving and narrow trails. I took a few pictures here, the funny part is if I didn't have such a wide stance I wouldn't be on EITHER of these rocks and could slip in between.

DSC_0420_zps2kg4gdjo.jpg~original


DSC_0427_zpsf4sjuzxc.jpg~original


DSC_0425_zps5a2lhpb4.jpg~original


For anyone who keeps up with this build, you know I'm running a 500/800 spring rate and it's not setup correctly. It works, but not perfect by any stretch. My tender spring (secondary, or top spring) is constantly compressed. So although I have a dual rate setup, the suspension isn't seeing the combined spring rates until it droops quite a bit. At ride height the dual rate slider has hit the collar, meaning effectively my ride height spring rate is just 800lbs/in. Originally I wanted the suspension to be able to fully cycle if it flexed out hard, but in retrospect I'm glad I messed up my spring rates. Because of the amount of up travel I have, I can't turn a lot at full compression. I had figured before it wouldn't be a huge issue, and I would just adapt and learn to steer only a fraction of the normal amount to the side fully compressed. Well I think that was a stupid assumption, since after crawling a bit I remembered/realized how crucial having full turning capability is let alone if you're on a tight trail trying to maneuver everywhere in a small space... So with that in mind, it's actually nice how stiff the front end is since the suspension won't compress so far to hinder my steering capability but I'm probably still pulling around 9" or more of total flex travel up front. That's not a LOT, but I'm happy since that's not even fully cycling the suspension and still getting quite a bit of travel. Not saying the spring rate is perfect by any stretch, but having it be wrong taught me a lot about what I want my tuning like in the future.

DSC_0428_zpswl9ujlrl.jpg~original


DSC_0433_zpslzu59g3s.jpg~original


I'm happy with the MTZs so far. They have lots of traction, though I haven't pushed them hard yet. At one point there was a pretty sharp rock I couldn't maneuver around and it had to shove the rear end over and I was afraid I was gonna slice the sidewall but they held up fine. Pretty sure it's the same rock that had sliced my spare tires side wall when I got stranded...

They really bulge aired down too which I like, this is flexed out but makes me confident they'll work well in deep snow.

DSC_0434_zpseoziobly.jpg~original


I liked the fact for this trip we were exploring areas I had never been before. In total we covered roughly 50+ miles offroad. Technical wheeling is fun, but ultimately stuff like this is why I decided to LT instead of SAS. I like how I can explore deep into the wilderness in comfort and cover a lot of ground fast.

DSC_0439_zpsbcgwproa.jpg~original


We hit another junction after awhile and took an alternate path which led us into a forest. At one section there were desert hills on the north of the little valley and the south side had pines and aspens and a full forest like back home which was neat. Found some funky little ponds and random picnic tables too.

DSC_0442_zpscnjgqfr5.jpg~original


Finally we got onto what we thought was a trail going to Bear lake and got to a cool overlook.

DSC_0444_zps6rrgoydj.jpg~original


Randomly there was another truck on the trail heading the opposite way as us, he pulled over and told us we were trespassing and asked if we were hunters... in my girlfriends blue outfit and me wearing my USU shirt. He asked if we had seen any trespassing signs which we said no, earlier there had been a sign saying trespassing if you go off trail and stay on the trail which is what we did to the best of our knowledge. After a fairly stupid conversation, we turned back. At the previous Y in the road, we had been debating to go left or right. The left had a fence with a cattle guard and gate which was wide open (no signs anywhere). We had chose to go through the gate specifically because it looked like it WAS the trail. As anyone who's gone on forest service or BLM trails knows, there's lots of gates which is what prompted us to go that way and since there was zero signs (let alone no trespassing) it seemed the likely route. What we concluded was the fence marked this idiots property, and he didn't know his gate was wide open and unmarked. Once we got back to that fork, we went the other way which we assumed would head to the lake. Earlier there had been another sign saying "laketown" which is why we were on this trail in the first place.

In the end the trail popped out about a mile from the Wyoming border on a highway that runs along the east side of the mountain range. Somehow we had gotten within a few miles of the lake, and headed in the most likely direction to get there and popped off on the other side of the mountains versus at Bear Lake which is in the mountains.

I had been on that highway a few times before since it's an alternate route for my commute to/from school, and we had a high level map which showed the highway too to confirm where we were. From there we aired up and drove about a half hour north and west until we got to Bear Lake. The CO2 setup had some issues at first, it seemed like the nozzle was clogging up and would get stuck open or not seal well with the schrader valve. It seemed to work itself out though, I'm guessing the air/condensation in the air line froze and messed with it for a bit since this was my first time using it. Once I got two tires done it was totally fine though and worked like a charm.

DSC_0453_zpsexxsyko8.jpg~original


In total we drove over 50 miles offroad, and spent about 6 hours on trails. We didn't hit our objective of getting to the lake, but we did drive from the west to east side of the Bear River Range which I've always wanted to do. The runner did great and didn't have any issues. Hopefully next time we'll actually hit our mark.

DSC_0448_zpstf4epfiq.jpg~original
 
Looks good. you could try running the rear sway bar if you wanted to get the front to flex more evenly. I bet you have good stability on side hills now though.
 
(Part 1 since apparently I have too many pictures)

This past weekend my girlfriend and I drove down near Green River, UT and met up with my parents to go exploring and camping. This post has a lot of photos, I'll try to keep them to a minimum though.

DSC_0544_zps1ulv17sr.jpg~original


The runner's steering rack is pretty wrecked at this point which made the drive annoying. AWD seems to help a lot with the front tires pulling, otherwise in 2WD it's a constant struggle to keep it pointing in the direction you want and it seems to go into a oscillation mode where the front end starts shifting back and forth--really annoying to say the least. 35s and driving fast are taking their toll.

We turned off of I-70 and started going up a trail called Fix It Pass, which then dumped into another trail called Devil's Racetrack. The first night we didn't go very far since we had driven most of Thursday and it was getting late when we showed.

DSC_0566_zpsdewrbyrj.jpg~original


DSC_0568_zpsgox9q7kn.jpg~original


In the morning as my parents were packing up camp my girlfriend and I ran over to check out some petroglyphs.

DSC_0573_zpsoggra0wm.jpg~original


DSC_0570_zpsobrrsyj0.jpg~original


DSC_0576_zpsm0ppcx6o.jpg~original


After packing up we spent the rest of Friday doing Fix It Pass which is easy until a decent rock section near the end.

DSC_0589_zpsprmnf5kx.jpg~original


Gotta love the super low CG and wide stance, a few times I really cranked the truck over and it was totally planted.

DSC_0585_zpsztexn11v.jpg~original


We concluded this was the "top" of the pass, or maybe it was the next saddle. This one had a map on it which I concluded marked the top.

DSC_0597_zpsnhpi55h5.jpg~original


DSC_0599_zpsef0suylq.jpg~original
 
(Part 2)

I don't have any pictures of me going through the rock section of Fix It. The 35s are sweet, it's amazing what an extra inch or two of ground clearance can do vs 31s/33s. At one my right slider touched, but for the most part I just pointed the truck and crawled over whatever I wanted. At one point I backed up a little and didn't realize a rock behind me so the drivers tail light got dinged and the body got a little dent near the bumper, but nothing bad (compared to the rest of the body damage on the runner). My mom's 4th gen is essentially stock, it has 5100s with the front cranked a little to level it and then an RCI front skid but that's it. Took a lot of spotting and stacking some rocks in a few places but she made it through! Goes to show with some creative driving and spotting you can make it far.

DSC_0609_zpsgur4oeun.jpg~original


DSC_0612_zpssh3gl4ij.jpg~original


After the rock section the trail goes up a river bed for awhile and then tees into Devil's Racetrack. From there we headed back south. After the rock section my girlfriend drove, which was her first time driving the runner offroad. Immediately on Devil's Racetrack there was a good sized ledge which she crawled up like a pro.

DSC_0620_zpsuqgyz5eb.jpg~original


Of course, after that she concluded she would rather ride than drive and "risk killing us". I was proud of her, like I said she had never driven offroad at all so at least I got her feet wet.

DSC_0631_zps0cin1hng.jpg~original


That night we camped on Devil's Racetrack.

DSC_0637_zpsqlfqstsr.jpg~original


Saturday morning showed that we had camped at the beginning of the hardest rock section of anything we would do.

DSC_0645_zpszhqqub51.jpg~original


Also happened to be on the edge of a cliff.

DSC_0648_zpsdb5ejgrk.jpg~original


DSC_0652_zpsdxxmmg7d.jpg~original


DSC_0664_zpscieoyna2.jpg~original


I've nearly finished fixing my rear bump stops and shortening them, but not quite so I had no rear bumps at all. Needless to say the 35s and the body had a great time trying to kill each other. It made everyone cringe whenever I would flex enough for one side to stuff and get ripped up. I'm gonna pull what's left of my fender flares and trim the body up an inch or two, and then once the bump stops are back in I think I should clear throughout the whole travel range.

DSC_0674_zpsn9dw2cv7.jpg~original


After Devil's Racetrack we crossed under I-70 and explored further south in search of a place to camp.

DSC_0676_zpscovcudig.jpg~original


DSC_0687_zpsmn5ombbn.jpg~original


Unfortunately a storm was moving in and started raining decently...

DSC_0684_zpslhdwq146.jpg~original


We turned back and decided to go back to Green River and from there figure out what to do next. We got slightly lost on the way back, but my girlfriend and I were trying a navigation app I had seen a lot of people talk about on DezertRangers called LeadNav for iOS. It has numerous features, but the most convenient is you can select how much zoom you want and what sections of the map you want and it'll download a topo map (which actually had a lot of trails and side routes marked) and then overlay your GPS location. It also shows speed, can plan routes and waypoints, compass, etc. You have to pay a yearly fee extra for a satellite map, but the topo works just fine. So using that we got back on course--I look forward to using it a lot in the future, the fact you can have GPS positioning on a map and not need any cell signal is awesome.

DSC_0690_zpsinjdcnee.jpg~original


So after probably 20 miles or so we got back to I-70. The truck was feeling more squirrely than normal when I hit the pavement. I pulled over and found that I had broken another rear upper link. No idea when that happened, I've broken them in the past from flexing the rear a lot so I assume that's what happened again. We drove the 25 miles to Green River and tried to find a welding shop in town, but Green River doesn't seem to have anything... My dad and I strategized possible temporary fixes, luckily they had a hardware store in town and this is the solution we came up with:

DSC_0691_zpsf4pif5ts.jpg~original


We originally were gonna use some C-channel that had holes in it and then preload it with a ratchet strap, or use two ratchet straps to be in tension in opposite directions to take the compressive and tensile forces the link normally sees, but this seemed to be the best alternative where one turn buckle was pushed out to act in compression and the other was tightened to react tensile forces and try to remove the most possible slop. Considering the links are obviously redundant, the main goal was to add some strength back and mainly keep the axle properly located. For anyone who hasn't broken an upper link before, the axle is still located but due to the bushing interface of the upper link that's still intact and how far offset it is, the axle is able to rotate slightly on the side that doesn't have the link still and that induces a rear steer effect. Point is, you can drive but it gets sketchy since whenever there is a torque change (like accelerating or getting off the gas) the axle will twist and steer the rear to the side--so our goal was to stop that, which actually worked great! So I drove home with this makeshift upper link:

DSC_0692_zpsckejmojq.jpg~original


We decided to head north to look for camping spots since that would put my girlfriend and I closer to home. About a half hour towards Price the rain was getting worse so we decided to call it. My parents turned around and we made a dash for home since it wasn't gonna be any fun to camp in a downpour. The truck made it home fine considering the front end was super loose and the rear was in a bad way. Overall though it was an awesome trip and a lot of fun exploring in the desert!
 
Hopefully going to revalve tomorrow and charge the rear bump stops and probably bump the front ones to 300psi. Plan was to do that all today but the guy I get nitrogen from is in Moab right now. I'll have to look at what shims are laying around, worst case scenario I'll double stack 0.010" shims for the last two or three of the six shim stack since I have a ton of 10s, so it would be three or four 10s and then two or three 20s essentially. Not exactly great, but it'll stiffen up the front end when it hits hard since I've been hitting the bumps way too often. Likewise I'll stiffen up the rebound since it's coming back up too fast. The rear bump stops are fixed, I shortened them so they are essentially 2" stroke bump stops. One of them was a pain in the ass to get the nut off of to remove the piston, whoever torqued that should be fired. FOAs shock spec is like 50ft-lbs, after trying everything possible I finally got the nut off using an impact and clamping the shaft and heating the nut up with the torch first. So my bump stop shaft is ****ed at the top, but since it has shortened travel it won't touch the seals ever. I figure since they cost like $30 for a new shaft if I ever lengthen it I'll just buy a new shaft. Since the rears are just 2" travel now I'll run them at 300psi since I need all the help from them I can get, likewise I'm bumping the front to 300psi (which is what they're max rated to) because I figure if I'm hitting hard enough to touch the front bump stops I need a lot of extra damping going on. It's rare if I fully compress a bump stop, but since they're a last resort I want a lot of damping happening once they kick in--thus the reasoning for running max pressure.

Anyways, I didn't really do anything today. Greased the front bushings on the LCA but that didn't stop the squeaking, pretty sure it's the uniballs which is not surprising since they have a lot of dirt miles on them now. I also removed the remains of the fender flares in the back, I'll go in during winter break and clean everything up a lot but it looks a lot nicer I think. The flares looked off now that I don't have flares up front. Plan is to eventually trim the body to help clear the rear tires, though once the rear bumps are in I should be totally fine. After all that the girlfriend and I did a quick loop to catch the sunset.

DSC_0706_zpsw7pjti8g.jpg~original


DSC_0709_zpsi2qp4n1f.jpg~original


DSC_0715_zps9eyfz89m.jpg~original
 
Thanks man! And likewise if I win the lottery you're getting an LT kit of your choice. Are you planning to take it back to school next semester and get it going over winter break?

I'm gonna start some solid works plans over winter break for sure. Including a custom spindle, horizontal uniballs, and 2nd gen Tacoma hub's so the wheel bearings bolt in. I need to keep it running first though. She needs a regear and boost so I can take it on long trips again. I miss 4Runner road trips...
 
Sweet, sweet picture updates! I love the wide stance - looks so planted, and the truck looks perfectly happy at home with that height/stance combo. Keep it up!

What I like about guys who work on their own trucks is that they know how to fix it when stuff breaks - which you can certainly do since you engineered your own setup! I'm impressed. Looks like solid driving family all around, with your dad spotting your mom over some of that stuff and getting the 4th through! props to your girlfriend for trying it out as well!

I really like the pictures, you got some good backgrounds in there. Keep it up! As always, I enjoy it!
 
agreed! you got some great pics up there. Looked like it was a great trail with lots of variety. Very cool you were able to go out and do some trails and camping with the folks.

Thanks for sharing.
cheers
 
Today involved the biggest jumps the runner has seen yet! Yesterday my girlfriend and I finished putting the bump stops together and got them filled with nitrogen from a local guy who's super cool--he's raced Baja, King of Hammers, short course, etc. etc. and is cool to talk to plus nitrogen is free. I couldn't find a spec for how much oil to use besides a vague idea of 1/16" above the top of the piston--which is of essentially no use, besides sounds plain wrong. Plus, since I had a sweet PVC spacer sitting under the piston to get the bump stop from rebounding too far (thus shortening it to 2"), whatever spec would be off anyways. So I expertly guessed and spent an hour measuring and remeasuring, in the end it was about 6fl oz of oil filled the bump stop to the top of the nut that holds the piston to the shaft. I have zero idea what it should be besides that one generic spec I found online, so figured there would be enough space for the nitrogen to fill and enough oil the piston wouldn't cavitate. This was especially annoying, since just like the piston nut being way over torqued, there's a set screw that I assume you're supposed to use to fill the bump stops and of course I couldn't get to come off--thus the long process of putting oil in and assembling and then using the schrader valve hole to fill/drain the bump...anyways, we got it.

Here's a picture from awhile back for anyone curious as to what a bump stop looks like on the inside, it's essentially identical to a normal shock except obviously the striker head has a rod end on it so it can apply rebound loads.

DSC_0539_zpss136sooo.jpg~original


DSC_0540_zps3sh0ye43.jpg~original


Shortened to 2" stroke

DSC_0719_zpsqhmvno3m.jpg~original


The reason I shortened them is at 4" they were constantly hitting, like literally slightly lifting the rear up. So shortened at 2" they still constantly hit, but now I have 1" of up travel until I hit them. And that's not an error in writing, I literally have 3" of total up travel. Keep in mind I have essentially no lift too, and I set the bump stops so I wouldn't rub when flexing--which in hindsight was a bad idea since I hadn't trimmed my fenders yet to gain more up travel... The bump stops are charged at 300psi because of the short stroke to help prevent me from bottoming them out often.

DSC_0726_zpsriv6r4e9.jpg~original


And that moment your front end has almost as much droop as your rear... yea I need longer rear shocks :(

DSC_0727_zpsdqvob8k5.jpg~original


So all this leads to jumping it. I got shit online because a guy with a relatively stock (compared to mine) 4Runner hucked the shit out of his around the same time I got the picture of the little jump two months ago. So finally having the rear bumps working I had to defend my reputation :D Plus test out the bumps of course! This wasn't high speed at all, there's an insanely steep section not far from our apartment where it goes to like 60 degrees for 50 feet and worked out well. We jumped it twice, the first one we did wasn't on camera but was pretty scary. I think I let off the gas near the top and the truck rotated forward and to the passenger side pretty hard, it wasn't a brutal landing but you could tell the passenger side was working overtime trying to push the truck back over, and I think the beadlock probably helped quite a bit in keeping us together safely. The second time I made sure to hit a lot more square and be more smooth on the throttle control. Not gonna lie and say it was buttery smooth, but it definitely didn't feel like one of those harsh bottom outs where you know the bumps were fully compressed and your spine gets jarred; probably the worst feeling was how fast we bounced back up. I was hoping I would get the front revalved in the past week but obviously that didn't happen, maybe get it done this weekend since as you'll see all the tires were stuffing as far as they could. The cool part is the front didn't rub on ANYTHING, which I'm proud of since those tires took work to not rub at full stuff. Anyways, here's the video. Sorry for the quality, the camera is a lot better at pictures than videos:

 
Last edited:
The past week its been pretty cold, and you could see the snow on the peaks. I decided to invite some people to go wheeling up Providence canyon to go to mount logan and try to find some decent snow. There wasn't much at the top but it was a good trip.

DSC_0759_zpsbsusooew.jpg~original


We started out with another 4Runner, I'm not sure if he's on here, and he brought his buddy with a TJ and then two guys who had messaged me awhile ago asking about wheeling and they had JKs, and then there was a guy who met up with us for a little bit who had a RZR.

DSC_0761_zpsuxohm6a1.jpg~original


DSC_0762_zpslhyyyugz.jpg~original


This is the one picture of the JKs. It's an awesome story of why they pussed out. From the get go both of us in the runners aired down, the other guy took it down to 12-15ish I think and I started at 8psi because why not and the trail gets super icy. The JKs were aired up, and they get to this section of the trail, literally 500ft from where it gets "rough". Rough meaning what you see, essentially baby heads with the occasional "medium sized" rock (see the rock in front of the larger rock on the left). So the JKs start slipping and don't want to air down, I quote "will there be any more gnarly rocks like those" as the kid points to the rock that's slightly bigger than a printer.

The way I met them was I'm part of a facebook offroading group that I helped start for our university, they found it and asked about it and since I wheel the most they started talking to me and I figured I would invite them. They said they had "built" JKs, which they are (bumpers, light bars, winches, 35s, etc) and I figured they would know something. Additionally one of them was from St. George so I ASSUMED he would know what he was doing, being from southern Utah and being "built". Well, after spending 10 minutes thinking about it they turned around. I should of guessed from the beginning when they showed up with the cleanest Jeeps ever. The other runner with me has a Toytec lift and 33s and rear locker, like I said he aired down and had no issue until some steep spots and these Jeeps wouldn't even ATTEMPT to follow us. Add to that, they were freshmen. So college freshmen who have brand new built JKs... I know I'm luckier than some since I got my dad's 3rd gen from him when I started going to college, so it's slightly hypocritical but I can't help but face palm myself when someone with a brand new Jeep that is built to offroad and the guy can barely drive let alone go over a pebble. Oh, I forgot to mention that they pull off to the side, snap a picture, turn around, and I see them post it on Facebook later. Yea, you guys went hard offroading when you made it 500ft up a trail that (relative to the JKs) stock vehicles were climbing fine. One of the saddest offroading experiences ever.

Anyways, after they turned around it was pretty without hitch.

DSC_0768_zps2vlecqxp.jpg~original


A few steep spots, the TJ eventually aired down. I never had any issues with anything, which I attribute to running such low air pressure.

DSC_0770_zpsvqljx9n4.jpg~original


DSC_0776_zpsssutogts.jpg~original


DSC_0777_zpsmhdqmiaf.jpg~original


I was actually really impressed with the runner, my traction control is still not working at all so I am 100% open diffs front and rear and should of had the least amount of traction out of the three of us (the TJ had a limited slip rear) but the runner just chugged. Like I said, low pressure obviously goes far and the 35s are amazing. This was the first time I've had the MTZs truly impress me and show they seemed to grip in ice and packed snow well, which is why I went with them over other MTs. Another thing that was funny was further in the trail there were tracks from earlier people, and I was still making tracks on both sides since the front end is so wide. In some spots it actually made a big difference I think since I was chewing through powder on both sides versus the packed snow in the center of the trail.

DSC_0785_zpscb2p6sqb.jpg~original


DSC_0788_zpsoz41xmoi.jpg~original


At the top of the trail we split ways since I wanted to go to the summit in my search for deeper snow.

DSC_0794_zps5ya3gk4s.jpg~original


At the summit there was probably 5" of powder, some decent size 12"+ drifts too but that was it.

DSC_0816_zpsdvr1jazq.jpg~original


And finally on the way down I snapped a few pictures as the sun was setting behind the mountains as we dropped into the main canyon going into Logan.

DSC_0820_zpskyvkl7vr.jpg~original


DSC_0822_zpsundnglvj.jpg~original


I really want it to snow more so I can actually put the beadlocks to use, so far I'm just finding excuses to drop the tire pressure. Rear bump stops are working great offroad, we can actually hit jumps and dips and it's smooth as butter unless we go big and then the rebound is a little unsettling but they've made a huge difference in how fast we can go. It's supposed to snow more this coming week, so hopefully I can get some decent snow pictures and get a bigger group.
 
Yep, that's me! I was extremely impressed with how well your runner did with open diffs! I wheel with quite a few jeeps and I will say that they are usually much more capable than my rig. These jeep owners are the reason I talk so much crap on jeep. That and the fact that most of them rarely make it to 200k miles without rebuilding everything a couple times. The jeeps themselves would've easily made it to where we got, especially the rubicon. I don't understand why you would Spend 30+ thousand dollars on a vehicle that rarely leaves the pavement, when that's all they're good for.
 
Went back up prov tonight. Was snowing last night and looked like it dumped higher up, then today got an invite to tag along with some Rzrs. By the time we were at the quarry there was already probably 6" of snow, once we went onto the main trail and it was a little steep some of the rzrs started having issues and couldn't make it. My buddy and I went up a little further but were too lazy to drop the pressure lower once we started having traction issues on the rocks. Played around the quarry a bit, jumped around the snow, did some hill climbs. One hill climb and the truck started making the constant high pitched tone like when the traction control overheats, except I have no traction control or abs or anything right now. Later on we realized I had no power brakes at all, this then lead to finding there was no brake fluid. After pouring in all the brake fluid I had the level came up a little but the ringing didn't stop for probably 10 minutes, then we had power brakes, then that stopped again and the ringing started again. So somehow I am leaking fluid, but the pump is working and I have fluid in all the lines, so somewhere after the pump I'm leaking and I'm assuming the ringing tone is because of low brake fluid. No idea what's up but something about that hill climb and rubbing the belly of the truck near the top or throwing rocks everywhere did something... I'll look later when the underside isn't covered in snow. Anyways, lots of fun in the snow and I only got one decent photo out of the couple I took. Probably head up somewhere else this weekend since I bet higher up in the mountains it dumped.

'murica

DSC_0827_zpshosrs3jc.jpg~original
 
Was just looking through your long travel build. Very cool. I was looking for some info that I may have just missed . . .

By how much did you increase your front trac? It looks even wider than the 3.5" total chaos long travel kit. Just curious

And then not specifically related to your truck, but just a general suspension question I have since you know suspension . . . why are upper arms shorter than lower arms on front ifs designs? Wouldn't it make more sense to have the control arms the same length, with the mounts directly vertical both on the frame and steering knuckle, to keep camber closer to vertical throughout the range of travel? Kind of like you see on quads, atvs, etc. This is something Ive always wondered about when looking at ifs on vehicles
 
Was just looking through your long travel build. Very cool. I was looking for some info that I may have just missed . . .

By how much did you increase your front trac? It looks even wider than the 3.5" total chaos long travel kit. Just curious

And then not specifically related to your truck, but just a general suspension question I have since you know suspension . . . why are upper arms shorter than lower arms on front ifs designs? Wouldn't it make more sense to have the control arms the same length, with the mounts directly vertical both on the frame and steering knuckle, to keep camber closer to vertical throughout the range of travel? Kind of like you see on quads, atvs, etc. This is something Ive always wondered about when looking at ifs on vehicles

Thanks! Few reasons it looks so wide: The track width is extended the standard 3.5". However, after my recent modifications this summer I upgraded my steering to double shear and because I'm running 15" wheels I wasn't able to clear the larger steering assembly without spacers. So it's already 3.5" wider plus 1.25" spidertraxs on each side. Then I also have fairly deep wheels, 15x9s with 4" backspace, which if you compare them to how the truck looked with the narrow FJ wheels and skinnies before that alone makes it way wider. And finally I think because I have a really low ride height, the fact the suspension is so wide but the overall truck is so low makes it look disproportioned compared to your normal truck.

Keep in mind I am far from a suspension expert or suspension engineer like [MENTION=57546]4-Ripcord[/MENTION] so maybe he can chime in. Obviously there are different suspension designs for different applications, for "some" vehicles you want camber change during the suspension cycle. When you have a shorter upper arm it has a shorter pivot distance obviously, so as the suspension bumps the upper ball joint will swing inwards faster than the lower ball joint causing the camber to pull in at the top (negative). Now say you're taking a corner and as the body/chassis is shifting weight to the outside edge, that side of the suspension is compressing AND gaining negative camber. The combination of the chassis angling over from the corner and the camber going negative keeps the tire flat relative to the ground through the corner to help maintain traction.

That's the main reasoning as I understand it for having shorter upper arms. If you look at trophy trucks they usually have, or close to, equal length arms with no camber swing as the suspension cycles. I would assume because they are more designed for straight line performance through varying terrain that it's more desirable for the tire to remain straight since you want full traction as the suspension is constantly going from full droop to full bump in whoops. Again, this is just my understanding and I know just enough to be dangerous you could say :bigok:
 
You are absolutely correct, camber gain.

Desert racing vehicles do still have unequal length arms usually, but the difference in length between the upper and lower arms is small because with all that damn travel they have they still get the same camber gain properties in the end.

Btw that story about the jeep kids taking their internet points photos then leaving was hilarious. Never saw very much of that at my school, New Mexico is too poor to have privileged kids like that.
 
Yesterday after moving the truck out of the puddle it had created I came to the conclusion I was losing brake pressure and fluid through the drivers side drum brake. After looking around online most people said it was the wheel cylinder, which for anyone who was like me and doesn't know drums, is the little piston that pushes the brake shoes apart and that the brake line goes into.

Today I bought $160 of crap once I pulled the drum off. By the way the drum comes off (fairly easily) by two M8x1.25 bolts, you only need ones that are like 2" long. They screw into the drum and push against the inside and pop it off. Majority of stuff I read no one mentioned that, so FYI.

DSC_0831_zpsrdk9nehi.jpg~original


I'm not sure if that's bad, I would assume it IS but like I said this was my first time touching drum brakes. I knew my axle seals had blown awhile ago, I had the seals but didn't have time before school to install them and once at school didn't feel like installing them :crutch: So I figured if I was taking the drum apart I may as well do those too. I bought brake cleaner, 75w90, brake fluid, O-rings, brake shoes, wheel cylinders, and a bunch of rags.

A buddy came over and helped me which made the whole process take half the time since he did the passenger side which looked pretty normal. It appears the brake shoes were completely gone on my side at least, and then obviously the axle seal was blown, and it had leaked brake fluid for at least a few days. How it lead to that much shit covering everything is beyond me. One of the brake shoes didn't even have the spring that holds it to the housing in it so it was kinda hanging there, and then the brake cylinder appeared to have shit itself and blown all of its seals. Besides trying to get past all the gunk and figure out what I was looking at the whole job was fairly easy.

Taking off the backing plate was sad. The diff fluid looked like chocolate milk. My buddy who had the XJ told me his was worse and had mud in it, which I guess makes me feel better? The axle still had about 2 quarts of gear oil in it which is good, honestly I was kinda surprised it wasn't totally empty.

DSC_0833_zps1cclmca0.jpg~original


The axle shafts are also surprisingly short.

DSC_0834_zpsilficmni.jpg~original


I had sprayed the diff plugs with penetrator before we started, both came off pretty easy though with a 6 point which I was afraid would be a pain. After draining the diff I poured a little oil in to try and wash out some of the crude, I'll probably refresh the oil in a few months again. :doh: I cleaned up the brake parts as best I could with all the brake cleaner.

DSC_0835_zps4jwqnagx.jpg~original


The diff breather was plugged, unsurprisingly. Considering I have under 170k miles I think that is what blew the seals and what got all the shit in the diff oil obviously. I bought the stuff I need to extend the breather and will do that tomorrow. Fingers crossed the new seals don't blow, but at least I have new shoes for the moment and totally refreshed drums and the diff won't explode now. Oh, speaking of more horrible stuff on the truck I found that I lost a bolt to the drivers upper link (same one that broke a few weeks back). Bought a new bolt and torqued the shit out of this one, I have no idea how the old bolt came out since I torqued it plenty hard I thought considering they have those self locking grooves.

I realize this whole post probably makes me look like a complete moron, but the truck is pretty low on the priority list right now and it has been working great lately and continues to, so despite my ignorance the Toyota resilience saves me again! Lesson to everyone, don't wait around if you suspect something is wrong :madgrin:
 

Members online

No members online now.

Forum statistics

Threads
278,316
Messages
3,554,120
Members
248,016
Latest member
Advally Service

Trending content

Back
Top