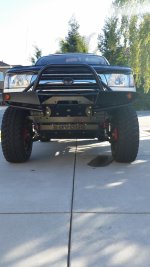
Snowden's Thread

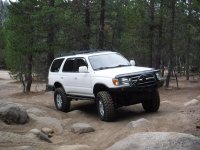
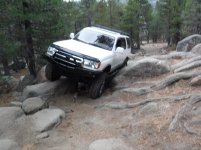
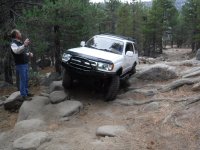
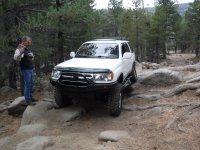
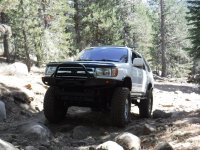
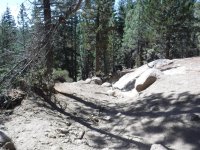
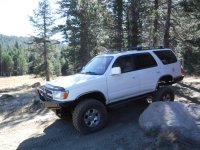
Dang Ash! Great pics. I don't think you could fit a quarter between you and that big rock! It looks like you had a fantastic trail ride. At some point the sun will shine here again too. Thanks for sharing the beautiful pics.
 
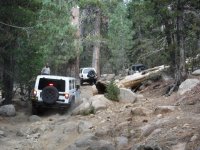
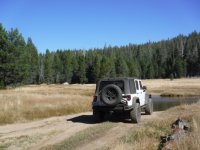
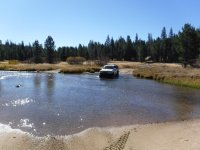
I love that area of the Mokelumne wilderness, my favorite place to go camping. Thunder Mountain is a hard but spectacular day hike with stunning views if you'd rather have your legs do the bouldering instead of your 4Runner!

Mine's still stock height with no armor, I keep to the beginner/intermediate trails :). Your 4Runner has way too nice of a paint job to be going on those sorts of trails!
 
Dang Ash! Great pics. I don't think you could fit a quarter between you and that big rock! It looks like you had a fantastic trail ride. At some point the sun will shine here again too. Thanks for sharing the beautiful pics.

Man I owed my Jeep buddy many beers for putting his back into keeping my door panel off as I gently eased her back. But that was all rock slider kickout that prevented some nasty carnage from happening. Funny too because I remembered back when I originally ordered the sliders I was actually trying to decide if I wanted the kickout or not. Some guys have a theory they can do more harm than good. But I was so thankful I had it. What you can't actually see in the picture is that slider is on the rock holding the truck off of it. And you are right barely even a quarter would have passed through there...

I love that area of the Mokelumne wilderness, my favorite place to go camping. Thunder Mountain is a hard but spectacular day hike with stunning views if you'd rather have your legs do the bouldering instead of your 4Runner!

Mine's still stock height with no armor, I keep to the beginner/intermediate trails :). Your 4Runner has way too nice of a paint job to be going on those sorts of trails!

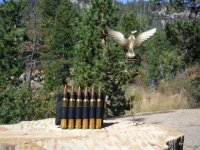
Totally agree with you. I'm very much into hiking actually. I go into the wilderness to do three things; Shoot, hike, wheel. Okay and a fourth reason is for peace and sanity...


Awesome thread Ash! Look forward to seeing all the new mods in person on the next mod day

Right on thanks man! Yup looking forward to the next group hang day for sure.

Great pictures Ash; it looks like a fun trip!

Definitely fun times for sure. My daughter was home from school for the Deer Valley trip so she enjoyed roughing it for the weekend. But she's into the whole climbing world so she is pretty used to rugged adventure...

Maybe the Bay Area group and NoCal guys will all do a group trail run some time that would be cool.
 
Last edited:
Hi-Lift Jack

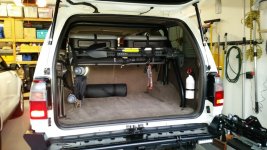
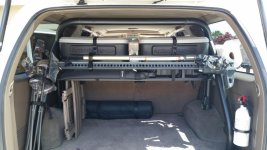
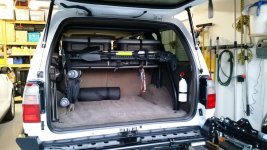
Managed to fit my 48" Hi Lift inside. Found some HiLift mounts that fit to the roll bar nicely.

20180407_141134.jpg

20180407_193722.jpg
 

Attachments

  • 20180407_141134.jpg
    20180407_141134.jpg
    134.8 KB · Views: 320
  • 20180407_193722.jpg
    20180407_193722.jpg
    141 KB · Views: 330
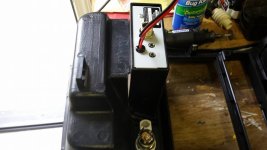
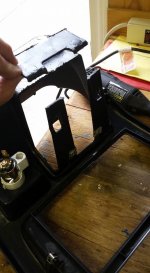
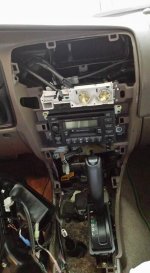
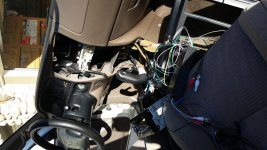
CB mod, Stereo/Amp install

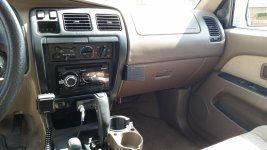
I did each of these at different times and some time ago but just adding the pics into the thread. The CB ash tray mod I found here on T4R and many thanks to those folks that originally created and shared it. This is truly a great little mod.

The stereo swap is a Sony double din and the amp is Alpine Power Pack. In addition I changed all 4 door speakers to Kenwood 6.5" 320w. I posted the speaker install write up on another thread on this site somewhere.

IMG_0174.JPG

IMG_0175.JPG

IMG_0176.JPG

20180203_153708.jpg

20180407_141208.jpg
 

Attachments

  • IMG_0174.JPG
    IMG_0174.JPG
    84.9 KB · Views: 299
  • IMG_0176.JPG
    IMG_0176.JPG
    95.9 KB · Views: 296
  • 20180203_153708.jpg
    20180203_153708.jpg
    139.9 KB · Views: 314
  • 20180407_141208.jpg
    20180407_141208.jpg
    131 KB · Views: 334
  • IMG_0175.JPG
    IMG_0175.JPG
    107 KB · Views: 305
Last edited:
Snowden, when you get a chance please post up some pictures of your 1st gen roll bar upgrade and the sweet camping setup with the sliding compartments.
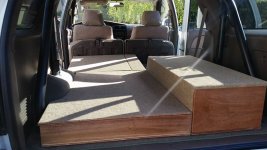
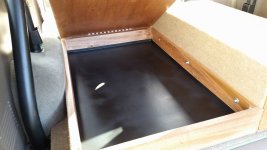
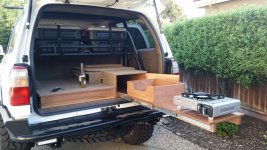
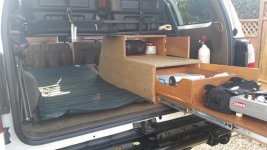
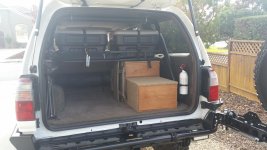
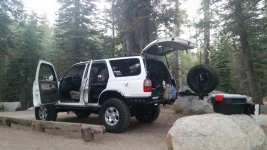
Hi JZiggy sorry I forgot to reply to this. Here's the set-up I built. I took the cue's from [MENTION=67615]Dirtco[/MENTION] in this design idea. That said I've also kind of gotten away from it a little. I started out with the full blown sleeper kit you see in the first photo but I found that too difficult for sleeping. I throttled back and as you see in another picture I was sleeping to one side of the 'galley' set up. Recently I have removed the entire thing as I found I was hauling around extra weight just for the sake of having kind of a cool set-up and I thought, for wheeling, it probably wasn't wise to make things unnecessarily heavier in the back. I currently have the custom unit out of the Runner and in my garage and I may end up parting with it or just using it for day runs out to the beach. I could be persuaded to sell it if anyone is interested in buying it just FYI.

4Runner 026.jpg

4Runner 025.jpg

4Runner 024.jpg

4Runner 001.jpg

4Runner 004.jpg

4Runner 042.jpg
 

Attachments

  • 4Runner 026.jpg
    4Runner 026.jpg
    70.5 KB · Views: 277
  • 4Runner 025.jpg
    4Runner 025.jpg
    51.2 KB · Views: 264
  • 4Runner 024.jpg
    4Runner 024.jpg
    146.2 KB · Views: 273
  • 4Runner 001.jpg
    4Runner 001.jpg
    137 KB · Views: 285
  • 4Runner 004.jpg
    4Runner 004.jpg
    137.3 KB · Views: 289
  • 4Runner 042.jpg
    4Runner 042.jpg
    138.4 KB · Views: 280
Last edited:
Diff breather

Finally got around to doing this 30 minute mod. I know, I know.....

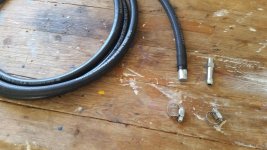
Parts numbers; Union part: 90404-51319. Breather: 90930-03136.
Approx. 7' of 5/16" ID fuel hose.

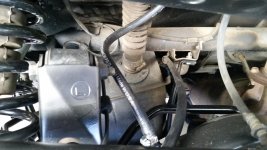
Very basic install nothing much to offer that others have not already stated. Yes the Breather is a little different than the original in that it does not have the little spring inside. Doesn't seem to be a huge deal and if you wanted to you could even figure out a way to use the original you take off the diff. I soaked my original breather in acetone and cleaned all the gunk off and out of it so I still have that to use if I decide to.

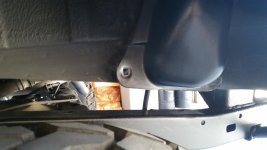
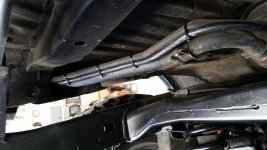
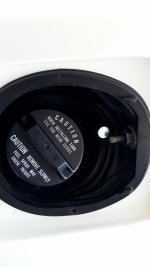
I cut a small whole inside the gas fill door and fed the hose line down it. I removed the two push clip s at the bottom of the trim piece inside the fender well so I could pull the hose through. If the hose hadn't kept curling on itself I possibly would not have had to do this. A suggestion next time for someone is try running the hose down but with a coat hanger inside it to keep it straight. Then it would just slip out the bottom of the trim piece as there is a gap there where the fuel fill and vent lines go past.

I also noted that a hose clamp is not necessary at the top breather connection as the piece fits very snug onto the hose. That helped to keep the installation clean and it fed in from the top very nicely. I did of course use a hose clamp on the union. YMMV...

20180602_133054.jpg

20180602_134853.jpg

20180602_141458.jpg

20180602_141555.jpg

20180602_134838.jpg
 

Attachments

  • 20180602_133054.jpg
    20180602_133054.jpg
    140.2 KB · Views: 228
  • 20180602_134853.jpg
    20180602_134853.jpg
    117.5 KB · Views: 264
  • 20180602_141458.jpg
    20180602_141458.jpg
    133.2 KB · Views: 266
  • 20180602_141555.jpg
    20180602_141555.jpg
    135.3 KB · Views: 270
  • 20180602_134838.jpg
    20180602_134838.jpg
    116.4 KB · Views: 267
Last edited:
Savage Off Road Skid Plates

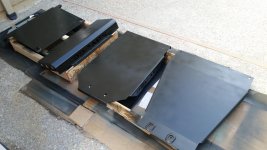
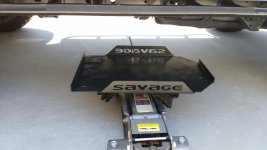
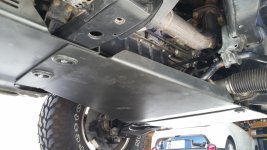
I finally installed skid plates. This is my third Savage product and once again I am very happy with Roy's quality, service and price. These skids hit an amazing price point and the cost to benefit ratio is huge IMO. I am hoping down the road this doesn't become a love/hate relationship with aftermarket skids noting the other potential developments I have read about but at the end of the day, knowing they are below the rig protecting valuable assets of the vehicle, I'm pleased so far. And if you do any kind of rock crawling there really is just no way around needing after market skid plates, or risk expensive undercarriage damage.

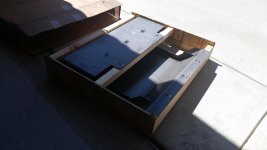
Installation was very straight forward following the instructions Savage has available on their web site. There were a couple of things that were slightly different possible being due to the fact that their design may have evolved over the years since the installation instruction was prepared but nothing that wasn't obvious. I first stripped the oil coating they are shipped with then hit them with rattle can primer and matte finish black.

One issue I didn't realize until now (and apparently much has been discussed about it - not sure how I missed that....) is the vibration that is caused by the transfer case. Or more specifically the Vibration Dampener and factory skid plate that are mounted to the transfer case. This issue is not specific to this brand of skid plate as it has been reported by people running different brands as well. It isn't a huge issue in my case I don't think but after reading about it I do plan to go back in and try to resolve it.

The solutions are pretty much to remove the small factory skid from the TC, mounted on its left side, as well as the Vibration Dampener mounted on its right side (may not need to remove this item as it sits slightly higher than the little skid) and then add spacers (stack of washers) to the very back two mounting bolts of the Savage transfer case skid (last skid in the series). The simple fact is these sit right at the level of the bottom of the frame rails and depending on other factors such as the condition of the transmission mount (how well it is holding up the transmission or of it is sagging a bit more from age) or if you have multi-mode ('00-'02) it may or may not touch and vibrate on the Savage skid. Lots of other discussion threads about that so I won't go in to detail.

Savage skid plates 01.jpg

Savage skid plates 02.jpg

Savage skid plates 03.jpg

Savage skid plates 06.jpg

View attachment 312131
 

Attachments

  • Savage skid plates 01.jpg
    Savage skid plates 01.jpg
    133.7 KB · Views: 219
  • Savage skid plates 02.jpg
    Savage skid plates 02.jpg
    135.6 KB · Views: 215
  • Savage skid plates 03.jpg
    Savage skid plates 03.jpg
    134 KB · Views: 224
  • Savage skid plates 06.jpg
    Savage skid plates 06.jpg
    132.2 KB · Views: 215
  • Savage skid plates 05.jpg
    Savage skid plates 05.jpg
    137.1 KB · Views: 237
Last edited:
I am digging what all you've done to your rig. I especially like the 1st gen roll bar and storage that is incorporated into it. And the storage drawers are looking sharp too.

As far as skids go, I think you have made a good investment. You may have and never need, but if you don't have them, you'd be guaranteed some damage at some point. like I can pretty much guarantee it's going to rain if I don't bother to bring a rain jacket with me.

You should be able to address your vibration issues by adding washers to the for mounting points of the rear skid. I would start by just removing the factory transfer case skid and leaving the harmonic balancer attached. I would see how it goes and go from there. I am about to reinstall mine after touching them up and as soon as I address a few more undercarriage maintenance items. When I do so I will probably end up using about 8 washers on those for mounting bolts. I don't really think you're giving up a lot in the way of clearance to buy yourself a little bit of room between the transfer case and the skid. Good luck and keep us posted.
 
Nice skids. I suggest using some bar stock aluminum, like 1" x 3/16" from Lowes to make a spacer. Just cut to length and drill the holes where needed. Much easier to line up and keep track of than a stack of washers on each bolt. That's how I got rid of my clunk/vibration from my Shrockworks skids and transfer case.
 
Skid clearance

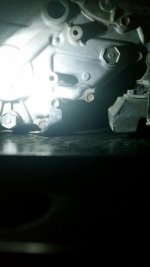
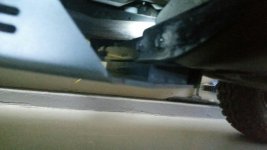
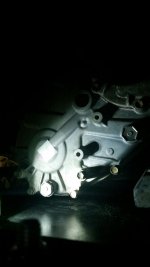
Here's how I ended up doing it. Originally, after closer inspection, I found that the Vibration Dampener was not touching the Savage skid at all and it cleared by 1/2"+. The TC factory skid however, was touching hard.

I removed the little factory skid from the TC but I left the vibration dampener on as I preferred to keep it installed and there is no reason to remove it. Before adding the HDPE spacer the TC still cleared, and about the same height as the VD, but I wanted to give more clearance to both.

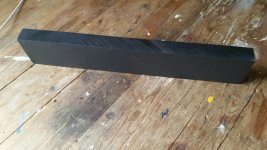
I added the spacer to lower the back end of Savage skid and instead of washers I went down to TAP Plastics and had them cut me a 2" x 11" x 3/4" piece of HDPE (Starboard) to provide support along the entire contact with the cross member. Cost me $3.50.

Since I only added the 3/4" thick HDPE to the back mounting position and not on the front mounting position, by the time you go forward to the TC it doesn't lower 3/4" under the TC obviously but it does increase the gap about 1/4". Technically since the TC is closer to the front of that skid plate, if you add the spacer to the front you'll yield more clearance. Or I may go and lower the front as well but for now it all clears just fine and I no longer have the vibration and it's back to normal. The skid itself is a relatively small square so I am not sure how easy one could cause it to bend and make TC contact. It's a very robust plate to begin with.

TC touches:
TC 03.jpg

Spacer:
TC 07.jpg

Spacer installed:
TC 04.jpg

TC clearance
TC 05.jpg
 

Attachments

  • TC 07.jpg
    TC 07.jpg
    138.9 KB · Views: 310
  • TC 04.jpg
    TC 04.jpg
    136.3 KB · Views: 294
  • TC 03.jpg
    TC 03.jpg
    125 KB · Views: 305
  • TC 05.jpg
    TC 05.jpg
    113.2 KB · Views: 303
Deer Valley - September 2018

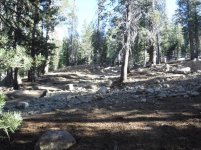
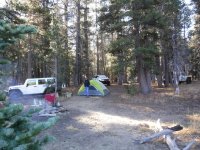
2 Jeeps and my 4Runner. I went up by myself Friday morning because I wanted to take my time and enjoy the drive along the way. My friends John and Steve departed at 4am Saturday and we met at the trail head for the weekend.

DVT is technical but very enjoyable if you take your time, and fortunately no body or undercarriage damage on this trip. Slid a few times on my new Savage skids but I didn't damage them like I did my factory skids the last time we were on this trail. Occasionally spotted each other and definitely more often on the first half + of the trail from the 'south' entrance. 70% of the trail from the 'south' side is a slog but with the uphill advantage, plus you get the 'gatekeeper' out of the way first rather than at the end if you come from the other direction.

Ground clearance is key and as a noted point of fact; Our friend Steve has a stock height Rubicon, with front and rear lockers, and the extra optioned 'Rock Slide Edition'. He needed to winch, I stopped counting at 9 times, due to high centering. But with now my second time on this trail, even without a locker, I've managed to get through it without winching. I do have the added benefit of the 2" BL in addition to the suspension lift and this prevents my tires from stuffing into the fender rockers when max articulated.

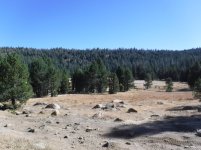
Unfortunately I don't have pictures of the challenging sections since we were pretty occupied in getting through those sections. These are just pictures of the relaxing parts. And as usual photos don't capture the angles and grades very well so it's hard to get the full perspective.

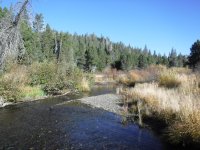
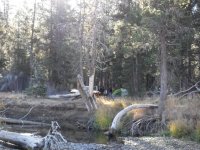
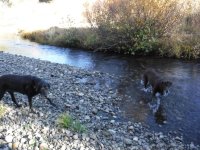
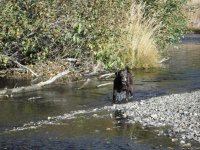
Camped inside the trail Saturday night by one of the streams and it was delightfully peaceful. The next morning we departed and continued North but this last section of the trail is pretty easy going. We also had some time for target shooting which always rounds out an adventure nicely.

Silver Valley CG.jpg

DSCF0047.jpg

DSCF0048.jpg

DSCF0050.jpg

DSCF0051.jpg

DSCF0054.jpg

DSCF0059.jpg

DSCF0060.jpg
 

Attachments

  • Silver Valley CG.jpg
    Silver Valley CG.jpg
    142.9 KB · Views: 268
  • DSCF0047.jpg
    DSCF0047.jpg
    138.4 KB · Views: 258
  • DSCF0048.jpg
    DSCF0048.jpg
    125.2 KB · Views: 266
  • DSCF0050.jpg
    DSCF0050.jpg
    138.6 KB · Views: 276
  • DSCF0051.jpg
    DSCF0051.jpg
    138 KB · Views: 261
  • DSCF0054.jpg
    DSCF0054.jpg
    140.9 KB · Views: 256
  • DSCF0059.jpg
    DSCF0059.jpg
    143.4 KB · Views: 244
  • DSCF0060.jpg
    DSCF0060.jpg
    145.8 KB · Views: 253
Deer Valley - September 2018 Continued

DSCF0061.jpg

DSCF0082.jpg

DSCF0083.jpg

DSCF0081.jpg

DSCF0087.jpg

DSCF0090.jpg

DSCF0091.jpg
 

Attachments

  • DSCF0061.jpg
    DSCF0061.jpg
    145.7 KB · Views: 238
  • DSCF0082.jpg
    DSCF0082.jpg
    139.7 KB · Views: 233
  • DSCF0083.jpg
    DSCF0083.jpg
    141.9 KB · Views: 263
  • DSCF0081.jpg
    DSCF0081.jpg
    143 KB · Views: 253
  • DSCF0087.jpg
    DSCF0087.jpg
    144.3 KB · Views: 254
  • DSCF0090.jpg
    DSCF0090.jpg
    143.3 KB · Views: 245
  • DSCF0091.jpg
    DSCF0091.jpg
    136.8 KB · Views: 241
Deer Valley - September 2018 continued 3

DSCF0092.jpg

DSCF0095.jpg

DSCF0099.jpg

DSCF0104.jpg

DSCF0107.jpg

DSCF0117.jpg
 

Attachments

  • DSCF0092.jpg
    DSCF0092.jpg
    139 KB · Views: 251
  • DSCF0095.jpg
    DSCF0095.jpg
    122.3 KB · Views: 247
  • DSCF0099.jpg
    DSCF0099.jpg
    136.2 KB · Views: 245
  • DSCF0104.jpg
    DSCF0104.jpg
    140.2 KB · Views: 262
  • DSCF0107.jpg
    DSCF0107.jpg
    128.1 KB · Views: 256
  • DSCF0117.jpg
    DSCF0117.jpg
    127.9 KB · Views: 242
Last edited:
Thanks for the trip report and pictures! Always great to see the Snowden rig in action.

When your spotter has a sweater vest you know you can trust him.
 
My time came... Rear bearings and seals.

It's been too long since my last post. A busy and hectic year with life and work but did find some time to make the occasional trip and do some maintenance. Just haven't had a chance to post.

The biggest job in the last few months was the rear axle bearings and seals. Mine was a bit odd in that they began leaking at one point but then for some reason seemed to stop or slow down significantly. The inside wheels where gummed up as they do from the axle oil and grime but at some point the tires showed no more sign of fresh oil. And yes there was still gear oil in the axle... I kind of wondered if it was due to hard wheeling and some water crossings I'd made before adding the extended diff breather. I finally did add the breather and after that, still having gone off-road again a few times, I didn't get fresh tracks on the tires.

Anyway, that said, while talking about it one day with Tim [MENTION=120071]mtbtim[/MENTION] he convinced me that regardless, it should be done because they were already compromised. And by that time I'd also noticed my rear brakes were clearly saturated.

It's here that I want to give huge respect and thanks to both Tim [MENTION=120071]mtbtim[/MENTION] and Sean [MENTION=102606]infamousRNR[/MENTION] for helping me with this repair. And by helping me with it I mean, actually doing it and me just helping them. A phenomenal contribution of their time to assist a fellow 4Runner dude. Their video on the repair is outstanding but to actually do it for me, and with all their personal experience on doing this job prior to now (Tim said something like 20+ now), I cannot thank them both enough...!! As always you two dudes rock!!!

I don't have any pictures of this job unfortunately. I was too busy trying to keep pace behind them by cleaning things, loosening things, watching and learning while they worked, etc. but needless to say it was the usual mess that is depicted in so many other threads on the subject.

............... :hail:................... :guitar2: ................. :hatsoff:
 
Last edited:
It's been too long since my last post. A busy and hectic year with life and work but did find some time to make the occasional trip and do some maintenance. Just haven't had a chance to post.

The biggest job in the last few months was the rear axle bearings and seals. Mine was a bit odd in that they began leaking at one point but then for some reason seemed to stop or slow down significantly. The inside wheels where gummed up as they do from the axle oil and grime but at some point the tires showed no more sign of fresh oil. And yes there was still gear oil in the axle... I kind of wondered if it was due to hard wheeling and some water crossings I'd made before adding the extended diff breather. I finally did add the breather and after that, still having gone off-road again a few times, I didn't get fresh tracks on the tires.

Anyway that said, while talking about it one day with Tim [MENTION=120071]mtbtim[/MENTION] he convinced me that regardless, it should be done because they were already compromised. And by that time I'd also noticed my rear brakes were clearly saturated.

It's here that I want to give huge respect and thanks to both Tim [MENTION=120071]mtbtim[/MENTION] and Sean [MENTION=102606]infamousRNR[/MENTION] for helping me with this repair. And by helping me with it I mean, actually doing it and me just helping them. A phenomenal contribution of their time to assist a fellow 4Runner dude. Their video on the repair is outstanding but to actually do it for me, and with all their personal experience on doing this job prior to now (Tim said something like 20+ now), I cannot thank them both enough...!! As always you two dudes rock!!!

I don't have any pictures of this job unfortunately. I was too busy trying to keep pace behind them by cleaning things, loosening things, watching and learning while they worked, etc. but needless to say it was the usual mess that is depicted in so many other threads on the subject.

............... :hail:................... :guitar2: ................. :hatsoff:

I am so grateful for this thread. It's given me a whole lot of inspiration for my 3rd gen. Thanks!
 

Members online

Forum statistics

Threads
278,307
Messages
3,554,048
Members
248,016
Latest member
Advally Service

Trending content

Back
Top